

RADIO CONTROL SLOPE SOARING
Author
Dave Garwood 5 Birch Ln., Scotia NY 12302 E-mail: [email protected]
The last two Slope Soaring columns covered fiberglass models; this month I turn to foam sailplanes. The wonder material of expanded polypropylene (EPP) foam has enabled designers to give us "bounceable" sailplanes. The EPP-foam model kits I've seen have excellent building instructions, so there is no need to cover basic techniques. Below are 27 advanced tips and tricks for building stronger, better-performing, and longer-lasting foam sailplanes.
Tips (Dave Garwood)
- Exercise your best craftsmanship when installing control systems; they can be difficult to reach for repair in a foam model. Make sure servos are firmly mounted, pushrods are solidly supported, and links are as strong and slop-free as you can make them.
- I put a small piece of waxed paper over the servo arms and linkages to make certain I don't get a blob of Goop adhesive on these parts when attaching the wing to the fuselage or when gluing small pieces of EPP foam to close the cavities.
- Be sure to cover the hollowed-out cavities for the battery, receiver, and elevator servo with EPP foam to protect the equipment and to stiffen the fuselage. When shaping this part, it's not easy to get the correct thickness. I carve a larger-than-necessary foam block to fit the cavity, glue it in place, and, after the Goop has cured, trim it flush with the fuselage using a knife and sanding block.
- Consider substituting tougher parts, such as the heavy-duty Sullivan No. 517 pushrod for elevator control. I've had foamie combat models take a hit to the fuselage that kinked the inner control snake, yet no damage was evident upon external examination. We didn't know why the elevator linkage had developed more friction until the pushrod was withdrawn for inspection.
- Do you find mounting the receiver on/off switch and the battery-charging connector troublesome? Try using a "charge switch." The ElectroDynamics Heavy Duty Ultra Switch is well worth its $16 price. It's available from www.electrodynam.com or (734) 422-5420.
- Have you been flying foam long enough to learn that the fuselage wears out before the wing? Even on a "Nerf airplane" every hit takes a little toll on fuselage stiffness and integrity, and eventually the nose becomes a squishy, floppy mess. One solution is to order a new fuselage part from the maker, excavate the salvageable radio gear from the worn fuselage, and build a new one. Order new vertical and horizontal stabilizer parts at the same time. It's quicker to replace a fuselage and tail parts than it is to build a whole new model, and there's no shame in wearing out an airframe.
- Painted parts withstand wear better than covered parts. We want most of our foamie to be covered, not painted, so we can smooth out wrinkles with a covering iron, but we can paint the horizontal and vertical stabilizers. I tape the edges with masking tape and apply Testors enamel with an airbrush or the Testors three-ounce spray cans.
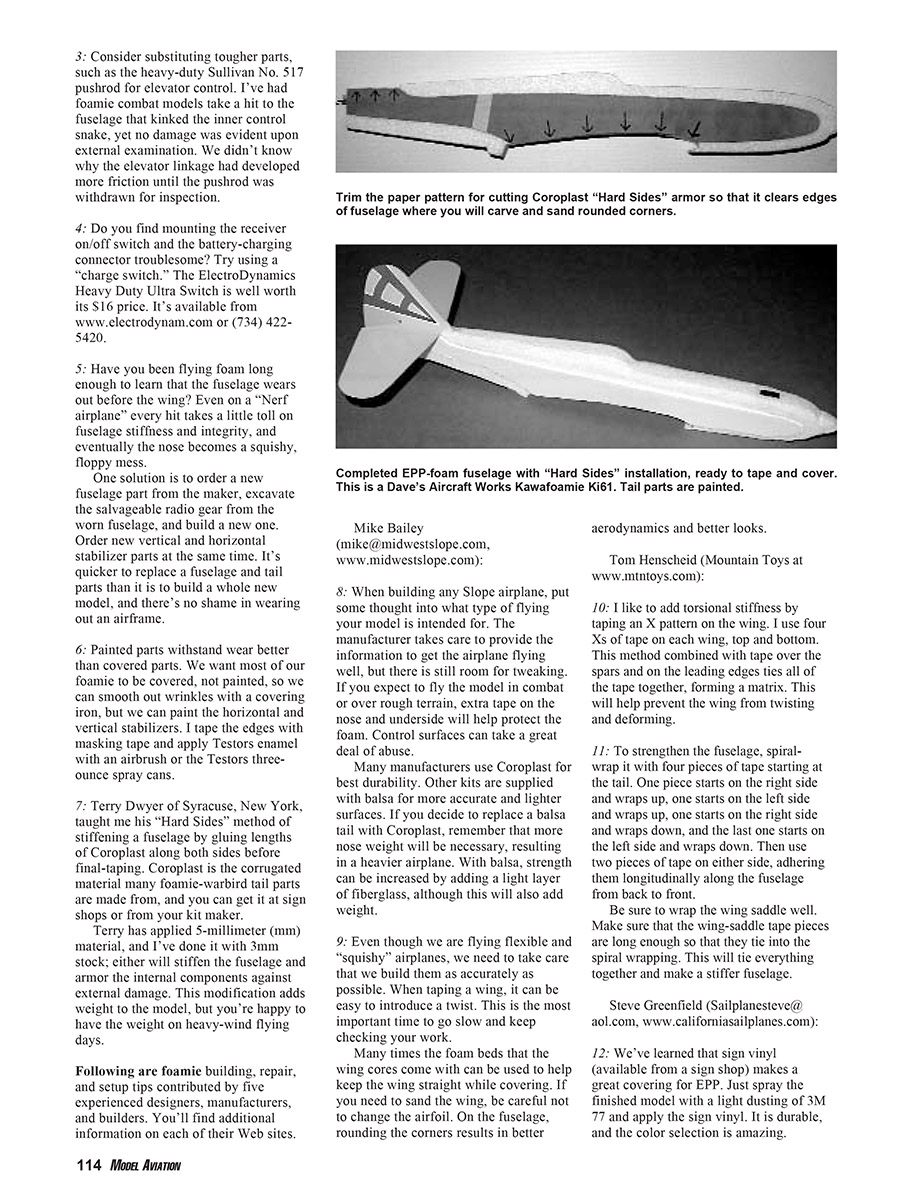
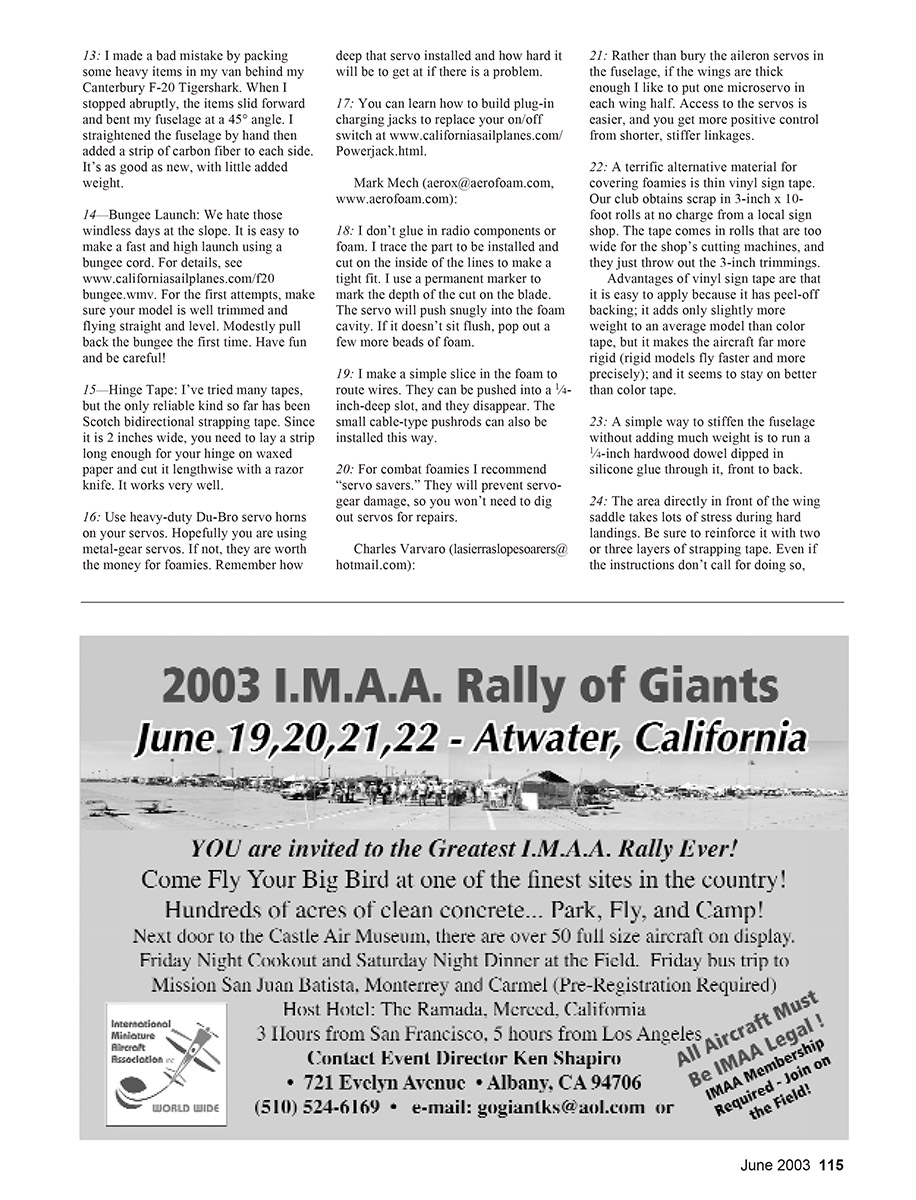
- Terry Dwyer of Syracuse, New York, taught me his "Hard Sides" method of stiffening a fuselage by gluing lengths of Coroplast along both sides before final-taping. Coroplast is the corrugated material many foamie-warbird tail parts are made from, and you can get it at sign shops or from your kit maker. Terry has applied 5-millimeter (mm) material, and I've done it with 3 mm stock; either will stiffen the fuselage and armor the internal components against external damage. This modification adds weight to the model, but you're happy to have the weight on heavy-wind flying days.
Mike Bailey ([email protected], www.midwestslope.com)
- When building any slope airplane, put some thought into what type of flying your model is intended for. The manufacturer takes care to provide the information to get the airplane flying well, but there is still room for tweaking. If you expect to fly the model in combat or over rough terrain, extra tape on the nose and underside will help protect the foam. Control surfaces can take a great deal of abuse.
- Many manufacturers use Coroplast for best durability. Other kits are supplied with balsa for more accurate and lighter surfaces. If you decide to replace a balsa tail with Coroplast, remember that more nose weight will be necessary, resulting in a heavier airplane. With balsa, strength can be increased by adding a light layer of fiberglass, although this will also add weight and improve aerodynamics and appearance.
Tom Henscheid (Mountain Toys — www.mtn-toys.com)
- I like to add torsional stiffness by taping an X pattern on the wing. I use four Xs of tape on each wing, top and bottom. This method combined with tape over the spars and on the leading edges ties all of the tape together, forming a matrix. This will help prevent the wing from twisting and deforming.
- To strengthen the fuselage, spiral-wrap it with four pieces of tape starting at the tail. One piece starts on the right side and wraps up, one starts on the left side and wraps up, one starts on the right side and wraps down, and the last one starts on the left side and wraps down. Then use two pieces of tape on either side, adhering them longitudinally along the fuselage from back to front.
Be sure to wrap the wing saddle well. Make sure that the wing-saddle tape pieces are long enough so that they tie into the spiral wrapping. This will tie everything together and make a stiffer fuselage.
Steve Greenfield ([email protected], www.californiasailplanes.com)
- We've learned that sign vinyl (available from a sign shop) makes a great covering for EPP. Just spray the finished model with a light dusting of 3M 77 and apply the sign vinyl. It's durable, and the color selection is amazing.
- I made a bad mistake by packing some heavy items in my van behind my Canterbury F-20 Tigershark. When I stopped abruptly, the items slid forward and bent my fuselage at a 45° angle. I straightened the fuselage by hand then added a strip of carbon fiber to each side. It's as good as new, with little added weight.
- Bungee Launch: We hate those windless days at the slope. It is easy to make a fast and high launch using a bungee cord. For details, see www.californiasailplanes.com/f20bungee.wmv. For the first attempts, make sure your model is well trimmed and flying straight and level. Modestly pull back the bungee the first time. Have fun and be careful!
- Hinge Tape: I've tried many tapes, but the only reliable kind so far has been Scotch bidirectional strapping tape. Since it is 2 inches wide, you need to lay a strip long enough for your hinge on waxed paper and cut it lengthwise with a razor knife. It works very well.
- Use heavy-duty Du-Bro servo horns on your servos. Hopefully you are using metal-gear servos. If not, they are worth the money for foamies. Remember how deep the servo is installed and how hard it will be to get at if there is a problem.
- You can learn how to build plug-in charging jacks to replace your on/off switch at www.californiasailplanes.com/Powerjack.html.
Mark Mech ([email protected], www.aerofoam.com)
- I don't glue in radio components or foam. I trace the part to be installed and cut on the inside of the lines to make a tight fit. I use a permanent marker to mark the depth of the cut on the blade. The servo will push snugly into the foam cavity. If it doesn't sit flush, pop out a few more beads of foam.
- I make a simple slice in the foam to route wires. They can be pushed into a 1/4-inch-deep slot, and they disappear. The small cable-type pushrods can also be installed this way.
- For combat foamies I recommend "servo savers." They will prevent servo-gear damage, so you won't need to dig out servos for repairs.
Charles Varvaro ([email protected])
- Rather than bury the aileron servos in the fuselage, if the wings are thick enough I like to put one microservo in each wing half. Access to the servos is easier, and you get more positive control from shorter, stiffer linkages.
- A terrific alternative material for covering foamies is thin vinyl sign tape. Our club obtains scrap in 3-inch x 10-foot rolls at no charge from a local sign shop. The tape comes in rolls that are too wide for the shop's cutting machines, and they just throw out the 3-inch trimmings. Advantages of vinyl sign tape are that it is easy to apply because it has peel-off backing; it adds only slightly more weight to an average model than color tape, but it makes the aircraft far more rigid (rigid models fly faster and more precisely); and it seems to stay on better than color tape.
- A simple way to stiffen the fuselage without adding much weight is to run a 1/4-inch hardwood dowel dipped in silicone glue through it, front to back.
- The area directly in front of the wing saddle takes lots of stress during hard landings. Be sure to reinforce it with two or three layers of strapping tape. Even if the instructions don't call for doing so, reinforce the wing leading edge with one layer of strapping tape. It may save your wing in a head-on midair hit.
- EPP-foam models cannot be cut as precisely as balsa models; that's why it is important to check the incidence of the horizontal stabilizer to make sure it is the same as the wing. After the wrong center of gravity (CG), an out-of-incidence horizontal stabilizer is probably the main reason why a foamie won't fly well.
- Rather than put dead weight in a foamie's nose to balance the model, install a higher-capacity battery. That way you will balance the model and have longer flight times. A fifth cell can also be used to add nose weight. Flight times will be slightly shorter, but servo responses will be faster.
- How well an EPP-foam combat wing recovers from a hit can make the difference between winning or placing in a contest. A slightly forward CG and only enough ballast necessary to penetrate the wind will make recoveries faster.
Online Resources
- Charles Varvaro is a prolific builder and slope flier. See many more of his building tips, and ratings of 53 kits by La Sierra Slope Soarers, at www.lsss.homestead.com.
- More foamie-building information is available at www.davesaircraftworks.com and www.magnum-models.com.
- Got your race models and combat aircraft ready for the Midwest Slope Challenge (MWSC) in May? Get more information at www.alltel.net/~mwsc. Read R/C Soaring Digest's report on MWSC 2002 at www.b2streamlines.com/RCSD.html.
- I hope to see you western-branch Homo Slopiens at the Southern California PSS Festival in May. Information is available at http://ourworld.compuserve.com/homepages/ISR.
- Read R/C Soaring Digest's report on Cajon 2002 at www.b2streamlines.com/RCSD.html.
- See if you recognize yourself or any of your flying buddies in the "Slope Pilot Identification Guide" at www.slopeflyer.com/artman/publish/article_185.shtml.
Transcribed from original scans by AI. Minor OCR errors may remain.

