
Radio Control Slope Soaring
Dave Garwood [[email protected]]
This column describes slope flying at tiny hills, flying from the bottom of a slope, and a method of building removable tail parts.
Small Hills
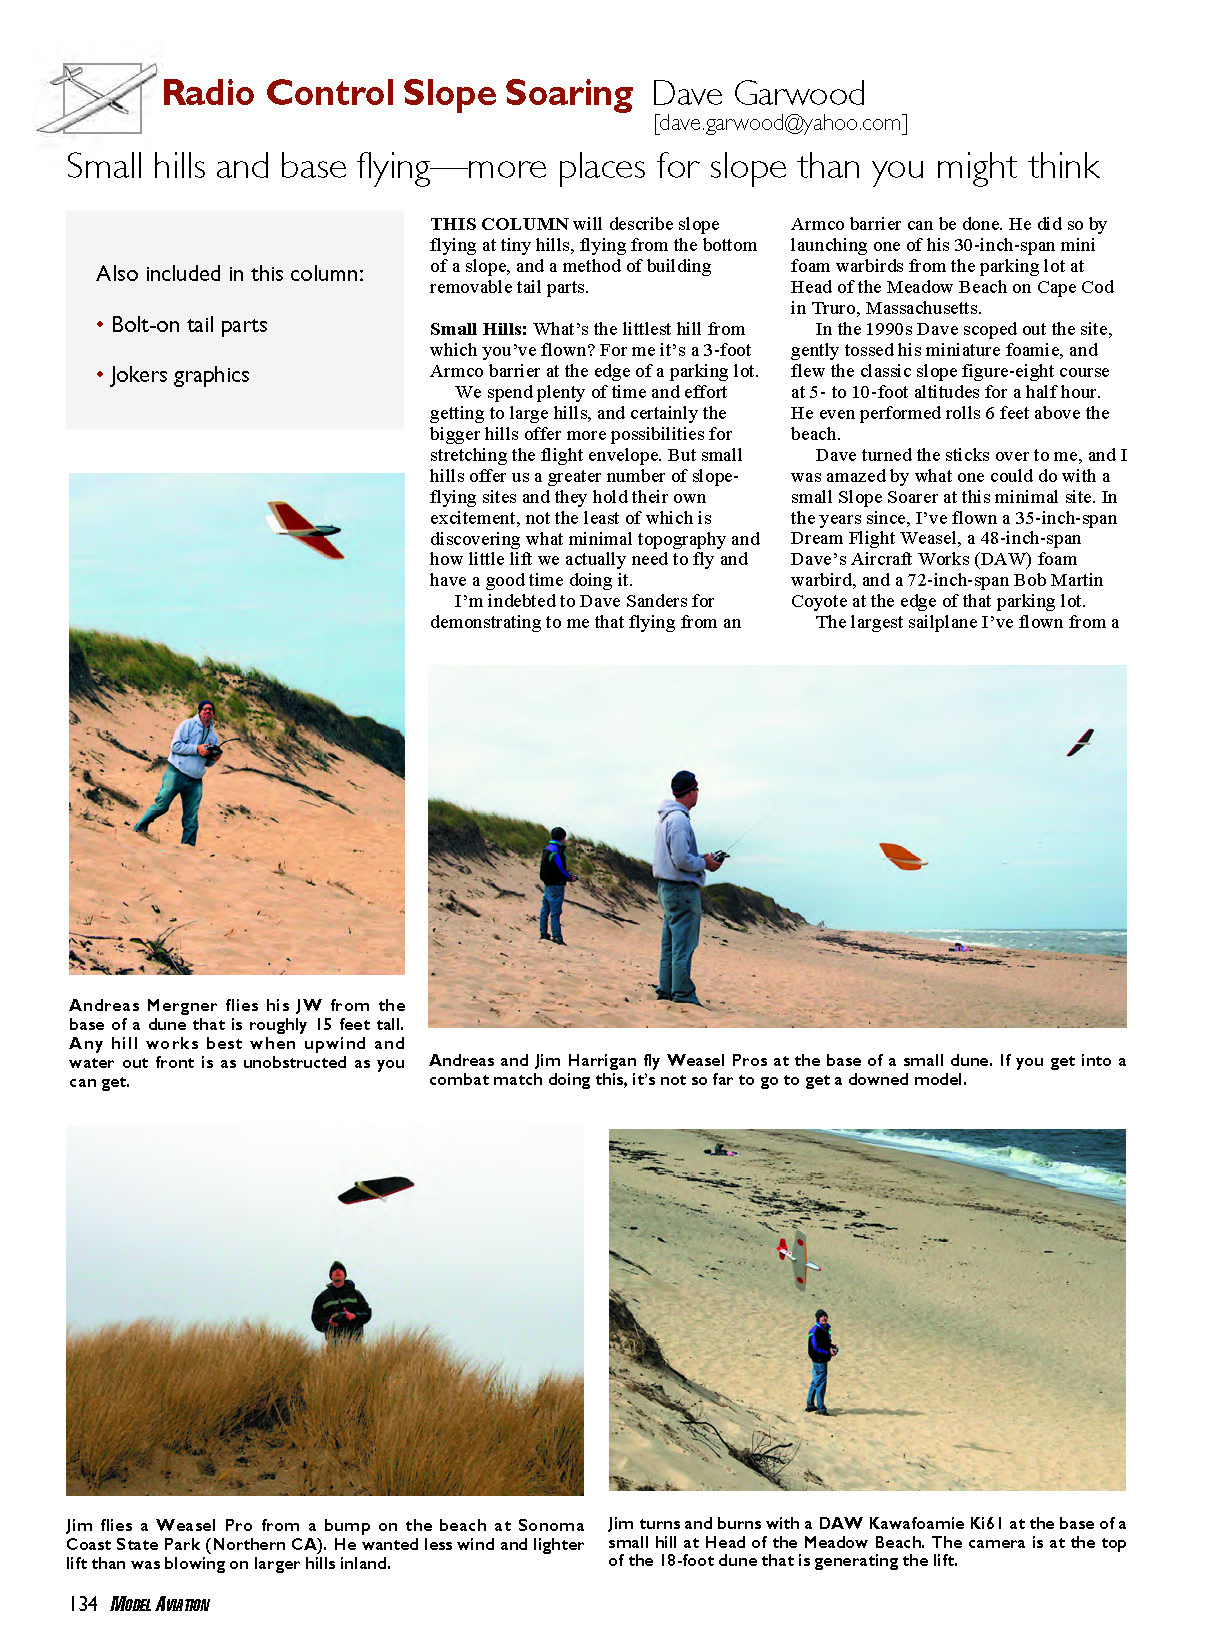
What's the littlest hill from which you've flown? For me it's a 3-foot Armco barrier at the edge of a parking lot.
We spend plenty of time and effort getting to large hills, and certainly the bigger hills offer more possibilities for stretching the flight envelope. But small hills offer a greater number of slope-flying sites and hold their own excitement, not the least of which is discovering what minimal topography and how little lift we actually need to fly and have a good time doing it.
I'm indebted to Dave Sanders for demonstrating that flying from an Armco barrier can be done. He launched one of his 30-inch-span mini foam warbirds from the parking lot at Head of the Meadow Beach on Cape Cod in Truro, Massachusetts.
In the 1990s Dave scoped out the site, gently tossed his miniature foamie, and flew the classic slope figure-eight course at 5- to 10-foot altitudes for a half hour. He even performed rolls 6 feet above the beach.
Dave turned the sticks over to me, and I was amazed by what one could do with a small Slope Soarer at this minimal site. In the years since, I've flown a 35-inch-span Dream Flight Weasel, a 48-inch-span Dave's Aircraft Works (DAW) foam warbird, and a 72-inch-span Bob Martin Coyote at the edge of that parking lot.
The largest sailplane I've flown from a small hill was the 120-inch-span DAW Ka6E EPP-foam aero-tow trainer. Imagine flying a 10-foot-span sailplane from an 18-foot-high hill. Working together in that flying session, Dave and I got the lead photo for a kit-review article.
I would guess that there are many more potential slope-flying sites across the country with hills less than 20 feet tall than with hills higher than 20 feet. Learning to fly from them opens up opportunities at more flying spots.
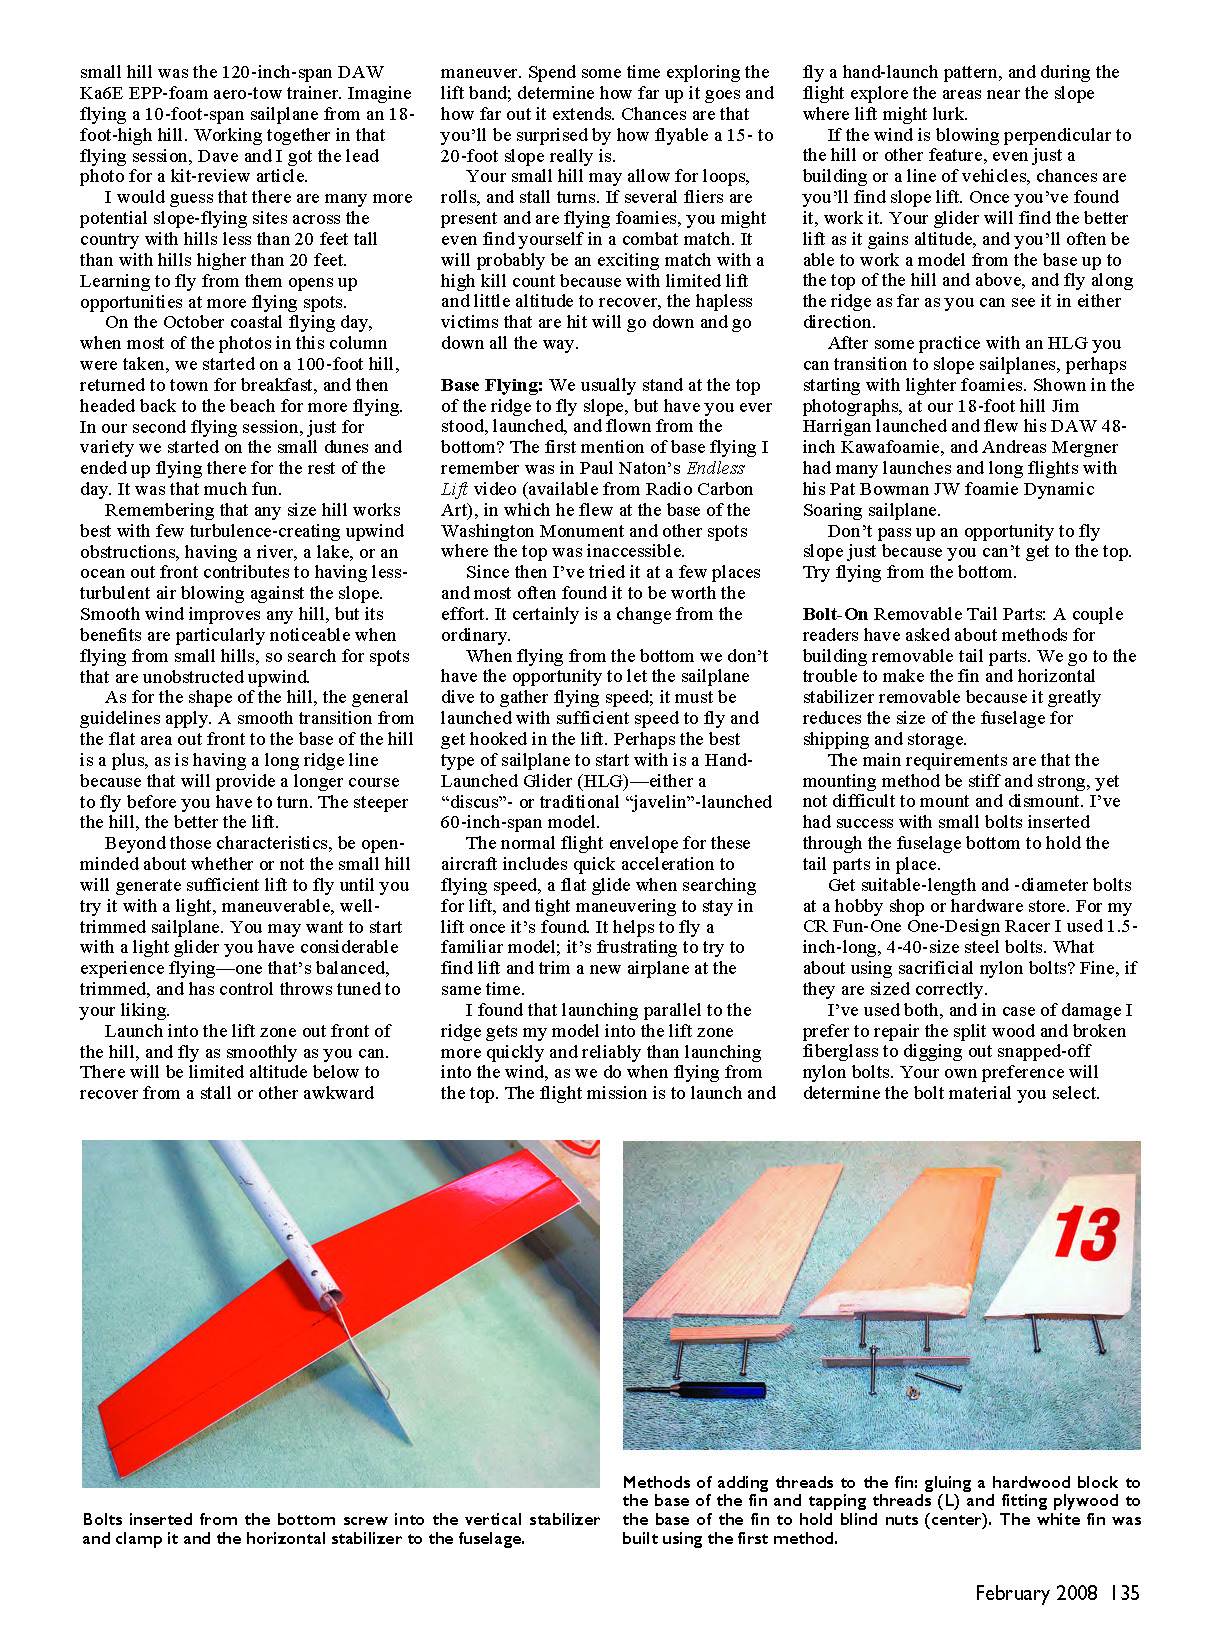
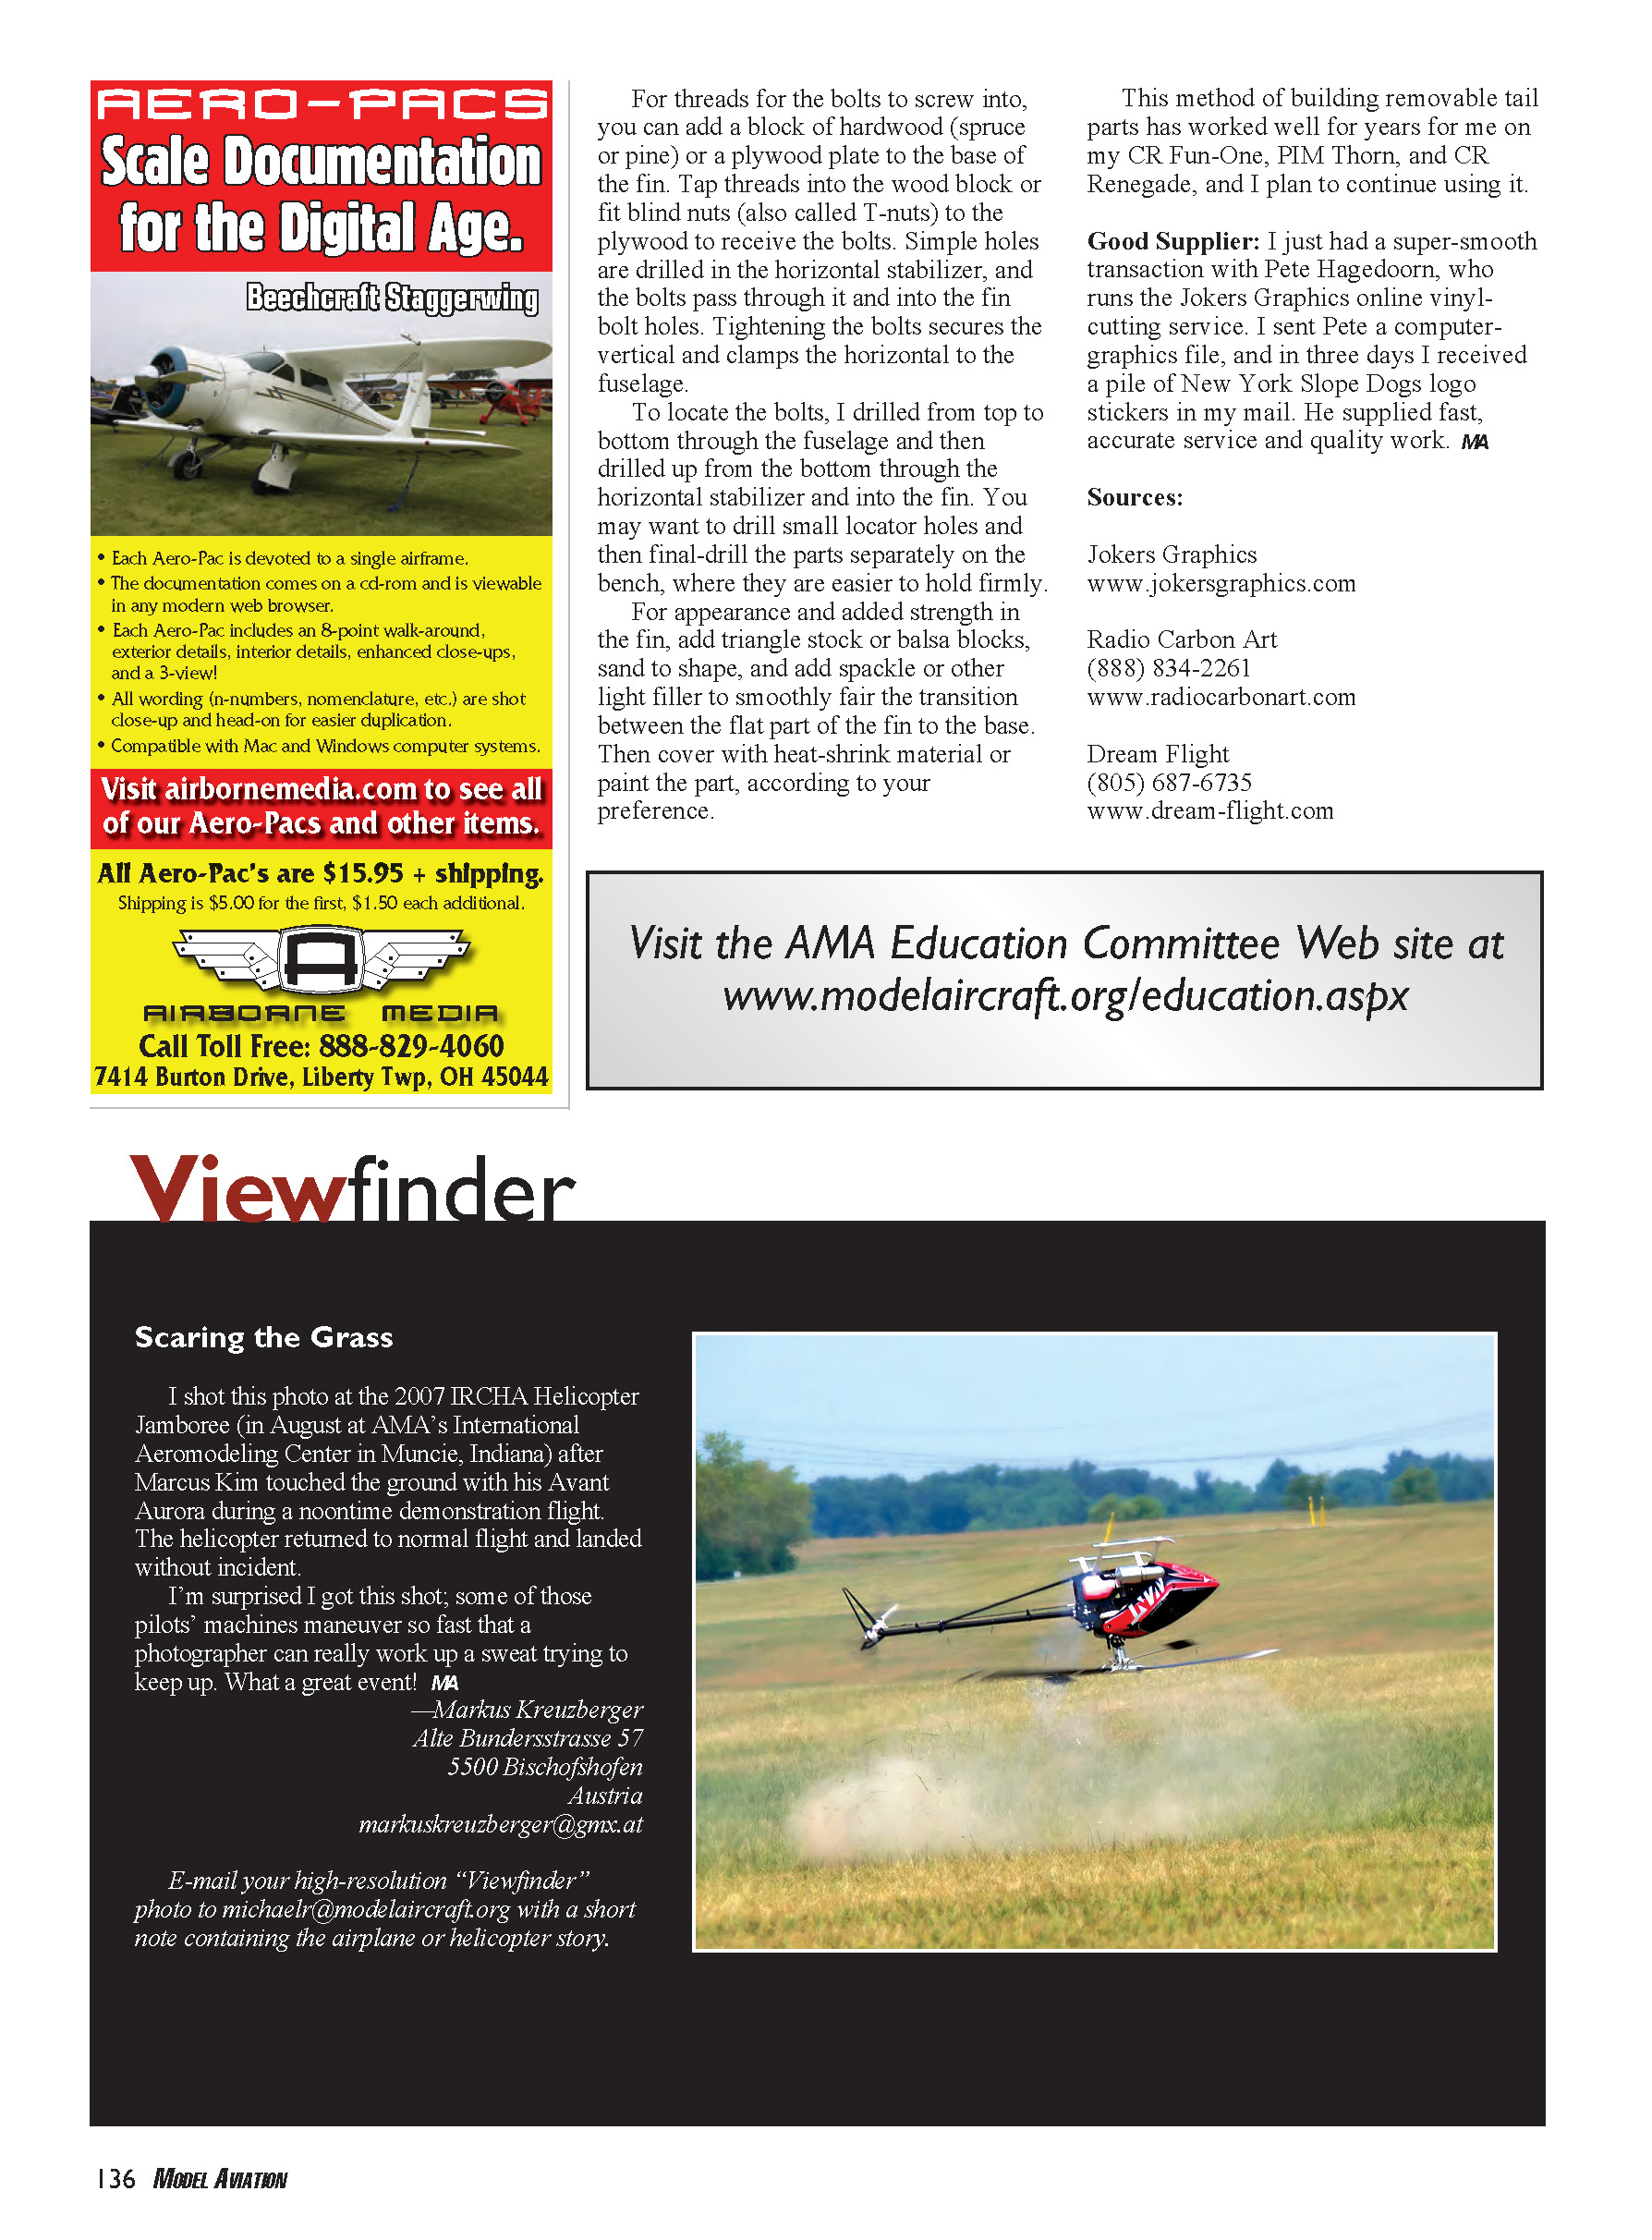
On the October coastal flying day, when most of the photos in this column were taken, we started on a 100-foot hill, returned to town for breakfast, and then headed back to the beach for more flying. In our second flying session, just for variety, we started on the small dunes and ended up flying there for the rest of the day. It was that much fun.
Remembering that any size hill works best with few turbulence-creating upwind obstructions, having a river, lake, or ocean out front contributes to less-turbulent air blowing against the slope. Smooth wind improves any hill, but its benefits are particularly noticeable when flying from small hills, so search for spots that are unobstructed upwind.
As for the shape of the hill, the general guidelines apply. A smooth transition from the flat area out front to the base of the hill is a plus, as is having a long ridgeline because that will provide a longer course to fly before you have to turn. The steeper the hill, the better the lift.
Beyond those characteristics, be open-minded about whether the small hill will generate sufficient lift until you try it with a light, maneuverable, well-trimmed sailplane. You may want to start with a light glider you have considerable experience flying—one that's balanced, trimmed, and has control throws tuned to your liking.
Launch into the lift zone out front of the hill, and fly as smoothly as you can. There will be limited altitude below to recover from a stall or other awkward maneuver. Spend some time exploring the lift band; determine how far up it goes and how far out it extends. Chances are you'll be surprised by how flyable a 15- to 20-foot slope really is.
Your small hill may allow for loops, rolls, and stall turns. If several fliers are present and are flying foamies, you might even find yourself in a combat match. It will probably be an exciting match with a high kill count because with limited lift and little altitude to recover, the hapless victims that are hit will go down and go down all the way.
Base Flying
We usually stand at the top of the ridge to fly slope, but have you ever stood, launched, and flown from the bottom? The first mention of base flying I remember was in Paul Naton's Endless Lift video (available from Radio Carbon Art), in which he flew at the base of the Washington Monument and other spots where the top was inaccessible.
Since then I've tried it at a few places and most often found it to be worth the effort. It certainly is a change from the ordinary.
When flying from the bottom we don't have the opportunity to let the sailplane dive to gather flying speed; it must be launched with sufficient speed to fly and get hooked in the lift. Perhaps the best type of sailplane to start with is a hand-launched glider (HLG)—either a "discus" or traditional "javelin"-launched 60-inch-span model.
The normal flight envelope for these aircraft includes quick acceleration to flying speed, a flat glide when searching for lift, and tight maneuvering to stay in lift once it's found. It helps to fly a familiar model; it's frustrating to try to find lift and trim a new airplane at the same time.
I found that launching parallel to the ridge gets my model into the lift zone more quickly and reliably than launching into the wind, as we do when flying from the top. The flight mission is to launch and fly a hand-launch pattern, and during the flight explore the areas near the slope where lift might lurk.
If the wind is blowing perpendicular to the hill or other feature—even just a building or a line of vehicles—chances are you'll find slope lift. Once you've found it, work it. Your glider will find the better lift as it gains altitude, and you'll often be able to work a model from the base up to the top of the hill and above, and fly along the ridge as far as you can see it in either direction.
After some practice with an HLG you can transition to slope sailplanes, perhaps starting with lighter foamies. At our 18-foot hill Jim Harrigan launched and flew his DAW 48-inch Kawafoamie, and Andreas Mergner had many launches and long flights with his Pat Bowman/JW foamie dynamic soaring sailplane.
Don't pass up an opportunity to fly slope just because you can't get to the top. Try flying from the bottom.
Bolt-On Removable Tail Parts
A couple readers have asked about methods for building removable tail parts. We go to the trouble to make the fin and horizontal stabilizer removable because it greatly reduces the size of the fuselage for shipping and storage.
The main requirements are that the mounting method be stiff and strong, yet not difficult to mount and dismount. I've had success with small bolts inserted through the fuselage bottom to hold the tail parts in place.
Get suitable-length and -diameter bolts at a hobby shop or hardware store. For my CR Fun-One One-Design Racer I used 1.5-inch-long, 4-40-size steel bolts. What about using sacrificial nylon bolts? Fine, if they are sized correctly.
I've used both, and in case of damage I prefer to repair the split wood and broken fiberglass to digging out snapped-off nylon bolts. Your own preference will determine the bolt material you select.
For threads for the bolts to screw into, you can add a block of hardwood (spruce or pine) or a plywood plate to the base of the fin. Tap threads into the wood block or fit blind nuts (also called T-nuts) to the plywood to receive the bolts. Simple holes are drilled in the horizontal stabilizer, and the bolts pass through it and into the fin bolt holes. Tightening the bolts secures the vertical and clamps the horizontal to the fuselage.
To locate the bolts, I drilled from top to bottom through the fuselage and then drilled up from the bottom through the horizontal stabilizer and into the fin. You may want to drill small locator holes and then final-drill the parts separately on the bench, where they are easier to hold firmly.
For appearance and added strength in the fin, add triangle stock or balsa blocks, sand to shape, and add spackle or other light filler to smoothly fair the transition between the flat part of the fin and the base. Then cover with heat-shrink material or paint the part, according to your preference.
This method of building removable tail parts has worked well for years for me on my CR Fun-One, PIM Thorn, and CR Renegade, and I plan to continue using it.
Good Supplier
I just had a super-smooth transaction with Pete Hagedoorn, who runs the Jokers Graphics online vinyl-cutting service. I sent Pete a computer-graphics file, and in three days I received a pile of New York Slope Dogs logo stickers in my mail. He supplied fast, accurate service and quality work. —MA
Sources
- Jokers Graphics — www.jokersgraphics.com
- Radio Carbon Art — (888) 834-2261, www.radiocarbonart.com
- Dream Flight — (805) 687-6735, www.dream-flight.com
Transcribed from original scans by AI. Minor OCR errors may remain.

