
Radio Control Slope Soaring
Dave Garwood [[email protected]]
Rudder-only slope-flying challenge
Many slope-soaring models run aileron and elevator control. Some add rudder control, and a few feature flaps or spoilers. Think for a minute: what would be the smallest number of control surfaces needed to complete a flight and land back on top of the hill under pilot control?
If your answer is one, you're right — but which surface would it be? If your answer is rudder, right again. But what would it be like to fly a "rudder-only" slope sailplane?
How smoothly could you fly without elevator control? Would it even be possible to launch, fly, and land back at the top using only rudder control, with no other control surfaces? Not only is it possible, but it has been done. Not only has it been done, but in the early days of slope soaring, it was the only way to fly RC for both power airplanes and for gliders.
John Hackert has done it. He is a longtime modeler who is president of the Electric Powered Aeromodelers in Scotia, New York. We rode together on a bus trip to the WRAM Show earlier this year, and he told me stories about CL flying in 1961 at La Cumbre Junior High School and rudder-only slope soaring with early RC equipment at Henry's Beach in Santa Barbara, California. John remembers that during his freshman and sophomore years in high school, he and schoolmates flew CL models at the school all day on Sundays. "I had a buddy who had a balsa glider, built from a kit, built up from sticks," said John. "The glider carried a single-channel radio receiver—one of the first to use transistors. He had remote control of rudder only."
The RC site featured a cliff overlooking the ocean, and John's buddy launched the model into slope lift. John explained: "It was remarkable that a model airplane could be controlled by radio, and it was amazing that a model glider could go up in slope lift. The transmitter had a single button. Press once to swing the rudder to the right; press again to center it. Press twice to give left rudder, and once again to return it to center." Servos had yet to be introduced into model flight; this airplane used rubber-band-powered escapements. John explained further: "Our frequency was on the citizen's band, between a couple of CB voice channels. We had all kinds of interference, and it was unusual to complete a flight without crashing. We crashed plenty, but we also flew."
John Hackert's recollections started me wondering if any of us are tough enough to launch a rudder-only-controlled slope soarer today. The brief time I've flown while intentionally not touching the elevator control, imagining that I was flying a rudder-only sailplane, has convinced me that this is a substantial task.
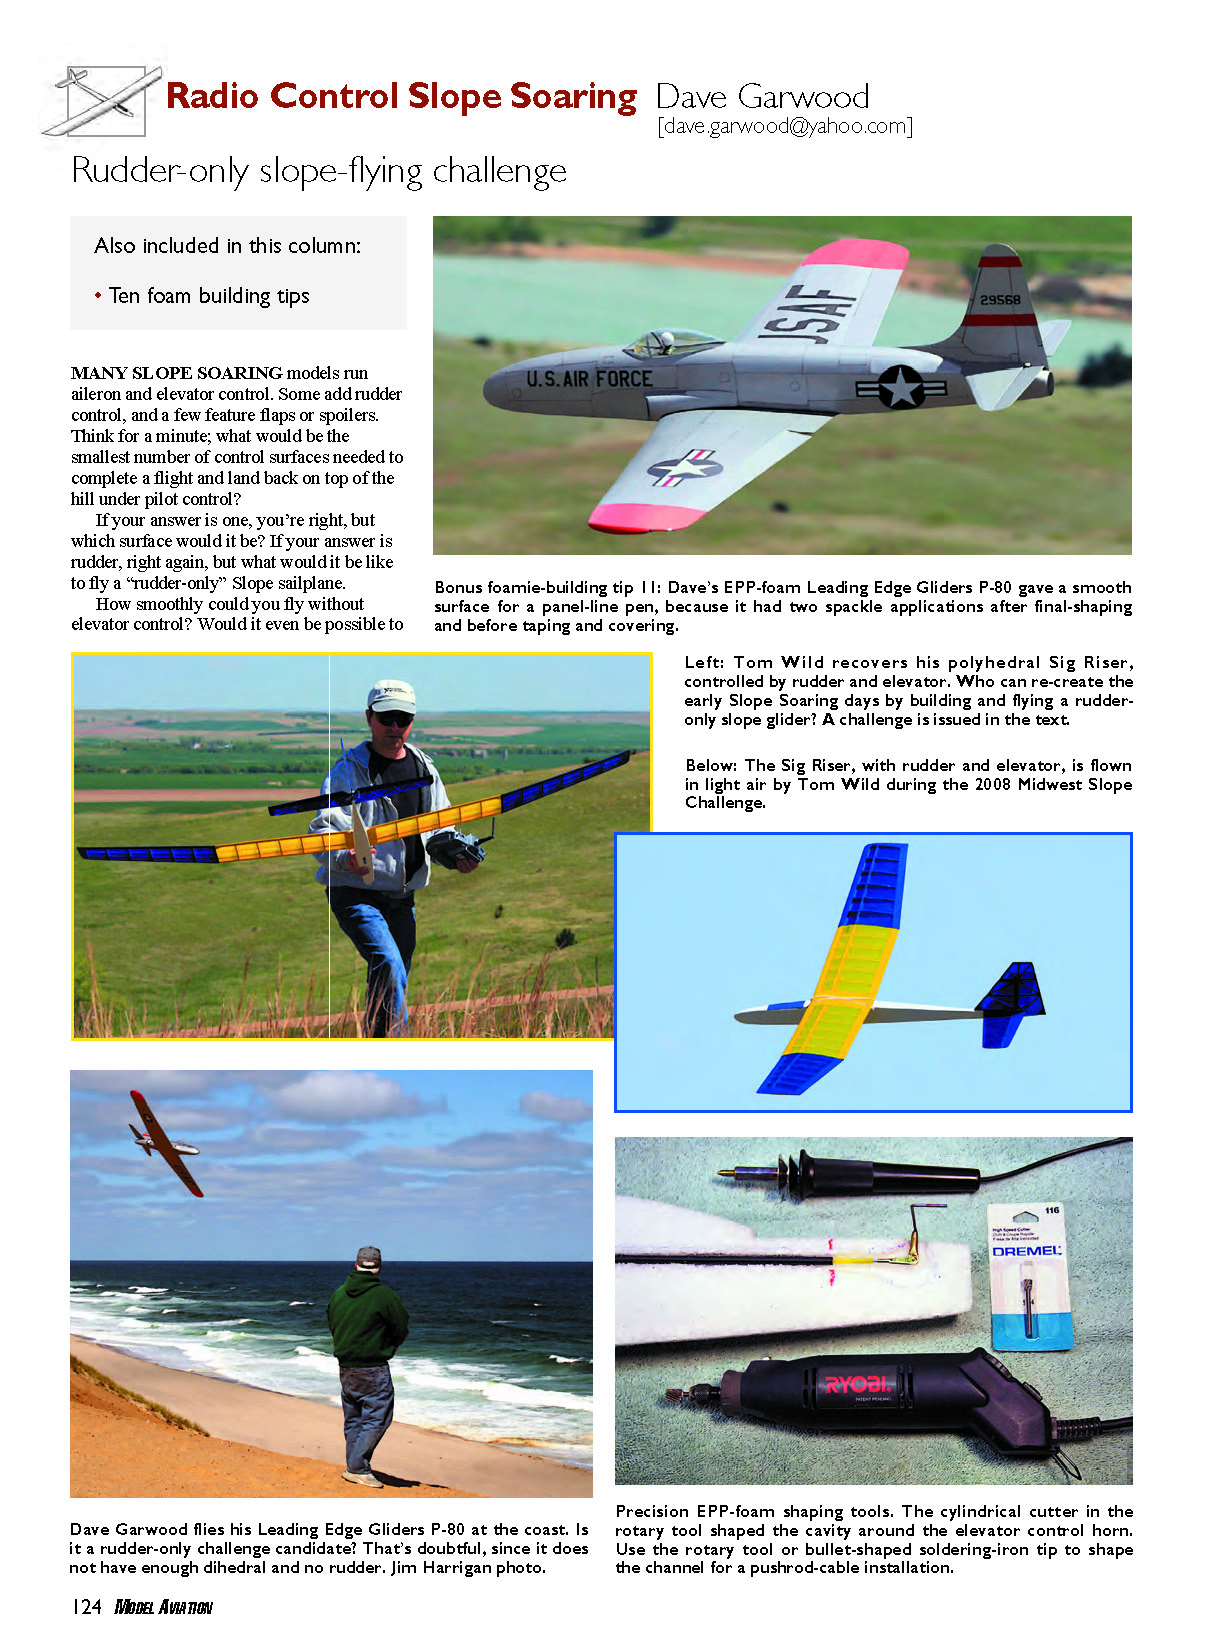
I'd like to hear the experiences of any RC pilot who is willing to build, prep, and launch a rudder-only sailplane into slope lift. I'll run photos and the stories of any of us who can complete such a flight and manage to land shiny-side up.
Are we tough enough to re-create the early days of radio-controlled slope flight? It's something like the days of iron men in wooden ships, it seems. Send in your stories and pictures.
Foam Aircraft Building Tips
The introduction of EPP foam in slope soarers in the mid-1990s boosted their damage resistance and heightened their crash tolerance. This nearly indestructible foam attracted newcomers, sped up aerobatics training, and offered us landing areas that were previously considered too gnarly to put a model down in, thus making more slopes flyable.
The following is from Wikipedia, an online encyclopedia (March 7, 2009):
"Expanded Polypropylene (EPP) is a foam form of polypropylene. EPP has very good impact characteristics due to its low stiffness; this allows EPP to resume its shape after impacts.
"EPP is extensively used in model aircraft and other radio controlled vehicles by hobbyists. This is mainly due to its ability to absorb impacts, making this an ideal material for RC aircraft for beginners and amateurs."
Incorporating EPP foam into model aircraft required that designers work to stiffen wings and fuselages and that builders perfect techniques to build with this miracle material. There's a necessary adjustment period for old-school modelers who are used to working with wood and fiberglass.
"Sanding EPP foam is like sanding bubble gum," quipped Carl Maas Sr., who is a legendary master scale builder.
We did learn to sand and shape and finish EPP foam and build some good-looking sailplanes with it. Following are some foam-aircraft building tips I learned on my path to constructing bounceable gliders.
- Read the instructions before you start.
Sure, this applies to wood and fiberglass models too, but for foamies it especially helps to make sure you have the right adhesives, tape, and finishing materials for the project. Will you be using epoxy, Gorilla Glue, 3M 77 spray contact cement, hot-melt glue, or all four? Will you use 1-inch- or 2-inch-wide filament tape? Are you going to finish the model with low-temperature film such as UltraCote or iron-on fabric such as Solartex? Or will you try something new, such as tool-handle dip or temperature-sensitive plastic designed for laminating ID cards (which a flying buddy showed me, and it looks promising)?
- Order tools, parts, and materials early in the build process, so you’ll have them on hand and save interruptions to the workflow. Get the correct-size servos and battery packs so that fuselage construction will proceed without interruption. Make sure you have sufficient tape and covering material at your disposal, to complete the project without a delay at a late stage when you might be anxious to get the model in the air. Do you need to order decals or special spray-paint colors?
- Remove the hot-wire-cutter "hairs" from wing and fuselage parts with a block of EPP foam. It’s quicker than picking off the strands with fingers, and it’s gentler on the foam parts than using a sanding block.
- I prefer to join wood parts with wood glue. It’s light and strong, and it sands more easily than epoxy or cyanoacrylate glue. Elmer’s ProBond Interior Wood Glue (yellow carpenter’s glue) or any brand of aliphatic resin will do the trick, and it is inexpensive.
- I like setting spars into a foam wing with polyurethane adhesive. I’ve used both Gorilla Glue and Borden Ultimate Glue Polyurethane, which is available from Elmer’s. When these adhesives are exposed to a slight amount of water, they foam slightly and expand, thus filling pores in wood and nooks and crannies in foam, locking them together in a tight bond. A polyurethane glue joint is lighter than an equivalent epoxy or hot-melt-glue joint, and it has a longer working time than the hot-glue method.
Using polyurethane adhesive is different from using most other glues. Some moisture is needed as a catalyst to start the curing process. It can be moisture in the air or on a humid day. In dry air, wipe one part with a damp paper towel. You’ll have 10–15 minutes to assemble and clamp the parts, and I like to let them cure overnight to develop maximum strength.
This glue is exceedingly sticky before curing. Clean up your hands and tools with mineral spirits before curing, and remove the adhesive from finished parts with a sanding block after curing.
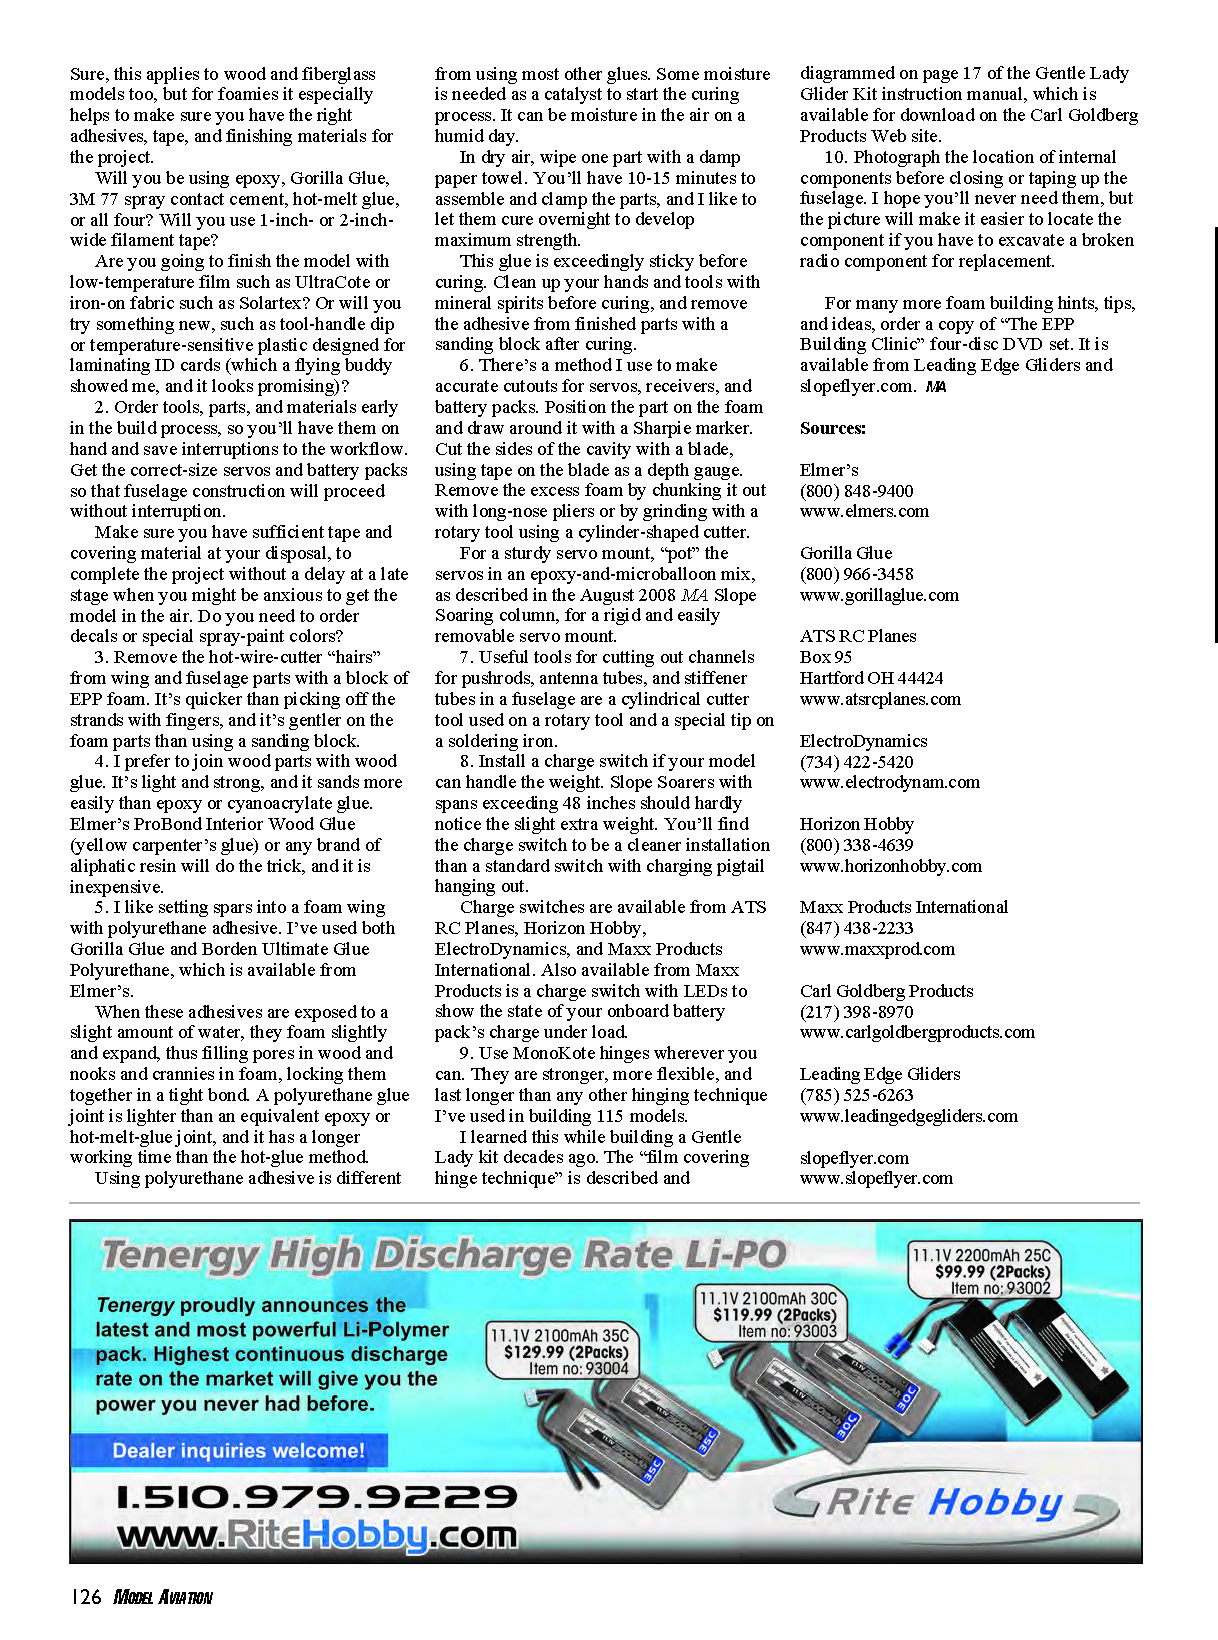
- There’s a method I use to make accurate cutouts for servos, receivers, and battery packs. Position the part on the foam and draw around it with a Sharpie marker. Cut the sides of the cavity with a blade, using tape on the blade as a depth gauge. Remove the excess foam by chunking it out with long-nose pliers or by grinding with a rotary tool using a cylinder-shaped cutter.
For a sturdy servo mount, "pot" the servos in an epoxy-and-microballoon mix, as described in the August 2008 MA Slope Soaring column, for a rigid and easily removable servo mount.
- Useful tools for cutting out channels for pushrods, antenna tubes, and stiffener tubes in a fuselage are a cylindrical cutter tool used on a rotary tool and a special tip on a soldering iron.
- Install a charge switch if your model can handle the weight. Slope soarers with spans exceeding 48 inches should hardly notice the slight extra weight. You’ll find the charge switch to be a cleaner installation than a standard switch with a charging pigtail hanging out.
Charge switches are available from ATS RC Planes, Horizon Hobby, ElectroDynamics, and Maxx Products International. Also available from Maxx Products is a charge switch with LEDs to show the state of your onboard battery pack’s charge under load.
- Use MonoKote hinges wherever you can. They are stronger, more flexible, and last longer than any other hinging technique I’ve used in building models.
I learned this while building a Gentle Lady kit decades ago. The "film covering hinge technique" is described and diagrammed on page 17 of the Gentle Lady Glider Kit instruction manual, which is available for download on the Carl Goldberg Products website.
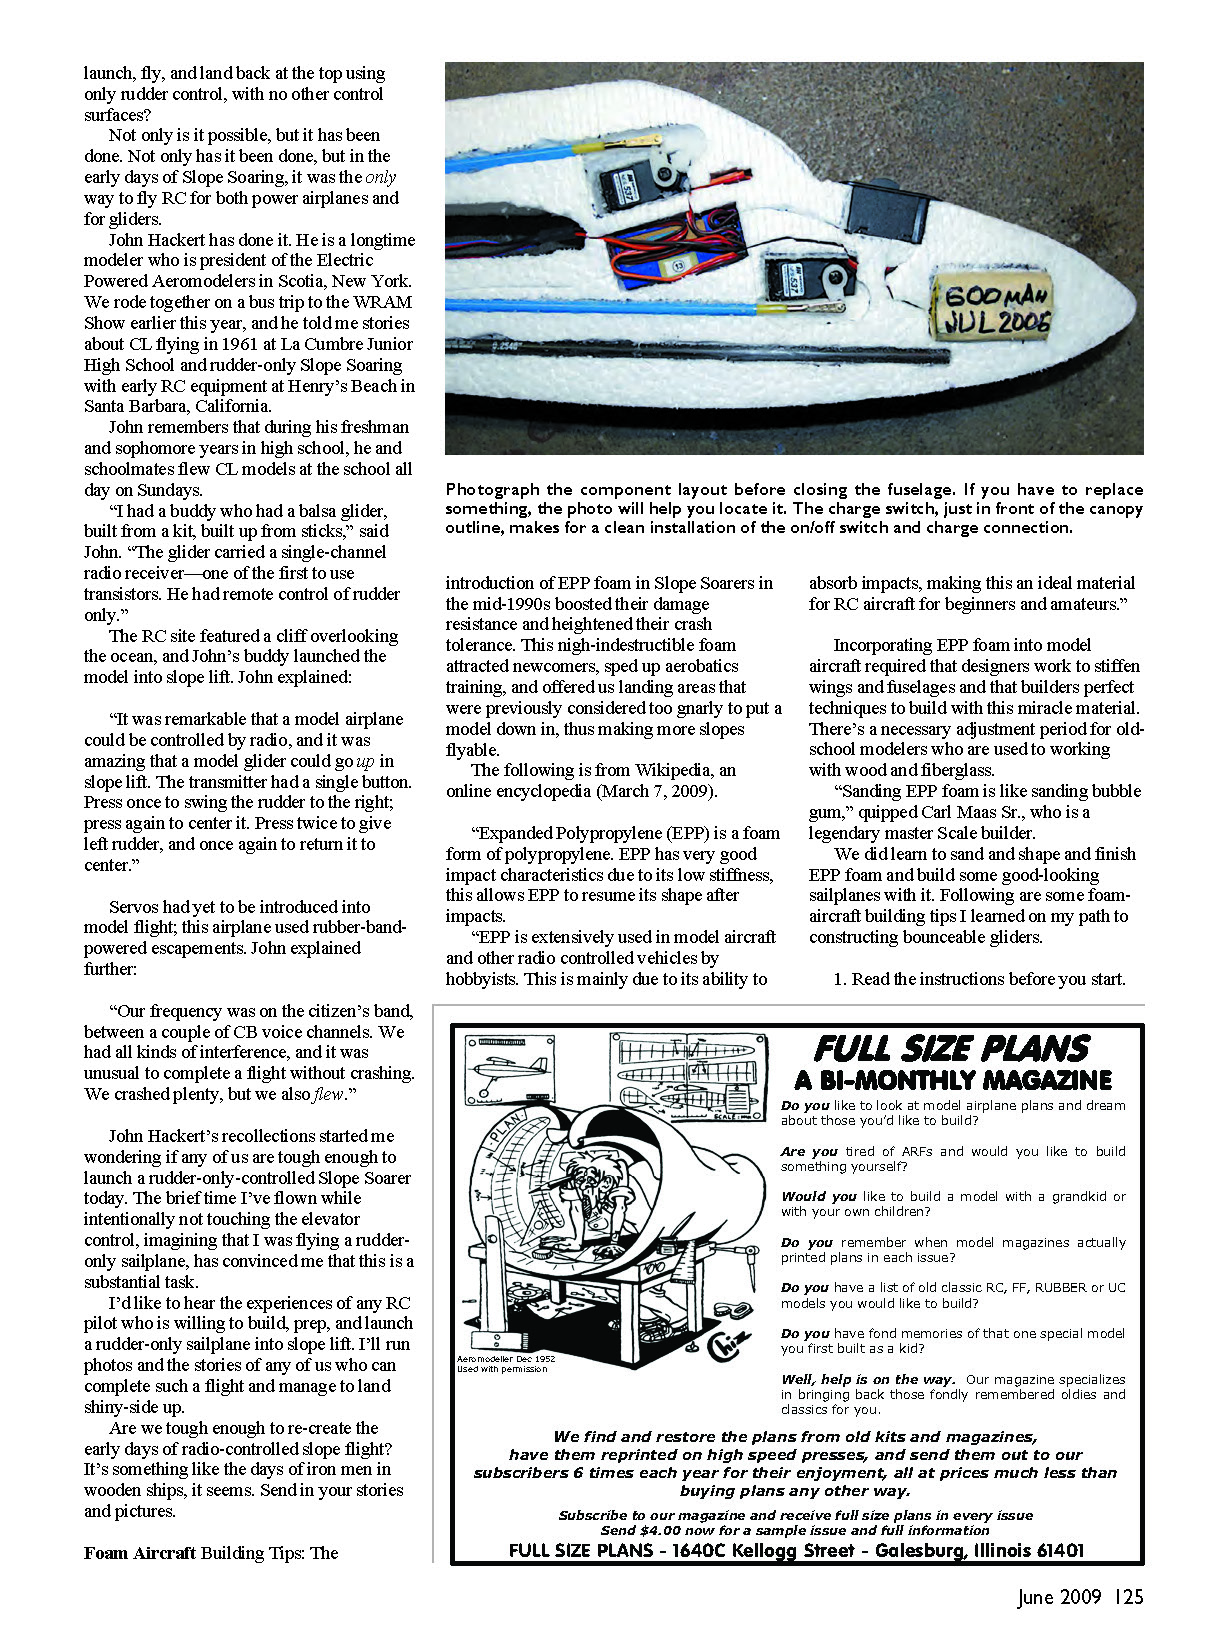
- Photograph the location of internal components before closing or taping up the fuselage. I hope you’ll never need them, but the picture will make it easier to locate the component if you have to excavate a broken radio component for replacement.
For many more foam building hints, tips, and ideas, order a copy of "The EPP Building Clinic" four-disc DVD set. It is available from Leading Edge Gliders and slopeflyer.com. MA
Sources
- Elmer’s
(800) 848-9400 www.elmers.com
- Gorilla Glue
(800) 966-3458 www.gorillaglue.com
- ATS RC Planes
Box 95 Hartford, OH 44424 www.atsrcplanes.com
- ElectroDynamics
(734) 422-5420 www.electrodynam.com
- Horizon Hobby
(800) 338-4639 www.horizonhobby.com
- Maxx Products International
(847) 438-2233 www.maxxprod.com
- Carl Goldberg Products
(217) 398-8970 www.carlgoldbergproducts.com
- Leading Edge Gliders
(785) 525-6263 www.leadingedgegliders.com
- slopeflyer.com
Transcribed from original scans by AI. Minor OCR errors may remain.

