
Radio Control Slope Soaring
Dave Garwood [[email protected]]
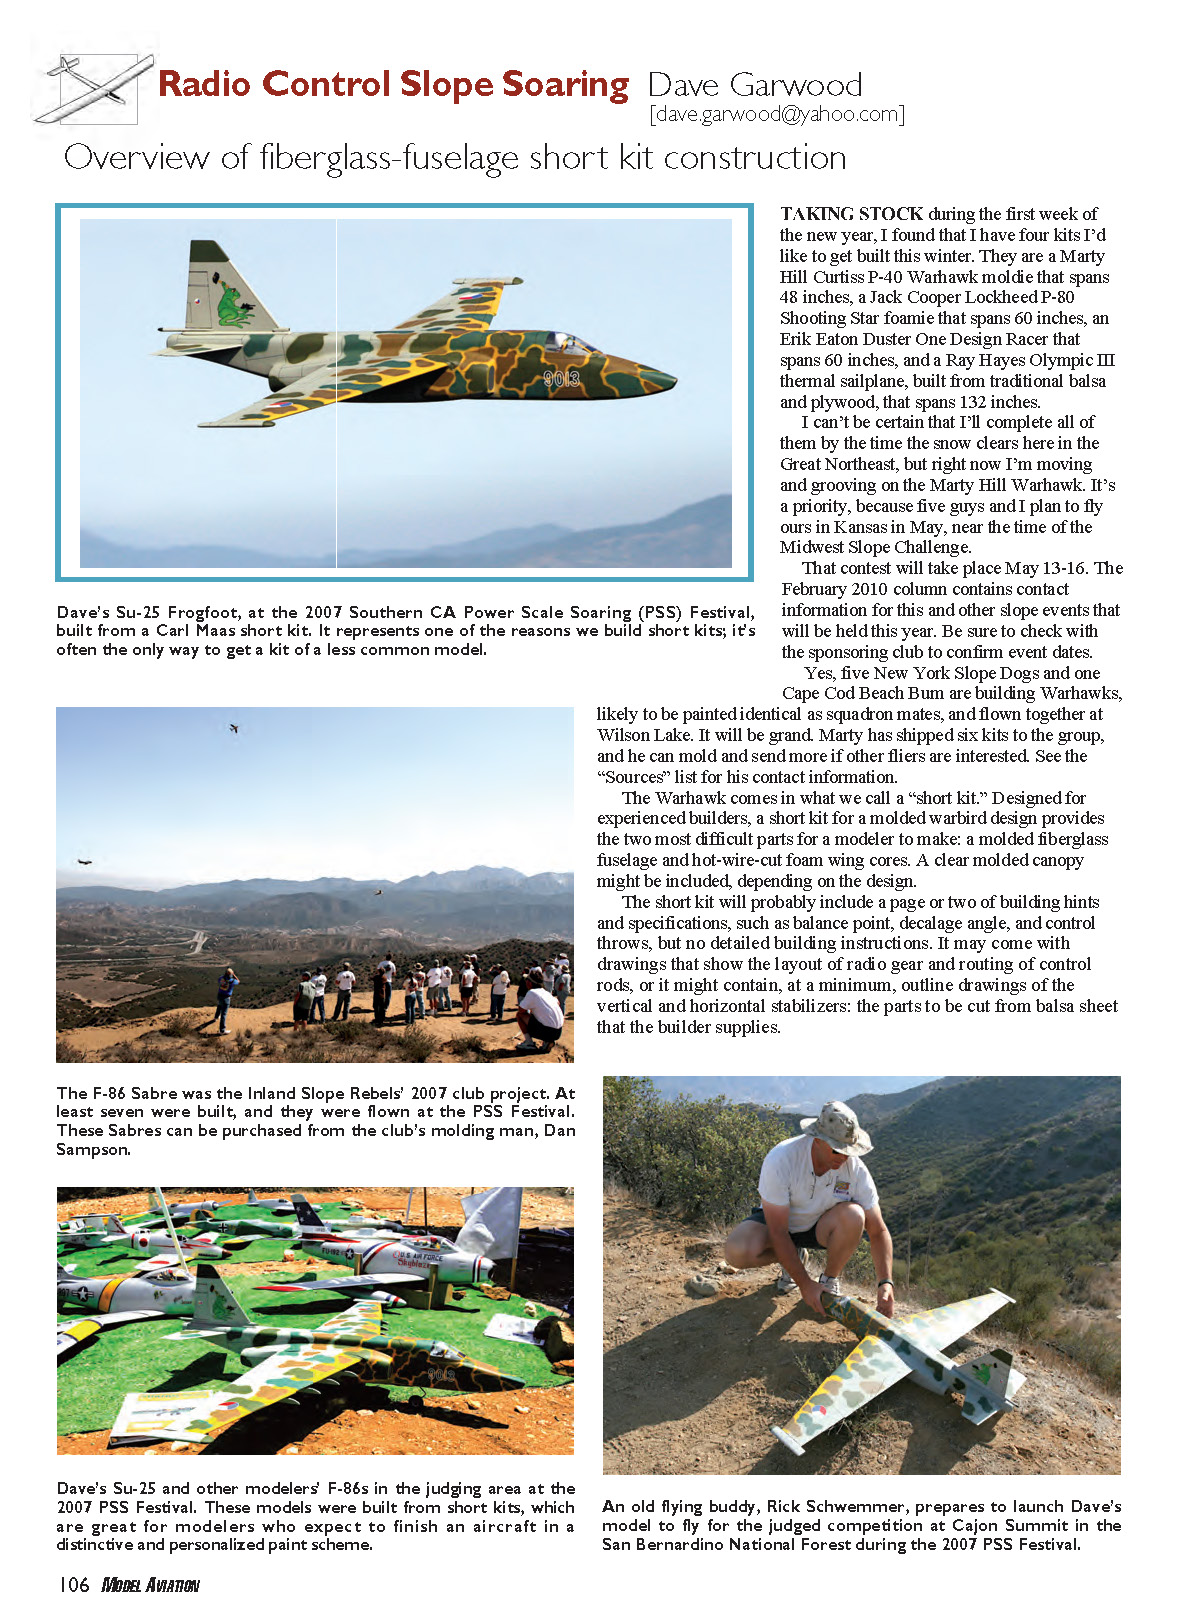
Overview of fiberglass-fuselage short kit construction
Taking stock during the first week of the new year, I found that I have four kits I'd like to get built this winter. They are a Marty Hill Curtiss P-40 Warhawk moldie that spans 48 inches, a Jack Cooper Lockheed P-80 Shooting Star foamie that spans 60 inches, an Erik Eaton Duster One Design Racer that spans 60 inches, and a Ray Hayes Olympic III thermal sailplane, built from traditional balsa and plywood, that spans 132 inches.
I can't be certain that I'll complete all of them by the time the snow clears here in the Great Northeast, but right now I'm moving and grooving on the Marty Hill Warhawk. It's a priority, because five guys and I plan to fly ours in Kansas in May, near the time of the Midwest Slope Challenge. That contest will take place May 13–16. The February 2010 column contains contact information for this and other slope events that will be held this year. Be sure to check with the sponsoring club to confirm event dates.
Yes, five New York Slope Dogs and one Cape Cod Beach Bum are building Warhawks, likely to be painted identical as squadron mates, and flown together at Wilson Lake. It will be grand. Marty has shipped six kits to the group, and he can mold and send more if other fliers are interested. See the "Sources" list for his contact information.
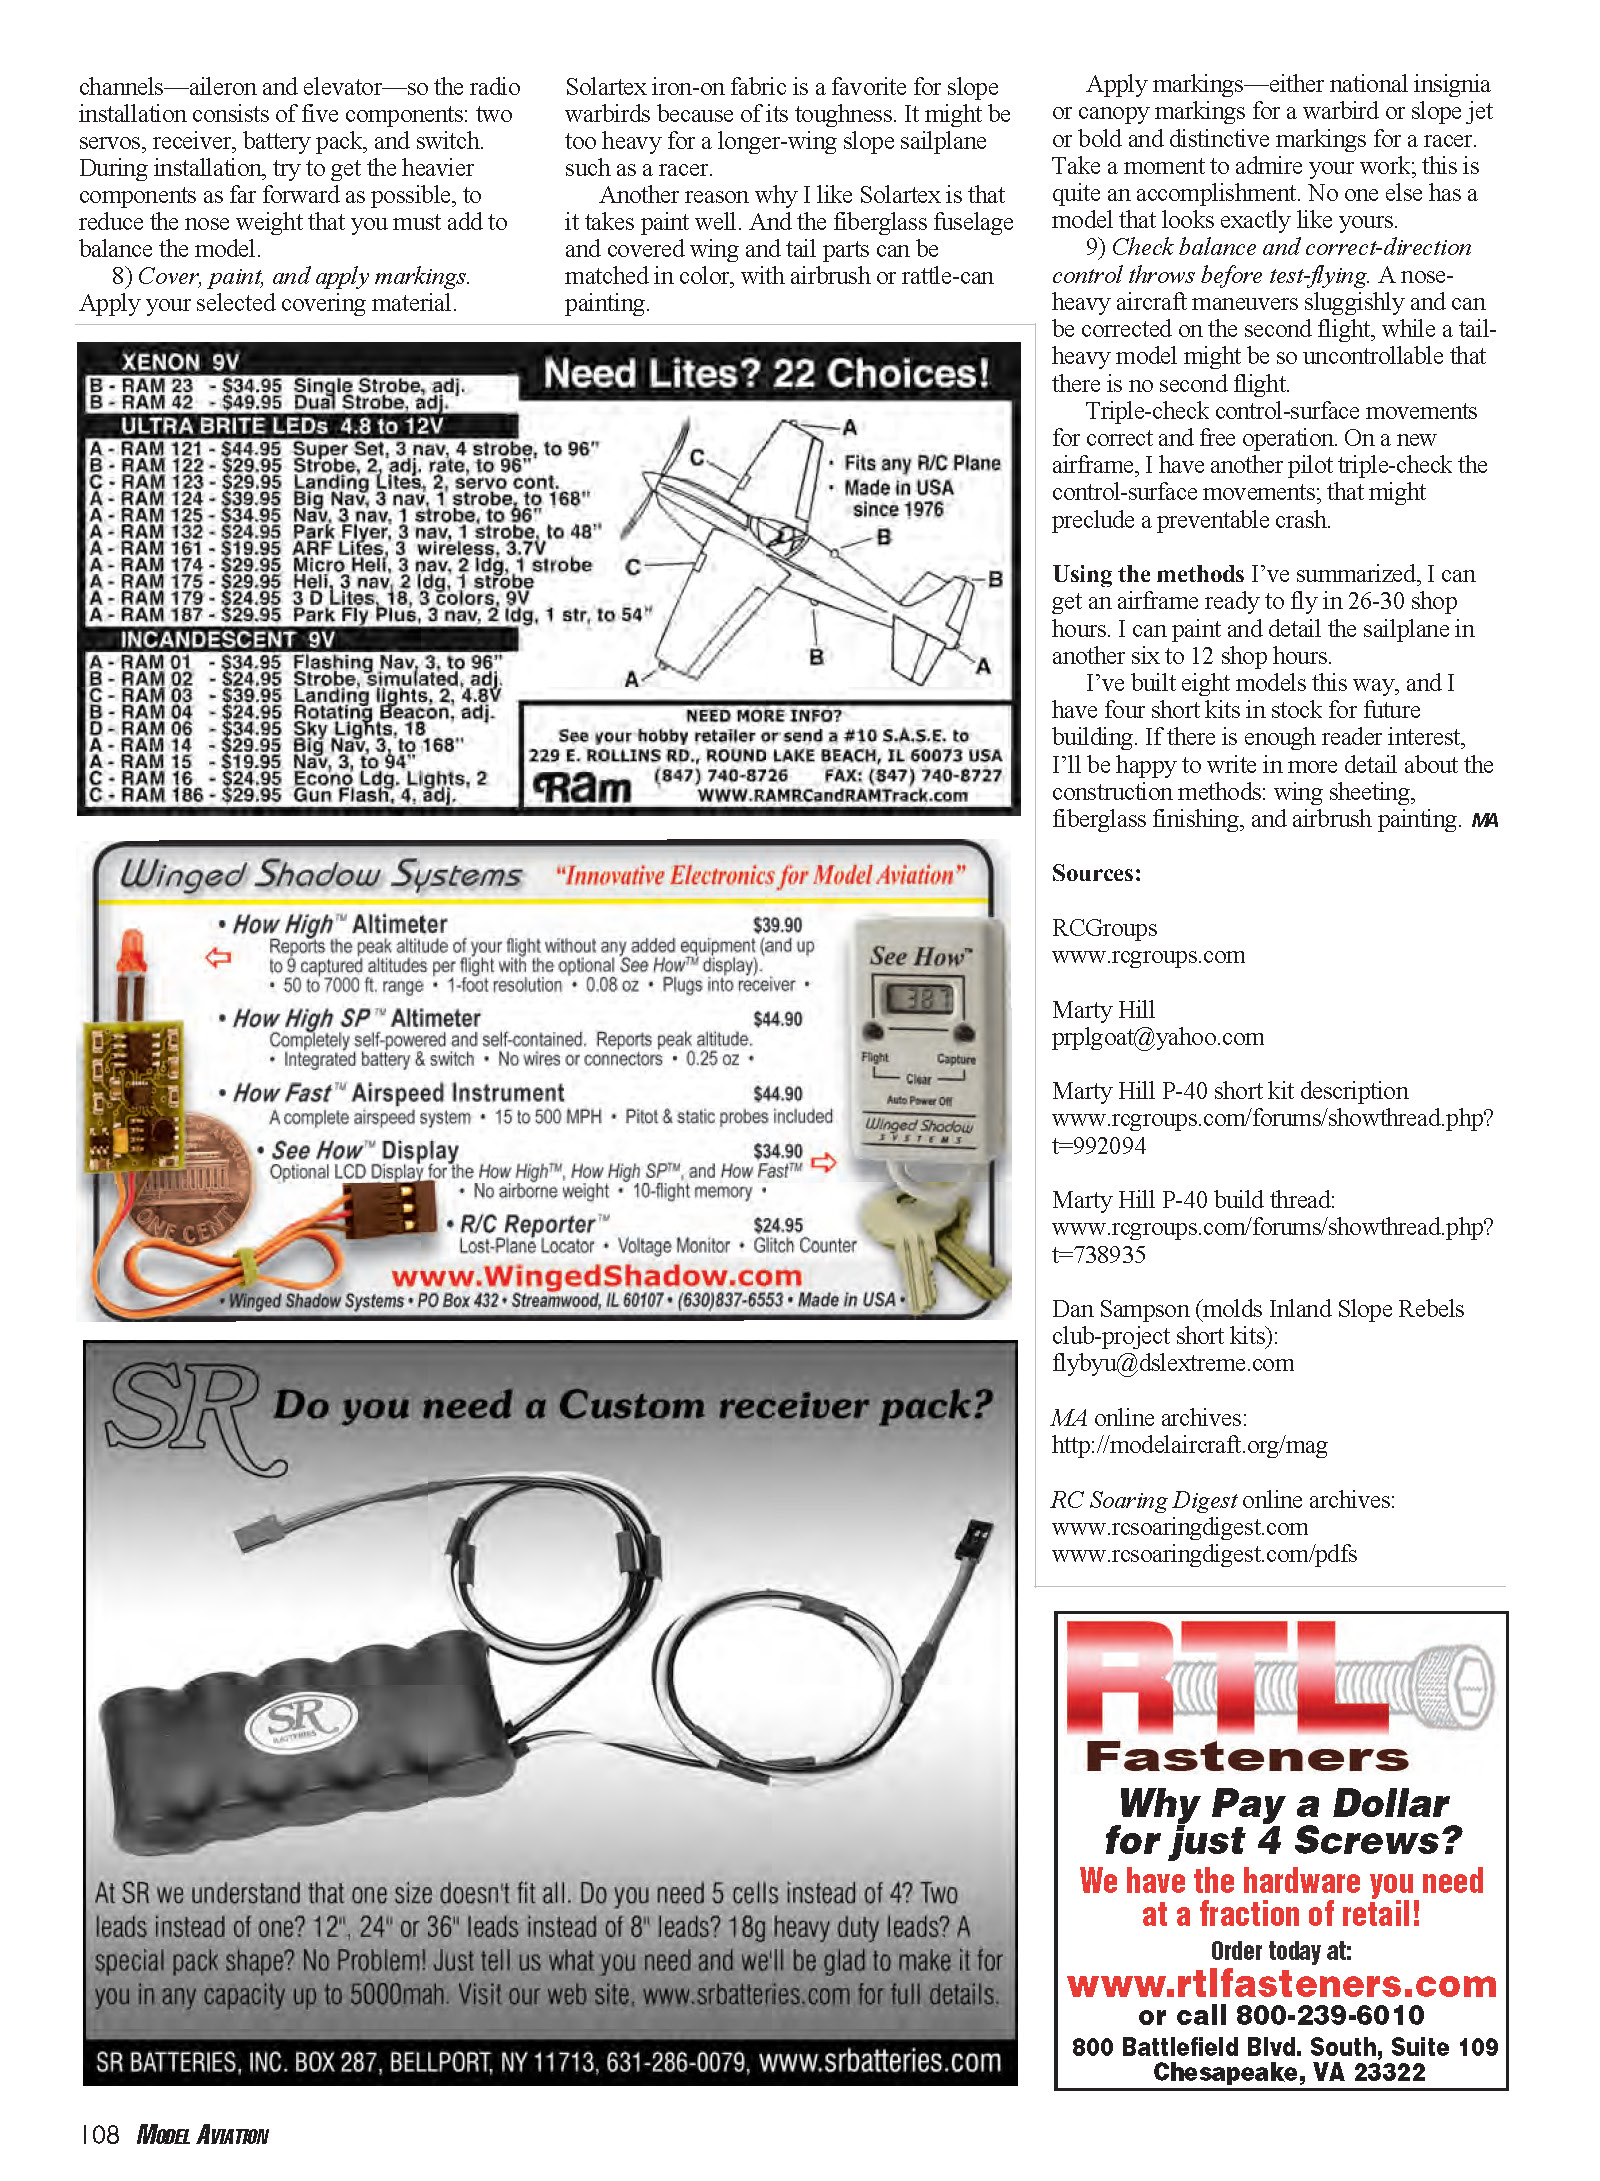
The Warhawk comes in what we call a "short kit." Designed for experienced builders, a short kit for a molded warbird design provides the two most difficult parts for a modeler to make: a molded fiberglass fuselage and hot-wire-cut foam wing cores. A clear molded canopy might be included, depending on the design.
A short kit will probably include a page or two of building hints and specifications, such as balance point, decalage angle, and control throws, but no detailed building instructions. It may come with drawings that show the layout of radio gear and routing of control rods, or it might contain, at a minimum, outline drawings of the vertical and horizontal stabilizers: the parts to be cut from balsa sheet that the builder supplies.
In the Internet age, information for builders can often be found on a website or a "building thread" on one of the message-posting pages. For the Warhawk kit, you can find Marty Hill's building thread on RCGroups; the address is in the source list. A short kit rarely includes wood or hardware; those decisions and acquisitions are left up to the builder.
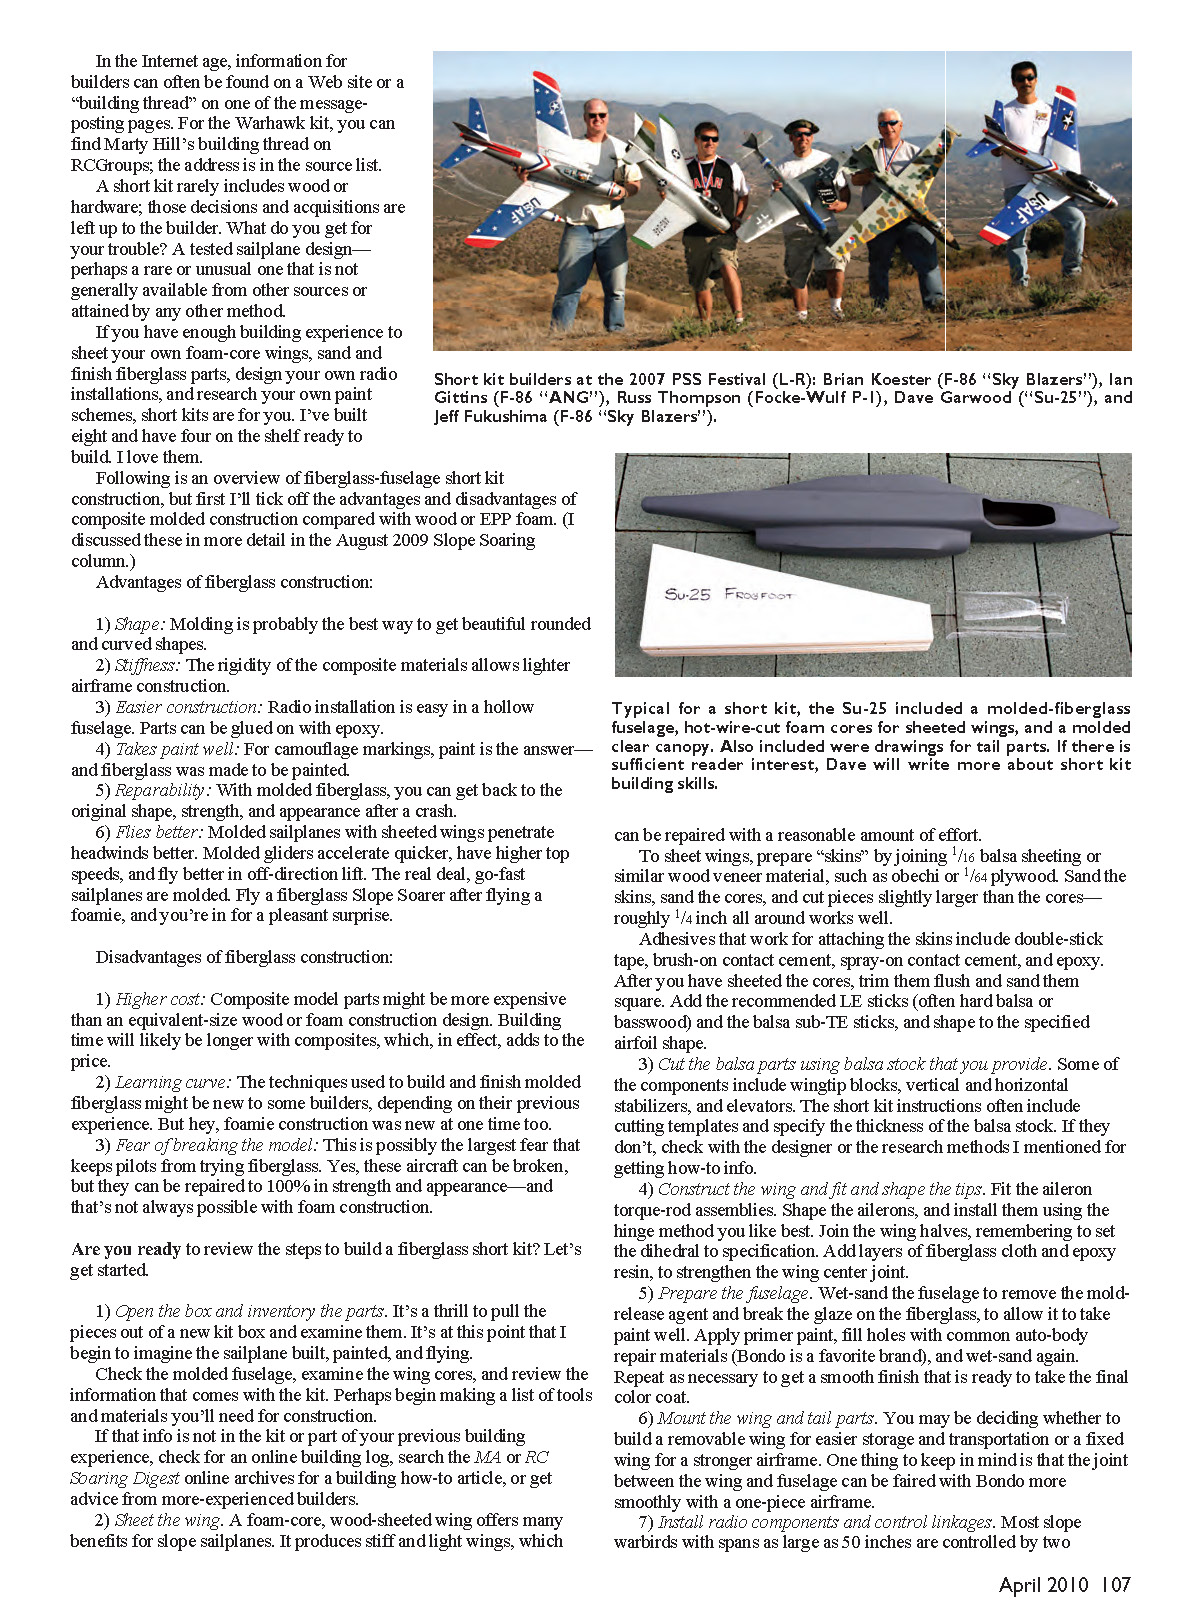
What do you get for your trouble? A tested sailplane design—perhaps a rare or unusual one that is not generally available from other sources or attained by any other method. If you have enough building experience to sheet your own foam-core wings, sand and finish fiberglass parts, design your own radio installations, and research your own paint schemes, short kits are for you. I've built eight and have four on the shelf ready to build. I love them.
Following is an overview of fiberglass-fuselage short kit construction, but first I'll tick off the advantages.
Advantages of fiberglass construction
- Shape: Molding is probably the best way to get beautiful rounded and curved shapes.
- Stiffness: The rigidity of the composite materials allows lighter airframe construction.
- Easier construction: Radio installation is easy in a hollow fuselage. Parts can be glued on with epoxy.
- Takes paint well: For camouflage markings, paint is the answer—and fiberglass was made to be painted.
- Repairability: With molded fiberglass, you can get back to the original shape, strength, and appearance after a crash.
- Flies better: Molded sailplanes with sheeted wings penetrate headwinds better. Molded gliders accelerate quicker, have higher top speeds, and fly better in off-direction lift. The real deal, go-fast sailplanes are molded. Fly a fiberglass slope soarer after flying a foamie, and you're in for a pleasant surprise.
Disadvantages of fiberglass construction
- Higher cost: Composite model parts might be more expensive than an equivalent-size wood or foam construction design. Building time will likely be longer with composites, which, in effect, adds to the price.
- Learning curve: The techniques used to build and finish molded fiberglass might be new to some builders, depending on their previous experience. But foamie construction was new at one time too.
- Fear of breaking the model: This is possibly the largest fear that keeps pilots from trying fiberglass. Yes, these aircraft can be broken, but they can be repaired to 100% in strength and appearance—and that's not always possible with foam construction.
Are you ready to review the steps to build a fiberglass short kit? Let's get started.
Building a fiberglass short kit
- Open the box and inventory the parts. It's a thrill to pull the pieces out of a new kit box and examine them. At this point I begin to imagine the sailplane built, painted, and flying. Check the molded fuselage, examine the wing cores, and review the information that comes with the kit. Make a list of tools and materials you'll need for construction.
If that information is not in the kit or part of your previous building experience, check for an online building log, search the Model Aviation (MA) or RC Soaring Digest online archives for a building how‑to article, or get advice from more-experienced builders.
- Sheet the wing. A foam-core, wood-sheeted wing offers many benefits for slope sailplanes. It produces stiff and light wings that can be repaired with a reasonable amount of effort. To sheet wings, prepare "skins" by joining 1/16" balsa sheeting or similar wood veneer material, such as obeche or 1/64" plywood. Sand the skins, sand the cores, and cut pieces slightly larger than the cores—roughly 1/4" all around works well.
Adhesives that work for attaching the skins include double-stick tape, brush-on contact cement, spray-on contact cement, and epoxy. After you have sheeted the cores, trim them flush and sand them square. Add the recommended LE sticks (often hard balsa or basswood) and the balsa sub-TE sticks, and shape to the specified airfoil.
- Cut the balsa parts using stock that you provide. Some components include wingtip blocks, vertical and horizontal stabilizers, and elevators. Short kit instructions often include cutting templates and specify the thickness of the balsa stock. If they don't, check with the designer or the online research methods mentioned above.
- Construct the wing and fit and shape the tips. Fit the aileron torque-rod assemblies. Shape the ailerons and install them using the hinge method you prefer. Join the wing halves, remembering to set the dihedral to specification. Add layers of fiberglass cloth and epoxy resin to strengthen the wing center joint.
- Prepare the fuselage. Wet-sand the fuselage to remove the mold-release agent and break the glaze on the fiberglass so it will take paint well. Apply primer paint, fill holes with common auto-body repair materials (Bondo is a favorite), and wet-sand again. Repeat as necessary to get a smooth finish that is ready for the final color coat.
- Mount the wing and tail parts. Decide whether to build a removable wing for easier storage and transportation or a fixed wing for a stronger airframe. One thing to keep in mind is that the joint between the wing and fuselage can be faired more smoothly with Bondo on a one-piece airframe.
- Install radio components and control linkages. Most slope warbirds with spans as large as 50 inches are controlled by two channels—aileron and elevator—so the radio installation consists of five components: two servos, receiver, battery pack, and switch. During installation, try to get the heavier components as far forward as possible to reduce the nose weight required to balance the model.
- Cover, paint, and apply markings. Apply your selected covering material. Solartex iron-on fabric is a favorite for slope warbirds because of its toughness, though it might be too heavy for a longer-wing slope sailplane such as a racer. Another reason I like Solartex is that it takes paint well. The fiberglass fuselage and covered wing and tail parts can be matched in color with an airbrush or rattle-can painting.
Apply markings—either national insignia or canopy markings for a warbird or slope jet, or bold and distinctive markings for a racer. Take a moment to admire your work; this is quite an accomplishment. No one else has a model that looks exactly like yours.
- Check balance and control throws before test-flying. A nose-heavy aircraft maneuvers sluggishly and can be corrected on the second flight, while a tail-heavy model might be so uncontrollable that there is no second flight. Triple-check control-surface movements for correct and free operation. On a new airframe, I have another pilot triple-check the control-surface movements; that can help preclude a preventable crash.
Using the methods I've summarized, I can get an airframe ready to fly in 26–30 shop hours. I can paint and detail the sailplane in another six to 12 shop hours. I’ve built eight models this way, and I have four short kits in stock for future building. If there is enough reader interest, I’ll be happy to write in more detail about the construction methods: wing sheeting, fiberglass finishing, and airbrush painting.
Sources
- RCGroups — www.rcgroups.com
- Marty Hill — [email protected]
- Marty Hill P-40 short kit description — www.rcgroups.com/forums/showthread.php?t=992094
- Marty Hill P-40 build thread — www.rcgroups.com/forums/showthread.php?t=738935
- Dan Sampson (molds Inland Slope Rebels club-project short kits) — [email protected]
- Model Aviation (MA) online archives — http://modelaircraft.org/mag
- RC Soaring Digest online archives — www.rcsoaringdigest.com
- RC Soaring Digest PDFs — www.rcsoaringdigest.com/pdfs
Transcribed from original scans by AI. Minor OCR errors may remain.

