
Radio Control Slope Soaring
Dave Garwood [[email protected]]
Painting and marking a fiberglass model
The April 2010 Slope Soaring column gave an overview of building the short kit, and the July column covered preparing a smooth finish on the fuselage and getting it ready to paint. In the August issue we looked at what is available in ARF and RTF slope sailplanes.
This month we return to our short kit finishing project, with painting and markings. Panel lines and weathering will be covered in the December installment.
Photographs, drawings, and paintings of prototype aircraft that show paint schemes come from books, scale research companies, and Internet searches. The Squadron/Signal "In Action" book series covers a large number of military aircraft.
Also included in this column:
- Researching and selecting paint and markings
- Commercial marking suggestions
Curtiss P-40 In Action by Ernest McDowell and Don Greer (ISBN 0-89747-025-7) is a great place to start for a P-40 project and might be all the documentation you need. To me, the definitive Warhawk modeler's reference is P-40 Curtiss: From 1939 to 1945 by Anis El Bied and Daniel Laurelut, published by Historie & Collections in Paris (ISBN 2-913903-47-9).
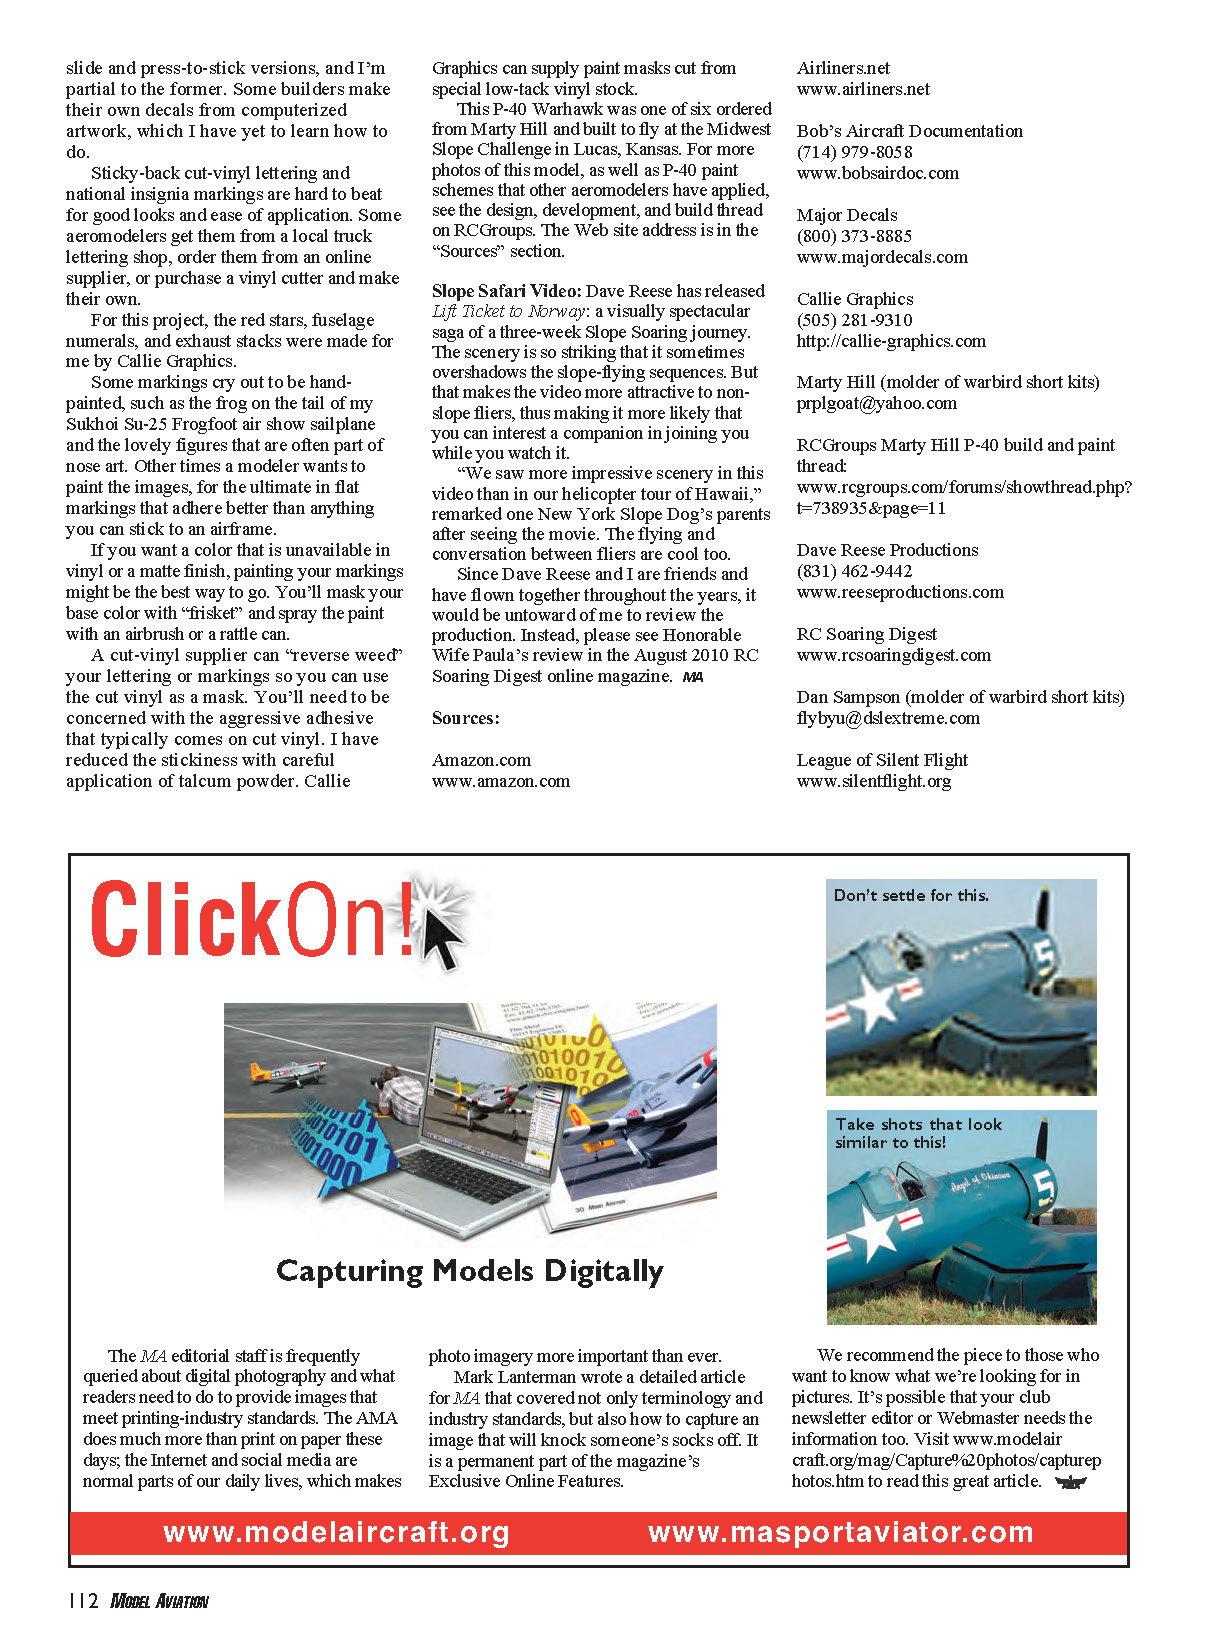
My brief review of that book is: comprehensive, beautifully produced, fun to read, and highly useful for the P-40 scale modeler. It contains 144 side-view paintings of P-40 paint schemes and details of 16 shark-mouth designs and 49 nose arts and unit insignia. I obtained my copy from a used bookseller linked to Amazon.com.
Bob's Aircraft Documentation is a rich source of three-view drawings for panel lines and color schemes and markings. Bob Banka offers custom services that will prepare to order and send drawings and packs of photographs from a walk-around of the aircraft.
Does online research suit your fancy? I like to start with Airliners.net, which has tens of thousands of high-quality photos of a huge number of civil and military aircraft.
Don't forget about Google and Bing search engines. Both can be set to look for images.
Masking and Painting
With any luck, your base color comes in a spray can. There's no need to break out the airbrush when a rattle can will do.
When spraying, remember the basics: keep your distance from the model and keep the spray can moving. A light touch on the nozzle and patience lead to good application of scale paint.
Letting paint dry overnight after spraying is a great idea. It prevents the fresh paint from being damaged by unnecessary handling.
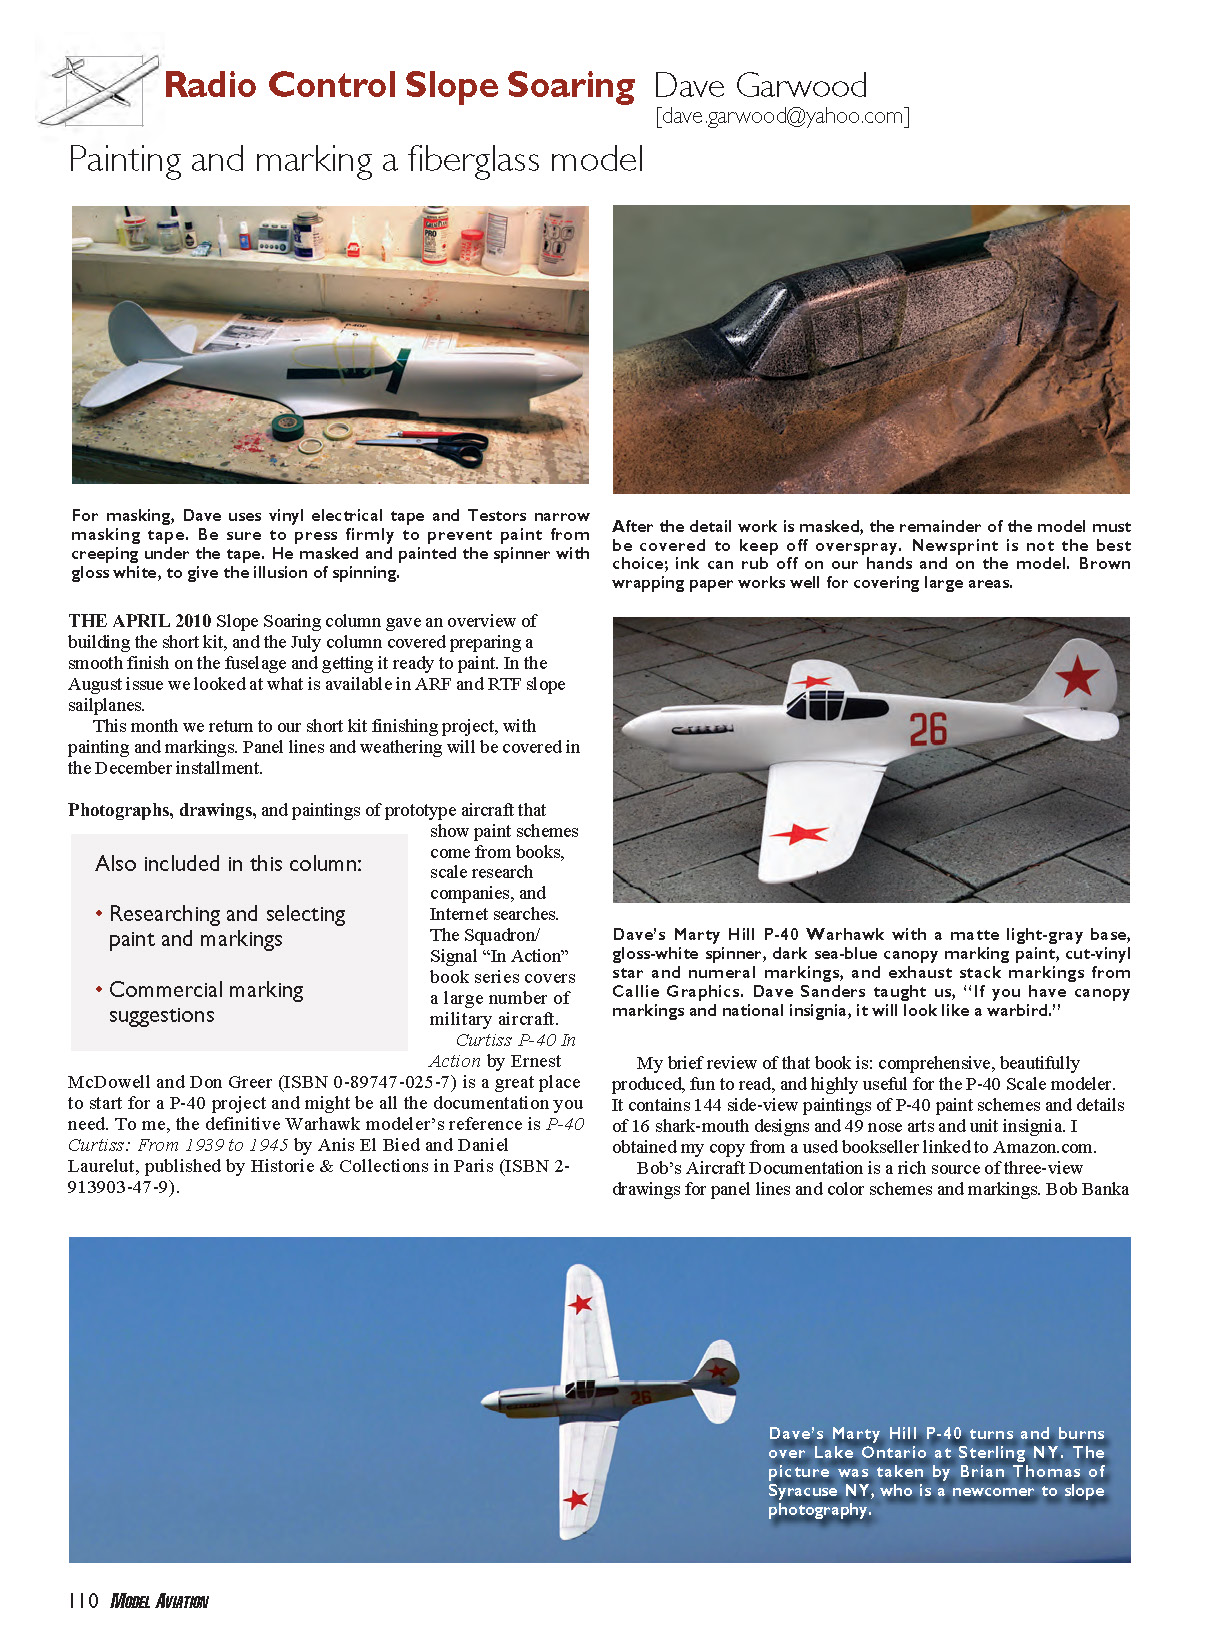
For masking canopy markings, I like vinyl tape over paper masking tape. It gives a sharper edge, tends to allow less paint creep under the tape, and peels off in a cleaner manner. Be careful of aggressive adhesive on masking materials, because they can pull up paint—even after it has thoroughly dried.
Test your supplies. Consider making one or more practice panels to check spray pattern from cans, paint coverage, decal performance, and the behavior of masking materials.
Take your time and work carefully. Although most mistakes can be fixed with a knife to remove slight excess paint, or a brush or toothpick to add a little more paint, this generally takes more time than doing it right the first time.
Consider letting the spray paint dry overnight before removing the masking materials. Yes, the edges might be raised a teensy bit more, but you won't ding up painted areas with tape that slipped out of your fingers while you were peeling it off.
When removing tape, pull it sharply back onto itself so it peels off at a sharp angle. This is less likely to pull up base-color paint than pulling tape off at a 90° angle.
Don't be too hard on yourself for lack of perfection. Plenty of full-scale warplanes were painted and repainted in the field under adverse conditions.
Small mistakes often seem huge on the bench but are unnoticeable in the air. If you slip up, simply respray the base coat and start again in that area.
Insignia Markings
After canopy markings, perhaps the most important detail needed to give the impression of a scale airplane is national insignia markings, which are often accompanied by lettering or numerals. The three methods I have used for markings and lettering are decals, cut-vinyl lettering and marking, and painting by hand with brush or airbrush.
Decals might be the first method that comes to mind, because some of us have been using them since we built plastic models. My main source for 48-inch-span slope warbirds is Major Decals. I've bought the company's products for years at the hobby shop, at trade shows, and from online hobby suppliers.
Major Decals images come in both water-slide and transfer styles. I'm partial to the former. Some builders make their own decals from computerized artwork, which I have yet to learn how to do.
Sticky-back cut-vinyl lettering and national insignia markings are hard to beat for good looks and ease of application. Some aeromodellers get them from a local truck lettering shop, order them from an online supplier, or purchase a vinyl cutter and make their own.
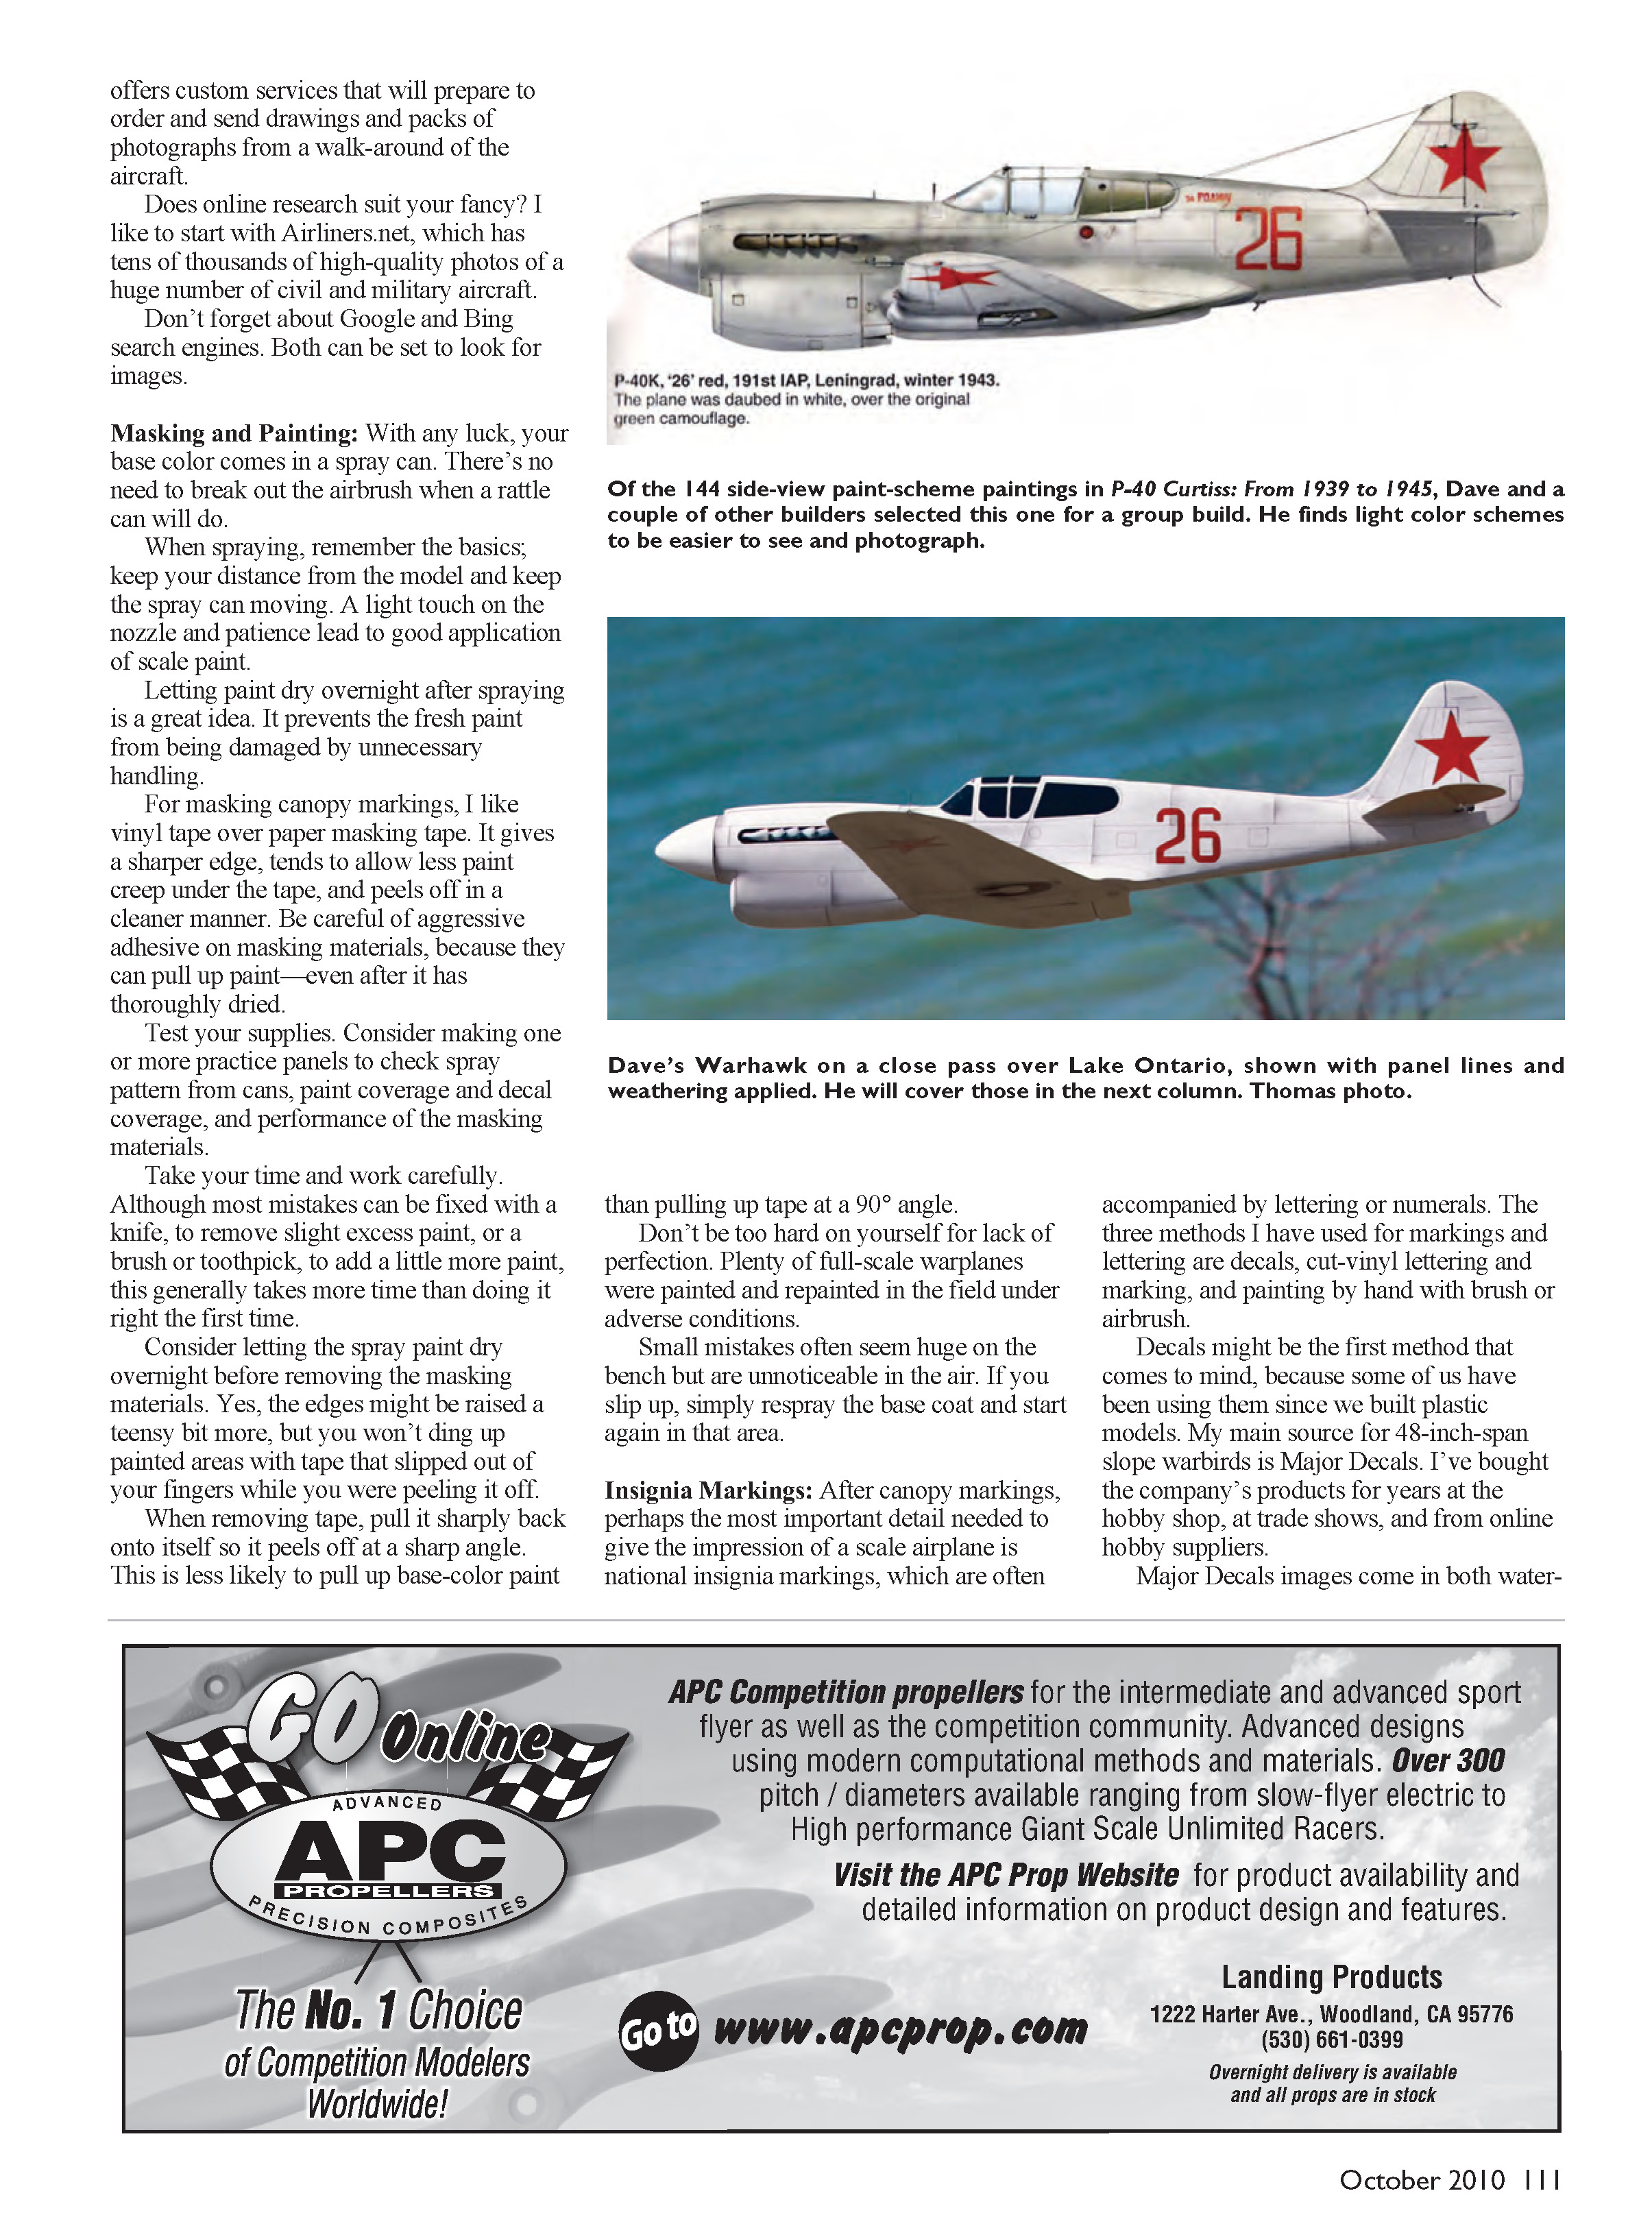
For this project, the red stars, fuselage numerals, and exhaust stacks were made for me by Callie Graphics.
Some markings cry out to be hand-painted, such as the frog on the tail of my Sukhoi Su-25 Frogfoot air show sailplane and the lovely figures that are often part of nose art. Other times a modeler wants to paint the images for the ultimate in flat markings that adhere better than anything you can stick to an airframe.
If you want a color that is unavailable in vinyl or a matte finish, painting your markings might be the best way to go. You'll mask your base color with "frisket" and spray the paint with an airbrush or a rattle can.
A cut-vinyl supplier can "reverse weed" your lettering or markings so you can use the cut vinyl as a mask. You'll need to be concerned with the aggressive adhesive that typically comes on cut vinyl. I have reduced the stickiness with careful application of talcum powder. Callie Graphics can supply paint masks cut from special low-tack vinyl stock.
This P-40 Warhawk was one of six ordered from Marty Hill and built to fly at the Midwest Slope Challenge in Lucas, Kansas. For more photos of this model, as well as P-40 paint schemes that other aeromodellers have applied, see the design, development, and build thread on RCGroups. The web site address is in the "Sources" section.
Slope Safari Video
Dave Reese has released Lift Ticket to Norway: a visually spectacular saga of a three-week Slope Soaring journey. The scenery is so striking that it sometimes overshadows the slope-flying sequences. But that makes the video more attractive to non-slope fliers, thus making it more likely that you can interest a companion in joining you while you watch it.
"We saw more impressive scenery in this video than in our helicopter tour of Hawaii," remarked one New York Slope Dog's parents after seeing the movie. The flying and conversation between fliers are cool too.
Since Dave Reese and I are friends and have flown together throughout the years, it would be untoward of me to review the production. Instead, please see Honorable Wife Paula's review in the August 2010 RC Soaring Digest online magazine.
Sources:
- Amazon.com
- Airliners.net
- Bob's Aircraft Documentation
(714) 979-8058 www.bobsairdoc.com
- Major Decals
(800) 373-8885 www.majordecals.com
- Callie Graphics
(505) 281-9310 http://callie-graphics.com
- Marty Hill (molder of warbird short kits)
- RCGroups Marty Hill P-40 build and paint thread:
www.rcgroups.com/forums/showthread.php?t=738935&page=11
- Dave Reese Productions
(831) 462-9442 www.reeseproductions.com
- RC Soaring Digest
- Dan Sampson (molder of warbird short kits)
- League of Silent Flight
Transcribed from original scans by AI. Minor OCR errors may remain.

