
Radio Control Slope Soaring
Dave Garwood [[email protected]]
Cularis flight report
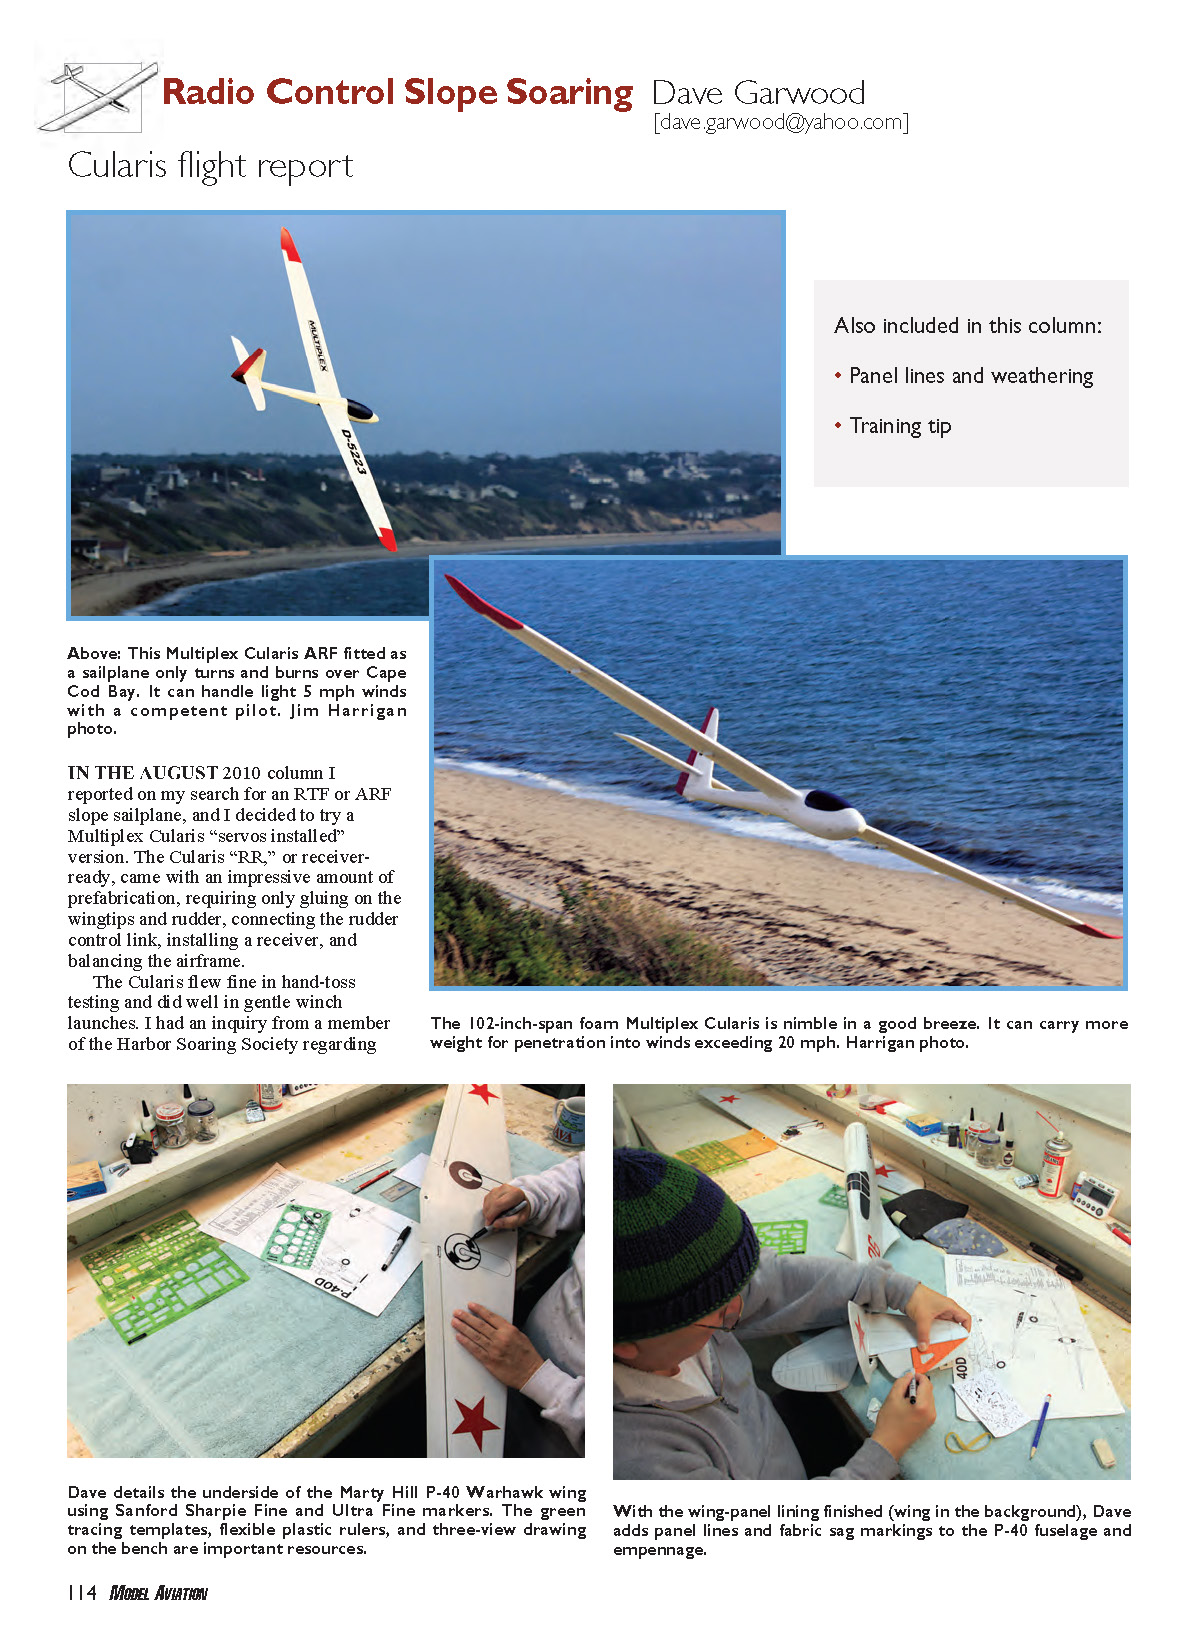
In the August 2010 column I reported on my search for an RTF or ARF slope sailplane, and I decided to try a Multiplex Cularis "servos installed" version. The Cularis "RR," or receiver-ready, came with an impressive amount of prefabrication, requiring only gluing on the wingtips and rudder, connecting the rudder control link, installing a receiver, and balancing the airframe.
The Cularis flew fine in hand-toss testing and did well in gentle winch launches. I had an inquiry from a member of the Harbor Soaring Society regarding the strength of the wing-joiner system and its suitability for winch launching. I agree with his concern; the Cularis wing-joiner system, which consists of plastic tubes sliding into plastic tubes, does not appear to be designed or built for vigorous winch launching. This model is designed to be an electric-powered sailplane, which does not need a wing-joiner system that is strong enough to withstand a contest winch launch.
Nevertheless, my Cularis did take a few gentle-on-the-pedal winch launches and flew fairly well in the thermal regime as long as I kept up the speed. It does not like to be flown slowly and will signal its protest with a gentle tip stall or a fairly dramatic forward stall. Keep the airspeed up and all will be okay.
In September I flew the Cularis on the slope during two days—once in light- and once in medium-lift conditions. I launched in 5–7 mph winds on a 100-foot dune, thinking that the long wingspan would handle the light lift. It did, until it came time for a turn, and then the tip stalls of the inside-the-turn wing began. However, the Cularis recovers well from a tip stall and quickly resumes flying, but in very light lift I had to cross-control (opposite aileron to hold the inside wing up through the turn, and steer with the rudder) to make turns. Once I got that routine down, the Cularis became pleasant to fly, making scores of gentle, close-in, silent passes without complaint.
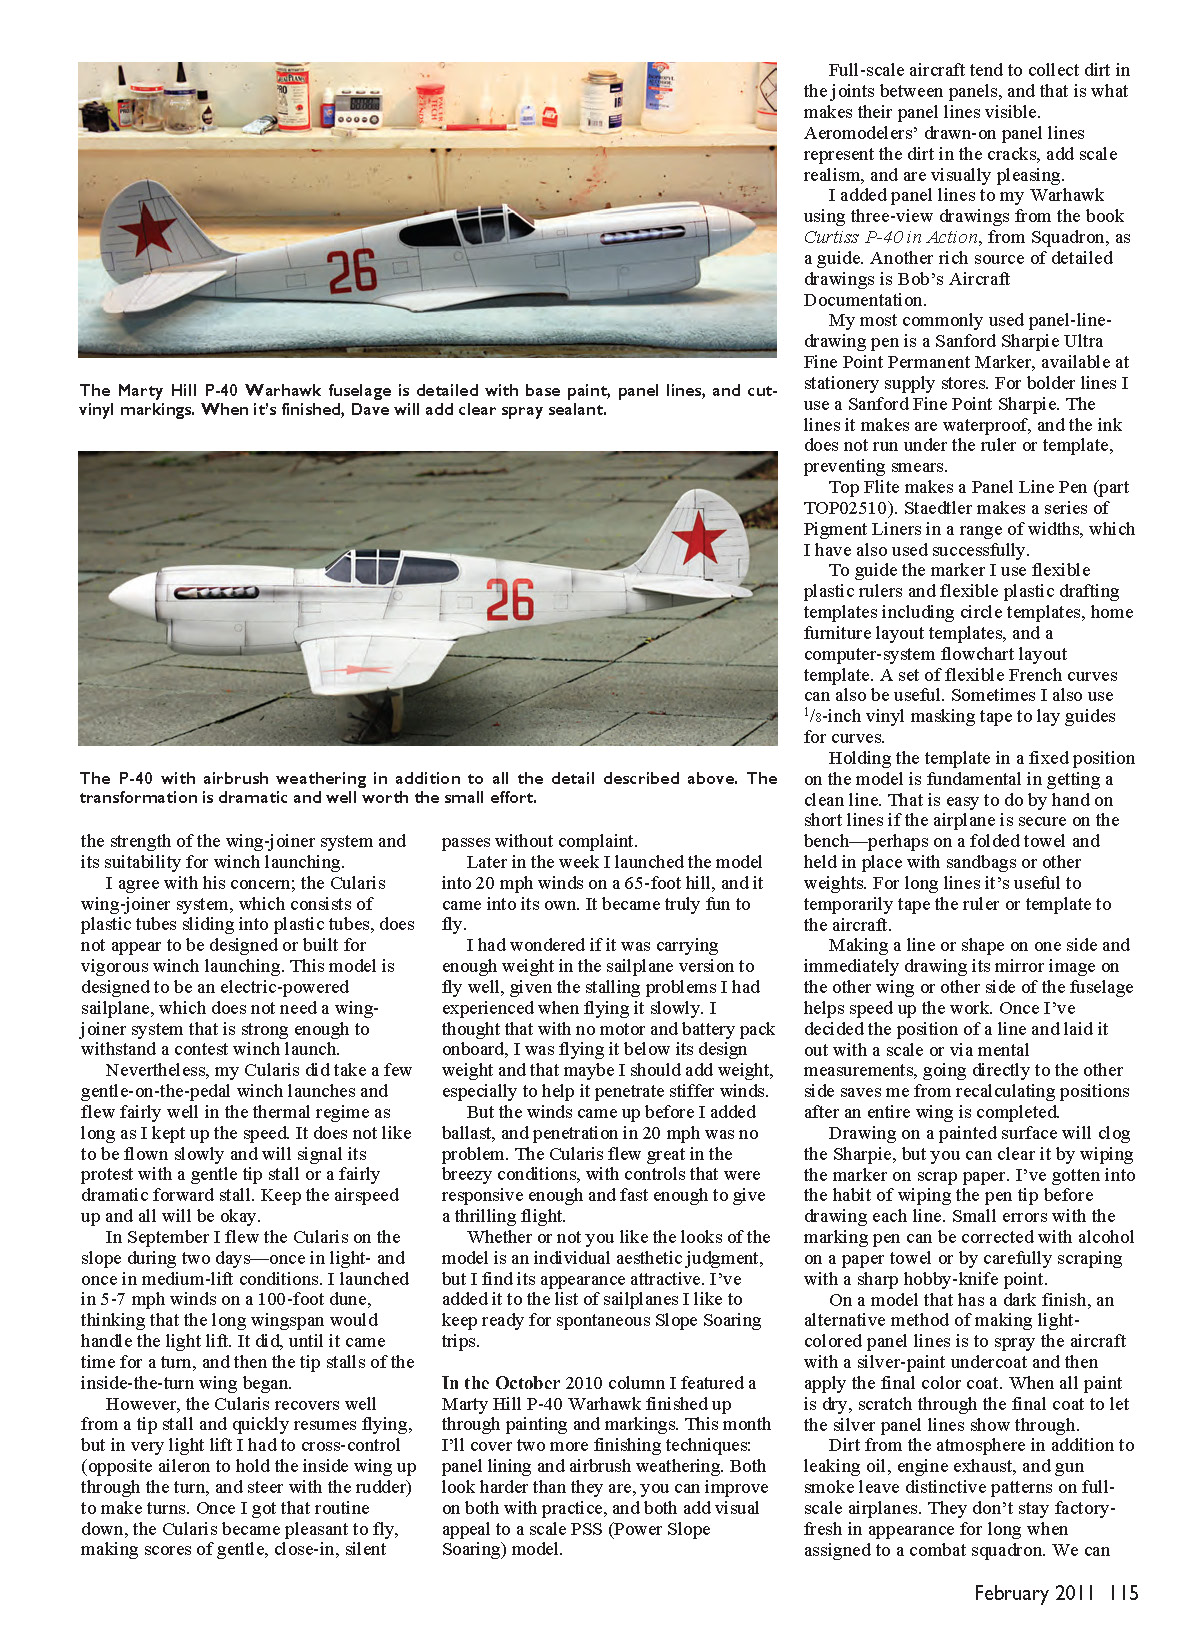
Later in the week I launched the model into 20 mph winds on a 65-foot hill, and it came into its own. It became truly fun to fly. I had wondered if it was carrying enough weight in the sailplane version to fly well, given the stalling problems I had experienced when flying it slowly. I thought that with no motor and battery pack onboard, I was flying it below its design weight and that maybe I should add weight, especially to help it penetrate stiffer winds. But the winds came up before I added ballast, and penetration in 20 mph was no problem. The Cularis flew great in the breezy conditions, with controls that were responsive enough and fast enough to give a thrilling flight. Whether or not you like the looks of the model is an individual aesthetic judgment, but I find its appearance attractive. I've added it to the list of sailplanes I like to keep ready for spontaneous slope-soaring trips.
Panel lining and airbrush weathering
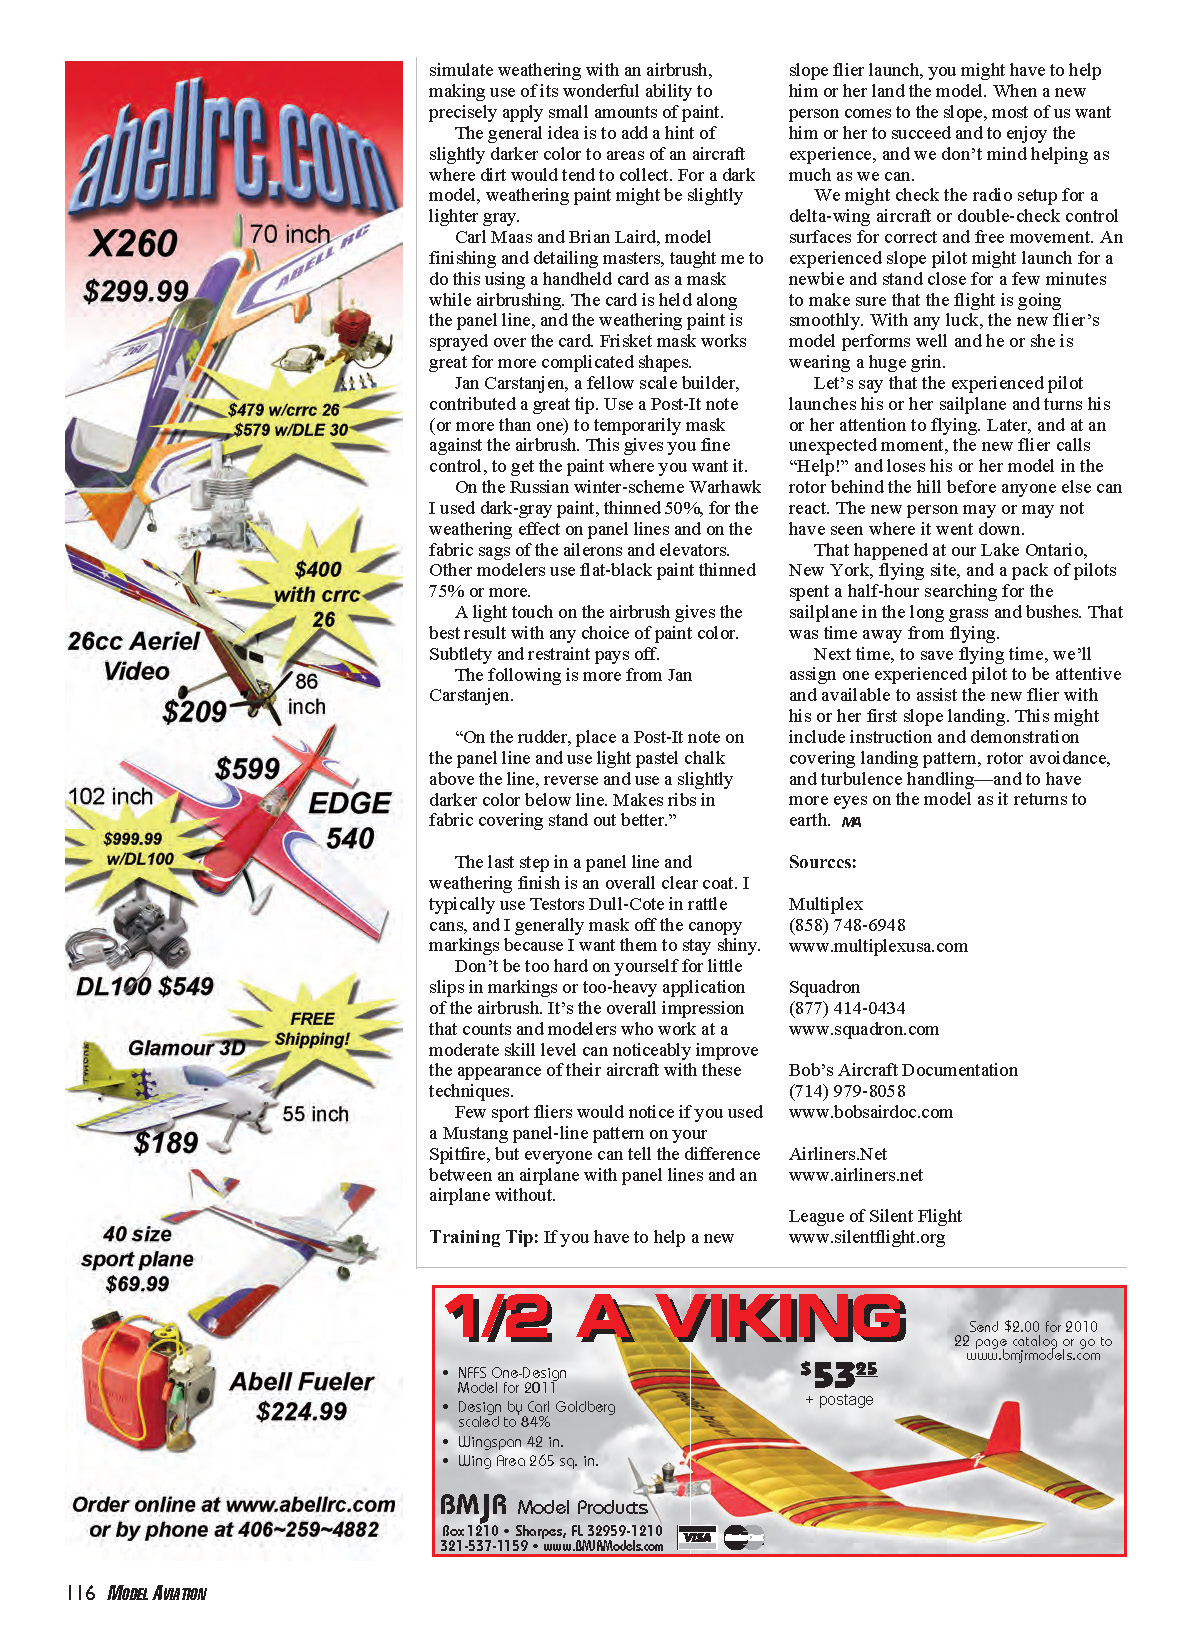
In the October 2010 column I featured a Marty Hill P-40 Warhawk finished up through painting and markings. This month I'll cover two more finishing techniques: panel lining and airbrush weathering. Both look harder than they are; you can improve with practice, and both add visual appeal to a scale PSS (Power Slope Soaring) model.
Full-scale aircraft tend to collect dirt in the joints between panels, and that is what makes their panel lines visible. Aeromodelers' drawn-on panel lines represent the dirt in the cracks, add scale realism, and are visually pleasing.
I added panel lines to my Warhawk using three-view drawings from the book Curtiss P-40 in Action (Squadron) as a guide. Another rich source of detailed drawings is Bob's Aircraft Documentation.
Tools and pens
- My most commonly used panel-line-drawing pen is a Sanford Sharpie Ultra Fine Point Permanent Marker. For bolder lines I use a Sanford Fine Point Sharpie. The lines are waterproof and the ink does not run under the ruler or template, preventing smears.
- Top Flite makes a Panel Line Pen (part TOP02510). Staedtler makes a series of Pigment Liners in a range of widths, which I have used successfully.
- To guide the marker I use flexible plastic rulers and flexible drafting templates: circle templates, home-furniture layout templates, and a computer-system flowchart layout template. A set of flexible French curves can also be useful. Sometimes I use 1/8-inch vinyl masking tape to lay guides for curves.
Technique
- Holding the template in a fixed position on the model is fundamental to getting a clean line. That is easy to do by hand on short lines if the airplane is secure on the bench—perhaps on a folded towel and held in place with sandbags or other weights. For long lines it's useful to temporarily tape the ruler or template to the aircraft.
- Making a line or shape on one side and immediately drawing its mirror image on the other wing or side of the fuselage helps speed the work and avoids recalculating positions after completing one wing.
- Drawing on a painted surface may clog the Sharpie; clear it by wiping the marker on scrap paper. I wipe the pen tip before drawing each line. Small errors with the pen can be corrected with alcohol on a paper towel or by carefully scraping with a sharp hobby-knife point.
- On a model with a dark finish, an alternative method for light-colored panel lines is to spray a silver paint undercoat and then apply the final color. When the paint is dry, scratch through the final color to let the silver show as panel lines.
Weathering with an airbrush
- Dirt from the atmosphere, leaking oil, engine exhaust, and gun smoke leave distinctive patterns on full-scale airplanes. We can simulate weathering with an airbrush, adding a hint of slightly darker (or for dark models, slightly lighter) color where dirt would collect.
- Carl Maas and Brian Laird taught me to use a handheld card as a mask while airbrushing: hold the card along the panel line and spray the weathering paint over the card. Frisket mask works well for more complicated shapes.
- Jan Carstanjen contributed a useful tip: use a Post-It note (or more than one) to temporarily mask against the airbrush. This gives fine control so you can get the paint where you want it.
- On the Russian winter-scheme Warhawk I used dark-gray paint thinned 50% for weathering on panel lines and on the fabric sags of the ailerons and elevators. Other modelers use flat-black paint thinned 75% or more.
- A light touch on the airbrush gives the best result; subtlety and restraint pay off.
Jan Carstanjen's additional tip: "On the rudder, place a Post-It note on the panel line and use light pastel chalk above the line, reverse and use a slightly darker color below the line. Makes ribs in fabric covering stand out better."
Finishing
- The last step in a panel-line and weathering finish is an overall clear coat. I typically use Testors Dull-Cote in rattle cans, and I generally mask off the canopy markings because I want them to stay shiny.
- Don't be too hard on yourself for little slips in markings or too-heavy airbrush application. It's the overall impression that counts. Modelers working at a moderate skill level can noticeably improve the appearance of their aircraft with these techniques.
- Few sport fliers would notice if you used a Mustang panel-line pattern on your Spitfire, but everyone can tell the difference between an airplane with panel lines and an airplane without.
Training Tip
If you have to help a new slope flier launch, you might have to help him or her land the model. When a new person comes to the slope, most of us want that person to succeed and enjoy the experience, and we don't mind helping as much as we can.
We might check the radio setup for a delta-wing aircraft or double-check control surfaces for correct and free movement. An experienced slope pilot might launch for a newbie and stand close for a few minutes to make sure the flight is going smoothly. With any luck, the new flier's model performs well and he or she is wearing a huge grin.
Let's say the experienced pilot launches his or her sailplane and turns attention to flying. Later, and at an unexpected moment, the new flier calls "Help!" and loses the model in the rotor behind the hill before anyone else can react. The new person may or may not have seen where it went down.
That happened at our Lake Ontario, New York, flying site, and a pack of pilots spent a half-hour searching for the sailplane in the long grass and bushes. That was time away from flying.
Next time, to save flying time, we'll assign one experienced pilot to be attentive and available to assist the new flier with his or her first slope landing. This might include instruction and demonstration covering landing pattern, rotor avoidance, and turbulence handling—and to have more eyes on the model as it returns to earth. MA
Sources
- Multiplex — (858) 748-6948 — www.multiplexusa.com
- Squadron — (877) 414-0434 — www.squadron.com
- Bob's Aircraft Documentation — (714) 979-8058 — www.bobsairdoc.com
- Airliners.Net — www.airliners.net
- League of Silent Flight — www.silentflight.org
Transcribed from original scans by AI. Minor OCR errors may remain.

