
RC Aerobatics
Eric Henderson, 303 Shady Ln., Marlton NJ 08053; E-mail: [email protected]
TWO BIG QUESTIONS were waiting to be answered at the 2001 Precision Aerobatics Nationals: How would the Focus Almost Ready to Fly (ARF) perform and would the O.S. 1.40 EFI be a force to be reckoned with?
Following is an answer to the first question from Lee Davies of Piedmont Models, the manufacturer of the Focus. He wrote:
"This year's Nats was fantastic! In addition to the competition, the getting reacquainted with old friends, and making new ones, is what makes the Nats so special. In terms of logistics, the NSRCA [National Society of Radio Controlled Aerobatics] and AMA should be congratulated. The event runs as smooth as silk.
"We're very pleased with the results pilots achieved flying our Focus. Three of six trophies awarded in FAI [Fédération Aéronautique Internationale] went to Focus pilots, and among all classes, every Focus pilot except one (he had to leave competition after the first day) won a trophy or made it the finals.
"There is no doubt that our reasonably priced, easy-to-build Focus is competitive at any level. We appreciate the faith and effort from all the Focus pilots who proved it."
Even allowing for the manufacturer's enthusiasm, it is clear that the ARF design did well. A high-performing airplane, at the low price, has definitely laid down the gauntlet to other manufacturers.
The answer to the second big question was that the jury is still out! In the "engine-wars" department it was an even battle. This year the O.S. 1.40 EFI (electronic fuel injection) was first and third, and the YS supercharged four-strokes took second and fourth in the FAI finals.
Both engine designs ran very quietly for their size. The two-stroke no longer sounds strange or different. As the SuperTigre and Webras become more "Pattern-ready," it is predictable that many more two-strokes will be heard.
Whether you run a two- or four-stroke engine, it is worth paying attention to the virtues of sound-reduction technology.
Most technical developments are spurred by rules changes. The FAI sets the standards for international competition noise levels. AMA has set the standard for Precision Aerobatics in the U.S.
The lower the decibel number, the lower the noise. A sustained loud noise damages the effectiveness of our hearing systems permanently.
If you have ever run a car engine without isolation mounts, you know that it sounds like a rogue jackhammer pounding away under the hood. The body of the car would amplify the noise and vibration of the reciprocating parts.
We need to prevent the pounding of our engines from reaching the airframe. Any reduction in vibration will increase the protection of your receiver, switches, servos, control hookups, and batteries.
Even with all of those benefits, the primary reason to isolation-mount your model-airplane engine is sound reduction. The fuselage and wings are like big drums that love to amplify the sound that comes a-pounding out of the engine bay.
Keeping the high-frequency and low-frequency vibration from the servos has major benefits. Servo potentiometer wear is the big deal that will kill many a good servo long before their time.
Vibration can cause the servo to keep trying to reposition against the detected attempt to move the control surface. The new digital servos are very quick to react to “pressure” on control surfaces and will fight to hold output-arm position.
Vibration can fool the servo into working too hard. Some vibration tests revealed that as much as a momentary half amp could be drawn by just one servo. If you are getting low battery life in the air, this could be your problem.
There are many isolation-mount systems available to the Precision Aerobatics enthusiast. The even better news is that now there are many isolation-mount options available for sport fliers.
If these columns don’t convert you to compete in Pattern contests, hopefully they guide you to the technology that not only makes your airplane quieter but preserves your radio equipment and ears—and mine!
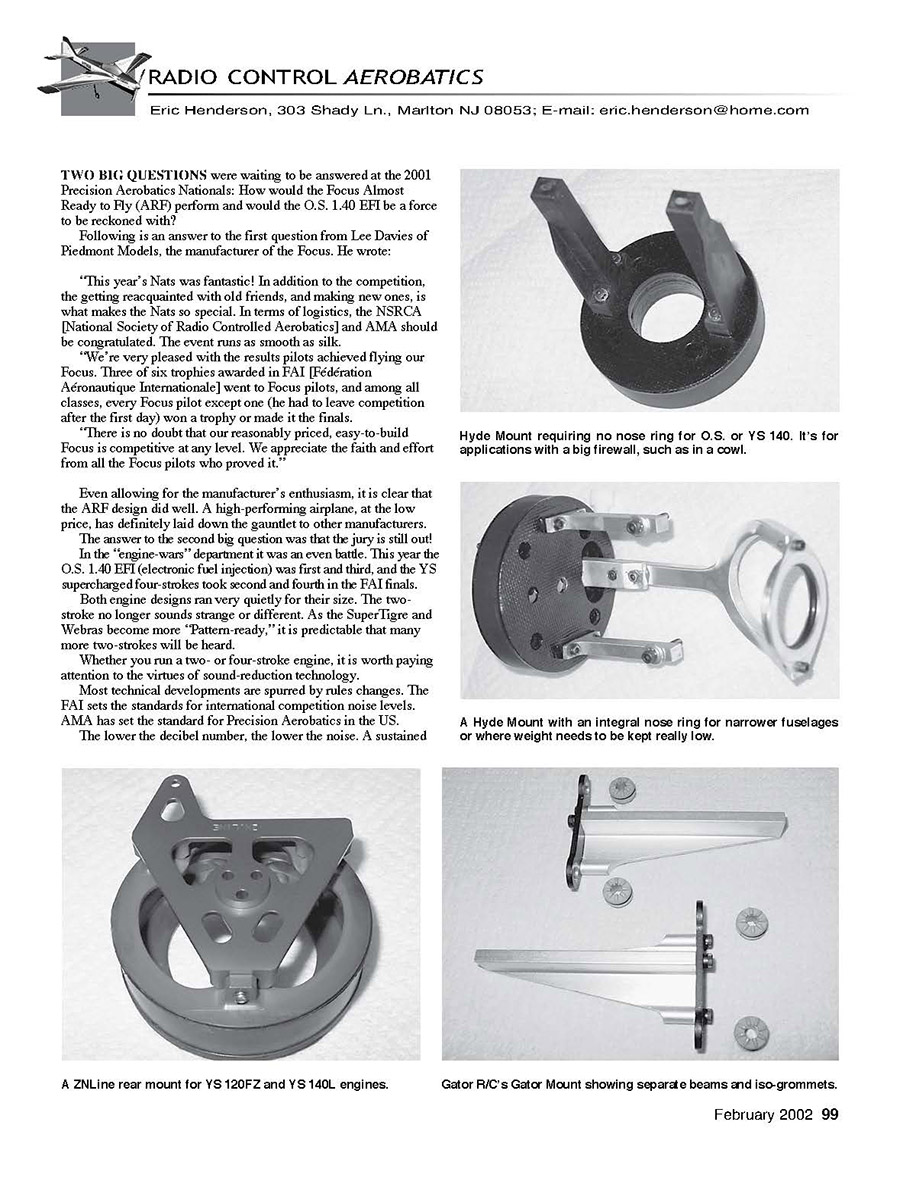
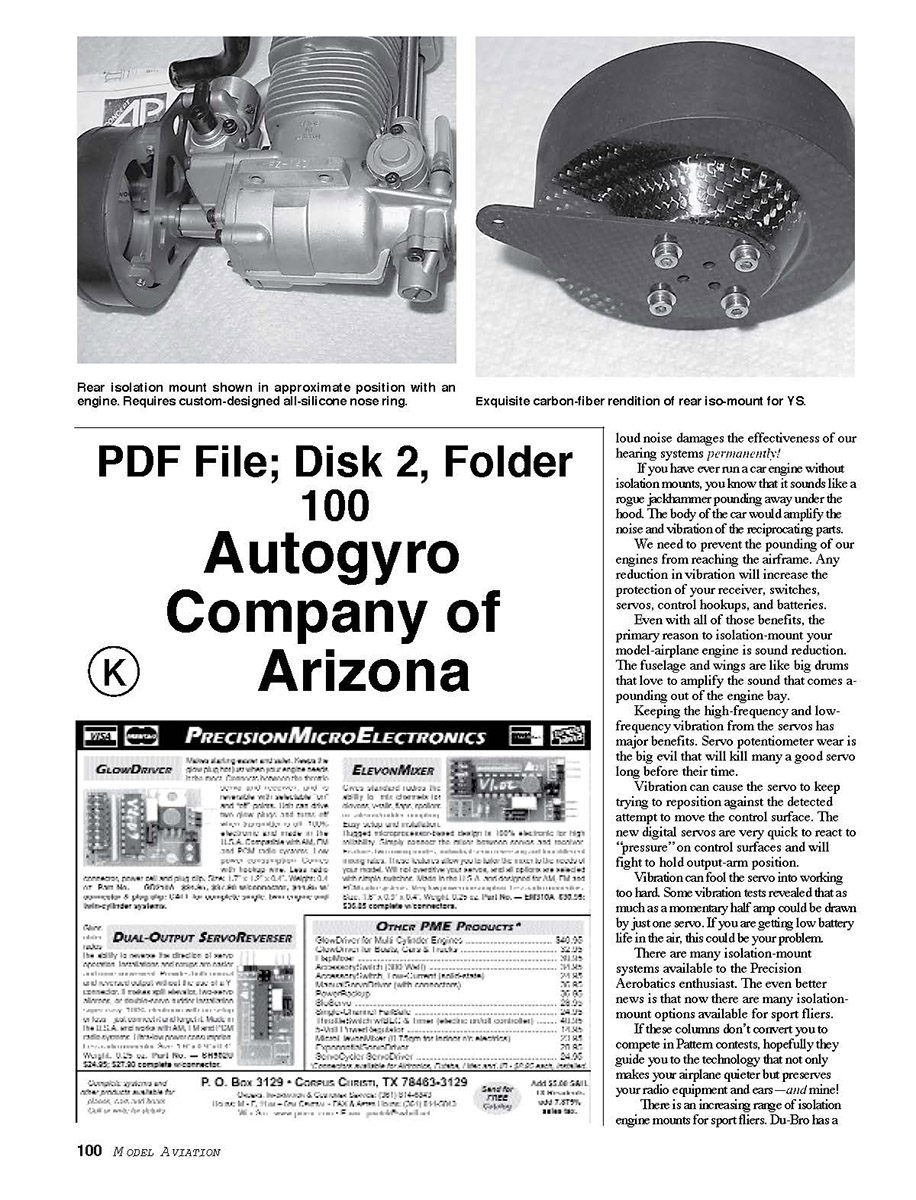
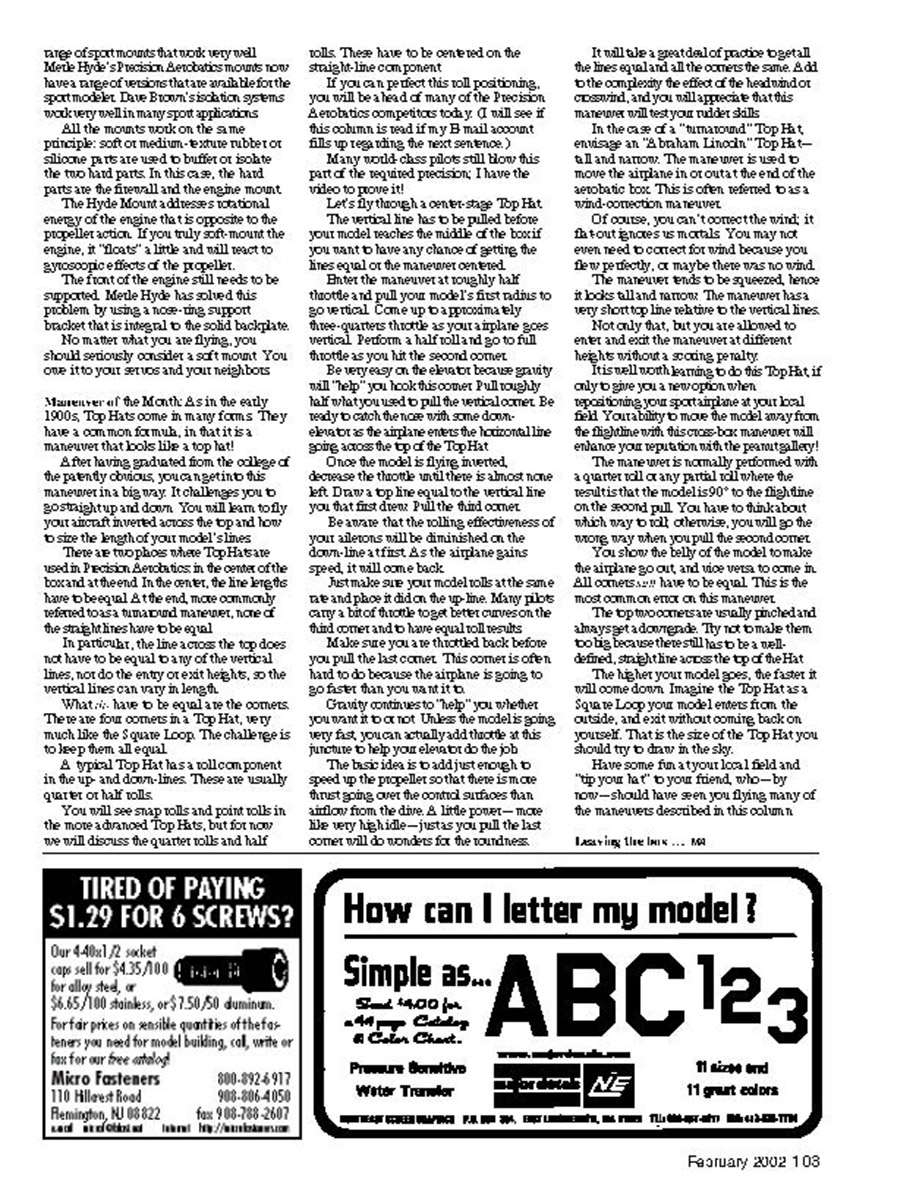
There is an increasing range of isolation engine mounts for sport fliers. Du-Bro has a range of sport mounts that work very well. Metre Hyde's Precision Aerobatics mounts now have a range of versions that are available for the sport modeler. Dave Brown's isolation systems work very well in many sport applications.
All the mounts work on the same principle: soft or medium‑texture rubber silicone parts are used to buffer or isolate the two hard parts. In this case, the hard parts are the firewall and the engine mount parts at the firewall and the engine mount.
The Hyde Mount addresses rotational energy of the engine that is opposite to the propeller action. If you truly soft‑mount the engine, it "floats" a little and will react to gyroscopic effects of the propeller.
The front of the engine still needs to be supported. Metre Hyde has solved this problem by using a two‑ring support bracket that is integral to the solid backplate.
No matter what you are flying, you should seriously consider a soft mount. You owe it to your servos and your neighbors.
Maneuver of the Month: Top Hats
As in the early 1900s, Top Hats come in many forms. They have a common formula, in that it is a maneuver that looks like a top hat!
After having graduated from the college of the early evening, you can get into this maneuver in a big way. It challenges you to go straight up and down. You will learn to fly your aircraft inverted across the top and how to size the length of your model's lines.
There are two phases where Top Hats are used in Precision Aerobatics; in the center of the box and at the end. In the center, the line lengths have to be equal. At the end, more commonly referred to as a turnaround maneuver, none of the straight lines have to be equal.
In particular, the lines across the top does not have to be equal to any of the vertical lines, nor do the entry or exit heights, so the vertical lines can vary in length.
What is have to be equal are the corners. There are four corners in a Top Hat, very much like the Square Loop. The challenge is to keep them all equal.
A typical Top Hat has a roll component in the up‑and‑down lines. These are usually quarter or half rolls.
You will see snap rolls and point rolls in the more advanced Top Hats, but for now we will discuss the quarter rolls and half rolls. These have to be centered on the straight‑line component.
If you can put the most roll positioning, you will be ahead of many of the Precision Aerobatics competitors today. (I will see if this column is read if my e-mail account fills up regarding the next sentence.)
Many world‑class pilots still blow this part of the required precision; I have the video to prove it!
Let's fly through a center‑stage Top Hat.
The vertical line has to be pulled before your model reaches the middle of the box if you want to have any chance of getting the lines equal or the maneuver centered.
Enter the maneuver at roughly half throttle and pull your model's first radius to go vertical. Come up to approximately three‑quarters throttle as your airplane goes vertical. Perform a half roll and go to full throttle as you hit the second corner.
Be very easy on the elevator because gravity will "help" you hook this corner. Pull roughly half what you used to pull the vertical corner. Be ready to catch the nose with some down elevator as the airplane enters the horizontal and is giving across the top of the Top Hat.
Once the model is flying inverted, decrease the throttle until there is almost no left. Draw a top line equal to the vertical line you first drew. Pull the third corner.
Be aware that the rolling effectiveness of your ailerons will be diminished as the down‑line at first. As the airplane gains speed, it will come back.
Just make sure your model rolls at the same rate and phase into the up‑line. Many pilots carry a little of throttle to get better roll‑over on the third corner and to have equal roll results.
Make sure you are throttled back before you pull the last corner. This corner is often hard to do because the airplane is going to go faster than you want it to.
Gravity continues to "help" you whether you want it to or not. Unless the model is going very fast, you can actually add throttle at this juncture to help your elevator do the job.
The basic idea is to adjust power to speed up the propeller so that there is more thrust moving over the control surfaces than airflow from the dive. A little power — more like very high idle — just as you pull the last corner will do wonders for the roundness.
It will take a great deal of practice to get all the lines equal and all the corners the same. Add to the complexity the effect of the headwind or crosswind, and you will appreciate that this maneuver will test your rudder skills.
In the case of a "turnaround" Top Hat, envision an "Abraham Lincoln" Top Hat — tall and narrow. The maneuver is used to move the airplane in or out at the end of the aerobatic box. This is often referred to as a wind‑correction maneuver.
Of course, you can't correct the wind; it is the wind's results. You may not even need to correct for wind because your flow is perfect, or maybe there was no wind.
The maneuver tends to be squeezed, hence it looks tall and narrow. The maneuver has very short top line relative to the vertical lines.
Not only that, but you are allowed to enter and exit the maneuver at different heights without a scoring penalty.
It is well worth learning to do Top Hat, if only to give you a revamp on better positioning; you can reposition at your local field. Your ability to move the model away from the flightline with a disc move can mean you will enhance your reputation with the judging jury!
The maneuver is normally performed with a quarter roll to any partial roll, where the results that the models 90° to the flightline on the second pull. You have to think about which way to roll otherwise, you will go the wrong way when you pull the second corner.
You show the belly of the model to make the airplane go out, and vice versa to come in. All corners have to be equal. This is the most common error in the maneuver.
The top two corners are usually pushed and always get a down‑edge. Try not to make them too big because there will still be a well‑defined, straight line across the top of the Hat.
The higher your model goes, the faster it will come down. Imagine a Top Hat as a Square Loop your model enters from the outside, and exit without coming back on yourself. That is the size of the Top Hat you should try to draw in the sky.
Have some firm natural local field and "tip your hat" to your friend, who—by now—should have seen you try many of the maneuvers described in this column.
Leaving the line ...
Transcribed from original scans by AI. Minor OCR errors may remain.

