
Building airplanes is often about correcting mistakes
by Mike Riggs [email protected]
In my January “RC Aerobatics” 2013 column, I wrote about the virtues of waterborne paint. I wasn’t happy with the results of painting my Black Magic with Auto Air paint.
The biggest issue was weight. Because Auto Air is a semitransparent paint, achieving the desired opaqueness took more than I anticipated. The Auto Air product is great and I will continue to use it on foamies and small parts, but the extra weight on a two‑meter airplane was worrisome.
After the grim realization that the Black Magic would weigh more than 11 pounds, I put it on a high shelf where it couldn’t be seen. It was there for nearly a year until this past fall when I had to decide whether to finish it or throw it away.
Finishing it meant doing something about weight. To fly well, it needed to go on a serious diet. The idea of stripping the paint came up. My flying friend Jim Welch, who has considerable experience finishing models and full‑scale aircraft, suggested using Citristrip, which has a pleasant orange smell and neutralizes with water.
My goal was to strip off the lacquer clear coat and Auto Air color coats, leaving the epoxy primer and fiberglass. Mastering the technique before destroying the airplane was my challenge.
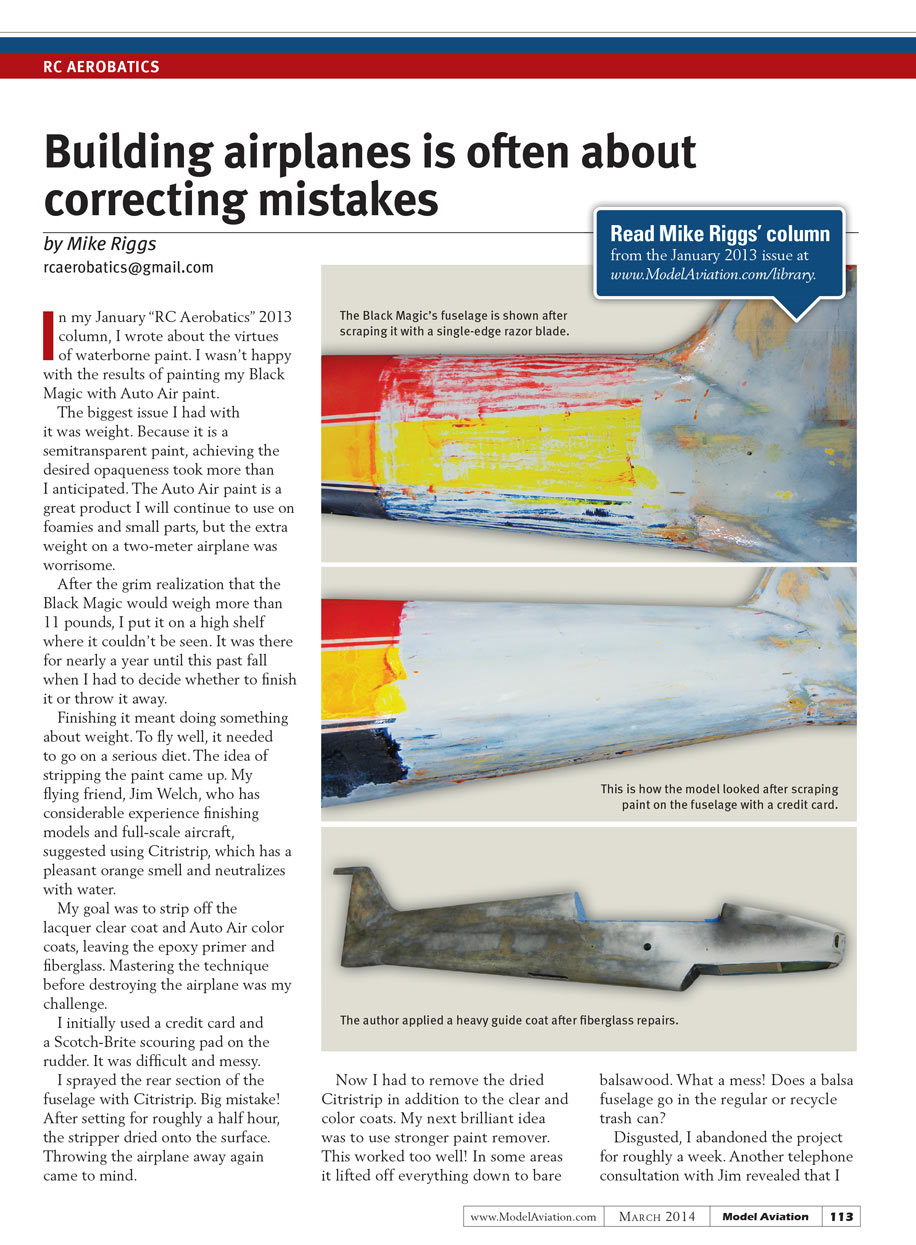
I initially used a credit card and a Scotch‑Brite scouring pad on the rudder. It was difficult and messy. I sprayed the rear section of the fuselage with Citristrip. Big mistake! After setting for roughly a half hour, the stripper dried onto the surface. Throwing the airplane away again crossed my mind.
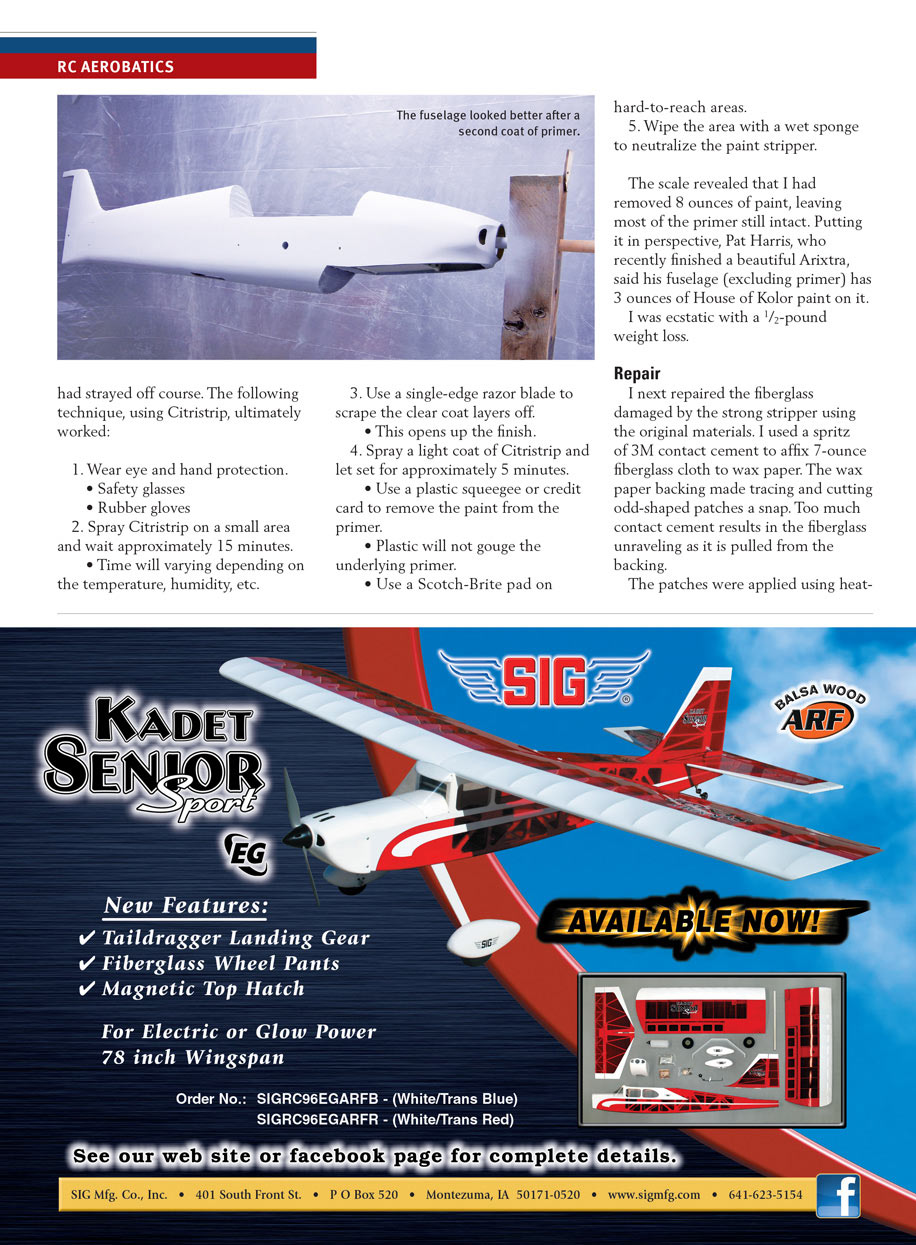
Now I had to remove the dried Citristrip in addition to the clear and color coats. My next brilliant idea was to use stronger paint remover. This worked too well: in some areas it lifted off everything down to bare balsa wood. What a mess.
Disgusted, I abandoned the project for roughly a week. Another telephone consultation with Jim revealed that I had strayed off course. The following technique, using Citristrip, ultimately worked:
- Wear eye and hand protection.
- Safety glasses
- Rubber gloves
- Spray Citristrip on a small area and wait approximately 15 minutes.
- Time will vary depending on temperature, humidity, etc.
- Use a single‑edge razor blade to scrape the clear coat layers off.
- This opens up the finish.
- Spray a light coat of Citristrip and let set for approximately 5 minutes.
- Use a plastic squeegee or credit card to remove the paint from the primer.
- Plastic will not gouge the underlying primer.
- Use a Scotch‑Brite pad on hard‑to‑reach areas.
- Wipe the area with a wet sponge to neutralize the paint stripper.
The scale revealed that I had removed 8 ounces of paint, leaving most of the primer still intact. Putting it in perspective, Pat Harris, who recently finished a beautiful Arixtra, said his fuselage (excluding primer) has 3 ounces of House of Kolor paint on it. I was ecstatic with a 1/2‑pound weight loss.
Repair
Next, I repaired the fiberglass damaged by the stronger stripper using the original materials. I used a spritz of 3M contact cement to affix 7‑ounce fiberglass cloth to wax paper. The wax paper backing made tracing and cutting odd‑shaped patches a snap. Too much contact cement results in the fiberglass unraveling as it is pulled from the backing.
The patches were applied using heat‑thinned finishing resin and left to cure overnight. Residual epoxy paraffin was removed from the cured resin with isopropyl alcohol before a light second coat of resin was applied to fill the weave.
After fiberglass repairs, the fuselage was bumpy. Obvious high areas were blocked off. Jim suggested applying a guide coat before primer. In the past I had only applied a guide coat after primer. Block sanding the guide coat flagged low spots and aided in sanding off more of the original primer, further lightening the airframe. Guide coating early saved at least one primer/sand cycle.
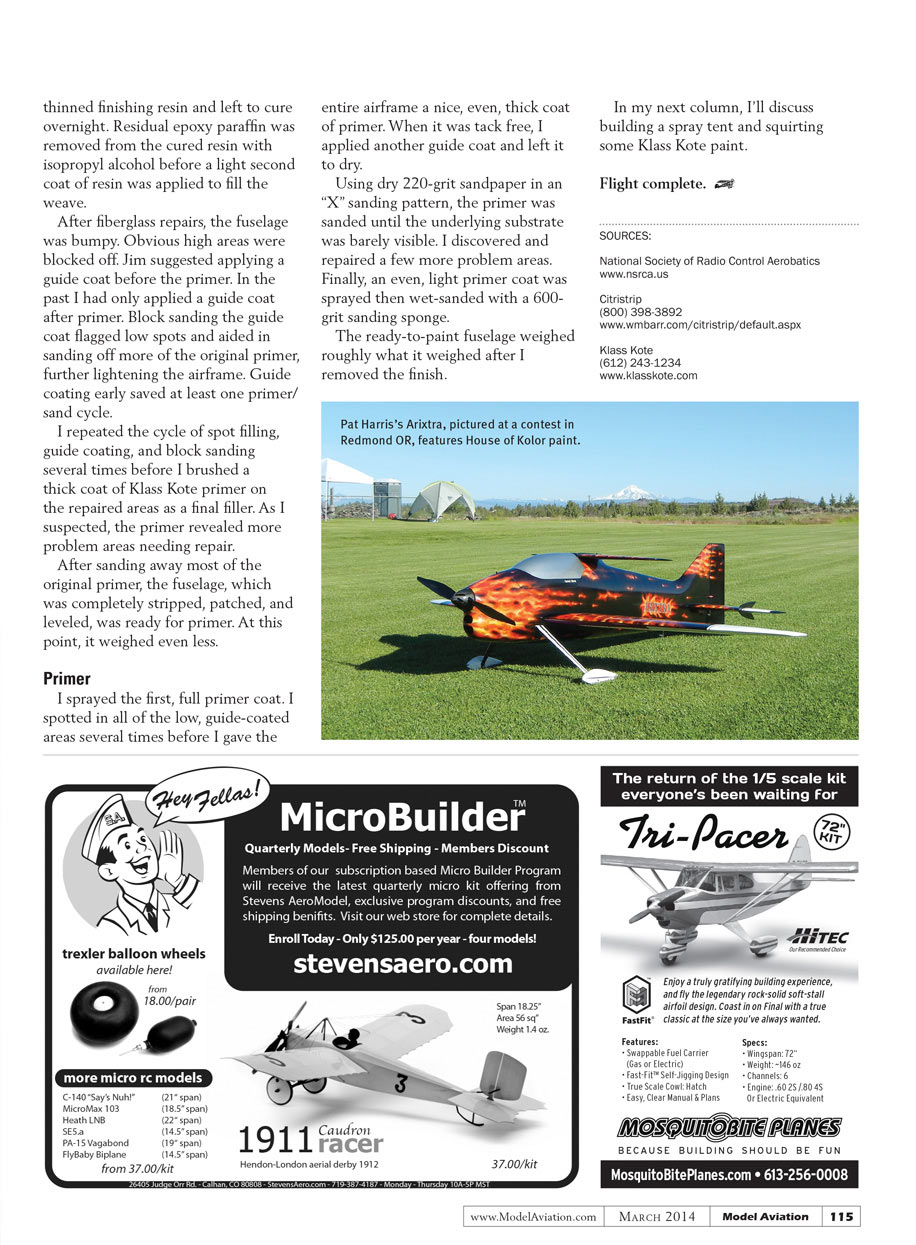
I repeated the cycle of spot filling, guide coating, and block sanding several times before I brushed a thick coat of Klass Kote primer on the repaired areas as a final filler. As I suspected, the primer revealed more problem areas needing repair. After sanding away most of the original primer, the fuselage — completely stripped, patched, and leveled — was ready for primer. At this point it weighed even less.
Primer
I sprayed the first full primer coat. I spot‑filled all of the low, guide‑coated areas several times before giving the entire airframe a nice, even, thick coat of primer. When it was tack‑free, I applied another guide coat and left it to dry.
Using dry 220‑grit sandpaper in an "X" sanding pattern, the primer was sanded until the underlying substrate was barely visible. I discovered and repaired a few more problem areas. Finally, an even, light primer coat was sprayed and then wet‑sanded with a 600‑grit sanding sponge.
The ready‑to‑paint fuselage weighed roughly what it weighed after I removed the finish.
In my next column, I'll discuss building a spray tent and squirting some Klass Kote paint.
Flight complete.
SOURCES
- National Society of Radio Control Aerobatics
- Citristrip
(800) 398‑3892 www.mwbarr.com/citristrip/default.aspx
- Klass Kote
(612) 243‑1234 www.klasskote.com
Transcribed from original scans by AI. Minor OCR errors may remain.

