

The quest for new airplanes
By Don Grissom
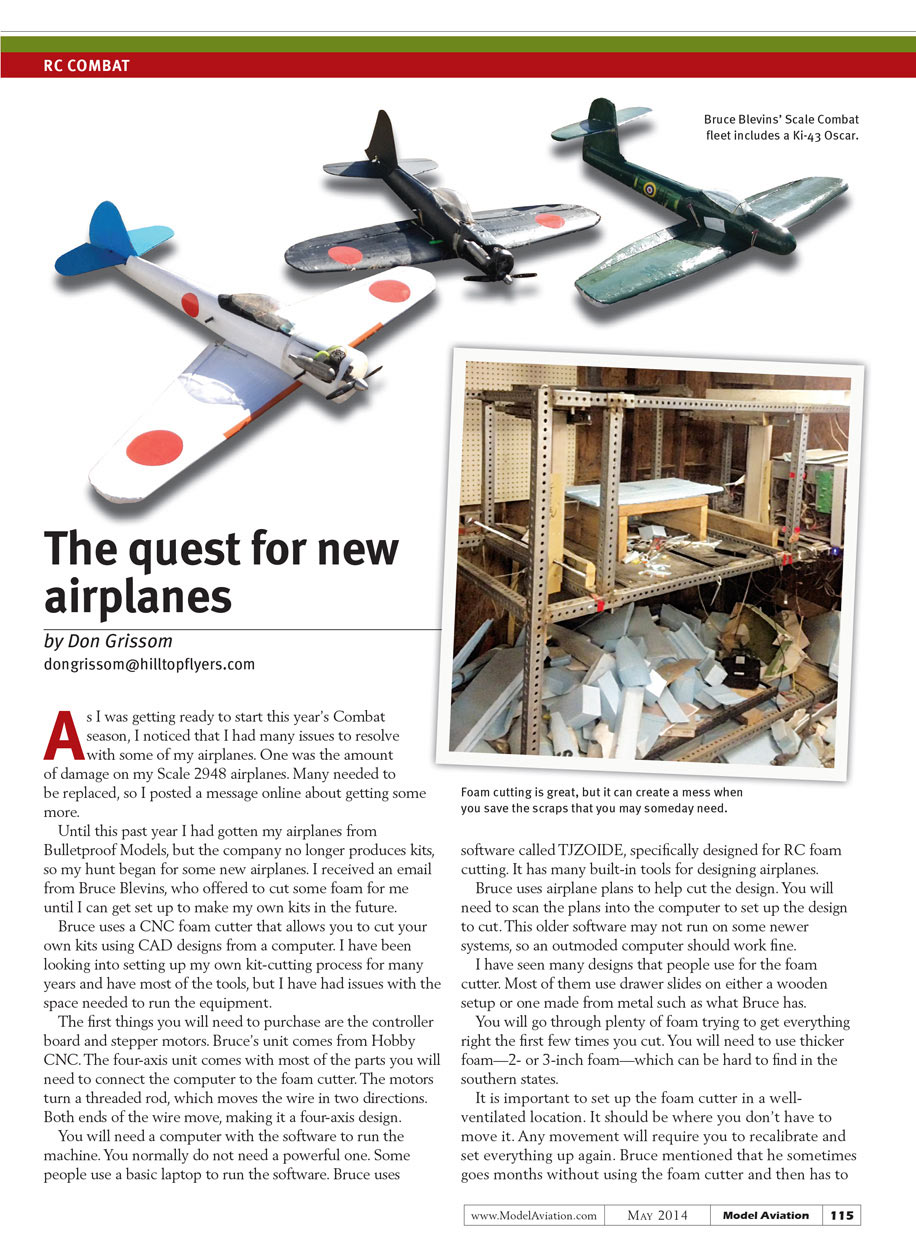
As I was getting ready to start this year's Combat season, I noticed I had many issues to resolve with some of my airplanes. One was the amount of damage on my Scale 2948 airplanes. Many needed to be replaced, so I posted a message online about getting some more.
Until this past year I had gotten my airplanes from Bulletproof Models, but the company no longer produces kits, so my hunt began for new airplanes. I received an email from Bruce Blevins, who offered to cut some foam for me until I can get set up to make my own kits in the future.
CNC foam cutting
Bruce uses a CNC foam cutter that allows you to cut kits using CAD designs from a computer. I have been looking into setting up my own kit-cutting process for many years and have most of the tools, but I have had issues with the space needed to run the equipment.
The first things you will need to purchase are the controller board and stepper motors. Bruce's unit comes from HobbyCNC. The four-axis unit comes with most of the parts you need to connect the computer to the foam cutter. The motors turn a threaded rod, which moves the wire in two directions. Both ends of the wire move, making it a four-axis design.
Equipment and software
You will need a computer with the software to run the machine. You normally do not need a powerful machine; some people use a basic laptop. Bruce uses software called TJZOIDE, specifically designed for RC foam cutting. It has many built-in tools for designing airplanes.
Bruce uses airplane plans to help set up the cuts. You will need to scan the plans into the computer in order to prepare the design. This older software may not run on some newer systems, so an outmoded computer should work fine.
I have seen many designs that people use for the foam cutter. Most of them use drawer slides on either a wooden setup or a metal frame such as what Bruce has.
Setup tips
You will go through plenty of foam trying to get everything right the first few times you cut. Use thicker foam—2- or 3-inch foam—which can be hard to find in the southern states.
It is important to set up the foam cutter in a well-ventilated location. Position it where you don't have to move it; any movement will require you to recalibrate and set everything up again. Bruce mentioned that he sometimes goes months without using the foam cutter and then has to remember how to set it up again. Because I have not yet been able to set mine up, Bruce did some of the cutting for me and I was able to put together four new airplanes.
First builds: Ki-43 Oscars
The first two airplanes Bruce cut for me were Ki-43 Oscars, the kind I have flown for many years. The simple design has a two-part wing and a four-part fuselage. The wing is cut from two parts: left and right. I use fiberglass rods in the top and bottom of the wing. I glued the wing halves together using a polyurethane adhesive, then used bidirectional tape to reinforce the leading and trailing edges as well as the glue joints and fiberglass rods. You will want to place two servos in the top of the wing because you will be making belly landings with the airplane.
Design changes and materials
One of the design changes Bruce made is to use a single rod in the fuselage. He designed the airplane to use an arrow shaft down the middle of the airplane placed behind the firewall. In the past I have used four fiberglass rods, but he said the single arrow shaft is much stronger.
Cut the tail section from Coroplast sign material. It is a good idea to get the sign material in the color you need, because painting it can sometimes be an issue; I have had to use vinyl material to change the color. The cowling on this airplane can be made from a common three-liter bottle. The 4-inch canopy comes from Sig Manufacturing. So far the airplanes are flying well and they seem to be strong.
SOURCES
- HobbyCNC
[email protected] www.hobbycnc.com
- TJZOIDE Software
- Sig Manufacturing Company, Inc.
(641) 623-5154 www.sigmfg.com
- Radio Control Combat Association (RCCA)
Transcribed from original scans by AI. Minor OCR errors may remain.

