

RC GIANTS
Sal Calvagna 1335 Broadway Ave., Holbrook, NY 11741 E-mail: [email protected]
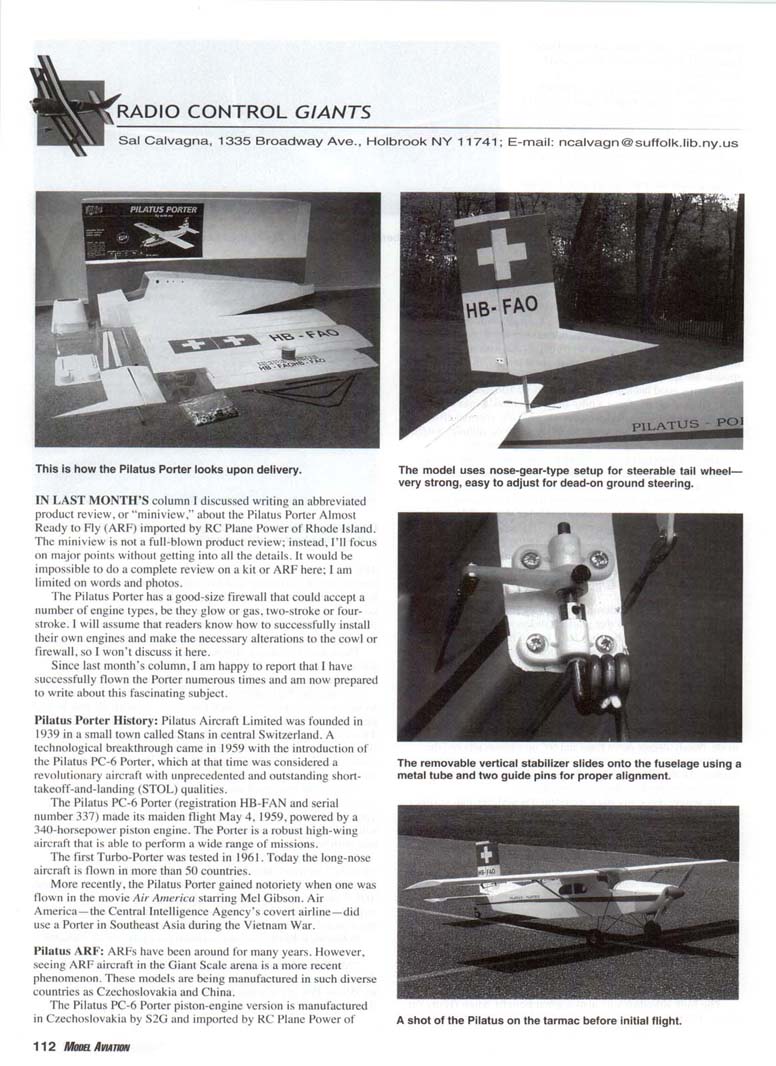
In last month's column I discussed writing an abbreviated product review, or "miniview," about the Pilatus Porter Almost Ready to Fly (ARF) imported by RC Plane Power of Rhode Island. The miniview is not a full-blown product review; instead, I focus on major points without getting into all the details. It would be impossible to do a complete review on a kit or ARF here because I'm limited on words and photos. The Pilatus Porter has a good-size firewall that could accept a number of engine types—glow or gas, two-stroke or four-stroke. I assume readers know how to successfully install their own engines and make the necessary alterations to the cowl or firewall, so I won't discuss basic engine installation here. Since last month's column, I am happy to report that I have successfully flown the Porter numerous times and am now prepared to write about this fascinating subject.
Pilatus Porter History
Pilatus Aircraft Limited was founded in 1939 in the small town of Stans in central Switzerland. A technological breakthrough came in 1959 with the introduction of the Pilatus PC-6 Porter, which at that time was considered a revolutionary aircraft with outstanding short-takeoff-and-landing (STOL) qualities.
The Pilatus PC-6 Porter (registration HB-FAN, serial number 337) made its maiden flight on May 4, 1959, powered by a 340-horsepower piston engine. The Porter is a robust high-wing aircraft able to perform a wide range of missions. The first Turbo-Porter was tested in 1961. Today the long-nose aircraft is flown in more than 50 countries.
More recently, the Pilatus Porter gained notoriety when one was flown in the movie Air America starring Mel Gibson. Air America—the Central Intelligence Agency's covert airline—did use a Porter in Southeast Asia during the Vietnam War.
Pilatus ARF
ARFs have been around for many years; however, seeing ARF aircraft in the Giant Scale arena is a more recent phenomenon. These models are being manufactured in such diverse countries as Czechoslovakia and China. The Pilatus PC-6 Porter piston-engine version is manufactured in Czechoslovakia by S2G and imported by RC Plane Power of Rhode Island.
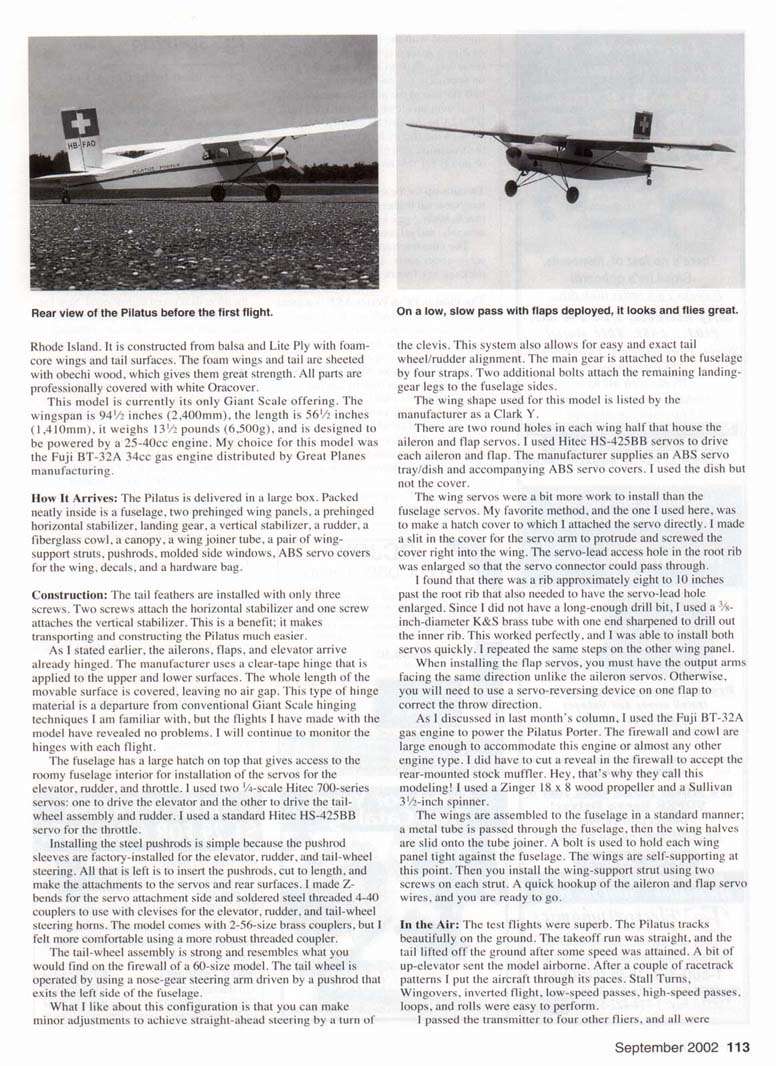
It is constructed from balsa and lite ply with foam-core wings and tail surfaces. The foam wings and tail are sheeted with obechi wood, which gives them great strength. All parts are professionally covered with white Oracover. This model is currently the company's only Giant Scale offering. The wingspan is 94-1/2 inches (2,400 mm), the length is 56-1/2 inches (1,410 mm), it weighs 13-1/2 pounds (6,500 g), and it is designed to be powered by a 25–40 cc engine. My choice for this model was the Fuji BT-32A 34 cc gas engine distributed by Great Planes Manufacturing.
How It Arrives
The Pilatus is delivered in a large box. Packed neatly inside are:
- Fuselage
- Two prehinged wing panels
- Prehinged horizontal stabilizer
- Vertical stabilizer and rudder
- Landing gear and tail-wheel assembly
- Fiberglass cowl (gel-coated)
- Canopy and formed side window panels
- Wing joiner tube and wing-support struts (pair)
- Pushrods and molded side windows
- ABS servo covers for the wing (tray and parts)
- Decals and a hardware bag
Construction
The tail feathers are installed with only three screws: two screws attach the horizontal stabilizer and one screw attaches the vertical stabilizer. This is a benefit because it makes transporting and constructing the Pilatus much easier. The ailerons, flaps, and elevator arrive already hinged. The manufacturer uses a clear-tape hinge applied to the upper and lower surfaces so the whole length of the moving surface is hinged.
The fuselage has a large hatch on top that gives access to the roomy interior for installation of the servos for elevator, rudder, and throttle. I used two 1/4-scale Hitec 700-series servos: one to drive the elevator and the other to drive the tailwheel assembly and rudder. I used a standard Hitec HS-425BB servo for the throttle.
Installing the steel pushrods is simple because the pushrod sleeves are factory-installed for the elevator, rudder, and tail-wheel steering. All that is left is to insert the pushrods, cut them to length, and make the attachments to the servos and control horns. I made Z-bends for the servo-attachment side and soldered steel threaded 4-40 couplers to use with clevises for the elevator, rudder, and tail-wheel steering horns. The model comes with 2-56-size brass couplers, but I preferred the more robust threaded couplers.
The tail-wheel assembly is strong and resembles what you would find on the firewall of a 60-size model. The tail wheel is operated by a nose-gear steering arm driven by a pushrod that exits the left side of the fuselage. What I like about this configuration is that you can make minor adjustments to achieve straight-ahead steering by a turn of the clevis. This system also allows for easy and exact tail-wheel/rudder alignment. The main gear is attached to the fuselage by four straps; two additional bolts attach the remaining landing-gear legs to the fuselage sides.
The wing uses a Clark Y airfoil, as listed by the manufacturer. There are two round holes in each wing half that house the aileron and flap servos. I used Hitec HS-425BB servos to drive each aileron and flap. The manufacturer supplies an ABS servo tray/dish and accompanying ABS servo covers. I used the dish but not the cover.
The wing servos were a bit more work to install than the fuselage servos. My preferred method, and the one I used here, was to make a hatch cover to which I attached the servo directly. I made a slit in the cover for the servo arm to protrude and then glued the cover right into the wing. The servo-lead access hole in the root rib was enlarged so that the servo connector could pass through.
I found a rib approximately eight to ten inches past the root rib that also needed the servo-lead hole enlarged. Since I did not have a long-enough drill bit, I used a 3/16-inch-diameter K&S brass tube with one end sharpened to drill out the inner rib. This worked perfectly, and I was able to install both servos quickly. I repeated the same steps on the other wing panel.
When installing the flap servos, you must have the control arms facing the same direction; otherwise, you will need to use a servo-reversing device on one flap to correct the throw direction.
As discussed in last month's column, I used the Fuji BT-32A gas engine to power the Pilatus Porter. The firewall and cowl are large enough to accommodate this engine or almost any other engine type. I did have to cut a reveal in the firewall to accept the rear-mounted stock muffler. I used a Zinger 18 x 8 wood propeller and a Sullivan 3-1/2-inch spinner.
The wings are assembled to the fuselage in a standard manner: a main tube is passed through the fuselage, then the wing halves are slid onto the tube joiner. A bolt is used to hold each wing panel tight against the fuselage. The wings are self-supporting at this point. Then you install the wing-support strut using two screws on each strut. A quick hookup of the aileron and flap servo wires, and you are ready to go.
In the Air
The test flights were superb. The Pilatus tracks beautifully on the ground. The takeoff run was straight, and the tail lifted off after some speed was attained. A bit of up elevator sent the model airborne. After a couple of racetrack patterns I put the aircraft through several passes. Stalls, turns, wingovers, inverted flight, low-speed passes, high-speed passes, loops, and rolls were all easy to perform.
I handed the transmitter to four other fliers, and all were impressed with the model's flying qualities. After a few flights we used those large flaps to really slow the Porter on approach. On one takeoff we used half flaps, and the aircraft rolled out and lifted with no elevator input. The BT-32A performed flawlessly throughout; it didn't skip a beat and provided plenty of power for this model.
Thumbs-up for the solid construction, removable tail feathers, formed side window panels, landing gear and tail-wheel assembly, and gel-coated fiberglass cowlings. The construction manual, ABS servo-cover parts, and hardware package need improvement.
The Pilatus PC-6 Porter ARF is a great scale model of which we should see more. You can have hours of fun flying the Porter, and one day you too can become an STOL expert.
The Pilatus Porter ARF is $379.95. To order, contact Brands Hobby:
- Phone: (401) 231-5380
- Fax: (401) 231-1595
- Mail: RC Plane Power, 2193 Mineral Spring Ave., North Providence, RI 02911
- Web: www.brandshobby.com
Have a great flying season. See you next month! MA
Transcribed from original scans by AI. Minor OCR errors may remain.

