
Radio Control Helicopters
Ray Stacy [[email protected]]
Guest reviewer Dave Playfair assembles and flies the Hirobo Evo 30
Also included in this column:
- A mishap before leaving for the IRCHA Jamboree
I LIKE TO let other people try new helicopters whenever the opportunity presents itself. It provides you readers a valuable service by letting you read opinions other than my own.
When the Hirobo Evo 30 came along, I saw it as the perfect chance for flying buddy David Playfair to try something different. As I mentioned a couple months ago, David is a great helicopter pilot, but all of his experience was on the Raptor. It was time for a change!
He wrote:
"I was recently given the opportunity to assemble and evaluate a 30-sized Hirobo Seabud Evolution, to be powered by a Toki .40 engine. Though I’ve only known Ray for a year since joining our local flying club, he must have thought this challenge would broaden my character or something. He was right.
"I had jumped directly to RC helicopters last year at age 37, my first model being an electric Lite Machines Corona. I currently have a collective pitch micro electric in addition to a Raptor 50 glow machine, which I purchased used and ready to fly last summer. I’ve burned 44 gallons in this model, upgrading and reassembling numerous times, from various degrees of disarray.
"A new kit build, from a different manufacturer, offered a refreshing point of view on these amazing flying machines.
"I must admit the Evo kit was intimidating at first, as the box was stuffed full of small bagged parts, and the lightly worded manual could have been translated by a Japanese exchange student.
"I thumbed through it as recommended, which pleasantly revealed a well-thought-out, logical assembly order, broken into manageable steps. Quality diagrams can speak a thousand words of direction! A few of the exploded views seemed complex, but I didn’t have to dust off that grade-school drafting book.
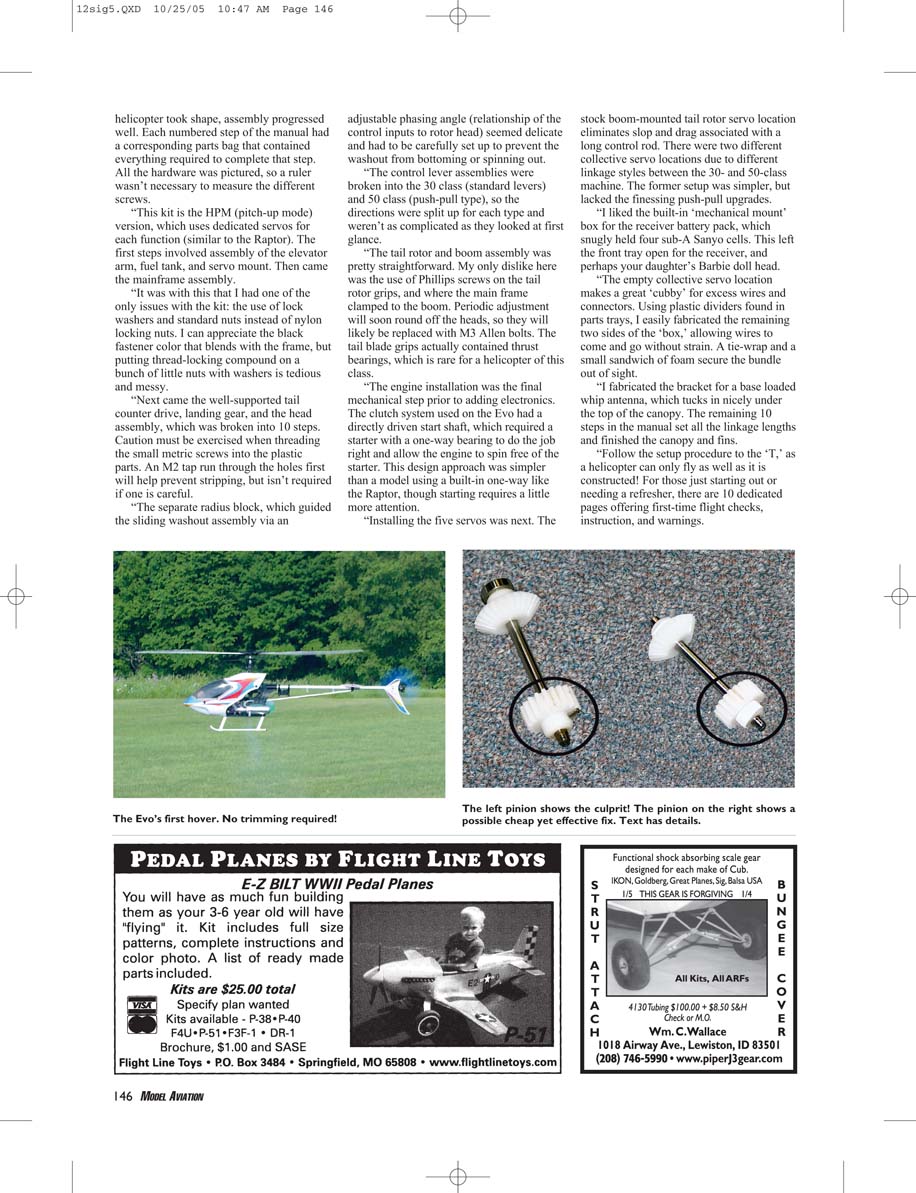
"It took a solid 12 hours to complete the build and setup with the help of my 3-year-old son, Mitchell. Getting started was hardest, as the 42 assembly steps seemed a tad overwhelming, but we breezed through the first couple pages as if the designers knew we needed a warm-up.
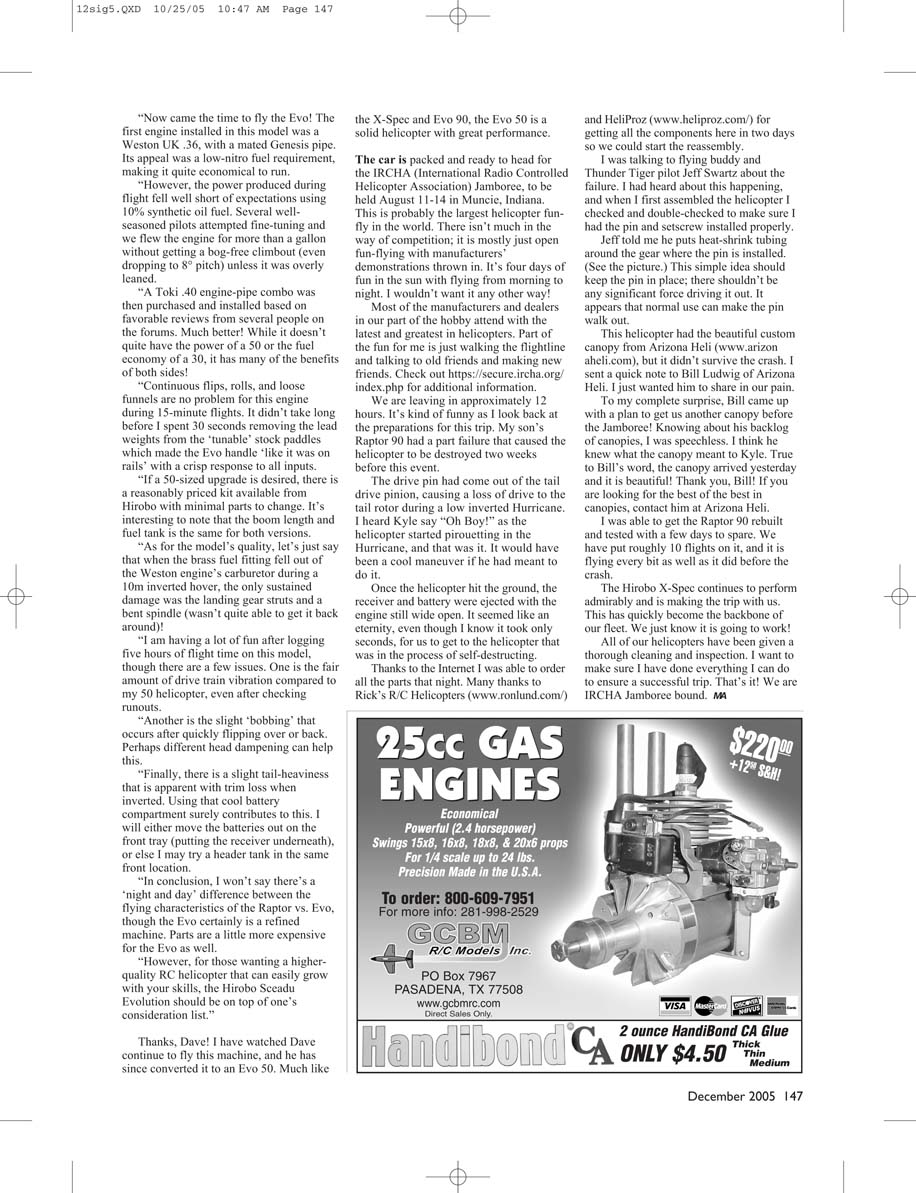
"Once something resembling a helicopter took shape, assembly progressed well. Each numbered step of the manual had a corresponding parts bag that contained everything required to complete that step. All the hardware was pictured, so a ruler wasn’t necessary to measure the different screws.
“This kit is the HPM (pitch-up mode) version, which uses dedicated servos for each function (similar to the Raptor). The first steps involved assembly of the elevator arm, fuel tank, and servo mount. Then came the mainframe assembly.
“It was with this that I had one of the only issues with the kit: the use of lock washers and standard nuts instead of nylon locking nuts. I can appreciate the black fastener color that blends with the frame, but putting thread-locking compound on a bunch of little nuts with washers is tedious and messy.
“Next came the well-supported tail counter drive, landing gear, and the head assembly, which was broken into 10 steps. Caution must be exercised when threading the small metric screws into the plastic parts. An M2 tap run through the holes first will help prevent stripping, but isn’t required if one is careful.
“The separate radius block, which guided the sliding washout assembly via an adjustable phasing angle (relationship of the control inputs to rotor head) seemed delicate and had to be carefully set up to prevent the washout from bottoming or spinning out.
“The control lever assemblies were broken into the 30 class (standard levers) and 50 class (push-pull type), so the directions were split up for each type and weren’t as complicated as they looked at first glance.
“The tail rotor and boom assembly were pretty straightforward. My only dislike here was the use of Phillips screws on the tail rotor grips, and where the main frame clamped to the boom. Periodic adjustment will soon round off the heads, so they will likely be replaced with M3 Allen bolts. The tail blade grips actually contained thrust bearings, which is rare for a helicopter of this class.
“The engine installation was the final mechanical step prior to adding electronics. The clutch system used on the Evo had a directly driven start shaft, which required a starter with a one-way bearing to do the job right and allow the engine to spin free of the starter. This design approach was simpler than a model using a built-in one-way like the Raptor, though starting requires a little more attention.
“Installing the five servos was next. The stock boom-mounted tail rotor servo location eliminates slop and drag associated with a long control rod. There were two different collective servo locations due to different linkage styles between the 30- and 50-class machine. The former setup was simpler, but lacked the finessing push-pull upgrades.
“I liked the built-in ‘mechanical mount’ box for the receiver battery pack, which snugly held four sub-A Sanyo cells. This left the front tray open for the receiver, and perhaps your daughter’s Barbie doll head.
“The empty collective servo location makes a great ‘cubby’ for excess wires and connectors. Using plastic dividers found in parts trays, I easily fabricated the remaining two sides of the ‘box,’ allowing wires to come and go without strain. A tie-wrap and a small sandwich of foam secure the bundle out of sight.
“I fabricated the bracket for a base loaded whip antenna, which tucks in nicely under the top of the canopy. The remaining 10 steps in the manual set all the linkage lengths and finished the canopy and fins.
“Follow the setup procedure to the ‘T,’ as a helicopter can only fly as well as it is constructed! For those just starting out or needing a refresher, there are 10 dedicated pages offering first-time flight checks, instruction, and warnings.
“Now came the time to fly the Evo! The first engine installed in this model was a Weston UK .36, with a mated Genesis pipe. Its appeal was a low-nitro fuel requirement, making it quite economical to run.
“However, the power produced during flight fell well short of expectations using 10% synthetic oil fuel. Several well-seasoned pilots attempted fine-tuning and we flew the engine for more than a gallon without getting a bog-free climbout (even dropping to 8° pitch) unless it was overly leaned.
“A Toki .40 engine-pipe combo was then purchased and installed based on favorable reviews from several people on the forum. Much better! While it doesn’t quite have the power of a 50 or the fuel economy of a 30, it has many of the benefits of both sides!
“Continuous flips, rolls, and loose funnels are no problem for this engine during 15-minute flights. It didn’t take long before I spent 30 seconds removing the lead weights from the ‘tunable’ stock paddles which made the Evo handle ‘like it was on rails’ with a crisp response to all inputs.
“If a 50-sized upgrade is desired, there is a reasonably priced kit available from Hirobo with minimal parts to change. It’s interesting to note that the boom length and fuel tank is the same for both versions.
“As for the model’s quality, let’s just say that when the brass fuel fitting fell out of the Weston engine’s carburetor during a 10 m inverted hover, the only sustained damage was the landing gear struts and a bent spindle (wasn’t quite able to get it back around)!
“I am having a lot of fun after logging five hours of flight time on this model, though there are a few issues. One is the fair amount of drive train vibration compared to my 50 helicopter, even after checking runouts.
“Another is the slight ‘bobbing’ that occurs after quickly flipping over or back. Perhaps different head dampening can help this.
“Finally, there is a slight tail-heaviness that is apparent with trim loss when inverted. Using that cool battery compartment surely contributes to this. I will either move the batteries out on the front tray (putting the receiver underneath), or else I may try a header tank in the same front location.
“In conclusion, I won’t say there’s a ‘night and day’ difference between the flying characteristics of the Raptor vs. Evo, though the Evo certainly is a refined machine. Parts are a little more expensive for the Evo as well.
“However, for those wanting a higher-quality RC helicopter that can easily grow with your skills, the Hirobo Seabud Evolution should be on top of one’s consideration list.”
Thanks, Dave! I have watched Dave continue to fly this machine, and he has since converted it to an Evo 50. Much like the X-Spec and Evo 90, the Evo 50 is a solid helicopter with great performance.
The car is packed and ready to head for the IRCHA (International Radio Controlled Helicopter Association) Jamboree, to be held August 11-14 in Muncie, Indiana. This is probably the largest helicopter fun-fly in the world. There isn’t much in the way of competition; it is mostly just open fun-flying with manufacturers’ demonstrations thrown in. It’s four days of fun in the sun with flying from morning to night. I wouldn’t want it any other way!
Most of the manufacturers and dealers are in our part of the hobby and attend with the latest and greatest in helicopters. Part of the fun for me is just walking the flightline and talking to old friends and making new friends. Check out https://secure.ircha.org/index.php for additional information.
We are leaving in approximately 12 hours. It’s kind of funny as I look back at the preparations for this trip. My son’s Raptor 90 had a part failure that caused the helicopter to be destroyed two weeks before the Jamboree.
The drive pin had come out of the tail drive pinion, causing a loss of drive to the tail rotor during a low inverted Hurricane. I heard Kyle say “Oh Boy!” as the helicopter started pirouetting in the Hurricane, and that was it. It would have been a cool maneuver if he had meant to do it.
Once the helicopter hit the ground, the receiver and battery were ejected with the engine still wide open. It seemed like an eternity, even though I know it took only seconds, for us to get to the helicopter that was in the process of self-destruction.
Thanks to the Internet I was able to order all the parts that night. Many thanks to Rick’s R/C Helicopters (www.ronlund.com) and HeliProz (www.heliproz.com/) for getting all the components here in two days so we could start the reassembly.
I was talking to flying buddy and Thunder Tiger pilot Jeff Swartz about the failure. I had heard about this happening, and when I first assembled the helicopter I checked and double-checked to make sure I had the pin and setscrew installed properly.
Jeff told me he puts heat-shrink tubing around the gear where the pin is installed (see the picture). This simple idea should keep the pin in place; there shouldn’t be any significant force driving it out. It appears that normal use can make the pin walk out.
This helicopter had the beautiful custom canopy from Arizona Heli (www.arizonaheli.com), but it didn’t survive the crash. I sent a quick note to Bill Ludwig of Arizona Heli. I just wanted him to share in our pain.
To my complete surprise, Bill came up with a plan to get us another canopy before the Jamboree. Knowing about his backlog of canopies, I was speechless. I think he knew what the canopy meant to Kyle. True to Bill’s word, the canopy arrived yesterday and it is beautiful! Thank you, Bill! If you are looking for the best of the best in canopies, contact him at Arizona Heli.
I was able to get the Raptor 90 rebuilt and tested with a few days to spare. We have put roughly 10 flights on it and it is flying every bit as well as it did before the crash.
The Hirobo X-Spec continues to perform admirably and is making the trip with us. This has quickly become the backbone of our fleet. We just know it is going to work!
All of our helicopters have been given a thorough cleaning and inspection. I want to make sure I have done everything I can do to ensure a successful trip. That’s it! We are IRCHA Jamboree bound. RA
RC Helicopters
Ray Stacy
Transcribed from original scans by AI. Minor OCR errors may remain.

