
RC Jets
Jim Hiller [email protected]
Jim reflects on his summer of sport jets
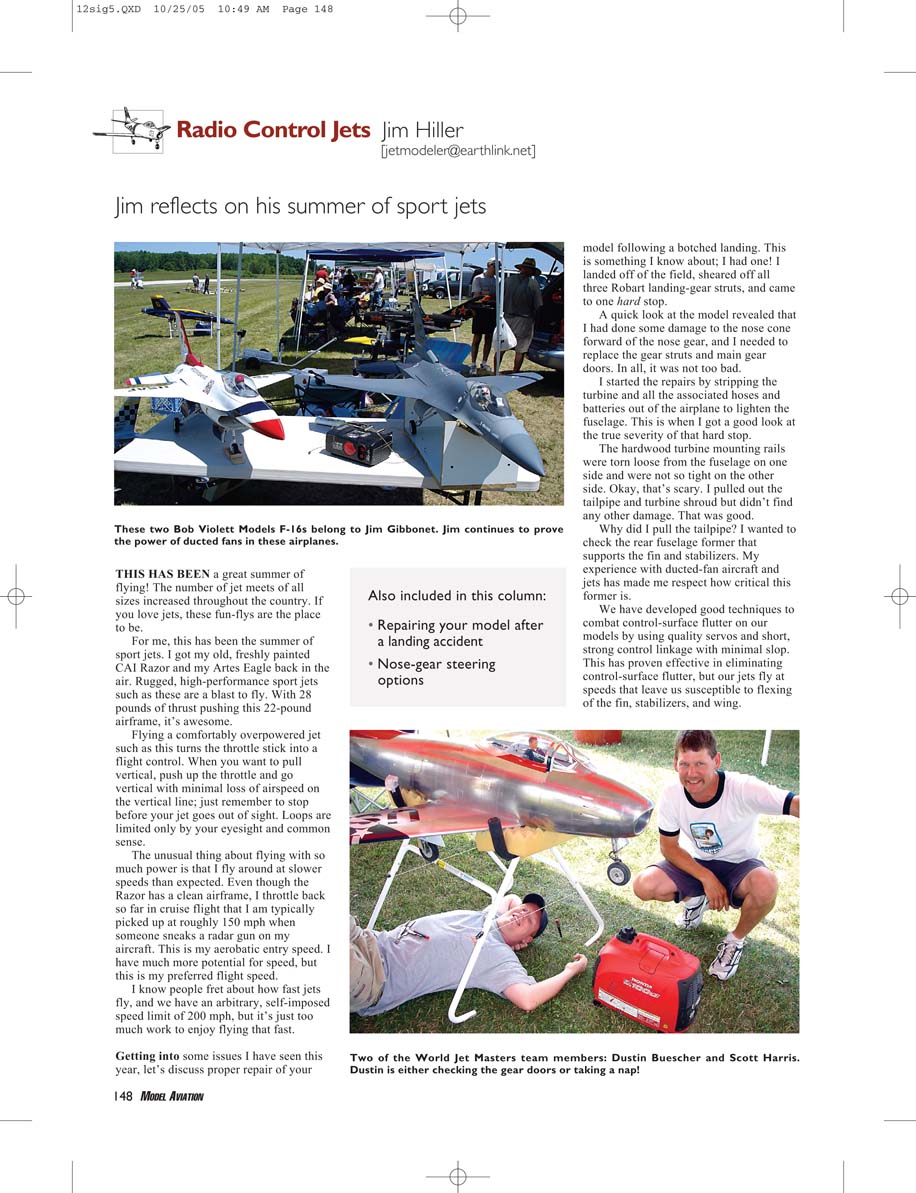
THIS HAS BEEN a great summer of flying! The number of jet meets of all sizes increased throughout the country. If you love jets, these fun-flys are the place to be.
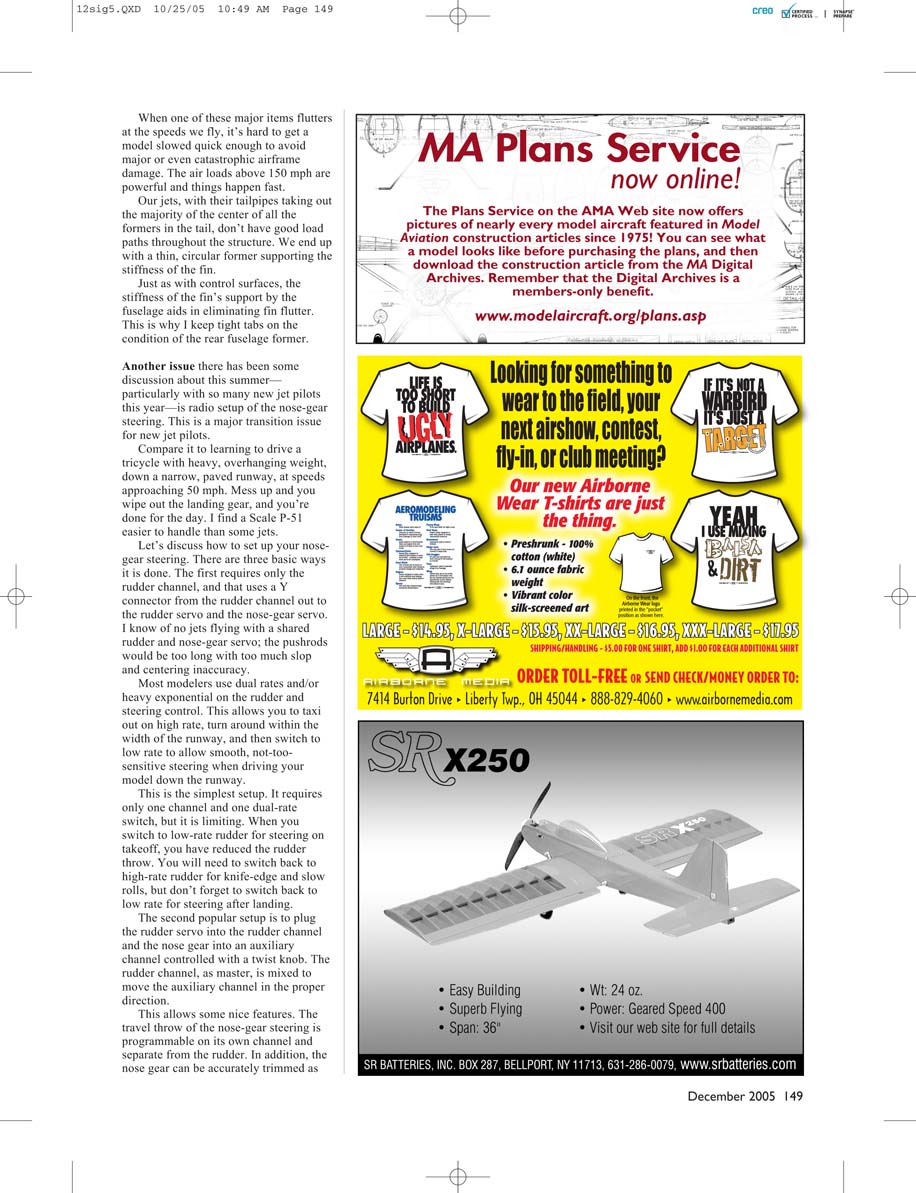
For me, this has been the summer of sport jets. I got my old, freshly painted CAI Razor and my Artes Eagle back in the air. Rugged, high-performance sport jets such as these are a blast to fly. With 28 pounds of thrust pushing this 22-pound airframe, it's awesome.
Flying a comfortably overpowered jet such as this turns the throttle stick into a flight control. When you want to pull vertical, push up the throttle and go vertical with minimal loss of airspeed on the vertical line; just remember to stop before your jet goes out of sight. Loops are limited only by your eyesight and common sense.
The unusual thing about flying with so much power is that I fly around at slower speeds than expected. Even though the Razor has a clean airframe, I throttle back so far in cruise flight that I am typically picked up at roughly 150 mph when someone sneaks a radar gun on my aircraft. This is my aerobatic cruise speed. I have much more potential for speed, but this is my preferred flight speed.
I know people fret about how fast jets fly, and we have an arbitrary, self-imposed speed limit of 200 mph, but it's just too much work to enjoy flying that fast.
Getting into some issues I have seen this year, let's discuss proper repair of your model following a botched landing. This is something I know about; I had one! I landed off of the field, sheared off all three Robart landing-gear struts, and came to one hard stop.
A quick look at the model revealed that I had done some damage to the nose cone forward of the nose gear, and I needed to replace the gear struts and main gear doors. In all, it was not too bad.
I started the repairs by stripping the turbine and all the associated hoses and batteries out of the airplane to lighten the fuselage. This is when I got a good look at the true severity of that hard stop.
The hardwood turbine mounting rails were torn loose from the fuselage on one side and were not so tight on the other side. Okay, that's scary. I pulled out the tailpipe and turbine shroud but didn't find any other damage. That was good.
Why did I pull the tailpipe? I wanted to check the rear fuselage former that supports the fin and stabilizers. My experience with ducted-fan aircraft and jets has made me respect how critical this former is.
We have developed good techniques to combat control-surface flutter on our models by using quality servos and short, strong control linkage with minimal slop. This has proven effective in eliminating control-surface flutter, but our jets fly at speeds that leave us susceptible to flexing of the fin, stabilizers, and wing.
Also included in this column:
- Repairing your model after a landing accident
- Nose-gear steering options
RC Jets
Jim Hiller
When one of these major items flutters at the speeds we fly, it's hard to get a model slowed quick enough to avoid major or even catastrophic airframe damage. The air loads above 150 mph are powerful and things happen fast.
Our jets, with their tailpipes taking out the majority of the center of all the formers in the tail, don't have good load paths throughout the structure. We end up with a thin, circular former supporting the stiffness of the fin.
Just as with control surfaces, the stiffness of the fin's support by the fuselage aids in eliminating fin flutter. This is why I keep tight tabs on the condition of the rear fuselage former.
Another issue there has been some discussion about this summer—particularly with so many new jet pilots this year—is radio setup of the nose-gear steering. This is a major transition issue for new jet pilots.
Compare it to learning to drive a tricycle with heavy, overhanging weight, down a narrow, paved runway, at speeds approaching 50 mph. Mess up and you wipe out the landing gear, and you're done for the day. I find a Scale P-51 easier to handle than some jets.
Let's discuss how to set up your nose-gear steering. There are three basic ways it is done. The first requires only the rudder channel, and that uses a Y connector from the rudder channel out to the rudder servo and the nose-gear servo. I know of no jets flying with a shared rudder and nose-gear servo; the pushrods would be too long with too much slop and centering inaccuracy.
Most modelers use dual rates and/or heavy expo on the rudder and steering controls. This allows you to taxi out on high rate, turn around within the width of the runway, and then switch to low rate to allow smooth, not-too-sensitive steering when driving your model down the runway.
This is the simplest setup. It requires only one channel and one dual-rate switch, but it is limiting. When you switch to low-rate rudder for steering on takeoff, you have reduced the rudder throw. You will need to switch back to high-rate rudder for knife-edge and slow rolls, but don't forget to switch back to low rate for steering after landing.
The second popular setup is to plug the rudder servo into the rudder channel and the nose gear into an auxiliary channel controlled with a twist knob. The rudder channel, as master, is mixed to move the auxiliary channel in the proper direction.
This allows some nice features. The travel throw of the nose-gear steering is programmable on its own channel and separate from the rudder. In addition, the nose gear can be accurately trimmed as a separate trim. You taxi out for takeoff by turning the auxiliary channel knob to readjust centering of the nose gear without affecting the rudder trim. Dual rates and exponential are now controlled through the rudder channel. This is a popular arrangement.
RC Jets
Jim Hiller
The third setup is one I have been using lately. Plug the nose-gear-steering servo into the rudder channel and the rudder servo into the auxiliary channel. Set up your dual rates and exponential as normal for best steering practices.
In your transmitter programming, turn off the rudder trim and dual rates from affecting the auxiliary-channel steering and travel throws. Then turn off the auxiliary-channel switch so the knob will not move the rudder servo. This way you don’t have to worry about bumping the knob and losing your rudder trim.
This programming allows you to use the rudder trim to trim the nose-gear servo centering while taxiing out without affecting the rudder trim. The rudder trim is much less sensitive, which eases the taxi-trim process.
The rudder dual-rate switch won’t affect the rudder travel which is plugged into the auxiliary channel, so you don’t have to switch back to high-rate rudder after takeoff for aerobatic flying. You leave the rudder dual rate in low so it is set up for landing.
These are not the only setups in use today. They are a starting point for setting up your model. But if takeoffs are so difficult, what about using gyros?
I fly with a gyro in my Razor and it is a pleasure. Although it doesn’t solve any problems caused by a poor nose-gear-steering setup, it sure reduces the pilot’s workload on takeoff and landing rollout, particularly while braking.
I have a JR gyro in place only on my nose-gear-steering servo. The Razor is rock-solid in yaw during all phases of flight, so I didn’t want to unnecessarily complicate the setup by tying it to the rudder servo. My desire for the gyro assistance was to improve my model’s steering-handling qualities at high ground speeds.
A gyro works great to reduce the workload. It won’t automatically make your takeoffs straight; it does make the airplane respond immediately and smoothly to the control-rudder stick. When you make a correction and release the rudder stick, the airplane instantly stops turning and straightens out.
Before the installation of the gyro, the Razor would continue to turn because of gyroscopic effect of all the weight at the extreme ends of the fuselage. Steering corrections on takeoff were complicated by the need to stop this rotation myself. Now the gyro does it for me.
Braking during landing rollout is another area that is greatly improved. Jet models tend to get squirrely under hard braking, but the gyro deals with it, keeping your landing rollout straight; that is until you lock up the tires, then all bets are off.
That sounds too good to be true. I can remind myself of just how effective the gyro is because I originally programmed it so I could turn it off just in case. I left it off for a takeoff and landing, and that’s not for me. I have reprogrammed the transmitter so I can’t accidentally turn off the gyro, and it rocks. I don’t want to take off or brake on landing without it.
If you are new to jets and are going to be flying off pavement, seriously consider a gyro. It makes a difference. Experienced jet modelers use them for a reason; they reduce the pilot’s workload. MA
Transcribed from original scans by AI. Minor OCR errors may remain.

