
RC Jets 2014/05
How modeling has changed
by Jim Hiller
The two projects I am currently working on illustrate how much modeling has changed. For the first project, I am in the middle of repairing and repainting my Jet-Teng Models EDF XXX Jet, a prepainted composite ARF model. I simply had to drop in the equipment and it was ready to fly. As I started this project, I realized that the jets I am actively flying are all prepainted composite ARFs.
I have always enjoyed building my own airplanes, which is my motivation for my other project: I have begun constructing an original-design jet. Nothing beats the feeling of flying a model that you made. The skills to create, repair, and maintain models are only part of the complete experience for me, and they are skills that many modelers who begin the sport with ARF aircraft have not learned.
In my early aeromodeling days, local club meetings included time for show-and-tell. Many models were incomplete and under construction so members could learn and share new building techniques. I remember presentations such as how to cover a model with MonoKote. That tradition has faded (at least in my area), but don't despair — it has been replaced by build threads on the Internet. These skills are still practiced and shared. Check out these threads for learning experiences. We learn from each other, and we never seem to stop developing our building skills, so the fun continues.
Repairing the XXX Jet’s nose section
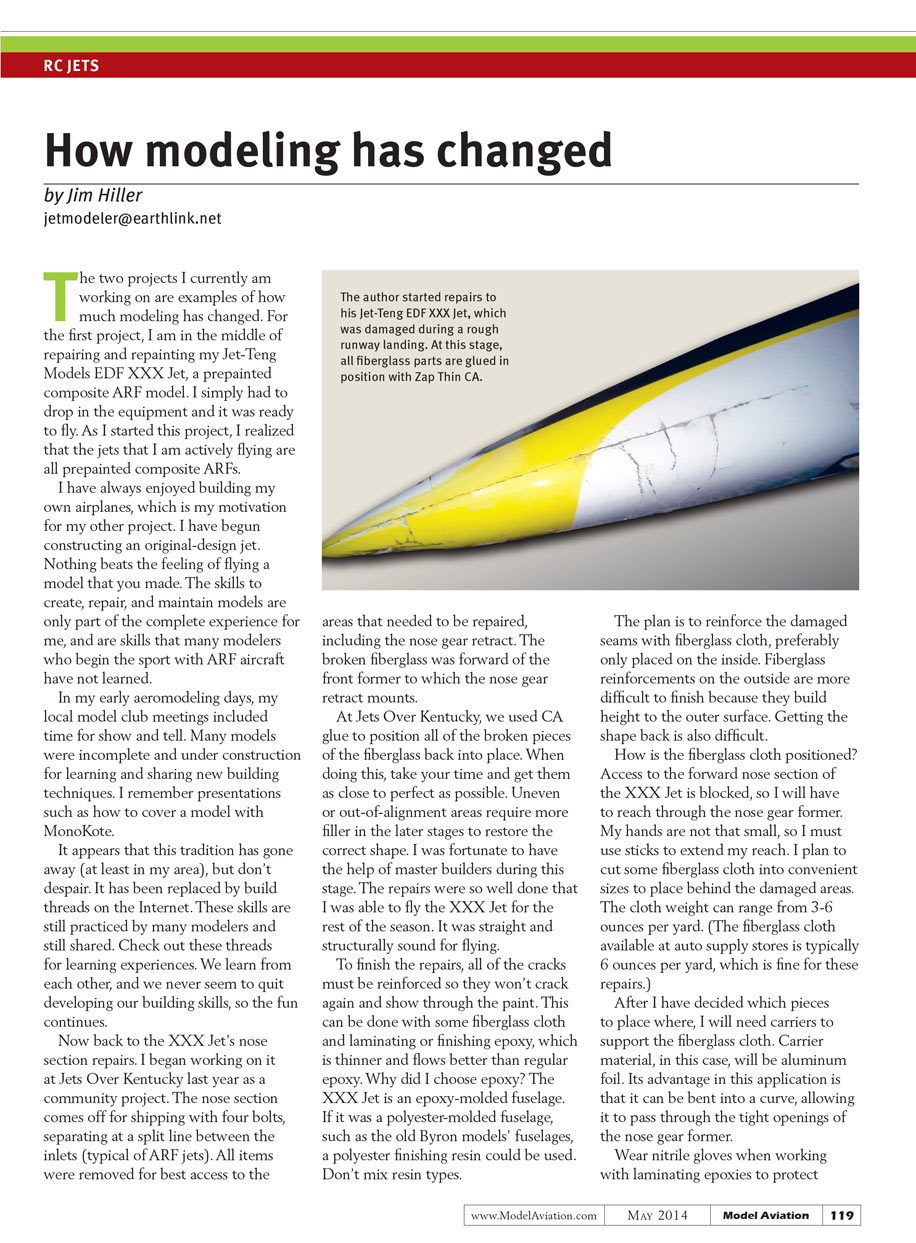
Now, back to the XXX Jet's nose section repairs. I began working on it at Jets Over Kentucky last year as a community project. The nose section comes off for shipping with four bolts, separating at a split line between the inlets (typical of ARF jets). All items were removed for best access to the areas that needed repair, including the nose gear retract. The broken fiberglass was forward of the front former to which the nose gear retract mounts.
At Jets Over Kentucky, we used CA glue to position all of the broken fiberglass pieces back into place. When doing this, take your time and get them as close to perfect as possible. Uneven or out-of-alignment areas require more filler in later stages to restore the correct shape. I was fortunate to have the help of master builders during this stage. The repairs were so well done that I actually flew the XXX Jet for the rest of the season — it was straight and structurally sound for flying.
To finish the repairs, all cracks must be reinforced so they won't crack again and show through the paint. This can be done with some fiberglass cloth and laminating or finishing epoxy, which is thinner and flows better than regular epoxy.
Note on resin compatibility
- I chose epoxy because the XXX Jet is an epoxy-molded fuselage.
- If the fuselage were polyester-molded (such as older Byron models), a polyester finishing resin could be used.
- Do not mix resin types.
The plan is to reinforce the damaged seams with fiberglass cloth, preferably only placed on the inside. Fiberglass reinforcements on the outside are more difficult to finish because they add thickness to the outer surface and make getting the original shape back more difficult.
How to position the fiberglass cloth
- Access to the forward nose section of the XXX Jet is blocked, so I must reach through the nose gear former.
- My hands are not that small, so I use sticks to extend my reach.
- I cut fiberglass cloth into convenient sizes to place behind the damaged areas.
- Cloth weight can range from 3–6 ounces per yard. The fiberglass cloth available at auto supply stores is typically 6 ounces per yard, which is fine for these repairs.
Carrier material and safety
- I use aluminum foil as a carrier for the patches because it can be bent into a curve and pass through the tight openings of the nose gear former.
- Wear nitrile gloves when working with laminating epoxies to protect your skin from the chemicals.
Applying the repair patch
I cut the aluminum foil carriers, mixed the epoxy, and wet out the fiberglass cloth on the carrier. Using an acid brush with a stick taped to it for the long reach required in the forward section, I brush some epoxy in the repair area.
Using sticks, I position the repair patch in place, pushing it down to get good contact, and remove the aluminum foil if I can. With my stick, I press down the fiberglass cloth to get uniform contact. Don't worry if you can't remove the aluminum foil carrier — it can stay there forever. Allow the epoxy to cure for at least 24 hours.
Cosmetic repairs and finishing
With the structure sound, I can begin the cosmetic repairs. I like this part; finishing is fun.
- Coarsely sand the outer skin to aid filler adhesion.
- Use an automotive lightweight, easy-to-sand, two-part filler. Lightweight filler sands and shapes easier than regular filler.
- Put a layer of filler over the depressions and let it cure.
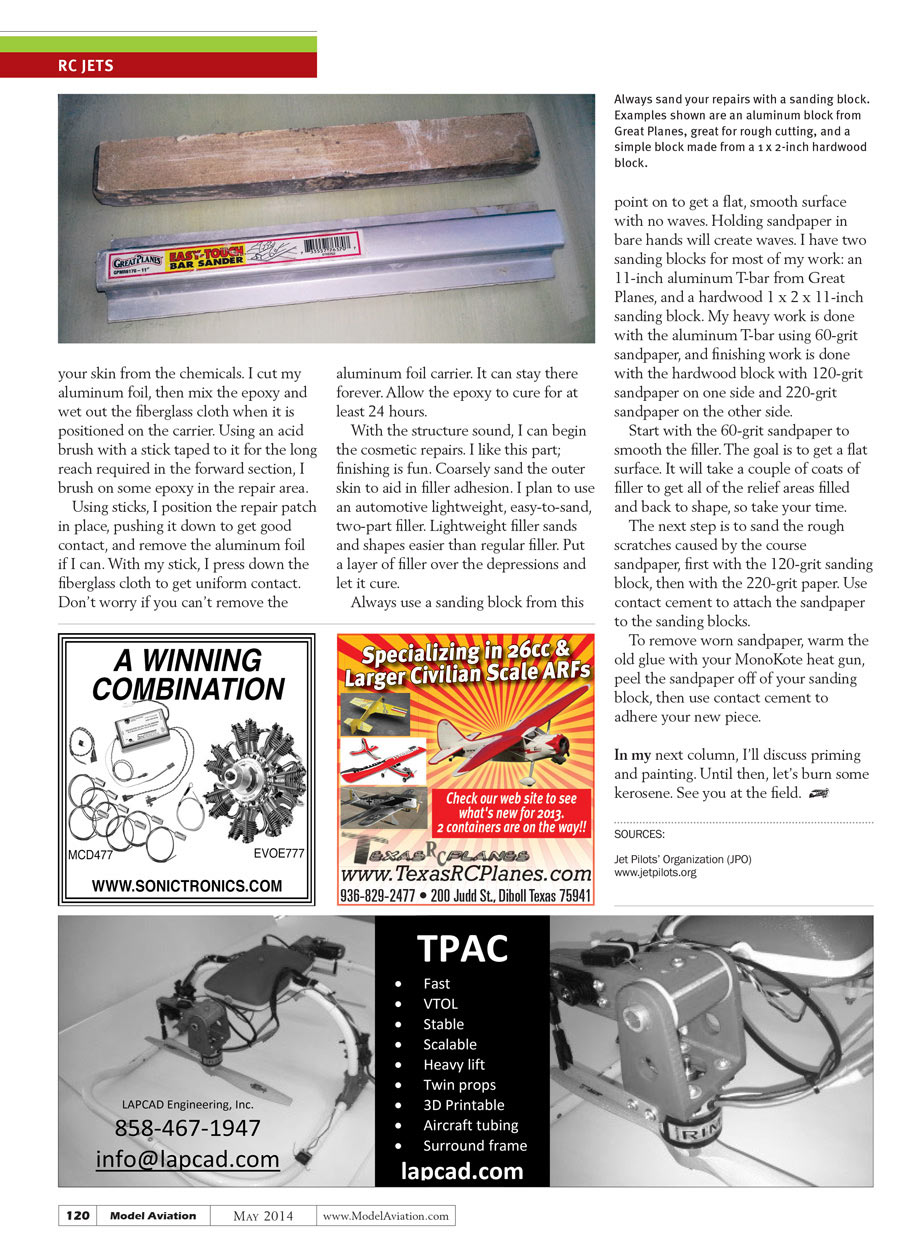
Always use a sanding block from this point on to get a flat, smooth surface with no waves. Holding sandpaper in bare hands will create waves. I have two sanding blocks for most of my work:
- An 11-inch aluminum T-bar (Great Planes) for heavy work.
- A hardwood 1 x 2 x 11-inch sanding block for finishing.
Sandpaper and progression
- Heavy work: aluminum T-bar with 60-grit sandpaper.
- Intermediate: hardwood block with 120-grit.
- Finishing: hardwood block with 220-grit.
Start with 60-grit to smooth the filler. The goal is a flat surface. It will take a couple of coats of filler to get all the relief areas filled and back to shape, so take your time. Then sand the rough scratches caused by the coarse paper, first with 120-grit, then with 220-grit.
To attach sandpaper to the blocks, use contact cement. To remove worn sandpaper, warm the old glue with your MonoKote heat gun, peel the sandpaper off the block, then use contact cement to adhere a new piece.
In my next column, I’ll discuss priming and painting. Until then, let’s burn some kerosene. See you at the field.
SOURCES:
- Jet Pilots' Organization (JPO)
- www.jetpilots.org
Transcribed from original scans by AI. Minor OCR errors may remain.

