
Painting Tips and Techniques, Part One
by Aaron "AJ" Seaholm [email protected]
Painting a racer can seem intimidating because of the unknowns and all of the stories told about painting gone wrong. In this two-part series I will provide information to help ease the learning curve of painting our racing models.
I enjoy painting because it allows me to customize the paint scheme, letters, graphics, and colors to my liking. Many current composite Q-500 and Q-40 models come painted in the mold. The tips and techniques in this article can be applied to customizing these racers as well.
Throughout the years, Lyle Larson has provided me with great information and allowed me to avoid a number of painful mistakes. I have also discovered my own list of interesting ways to mess up a paint job. For truth-in-advertising purposes, here are my top two favorite "lessons learned the hard way."
- Make sure the little vent hole in the top of your high-volume, low-pressure (HVLP) spray gun is not clogged. This leads to a confetti-like spray of material from the spray gun, similar to Silly String.
- Do not attempt to paint if the temperature is below 60°F and your hardener is designed for 70°F-plus weather. This leads to depressing sags and runs that become evident before the clearcoat sets.
I spent some time at Lyle Larson’s Speed Pros shop in early January, painting a new Proud Bird II for the February Phoenix Q-40 Classic race. Speed Pros is roughly 20 minutes from my home and is located in Piedmont, South Dakota.
Lyle has produced Q-40 models for racers around the world, and pumped out 56 in 2011. Lyle has painted hundreds, if not thousands, of models throughout the years and has the process down to a fine art.
The art of painting — there is far more art involved than science — can be read about, but you have to jump in and try it. You may make a few mistakes, but given a little time and patience, you can produce some beautiful paint jobs.
Materials
- Drywall spackle
- Transtar 6411 Finish-Tec 2K Kwik Prime Primer Surfacer Yellow
- 220-grit sandpaper
- 20-gallon air compressor
- Air compressor blow gun
- Air regulator and water filter attached to an air hose
- Blue Scott-brand shop towels
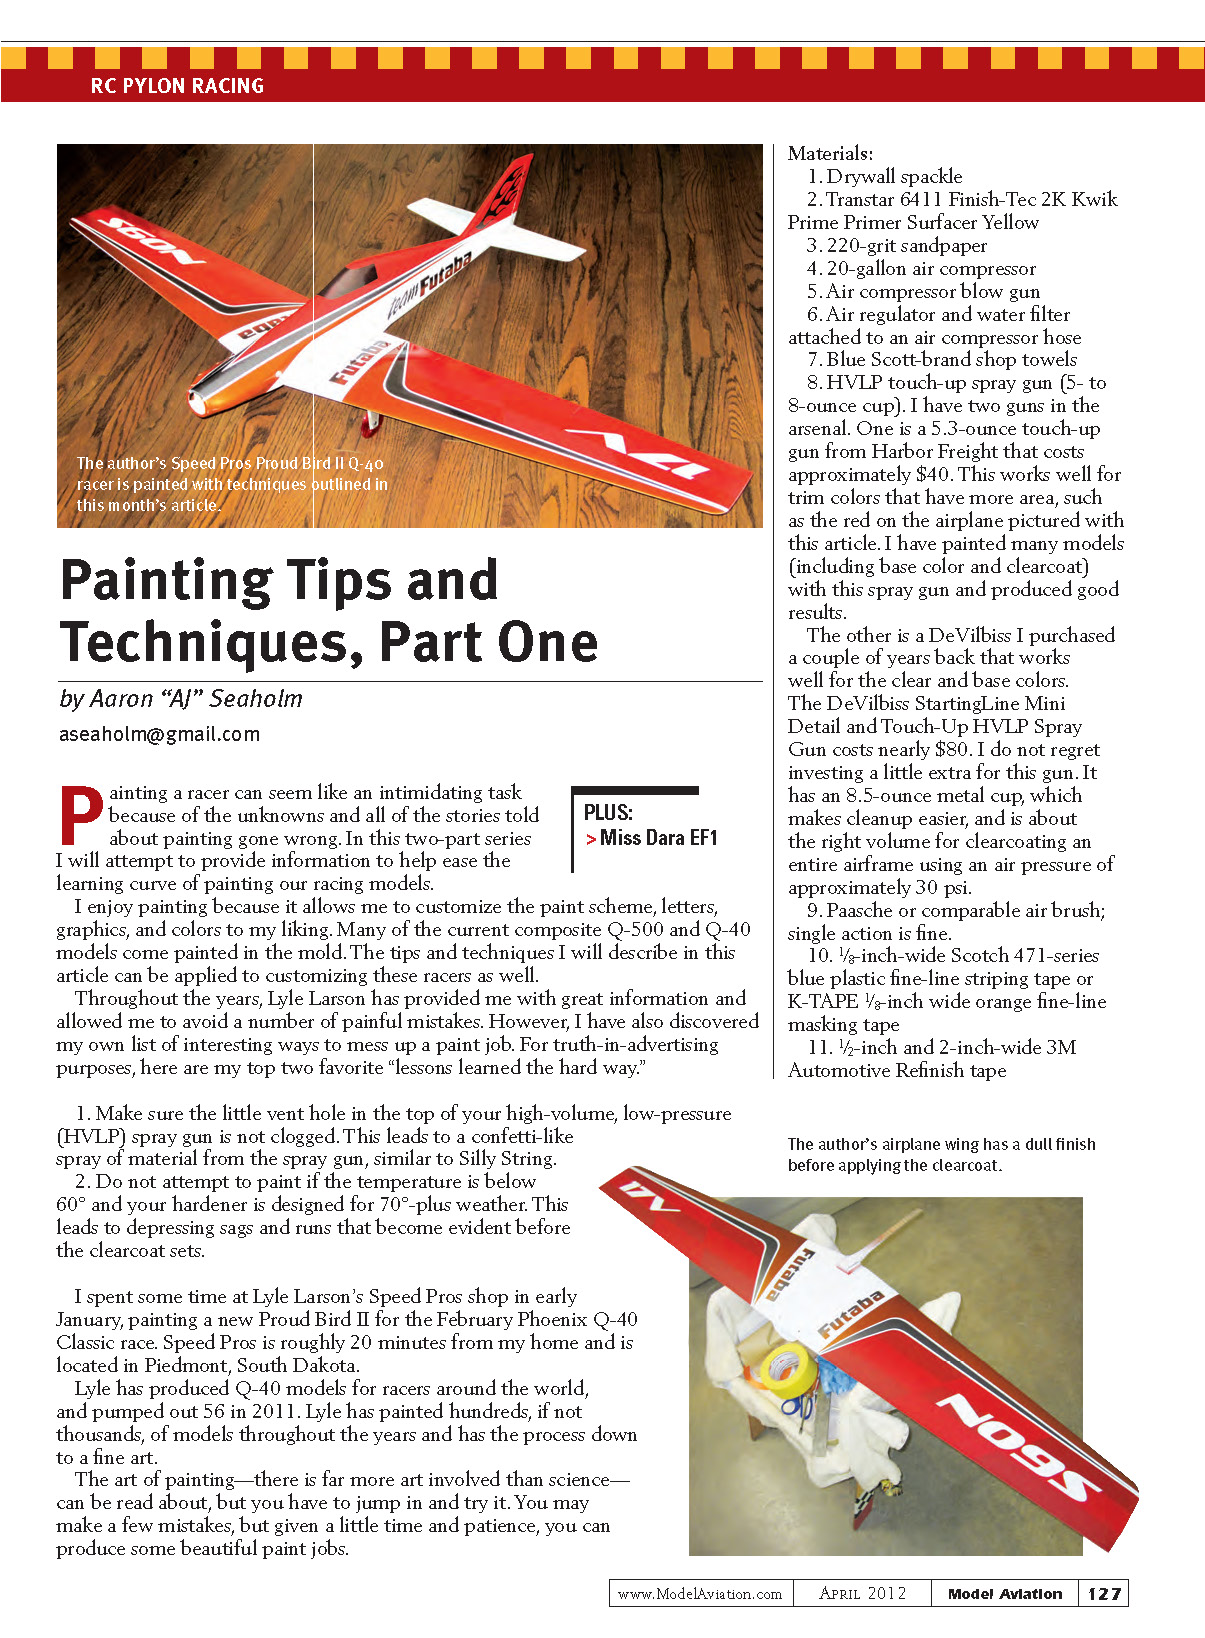
- HVLP touch-up spray gun (5- to 8-ounce cup). I have two guns in the arsenal. One is a 5.3-ounce touch-up gun from Harbor Freight that costs approximately $40. This works well for trim colors that have more area, such as the red on the airplane pictured with this article. I have painted many models (including base color and clearcoat) with this spray gun and produced good results.
The other is a DeVilbiss I purchased a couple of years back that works well for the clear and base colors. The DeVilbiss StartingLine Mini Detail and Touch-Up HVLP Spray Gun costs nearly $80. I do not regret investing a little extra for this gun. It has an 8.5-ounce metal cup, which makes cleanup easier, and is about the right volume for clearcoating an entire airframe using an air pressure of approximately 30 psi.
- Paasche or comparable airbrush; single action is fine.
- 1/8-inch-wide Scotch 471-series blue plastic fine-line striping tape or K-TAPE 1/8-inch-wide orange fine-line masking tape
- 1/2-inch and 2-inch-wide 3M Automotive Refinish tape
- GerberMask Ultra stencil material, cut with your numbers and graphics. Jim Allen, from Fast Lane Graphics near Phoenix, cuts stencils at a reasonable price.
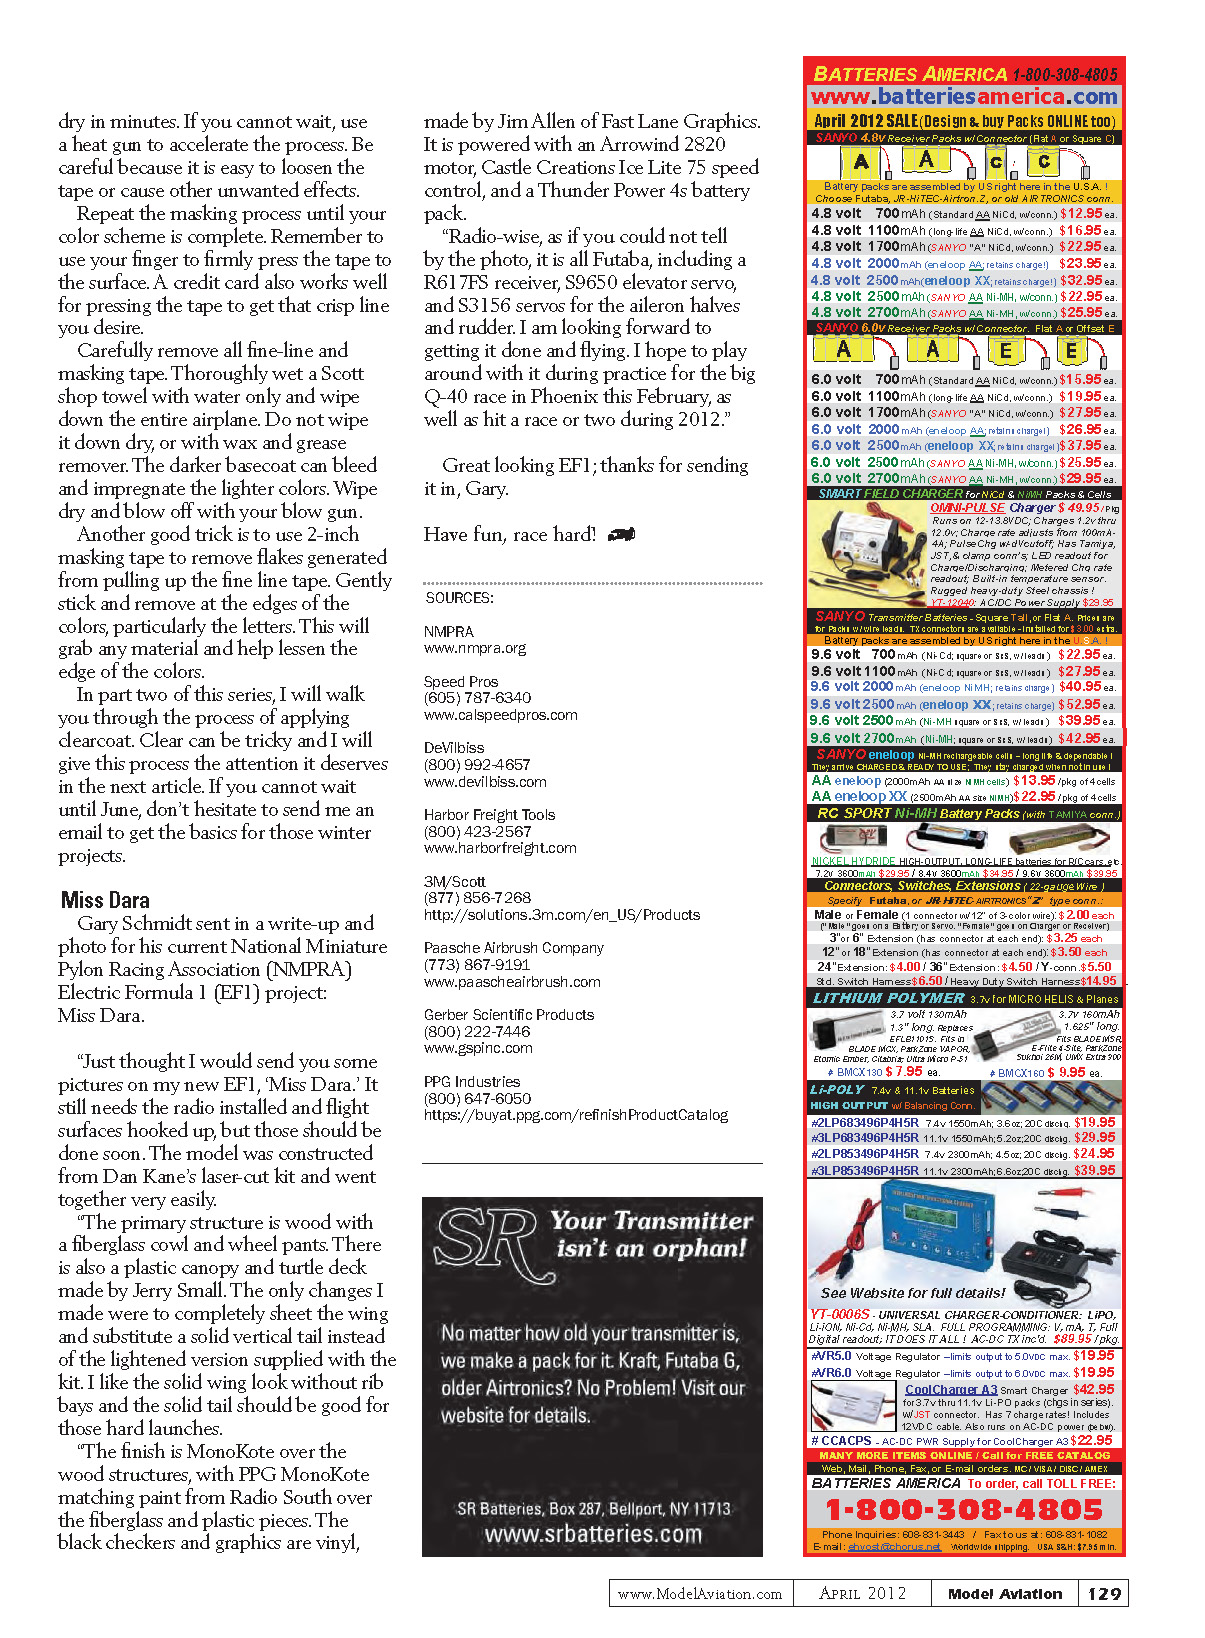
- PPG Deltron (DBU) and activator or PPG ShopLine basecoat paints. During my visit to Lyle’s shop, we painted two Proud Birds; he used ShopLine and I used DBU. The ShopLine went on thinner and only needed lacquer thinner to reduce, while the DBU requires an activating reducer.
The lacquer-thinner reduction of the ShopLine series allows the excess to be poured back into the can, which saves on waste. These paints are not cheap; minimizing waste is definitely a good thing. I plan to begin replacing my exhausted DBU supply with PPG ShopLine basecoat in the future.
- Lacquer thinner for gun cleanup and reducing ShopLine basecoats
- Clearcoat, 630 ShopLine clear or PPG DC3000
- JC605 basecoat blender by PPG ShopLine
- Heat gun
After you have secured the materials — and recovered from the price tag — it is time to start. Keep in mind that even with the minimum pint for your base color, half pints for trim colors, and a quart of clear, you have purchased roughly enough paint for a dozen models. The initial investment for the materials will be in the $500-plus range.
Surface preparation
To prepare the model for painting, use drywall spackling and smear the non-painted fiberglass areas. Thinning the spackling with water makes this process easier. Allow the coating to dry and then use 220-grit sandpaper to sand away the excess material.
If you look closely, you will see many pinholes full of white spackling. Wipe the fuselage down with a paper towel and spray a liberal coat of primer with your HVLP spray gun. Sand the primer down with 220-grit sandpaper until the fiberglass begins to show through the primer. Primer is heavy and can add substantial weight if not removed from the airframe.
Basecoat and trim colors
With the surface prepared, it is time to spray the base color over the entire airframe. Blow off the fuselage and wing with the blow gun to get the dust out of those cracks and crevices. Wipe all the surfaces down with a Scott-brand shop towel and blow off the fuselage again.
Be careful not to get the blow gun too close to the skinned hinge lines of the tail and wing. Excess pressure that builds up in the interior of a hollow composite structure can lead to delaminating skins off the spars.
Spray the entire airframe with basecoat and apply just enough paint to get a uniform color. The first time you spray basecoat, you will notice the shine dulls rapidly as the paint dries. This is normal and usually only takes a few minutes. Focus on applying a uniform color and do not worry about the sheen. The clearcoat will provide the shine for the basecoat/clearcoat paint system.
Set your air regulator to approximately 30 psi for shooting the basecoat and use your HVLP touch-up gun. If you see a small pinhole that was missed with the initial spackling and primer step, use your finger to fill in the blemish with spackling and shoot some basecoat over the top of the area — another Lyle trick.
After it’s dry (usually 15 to 30 minutes maximum; less if you dry with a heat gun), mask out your paint scheme with 1/8-inch fine-line tape. Apply the GerberMask stencils for numbers and other graphics.
I typically put the wing on the fuselage to ensure the wing stripes have the same offset left and right from the fuselage. When the color scheme masking is complete, mask off the area not needing color using 3/4-inch and 2-inch-wide 3M Automotive Refinish tape and paint your first trim color.
For smaller stripes, use your airbrush to apply the color. Use a tack cloth and blow off the surface with your air compressor blow gun before shooting the color. These basecoat colors will be dry in minutes. If you cannot wait, use a heat gun to accelerate the process. Be careful because it is easy to loosen the tape or cause other unwanted effects.
Repeat the masking process until your color scheme is complete. Remember to use your finger to firmly press the tape to the surface. A credit card also works well for pressing the tape to get that crisp line you desire.
Carefully remove all fine-line and masking tape. Thoroughly wet a Scott shop towel with water only and wipe down the entire airplane. Do not wipe it down dry, or with wax and grease remover. The darker basecoat can bleed and impregnate the lighter colors. Wipe dry and blow off with your blow gun.
Another good trick is to use 2-inch masking tape to remove flakes generated from pulling up the fine-line tape. Gently stick and remove at the edges of the colors, particularly the letters. This will grab any material and help lessen the edge of the colors.
In part two of this series, I will walk you through the process of applying clearcoat. Clear can be tricky and I will give this process the attention it deserves in the next article. If you cannot wait until June, don't hesitate to send me an email to get the basics for those winter projects.
Miss Dara
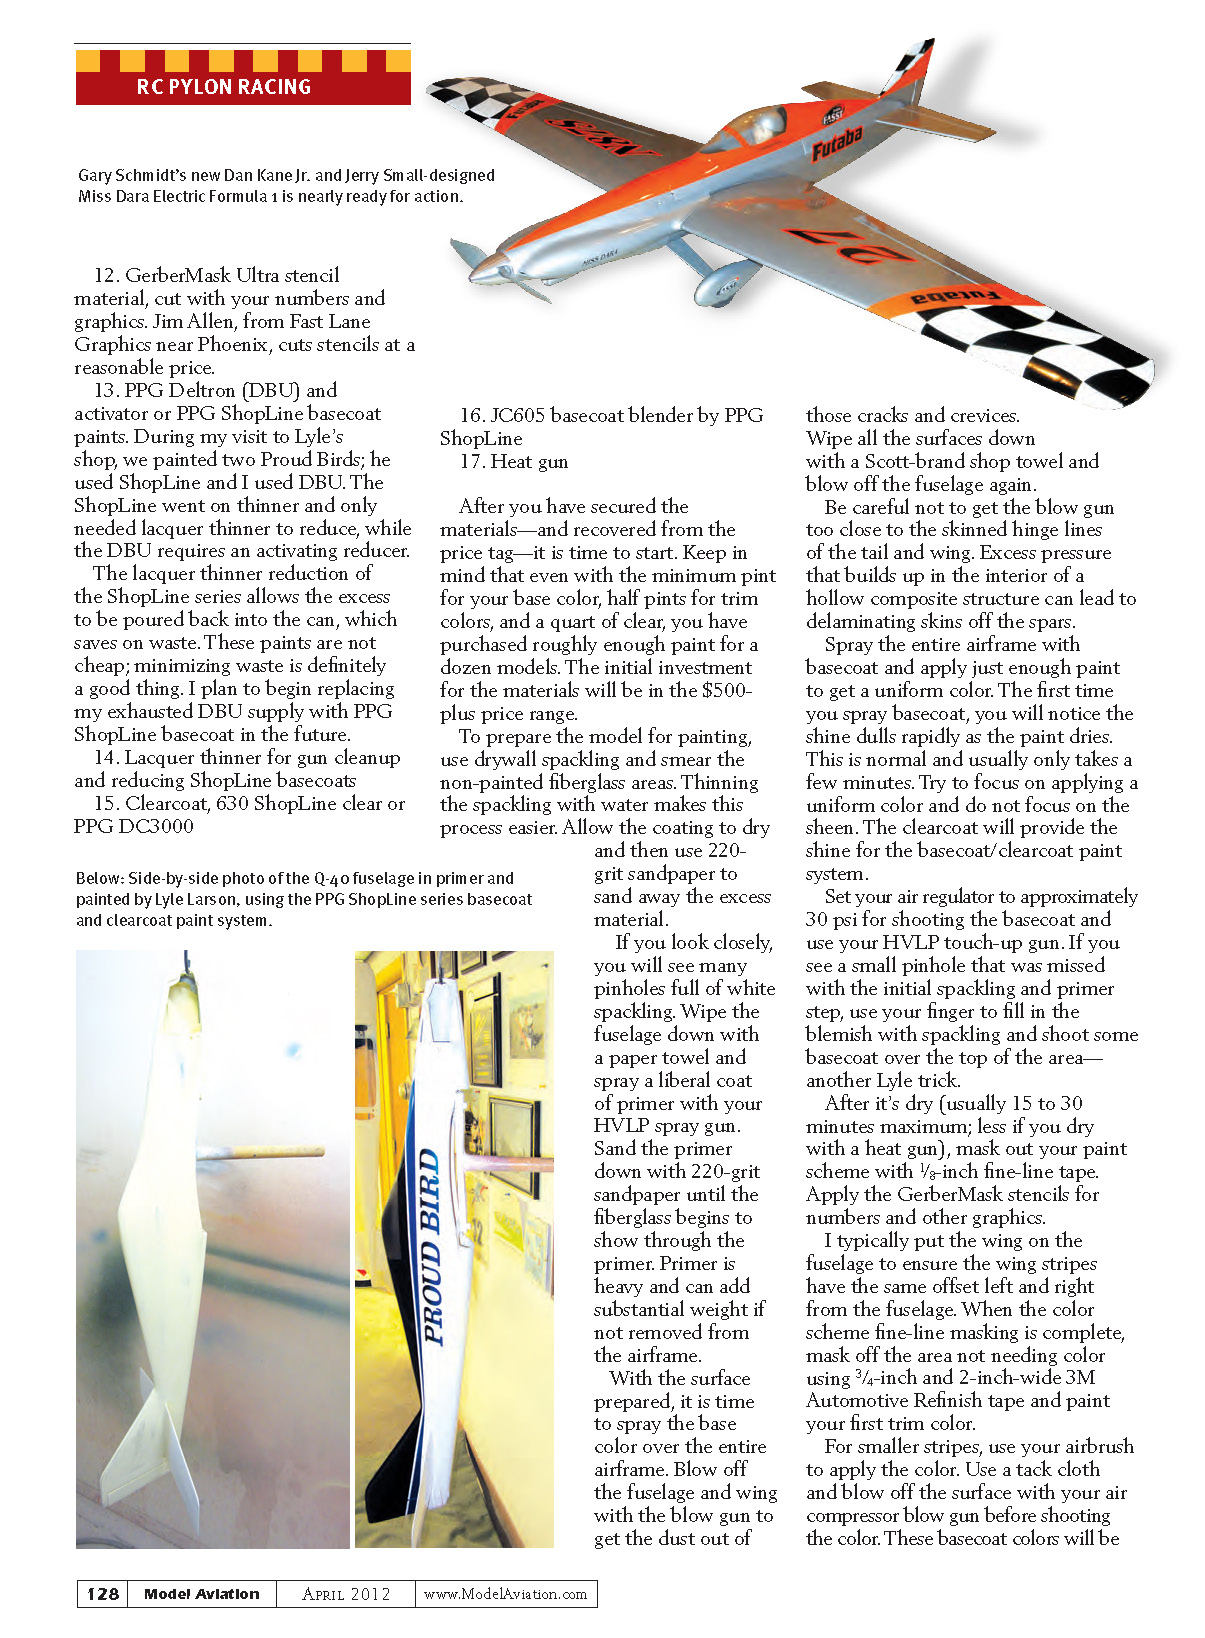
Gary Schmidt sent in a write-up and photo for his current National Miniature Pylon Racing Association (NMPRA) Electric Formula 1 (EF1) project: Miss Dara.
"Just thought I would send you some pictures on my new EF1, 'Miss Dara.' It still needs the radio installed and flight surfaces hooked up, but those should be done soon. The model was constructed from Dan Kane's laser-cut kit and went together very easily.
"The primary structure is wood with a fiberglass cowl and wheel pants. There is also a plastic canopy and turtle deck made by Jerry Small. The only changes I made were to completely sheet the wing and substitute a solid vertical tail instead of the lightened version supplied with the kit. I like the solid wing look without rib bays and the solid tail should be good for those hard launches.
"The finish is MonoKote over the wood structures, with PPG MonoKote matching paint from Radio South over the fiberglass and plastic pieces. The black checkers and graphics are vinyl, made by Jim Allen of Fast Lane Graphics. It is powered with an Arrowind 2820 motor, Castle Creations Ice Lite 75 speed control, and a Thunder Power 4s battery pack.
"Radio-wise, as if you could not tell by the photo, it is all Futaba, including a R617FS receiver, S9650 elevator servo, and S3156 servos for the aileron halves and rudder. I am looking forward to getting it done and flying. I hope to play around with it during practice for the big Q-40 race in Phoenix this February, as well as hit a race or two during 2012."
Great looking EF1; thanks for sending it in, Gary.
Have fun, race hard!
Sources
- NMPRA — www.nmpra.org
- Speed Pros — (605) 787-6340, www.calspeedpros.com
- DeVilbiss — (800) 992-4657, www.devilbiss.com
- Harbor Freight Tools — (800) 423-2567, www.harborfreight.com
- 3M/Scott — (877) 856-7268, http://solutions.3m.com/en_US/Products
- Paasche Airbrush Company — (773) 867-9191, www.paascheairbrush.com
- Gerber Scientific Products — (800) 222-7446, www.gspinc.com
- PPG Industries — (800) 647-6050, https://buyat.ppg.com/refinishProductCatalog
Transcribed from original scans by AI. Minor OCR errors may remain.

