
RC Pylon Racing — June 2012
Congratulations to Gary and Jim on a hard-fought, well-deserved win. Gary mentioned he had been trying to win this contest for 15 years.
Top finishers and highlights
- Second place: (pilot) with perfect calling by teammate Scott Causey — quickest time 1:01.20, one point behind Gary. Scott did not call a cut all weekend and helped produce 1:01 times in five or six of eight rounds. Thanks, Missile.
- Third place: Ben Jones (United Kingdom) — best time 1:03.64. Ben showed his FAI F3D flying skills transfer to head-to-head racing.
- Fourth place: Dan Kane — won a thrilling flyoff over Rusty Van Baren with a time of 1:03.27. Dan had a 50-foot lead down the backstretch on the final lap; Rusty closed it to less than an airplane length.
- Fifth place: Rusty Van Baren — 1:03.57.
- Sixth place: Tony Lopez, caller Gino Del Ponte — Tony’s Strega was very consistent; quickest time 1:01.68.
There was a five-way tie for seventh place, decided by two rounds of flyoffs. Jim Allen and Chuck Andraka raced wingtip to wingtip for 10 laps during Heat 1; Jim’s wing let go and folded on the final lap. In the second heat, Lyle Larson, Tom Scott, and Gino Del Ponte squared off; Gino cut early and pulled out, Tom and Lyle each cut once, and Lyle secured the heat card.
Lyle and Chuck put on another great show in the final flyoff for seventh place:
- Seventh: Lyle Larson — 1:01.96
- Eighth: Chuck Andraka — 1:02.12
- Ninth: Tom Scott — 1:03.75
- Tenth: Gino Del Ponte — 1:01.11
Fast Time
Fast Time for the contest went to the pilot/caller team Dub Jett and John Shannon with a time of 1:01.03. Dub recorded this time in a heat against the author, taking a point by the length of a fuselage and nailing Fast Time.
Well done, Dub and John.
Until next time: race hard and have fun.
Sources
- National Miniature Pylon Racing Association — www.nmpra.org
- SpeedWorld R/C Flyers — www.speedworldrcf.com
---
Applying Clearcoat (Part Two)
In Part Two I walk through applying clearcoat, which is more challenging than basecoat. This final coat will make or break your finish. Before describing technique, visualize spraying clearcoat from your HVLP spray gun as tiny droplets being squirted onto the surface. The goal is to spray enough material to turn those droplets into a solid coating — commonly called flowing. It’s easy to go from droplets to a glossy coating to sagging from too much material. This is the art of spraying clear: use good urethane clears (630 Shop-Line clear or PPG DC3000) and plenty of practice.
Preparatory steps
- Start with a thoroughly finished basecoat (see Part One).
- Wet down a Scott shop towel with water and wipe the entire airplane. Do not wipe dry or use wax-and-grease remover; darker basecoat colors can bleed into lighter ones.
- Wipe dry and blow off any dust with your blow gun.
- Use 2-inch masking tape to remove flakes from pulling up fine-line tape — gently stick and remove at color edges (especially letters) to grab loose material and dull the edges.
- Use a tack cloth to wipe down surfaces and blow off the airframe again.
Basecoat blender and sanding
- Prepare JC605 Basecoat blender (PPG Shop-Line) and spray a coat across the surfaces. Good lighting helps: when the clear looks like glass, stop. Don’t make another pass.
- Allow the basecoat blender to dry or force-dry with a heat gun (use caution — excess heat can damage the finish).
- Wet sand the basecoat blender with 600- to 1,000-grit sandpaper. Some builders (e.g., Lyle Larson) use 400-grit, but starting at 1,000-grit is safer. Take your time.
- The goal is to minimize basecoat edges by sanding the blender. If you see color in the sanding water, stop — you’re close to sanding through the blender and may need to touch up the basecoat.
- The surface will look dull after sanding; that is expected — the final clear will restore gloss.
Dust control and final clearcoat
- Dust, particles, insects, and cobwebs are your enemies. Prepare your garage/booth: sweep thoroughly and consider misting the floor to keep particles from stirring up while you spray.
- The clears mentioned dry to a dust-free state in about 5–10 minutes.
- Wipe the model again with a water-moistened Scott shop towel and blow off with your blow gun.
- Apply the final clear (630 Shop-Line clear or PPG DC3000) in controlled passes. Use the light reflection on the surface to judge coverage — stop when the surface looks like glass. Don’t overwork areas or try to perfect them with extra passes.
- Allow sufficient drying time and follow manufacturer directions for force-drying if needed.
Notes: Practice is crucial. Learning to flow the clear without sagging takes time, and good materials help. If you mess up, most problems can be fixed with sanding and re-coating.
---
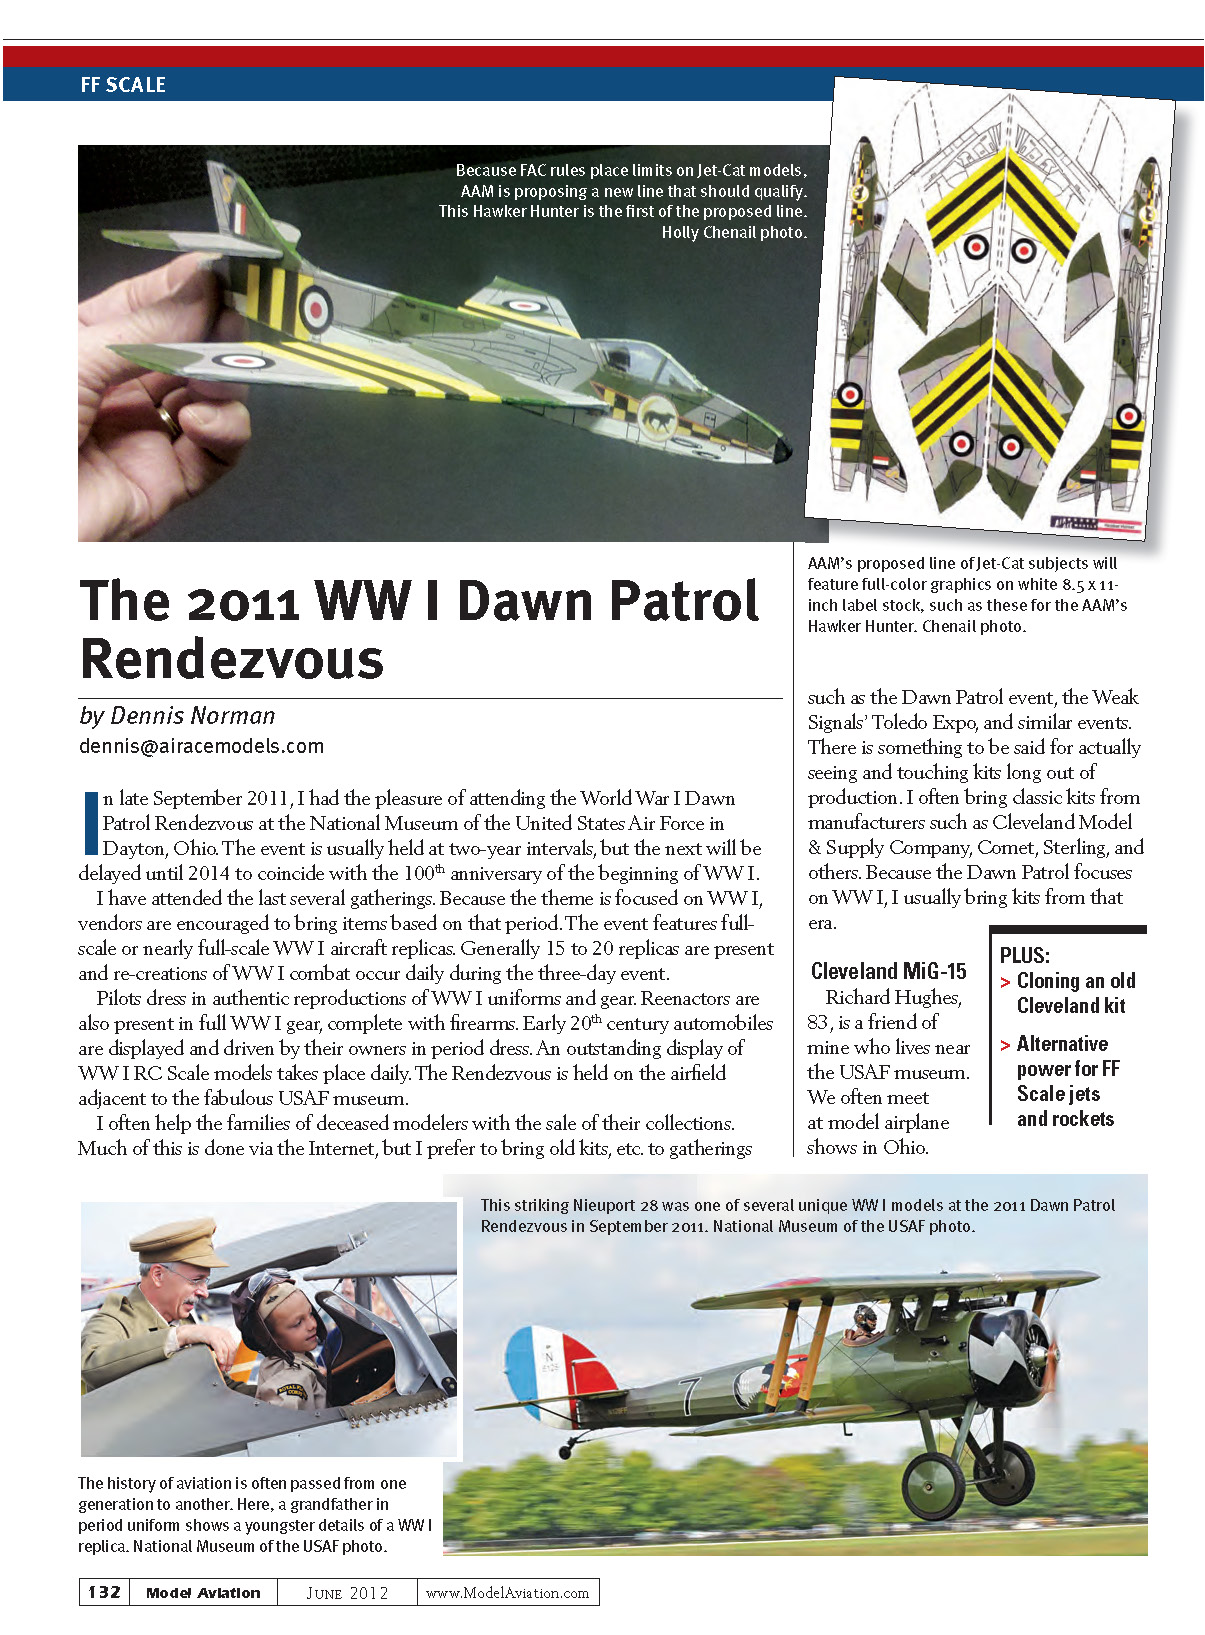
Replicating a 1951 Cleveland Simplex MiG-15
Richard spent much of his life in the U.S. military and has witnessed a lot of aviation history. At the 2011 Dawn Patrol, Richard asked if I had any Cleveland Model & Supply Company kits in my inventory, specifically the 1951 Cleveland Simplex 18-inch Russian MiG-15. I had several Cleveland kits from the early 1950s and promised to check.
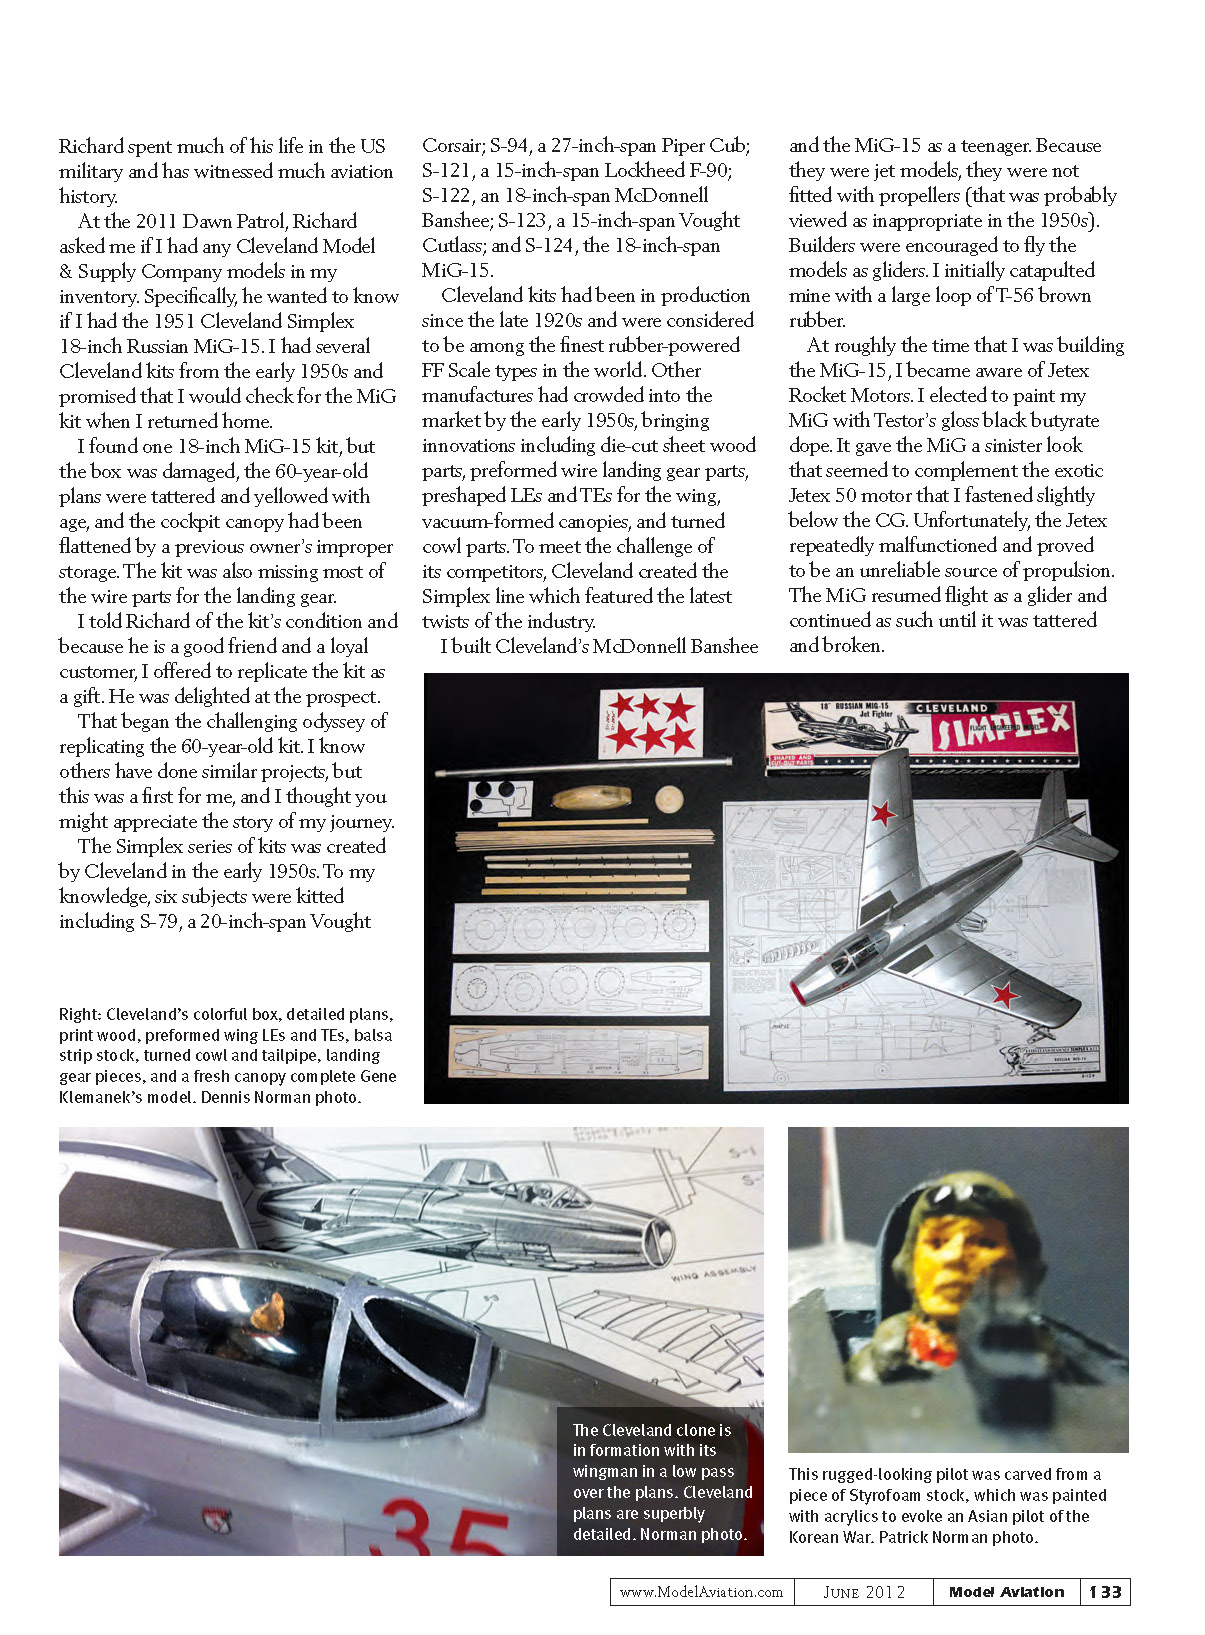
I found one 18-inch MiG-15 kit, but the box was damaged, the 60-year-old plans were tattered and yellowed, the canopy was flattened from improper storage, and most of the wire landing-gear parts were missing. Because Richard is a good friend and loyal customer, I offered to replicate the kit as a gift. He was delighted. That began the challenging odyssey of replicating a 60-year-old kit.
Cleveland Simplex series
The Simplex series (early 1950s) included six subjects to my knowledge:
- S-79: 20-inch-span Vought Corsair
- S-94: 27-inch-span Piper Cub
- S-121: 15-inch-span Lockheed F-90
- S-122: 18-inch-span McDonnell Banshee
- S-123: 15-inch-span Vought Cutlass
- S-124: 18-inch-span MiG-15
Cleveland kits had been produced since the late 1920s and were considered among the finest rubber-powered free-flight scale kits in the world. By the early 1950s other manufacturers introduced innovations — die-cut sheet wood parts, preformed wire landing gear, preshaped leading and trailing edges, vacuum-formed canopies, and turned cowl parts. Cleveland created the Simplex line to incorporate these industry developments.
Personal history with the MiG-15
I built Cleveland’s McDonnell Banshee and the MiG-15 as a teenager. Because they were jet models, they were not fitted with propellers — builders were encouraged to fly them as gliders. I initially catapulted mine with a large loop of T-56 brown rubber.
Around that time I became aware of Jetex rocket motors. I painted my MiG with Testor’s gloss black butyrate dope, which complemented the exotic Jetex 50 motor I fastened slightly below the CG. Unfortunately, the Jetex repeatedly malfunctioned and proved unreliable. The MiG returned to glider flight and continued until it became tattered and broken.
Replicating a 60-year-old kit is a challenge but rewarding for preserving a piece of modeling history.
Transcribed from original scans by AI. Minor OCR errors may remain.

