
RC Pylon Racing
Kurt Bozarth
Your first Pylon race from start to finish
I HAVE RECEIVED numerous E-mail messages from sport fliers requesting information about the basics of RC Pylon Racing. Duane Gall, my predecessor in writing this column, did an excellent job of routinely presenting helpful topics for the new pilot. With this in mind, I would like to follow in Duane’s footsteps.
The following is my attempt to describe a basic three-pole Pylon race from start to finish. I hope this overview will help motivate thousands of you to practice and eventually participate in a Pylon race with less anxiety and more confidence. Ultimately I hope to create a few more Pylon addicts like myself and the rest of the slightly-removed-from-reality Pylon Racing community.
Most clubs will try to have the pylons set up the day before a race to allow for practice. This is usually the case at larger races. Smaller local races may not have the course set up until the morning of the event. If so, you will probably get roughly an hour of practice on the course, assuming that you get to the field bright and early.
Take full advantage of this practice time to fly and learn the geographical feel of the course. It is good to familiarize yourself with landmarks on the horizon to help you orient yourself while flying the course. It is also nice to get rid of some of the jitters.
However, I have seen many crashes during this hour of pre-race practice. Pay attention to local frequency-control procedures and talk to the other racers to ensure that there are no frequency conflicts. A common technique is to announce your frequency to the other racers before turning on for a practice flight. Typically no more than two models will fly the course during practice, with a waiting line forming somewhere back in the pits.
You will need to have your airplane inspected before the race. This is normally done the morning of the contest, simultaneous to registration and practice-flying. Announcements are usually made indicating who is performing these safety inspections and where.
The AMA rule book specifically states which items are to be inspected. They include push/pull rods, control horns and clevises, engine mounts, radio installation, battery capacity, servo installation, hinging, wing mounts, wheels, and signs of structural damage.
You will need to bring your airplane, with the wing removed, to the inspector. After it has passed, the inspector will either write his or her initials on the wing or place a small sticker on it. This will allow all to see that your model has passed inspection. This has often been the high point of the day for me, but I digress.
You also need to register for the race. This includes filling out AMA forms (don’t forget to bring your AMA card!) requesting emergency contact info, class, and frequency. This information will allow the CD to populate the race matrix.
The “race matrix” is used to create the race schedule, preventing frequency conflicts yet maximizing the number of different racers to fly against. It’s no fun (well, less fun; racing is always fun) to race against the same pilots heat after heat. The race matrix attempts to prevent this, but there are only so many racers to compete against at smaller races.
The CD will announce when the race schedule has been posted and when the first heat will be flown. Most local races consist of five or six rounds. Each round consists of several heats, depending on the number of entrants. At the larger races, a maximum of four models will race in a heat; smaller races may only have three in a heat.
It will be up to you to keep track of when your heat is up. Some racers write their round/heat assignments on their model’s wing with an erasable marker. Sometimes a cheat sheet is given to each contestant with his or her round/heat assignments printed on it. Smaller clubs may simply post the schedule somewhere for all to see.
Shortly after the schedule has been posted, the CD will announce the start of a pilots’ meeting. He or she will review safety, race, and emergency procedures, as well as items unique to the field. The CD will also discuss flag techniques for launching each heat and answer questions. These meetings usually take approximately 15 minutes and are crucial, so listen up. After the meeting is finished, you will probably have no more than 15 minutes until the first heat.
Take the next few minutes to check out your airplane. Inspect the glow plug, battery, propeller, and your model’s overall condition.
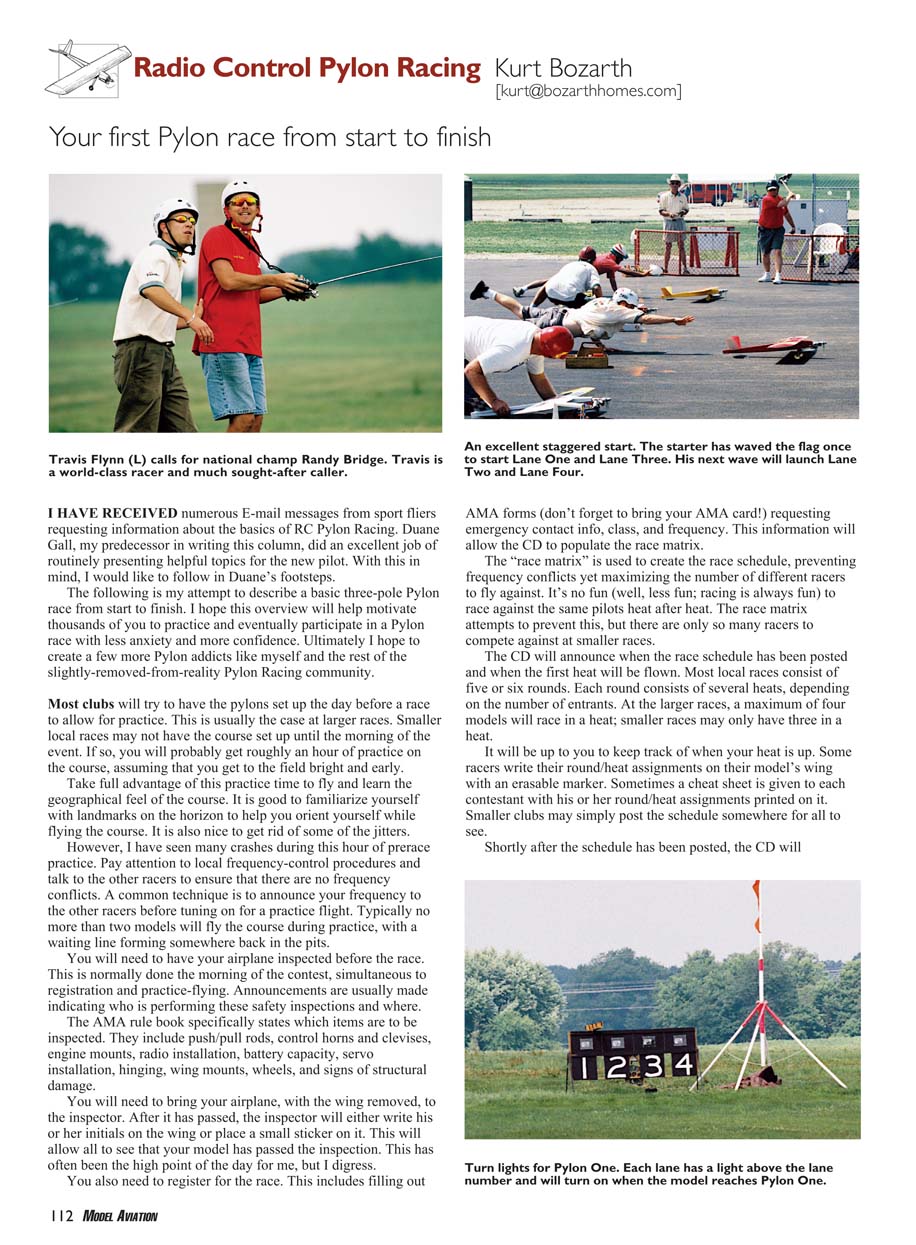
Make sure your flight box has what you need: a glow-plug igniter, a starter, an extra propeller, an extra plug (you did remember to check your glow plug, didn’t you?), a glow-plug wrench, a propeller wrench, and your hard hat. You will probably be asked to put your transmitter in the impound area.
Fuel is supplied at the race. Most contest procedures require you to fuel up your model at the fueling station and then leave it there until you step to the flightline. This is to ensure everyone uses the fuel provided.
When it’s time for your heat, grab your flight box, airplane, transmitter, and caller (helper), and head toward the flightline. Don’t forget your hard hat.
This is when the butterflies start to swirl. You will also swear at this point that you are not ready, your airplane isn’t trimmed, and you’ve spent way too much money on this hobby to give it all away in a midair!
Don’t worry; all these feelings will be gone shortly. But like any good addiction, they’ll be back!
When you arrive at the flightline, put your model in the assigned lane position. (The CD will have discussed lane assignments during the pilots’ meeting.) Identify your model to racecourse officials. Larger races use fluorescent-colored stickers on the wing for identification purposes. Smaller local races rely on old-fashioned eyeballs and the officials’ abilities to distinguish lines and colors on each airplane. The starter will walk you through this procedure.
The racecourse officials are interested in seeing the top and the bottom of your model. Each airplane, starting with Lane One, will be held up at different times, allowing the timer/lap counters and cut judges to identify every competitor’s model and associate it with the correct lane assignment.
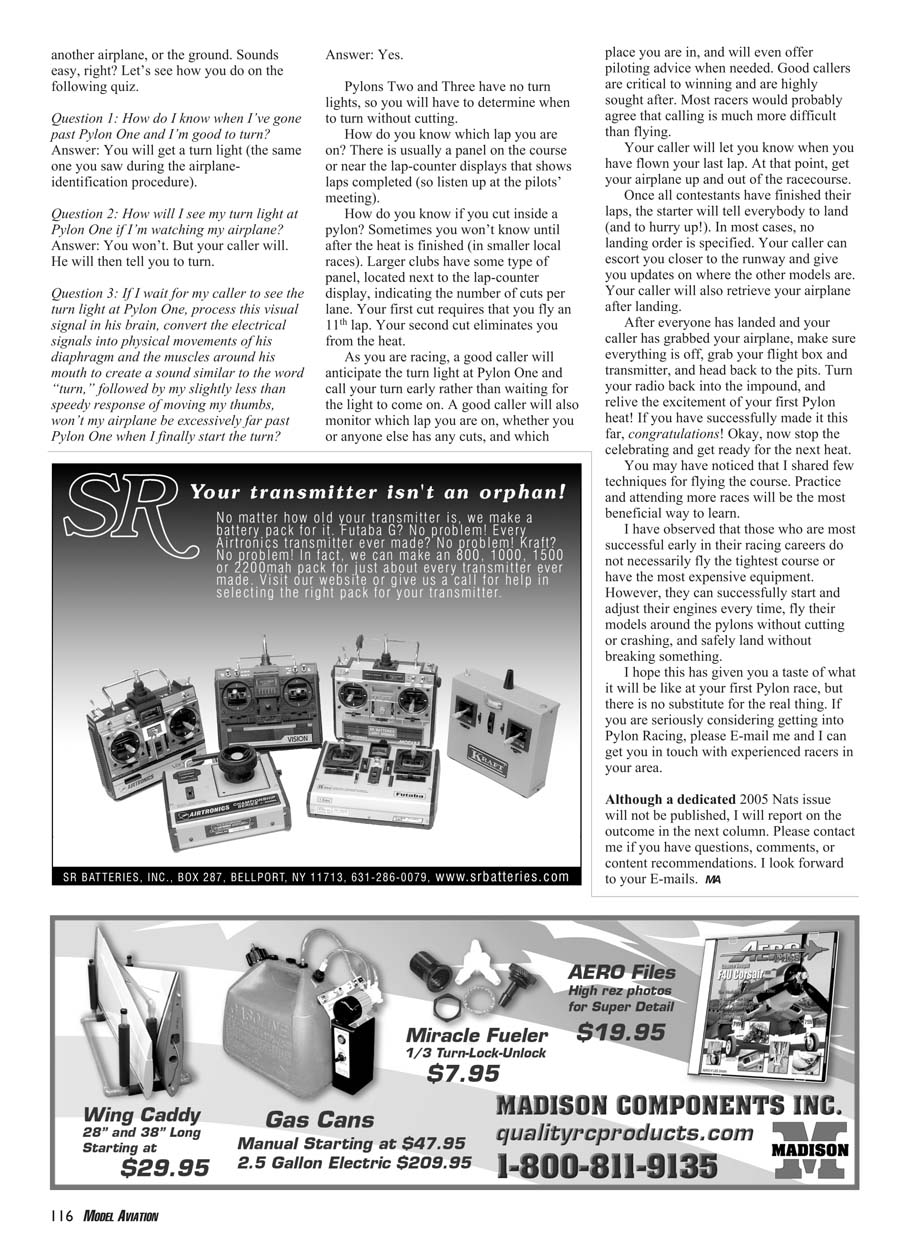
The starter will let you know when a positive identification has been made. The cut judges at Pylon One normally respond by lighting up the appropriate turn light (each lane has a different-colored light or a different light location). The caller is often the one who holds up the model during this ID process. This gives the pilot a chance to catch his or her breath. But that will be gone soon.
Once the ID process is complete, the starter will verify that all transmitters and receivers are on by asking to see movement of the controls of each airplane. After this, he or she will announce that you are “on the clock.” This means you have 60 seconds (time is specific to each club, so listen up at the pilots’ meeting) until the flag is dropped.
It is usually briefed that if all engines are started and everyone is ready before the said time, the race will start early. Sixty seconds sounds like plenty of time to start an engine and get into position; it is unless you forgot to check your glow plug!
After all pilots have started their engines and claimed their favorite spot of land between pylons Two and Three, the starter may point his flag at every racer as a way of verifying that each pilot is ready. If you are ready, nod your head really big when the starter points at you; just don’t knock your hard hat off.
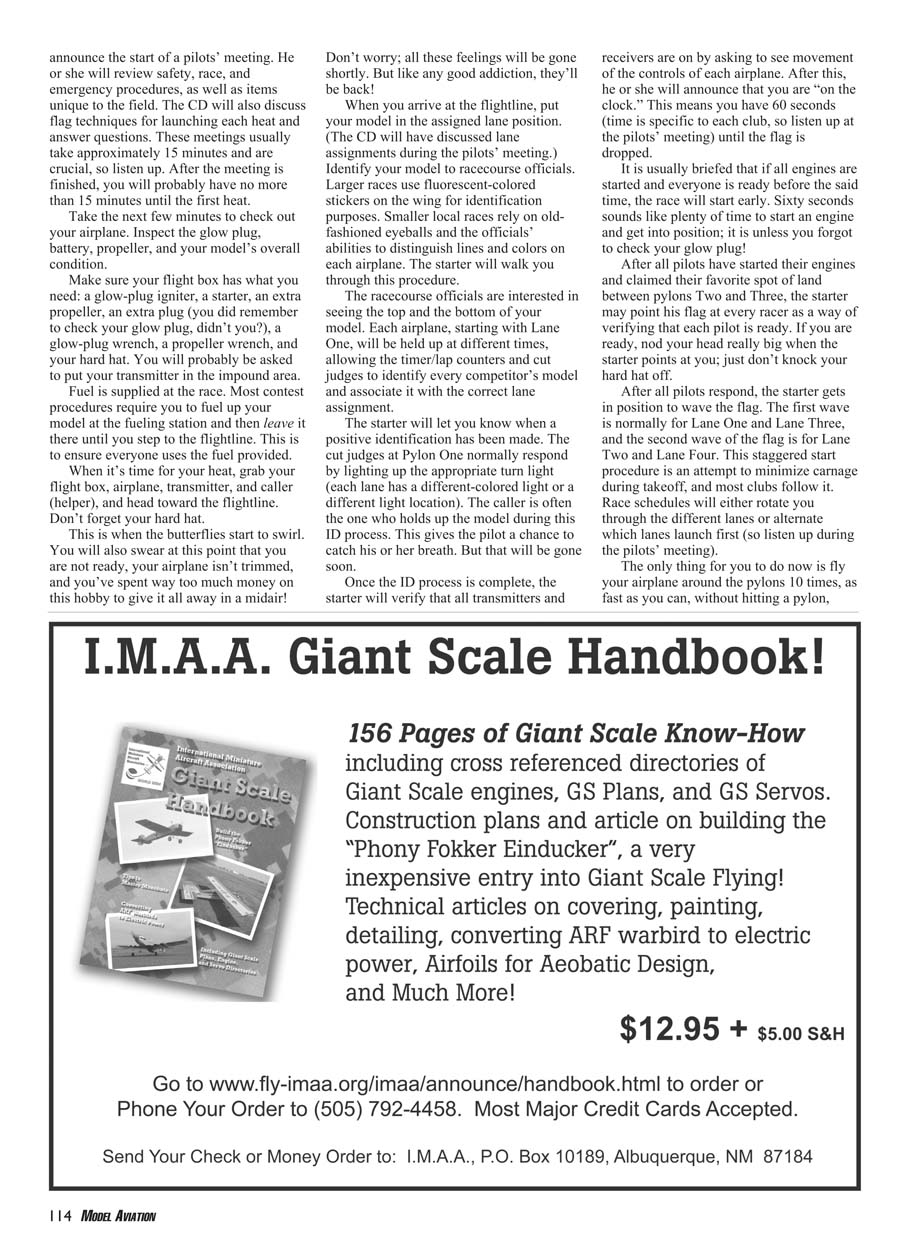
After all pilots respond, the starter gets in position to wave the flag. The first wave is normally for Lane One and Lane Three, and the second wave of the flag is for Lane Two and Lane Four. This staggered start procedure is an attempt to minimize carnage during takeoff, and most clubs follow it. Race schedules will either rotate you through the different lanes or alternate which lanes launch first (so listen up during the pilots’ meeting).
The only thing for you to do now is fly your airplane around the pylons 10 times, as fast as you can, without hitting a pylon, another airplane, or the ground. Sounds easy, right? Let's see how you do on the following quiz.
Question 1: How do I know when I've gone past Pylon One and I'm good to turn? Answer: You will get a turn light (the same one you saw during the airplane-identification procedure).
Question 2: How will I see my turn light at Pylon One if I'm watching my airplane? Answer: You won't. But your caller will. He will then tell you to turn.
Question 3: If I wait for my caller to see the turn light at Pylon One, process this visual signal in his brain, convert the electrical signals into physical movements of his diaphragm and the muscles around his mouth to create a sound similar to the word "turn," followed by my slightly less than speedy response of moving my thumbs, won't my airplane be excessively far past Pylon One when I finally start the turn? Answer: Yes.
Pylons Two and Three have no turn lights, so you will have to determine when to turn without cutting.
How do you know which lap you are on? There is usually a panel on the course or near the lap-counter displays that shows laps completed (so listen up at the pilots' meeting).
How do you know if you cut inside a pylon? Sometimes you won't know until after the heat is finished (in smaller local races). Larger clubs have some type of panel, located next to the lap-counter display, indicating the number of cuts per lane. Your first cut requires that you fly an 11th lap. Your second cut eliminates you from the heat.
As you are racing, a good caller will anticipate the turn light at Pylon One and call your turn early rather than waiting for the light to come on. A good caller will also monitor which lap you are on, whether you or anyone else has any cuts, and which place you are in, and will even offer piloting advice when needed. Good callers are critical to winning and are highly sought after. Most racers would probably agree that calling is much more difficult than flying.
Your caller will let you know when you have flown your last lap. At that point, get your airplane up and out of the racecourse.
Once all contestants have finished their laps, the starter will tell everybody to land (and to hurry up!). In most cases, no landing order is specified. Your caller can escort you closer to the runway and give you updates on where the other models are. Your caller will also retrieve your airplane after landing.
After everyone has landed and your caller has grabbed your airplane, make sure everything is off, grab your flight box and transmitter, and head back to the pits. Turn your radio back into the impound, and relive the excitement of your first Pylon heat! If you have successfully made it this far, congratulations! Okay, now stop the celebrating and get ready for the next heat.
You may have noticed that I shared few techniques for flying the course. Practice and attending more races will be the most beneficial way to learn.
I have observed that those who are most successful early in their racing careers do not necessarily fly the tightest course or have the most expensive equipment. However, they can successfully start and adjust their engines every time, fly their models around the pylons without cutting or crashing, and safely land without breaking something.
I hope this has given you a taste of what it will be like at your first Pylon race, but there is no substitute for the real thing. If you are seriously considering getting into Pylon Racing, please E-mail me and I can get you in touch with experienced racers in your area.
Although a dedicated 2005 Nats issue will not be published, I will report on the outcome in the next column. Please contact me if you have questions, comments, or content recommendations. I look forward to your E-mails. MA
Transcribed from original scans by AI. Minor OCR errors may remain.

