
Unique ways to apply markings to a model
by Stan Alexander [email protected]
Wow! It’s the holiday season again. I hope all of you receive that special scale something you want this year.
I want to discuss starting and finishing a model. Think about the process. If you have an ARF, your choices are limited unless you use your imagination. Many ARFs have identical markings and color schemes. When you see one at the field, you’ve pretty much seen them all. In many cases, you can change the markings and make something slightly different. The best advice I’ve ever received about building a scale aircraft is to obtain your documentation first!
There are many choices for detailing that weren’t available 10 to 20 years ago. You can choose stick-on vinyl letters or markings, or make them from MonoKote—especially if they are a different size than the markings or symbols that are already on the model.
Make a pattern, place the pattern over the base color of MonoKote, then put a new #11 blade in your hobby knife and carefully cut them out. If it’s a simple star-and-bar national marking such as what is on my Hellcat, it’s easy. The aircraft will look more realistic with the correct marking size.
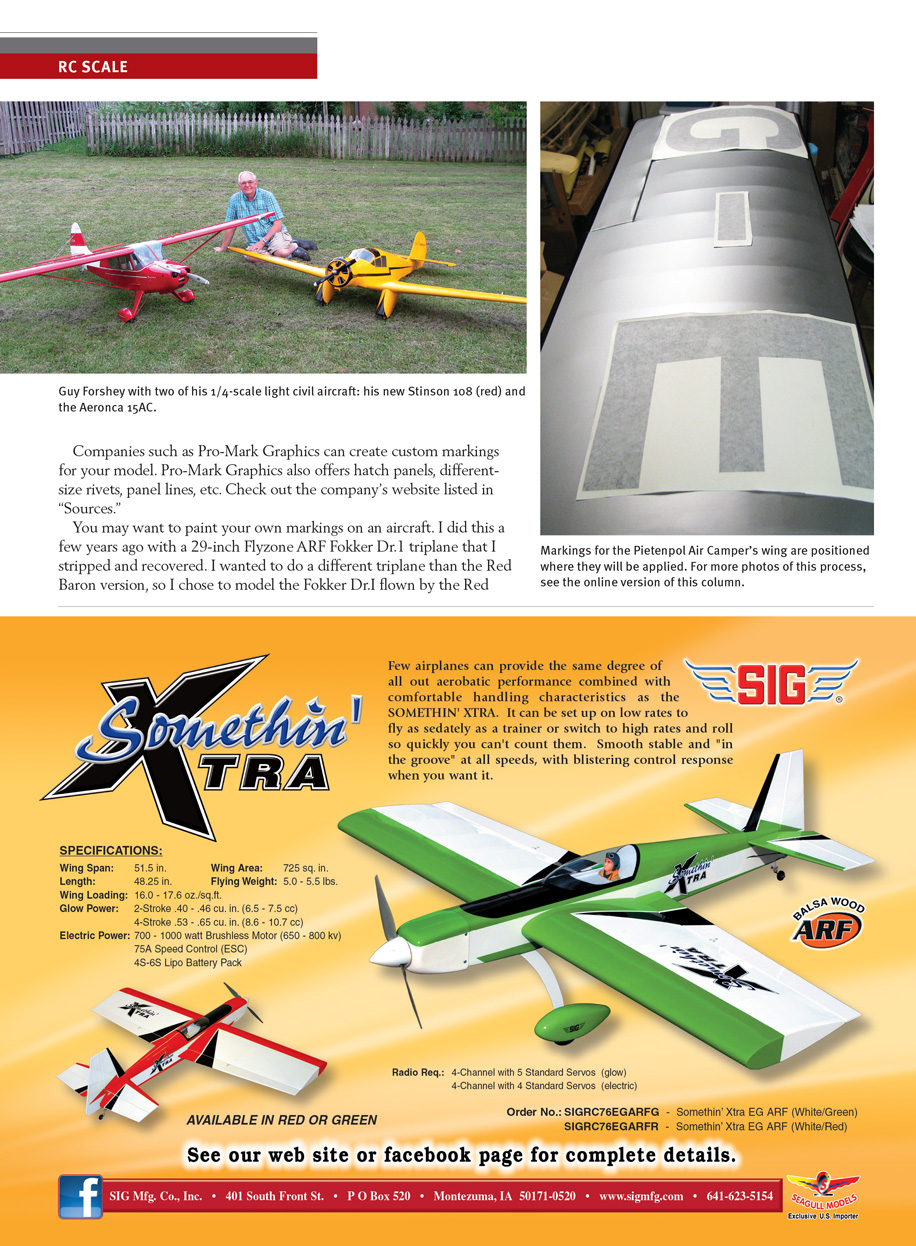
A few years ago I stripped and recovered a 29-inch Great Planes ARF Fokker Dr.I triplane. I wanted to do a different triplane than the Red Baron version, so I chose the Fokker Dr.I flown by the Red Baron’s brother, Lothar von Richthofen. I gathered the paints for the different color scheme and applied them with a brush—that’s the way it was done during World War I. When I was ready for the markings, I made the cross templates and cut them out. I used a #2 pencil with a dull tip and carefully traced the outline on the airplane. I first added the black, then finished the white outlines with a fine, stiff, small artist’s brush. Holding your breath with each brushstroke is a good idea; it steadies the hands.
I’ve seen several scale ARFs that have the markings already applied. This is okay, but many of us want something slightly different. My Hangar 9 P-47 can be made with a choice of four sets of markings from the same fighter group, the Eighth Air Force.
For the Pietenpol Air Camper, I chose to use stick-on vinyl letters. I took photos of the aircraft that I wanted to duplicate to a local printer. The company reviewed the photos, printed off several fonts, and I chose the best. The final font didn’t perfectly match, so the company touched up the letters on the computer and they looked great.
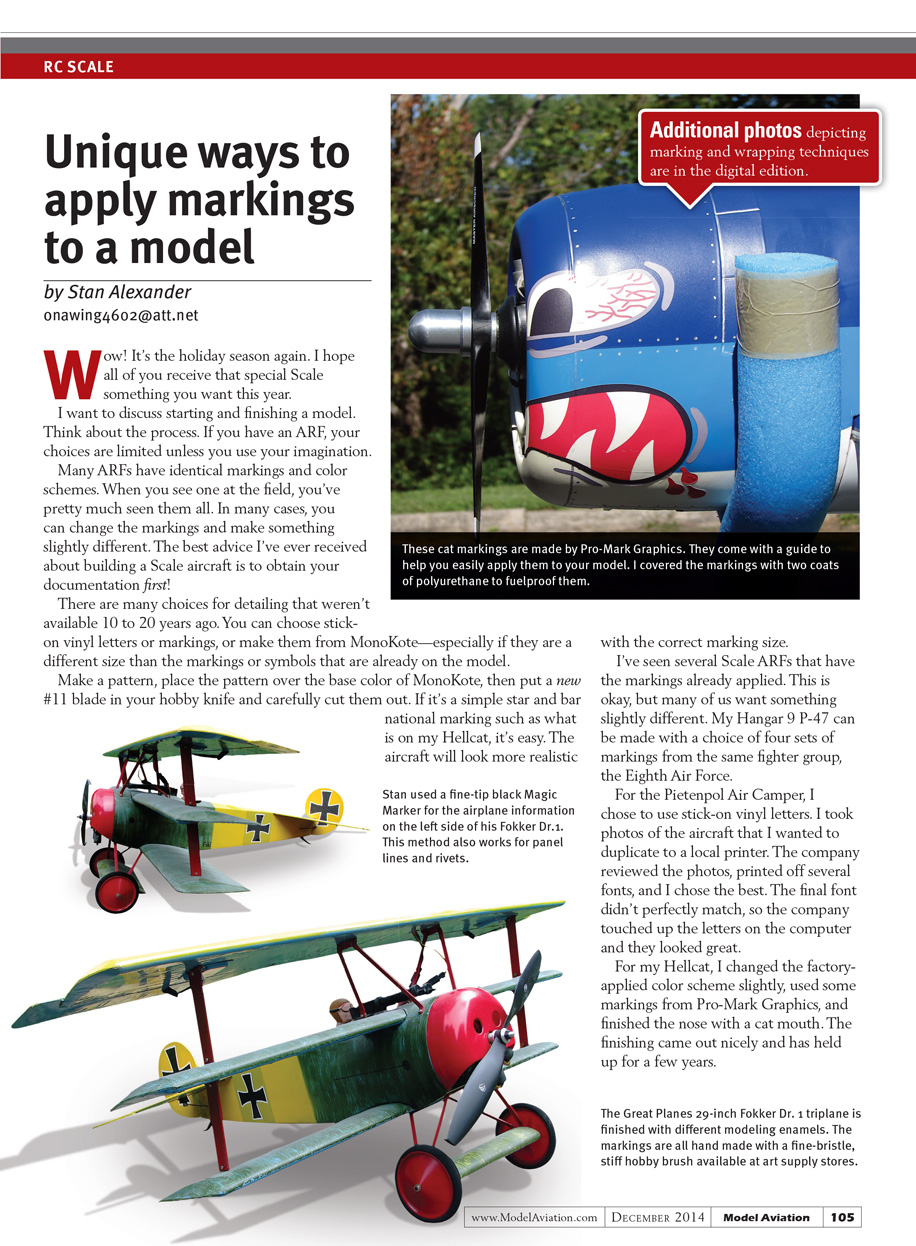
For my Hellcat, I slightly changed the factory-applied color scheme, used some markings from Pro-Mark Graphics, and finished the nose with a cat mouth. The finishing came out nicely and has held up for a few years.
Companies such as Pro-Mark Graphics can create custom markings for your model. Pro-Mark Graphics also offers hatch panels, different-size rivets, panel lines, and other detailing options. Check out the company’s website listed in “Sources.”
Projects by Others
I enjoyed reading about George Maiorana’s C-133A Cargomaster featured in the October issue of MA. It is an impressive aircraft, especially because it was almost entirely scratch-built. George has constructed several large multiengine airplanes over the years, but now exclusively builds electric-powered aircraft. Take a look at the Cargomaster’s building process on the National Association of Scale Aeromodelers (NASA) Flickr photo site; there are more than 1,000 photos of the five-and-a-half-year project.
Another modeler who has been busy is Guy Forshey, who scratch-built a 1/4-scale Aeronca 15AC Sedan. He drew his own plans and gave the aircraft a 112½-inch wingspan. The project took 16 months to build and features the full-scale airplane’s 1949 color scheme. Guy said that the Aeronca is unique because the full-scale aircraft had an all-aluminum wing and a steel-tube-and-fabric fuselage and tail surfaces. Production of the 15AC Sedan ceased in 1951, which marked the end of manufacturing small airplanes for Aeronca.
The model is built from balsa and plywood, and the wings are finished with 1/2-ounce fiberglass cloth and resin. The fuselage and tail surfaces are built into a balsa framework and covered with Sig Koverall. The entire aircraft was painted with Klass Kote epoxy. Panel lines, rivets, and pinked tape add to the airplane’s realism. The instrument panel was crafted as accurately as possible to simulate that of the full-scale aircraft.
Guy finished the model with fiberglass cloth and resin, and formed the cowling and wheel pants using the Styrofoam-and-plaster method. He added an O.S. 1.60 two-stroke engine for power and uses a Futaba seven-channel 2.4 GHz radio system.
Check out the additional photos in the online version of this column on the MA website. Thanks, Guy, for sharing with us.
Fair skies and tailwinds.
SOURCES
- Pro-Mark Graphics
(618) 742-6430 www.pro-mark.com
- NASA
- NASA photos on Flickr
www.flickr.com/photos/99965155@N02
- MA Digital Library
https://library.ModelAviation.com
Transcribed from original scans by AI. Minor OCR errors may remain.

