
RC Scale
Stan Alexander
CHRISTMASTIME is coming up sooner than you think! That means it’s time to go through those catalogs and check or mark anything you, as a modeler, just can’t do without next year and might want Santa to bring you. Usually when I do this, Santa gives me positive results; especially if she can find it at the local hobby shop.
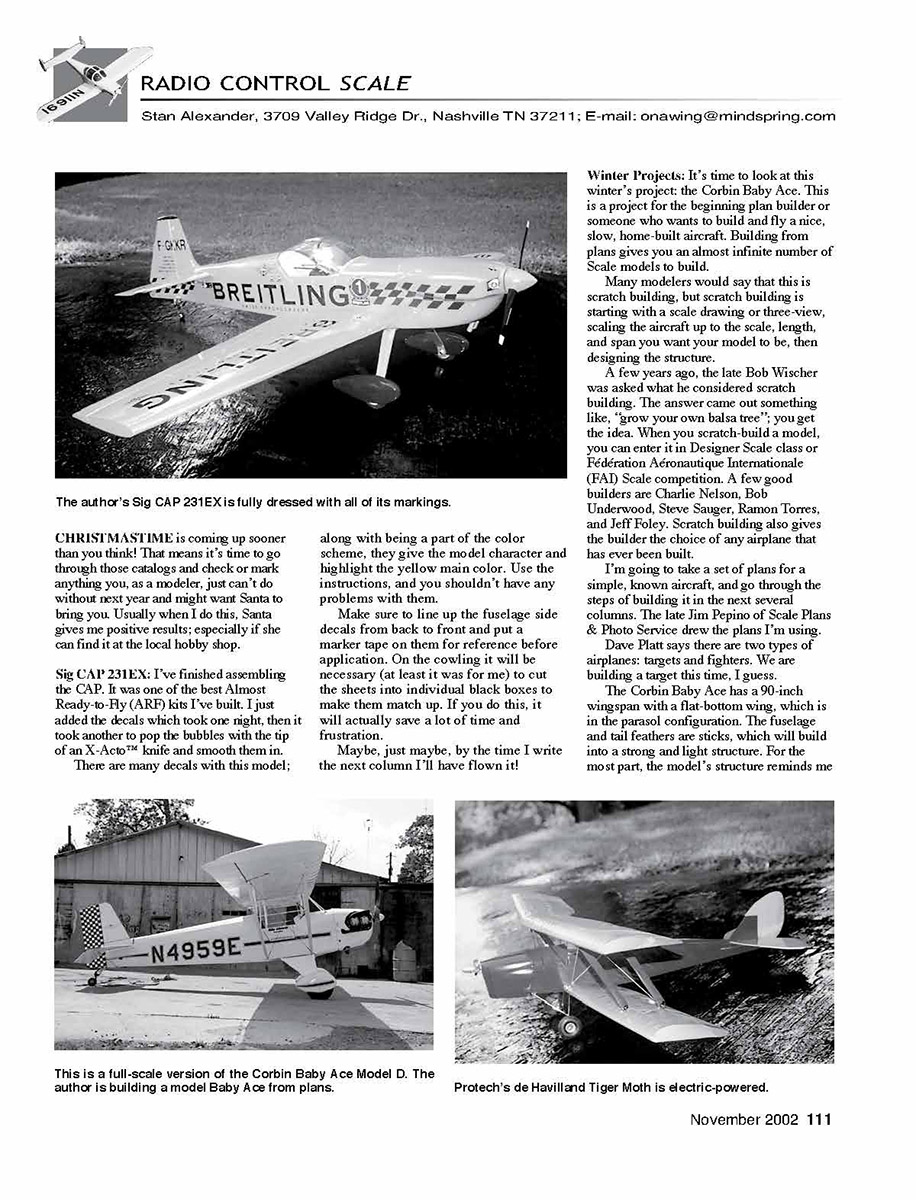
Sig CAP 231EX: I’ve finished assembling the CAP. It was one of the best Almost Ready-to-Fly (ARF) kits I’ve built. I just added the decals which took one night, then it took another to pop the bubbles with the tip of an X‑Acto™ knife and smooth them in. There are many decals with this model, and, along with being a part of the color scheme, they give the model character and highlight the yellow main color. Use the instructions, and you shouldn’t have any problems with them.
Make sure to line up the fuselage side decals from back to front and put a marker tape on them for reference before application. On the cowling it will be necessary (at least it was for me) to cut the sheets into individual black boxes to make them match up. If you do this, it will actually save a lot of time and frustration.
Maybe, just maybe, by the time I write the next column I’ll have flown it!
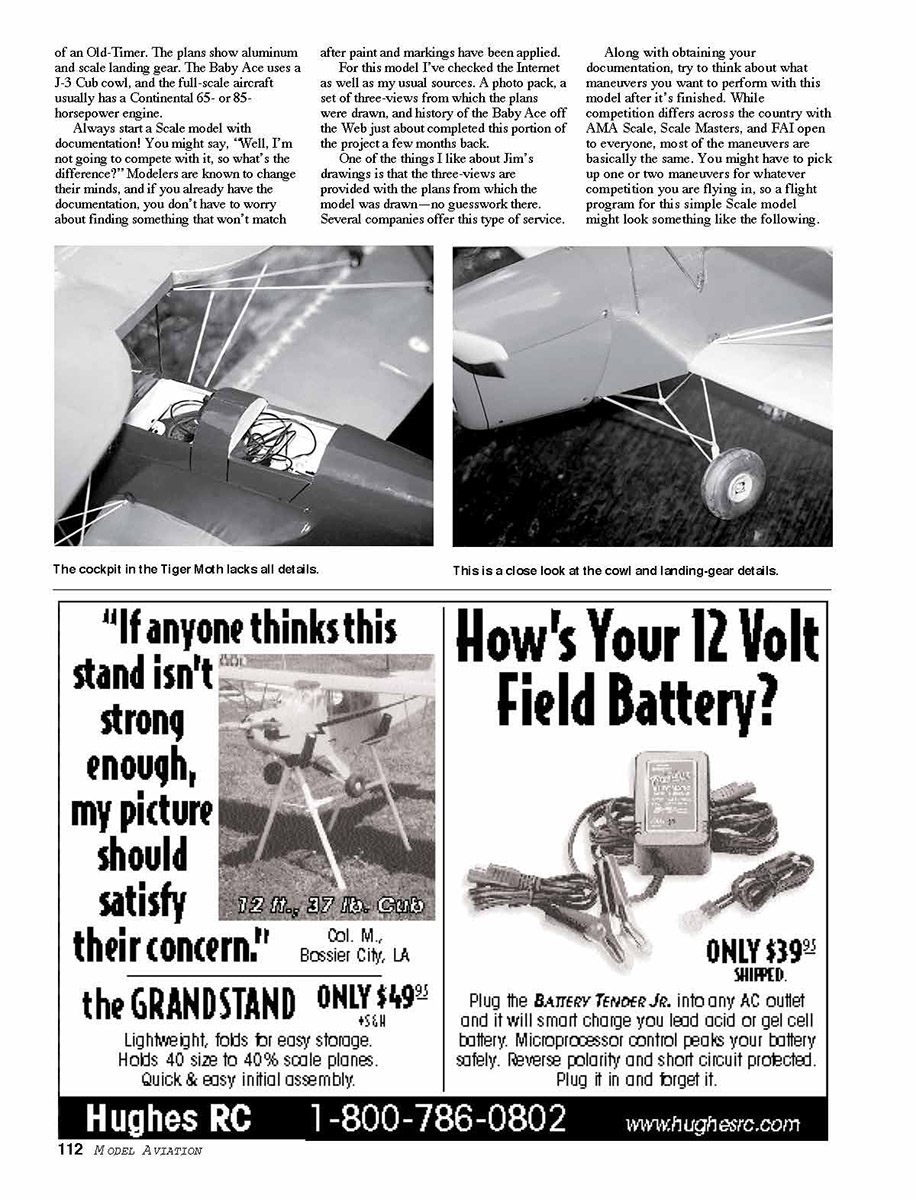
Winter Projects: It’s time to look at this winter’s project: the Corbin Baby Ace. This is a project for the beginning plan builder or someone who wants to build and fly a nice, slow, home-built aircraft. Building from plans gives you an almost infinite number of Scale models to build.
Many modelers would say that this is scratch building, but scratch building is starting with a scale drawing or three-view, scaling the aircraft up to the scale, length, and span you want your model to be, then designing the structure.
A few years ago, the late Bob Wischer was asked what he considered scratch building. The answer came out something like, “grow your own balsa tree”; you get the idea. When you scratch-build a model, you can enter it in Designer Scale class or Fédération Aéronautique Internationale (FAI) Scale competition. A few good builders are Charlie Nelson, Bob Underwood, Steve Sauger, Ramon Torres, and Jeff Foley. Scratch building also gives the builder the choice of any airplane that has ever been built.
I’m going to take a set of plans for a simple, known aircraft, and go through the steps of building it in the next several columns. The late Jim Pepino of Scale Plans & Photo Service drew the plans I’m using.
Dave Platt says there are two types of airplanes: targets and fighters. We are building a target this time, I guess.
The Corbin Baby Ace has a 90-inch wingspan with a flat-bottom wing, which is in the parasol configuration. The fuselage and tail feathers are sticks, which will be built into a strong and light structure. For the most part, the model’s structure reminds me of an Old-Timer. The plans show aluminum and scale landing gear. The Baby Ace uses a J-3 Cub cowl, and the full-scale aircraft usually has a Continental 65- or 85-horsepower engine.
Always start a Scale model with documentation! You might say, “Well, I’m not going to compete with it, so what’s the difference?” Modelers are known to change their minds, and if you already have the documentation, you don’t have to worry about finding something that won’t match after paint and markings have been applied.
For this model I’ve checked the Internet as well as my usual sources. A photo pack, a set of three-views from which the plans were drawn, and history of the Baby Ace off the Web just about completed this portion of the project a few months back.
One of the things I like about Jim’s drawings is that the three-views are provided with the plans from which the model was drawn—no guesswork there. Several companies offer this type of service.
Along with obtaining your documentation, try to think about what maneuvers you want to perform with this model after it’s finished. While competition differs across the country with AMA Scale, Scale Masters, and FAI open to everyone, most of the maneuvers are basically the same. You might have to pick up one or two maneuvers for whatever competition you are flying in, so a flight program for this simple Scale model might look something like the following.
RC Scale
AMA Scale Flight Routine: (The five required maneuvers are denoted by an asterisk)
- Takeoff*
- Fly-By*
- Figure Eight*
- 360° Descending Circle (required in FAI F4 Scale)*
- Touch-and-Go*
- Chandelle (climbing turn)
- Procedure Turn
- Landing*
- Realism in Flight
Of all the parts of a model, building the wings doesn’t thrill me, you probably won’t ever see me build a triplane unless I find a good kit.
It’s a good idea to make kits from the different sections of the model. The fuselage, wing, and tail feathers are separate areas I’ll deal with. If I don’t make a few mistakes on the measurements I’ll be surprised, so I’ll add a little blase to the tool. If you check this out, it really isn’t that expensive; the wing “kit” costs me less than $25 using one of the balsa suppliers listed in the sources.
This model should come out at 13–15 pounds. For power I’ll add an O.S. 120 four-stroke single under the cowl.
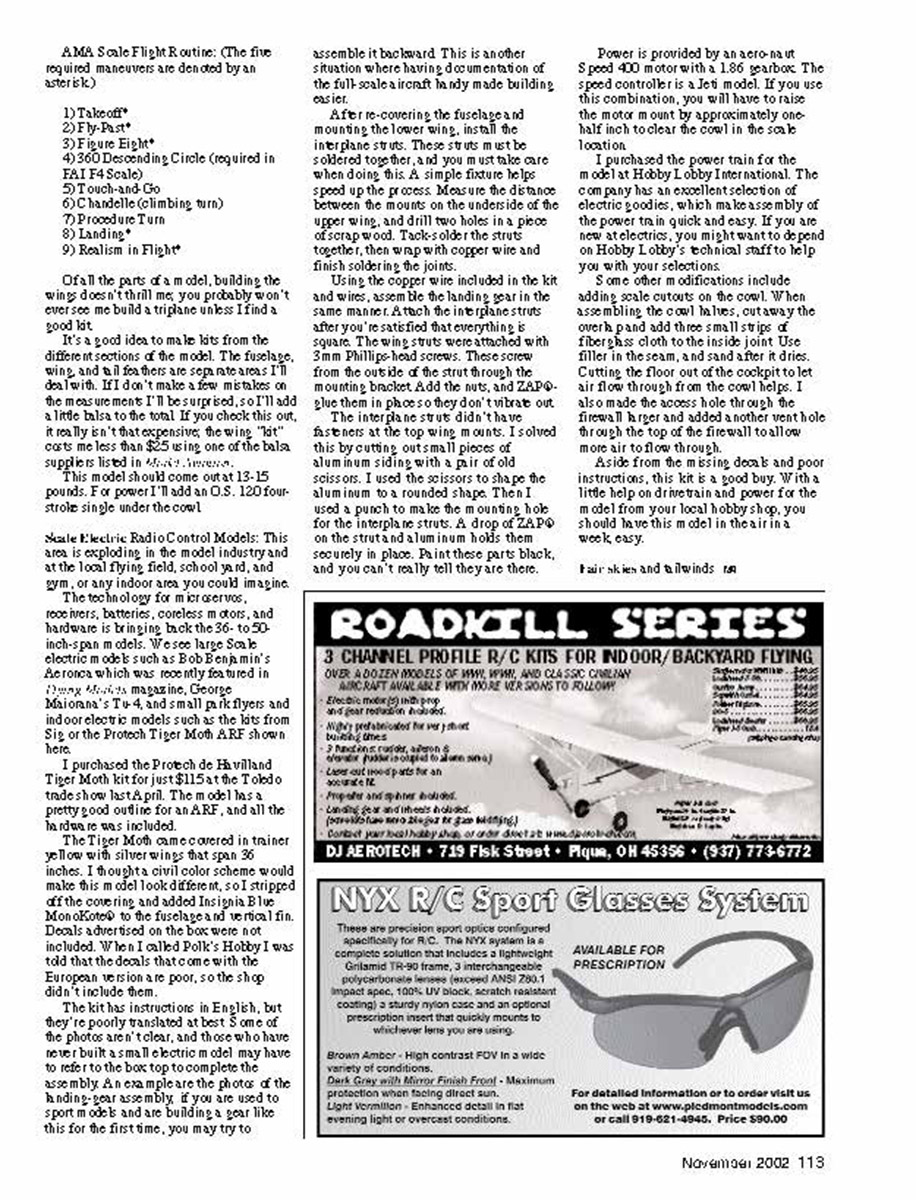
Scale Electric Radio Control Models: This area is exploding in the model industry and at the local flying field, school yard, and gym, or any indoor area you could imagine. The technology for micro servos, receivers, batteries, coreless motors, and hardware is bringing back the 36- to 50-inch-span models. We see large scale electric models such as Bob Benjamin’s Aeronca which was recently featured in Model Aviation magazine; George Morison’s T-6, and small park flyers and indoor electric models such as the kits from SIG or the Protech Trimotor ARF shown here.
I purchased the Protech de Havilland Tiger Moth kit for just $115 at the Toledo tradeshow last April. The model was a pretty good outline for an ARF, and all the hardware was included.
The Tiger Moth came covered in trainer yellow with silver wings that span 36 inches. I thought a civil color scheme would make this model look different, so I stripped off the covering and added insignia Blue Monokote® to the fuselage and vertical fin. Decals advertised on the box were not included. When I called Polk’s Hobby I was told the decals that came with the European version are poor, so the shop didn’t include them.
The kit has instructions in English, but they’re poorly translated at best. Some of the photos aren’t clear, and those who have never built a small electric model may have to refer to the box top to complete the assembly. As an example the photo of the landing-gear assembly, if you are used to sport models and are building a gear like this for the first time, you may try to assemble it backward. This is another situation where having documentation of the full-scale aircraft handy made building easier.
After re-covering the fuselage and mounting the lower wing, install the interplane struts. These struts must be soldered together, and you must take care when doing this. A simple fixture helps speed up the process. Measure the distance between the mounts on the underside of the upper wing, and drill two holes in a piece of scrap wood. Tack-solder the struts together, then wrap with copper wire and finish soldering the joints.
Using the copper wire included in the kit and wires, assemble the landing gear in the same manner. Attach the interplane struts after you’re satisfied that everything is square. The wing struts were attached with 3mm Phillips-head screws. These screw from the outside of the strut through the mounting bracket. Add the nut, and ZAP® glue them in place so they don’t vibrate out.
The interplane strut didn’t have fasteners at the top wing mounts. I solved this by cutting out small pieces of aluminum siding with a pair of tin snips. I used the scissors to shape the aluminum to a rounded shape. Then I used a punch to make the mounting hole for the interplane struts. A drop of ZAP® on the strut and aluminum holds them securely in place. Paint these parts black, and you can’t really tell they’re there.
Power is provided by an aero-naut S speed 400 motor with a 1.86 gearbox. The speed controller is a JetI model. If you use this combination, you will have to raise the motor mount by approximately one-half inch to clear the cowl in the scale location.
I purchased the power train of the model at Hobby Lobby International. The company has an excellent selection of electric goodies, which make assembly of the power train quick and easy. If you are not electrics, you might want to depend on Hobby Lobby’s technical staff to help you with your selections.
Some other modifications include adding scale cutouts on the cowl. When assembling the cowl halves, cut away the overhanging pad and add three small strips of fiberglass cloth to the inside joint. Use filler in the seam, and sand after it dries. Cutting the floor out of the cockpit to let air flow through it from the cowl helps. I also made the access hole through the firewall larger and added another vent hole through the top of the firewall to allow more air to flow through.
Aside from missing decals and poor instructions, this kit is a good buy. With a little help on drivetrain and power for the model from your local hobby shop, you should have this model in the air in a week easy.
Fair skies and tailwinds, ros
Transcribed from original scans by AI. Minor OCR errors may remain.

