
RADIO CONTROL SCALE
Jeff Troy, 19 E. Mt. Pleasant Ave., Ambler PA 19002
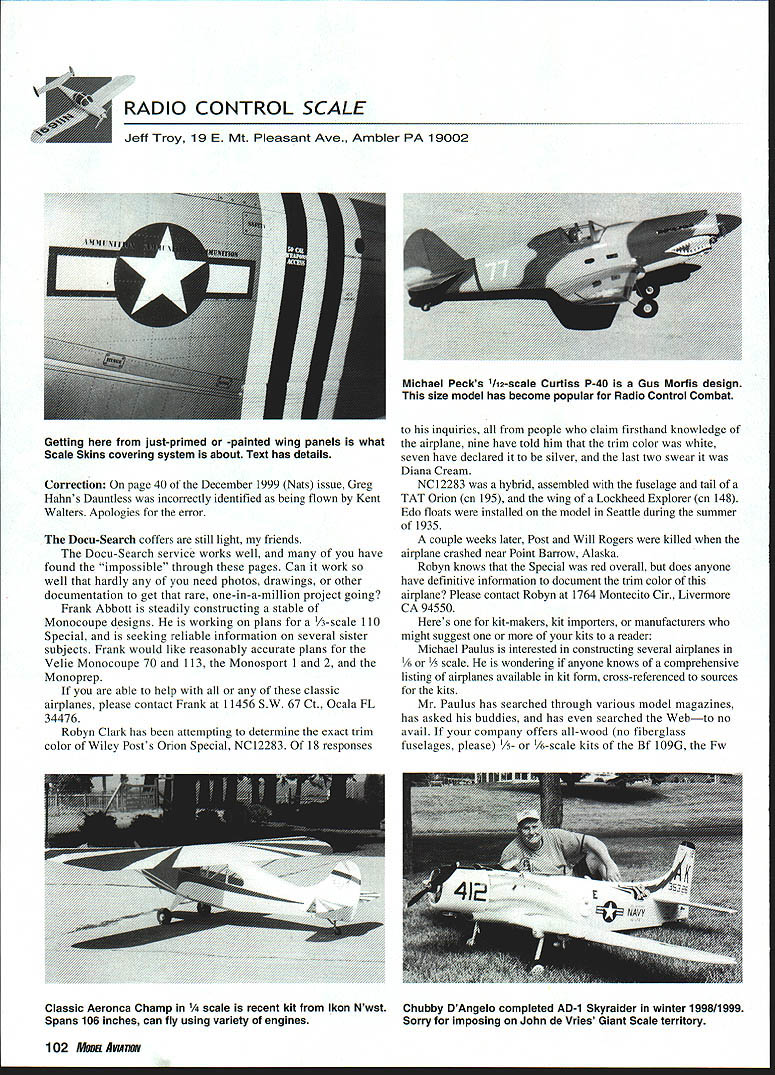
Getting there from just-primed or -painted wing panels is what Scale Skins covering system is about. Text has details.
Correction: On page 40 of the December 1999 (Nats) issue, Greg Hahn's Dauntless was incorrectly identified as being flown by Kent Walters. Apologies for the error.
The Docu-Search coffers are still light, my friends.
The Docu-Search service works well, and many of you have found the "impossible" through these pages. Can it work so well that hardly any of you need photos, drawings, or other documentation to get that rare, one-in-a-million project going?
Frank Abbott is steadily constructing a stable of Monocoupe designs. He is working on plans for a 1/4-scale 110 Special, and is seeking reliable information on several sister subjects. Frank would like reasonably accurate plans for the Velie Monocoupe 70 and 113, the Monosport 1 and 2, and the Monoprep.
If you are able to help with all or any of these classic airplanes, please contact Frank at 11456 S.W. 67 Ct., Ocala FL 34476.
Robyn Clark has been attempting to determine the exact trim color of Wiley Post's Orion Special, NC12283. Of 18 responses to his inquiries, all from people who claim firsthand knowledge of the airplane, nine have told him that the trim color was white, seven have declared it to be silver, and the last two swear it was Diana Cream.
NC12283 was a hybrid, assembled with the fuselage and tail of a TAT Orion (cn 195), and the wing of a Lockheed Explorer (cn 148). Edo floats were installed on the model in Seattle during the summer of 1935.
A couple weeks later, Post and Will Rogers were killed when the airplane crashed near Point Barrow, Alaska.
Robyn knows that the Special was red overall, but does anyone have definitive information to document the trim color of this airplane? Please contact Robyn at 1764 Montecito Cir., Livermore CA 94550.
Here's one for kit-makers, kit importers, or manufacturers who might suggest one or more of your kits to a reader:
Michael Paulus is interested in constructing several airplanes in 1/6 or 1/8 scale. He is wondering if anyone knows of a comprehensive listing of airplanes available in kit form, cross-referenced to sources for the kits.
Mr. Paulus has searched through various model magazines, has asked his buddies, and has even searched the Web—no avail. If your company offers all-wood (no fiberglass fuselages, please) 1/5- or 1/6-scale kits of the Bf 109G, the Fw 190A, or the Albatros, please contact Michael at 1747 S.E. 47th, Portland OR 97215.
Product News
I saw Scale Skins at last year’s WRAM (Westchester Radio Aero Modelers) Show in White Plains, New York.
Advertised as “a new product for the discriminating Scale modeler,” Scale Skins reproduces the finished upper flight surfaces of several popular WWII aircraft. It is a vinyl film covering system that replicates operating markings, stencils, access panels, rivet lines, panel lines, Dzus fasteners, and screw heads.
Scale Skins are available in clear and opaque aluminum 2-mil vinyl. They are intended for application over primed or painted balsa, obeche- or plywood-planked surfaces, primed or painted foam, primed or painted fiberglass, gel-coated epoxy, or ABS plastic.
Upper surface Scale Skins are offered for several Top Flite, Pica, Meister Scale, Balsa USA, Yellow Aircraft, Zirolli, Vailly Aviation, and American Eagle kits, and Jerry Bates plans.
For more information—and there’s a great deal of it—send two bucks postage to The Scale Skins Model Co., 210 Loma Sq.-Suite 132, Hoover AL 35216.
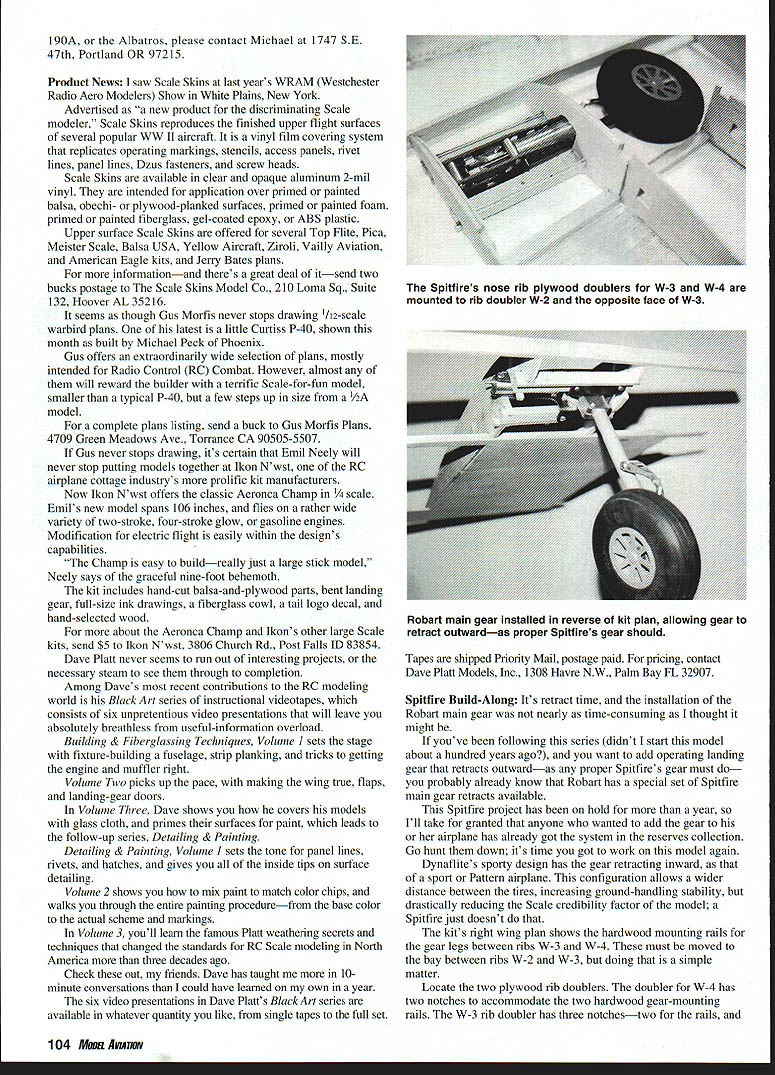
It seems as though Gus Morfis never stops drawing 1/2-scale warbird plans. One of his latest is a little Curtiss P-40, shown this month as built by Michael Peck of Phoenix.
Gus offers an extraordinarily wide selection of plans, mostly intended for Radio Control (RC) Combat. However, almost any of them will reward the builder with a terrific scale-for-fun model, smaller than a typical P-40, but a few steps up in size from a 1/2A model.
For a complete plans listing, send a buck to Gus Morfis Plans, 4709 Green Meadows Ave., Torrance CA 90505-5507.
If Gus never stops drawing, it’s certain that Emil Neely will never stop putting models together at Ikon N’Wst, one of the RC airplane cottage industry’s more prolific kit manufacturers.
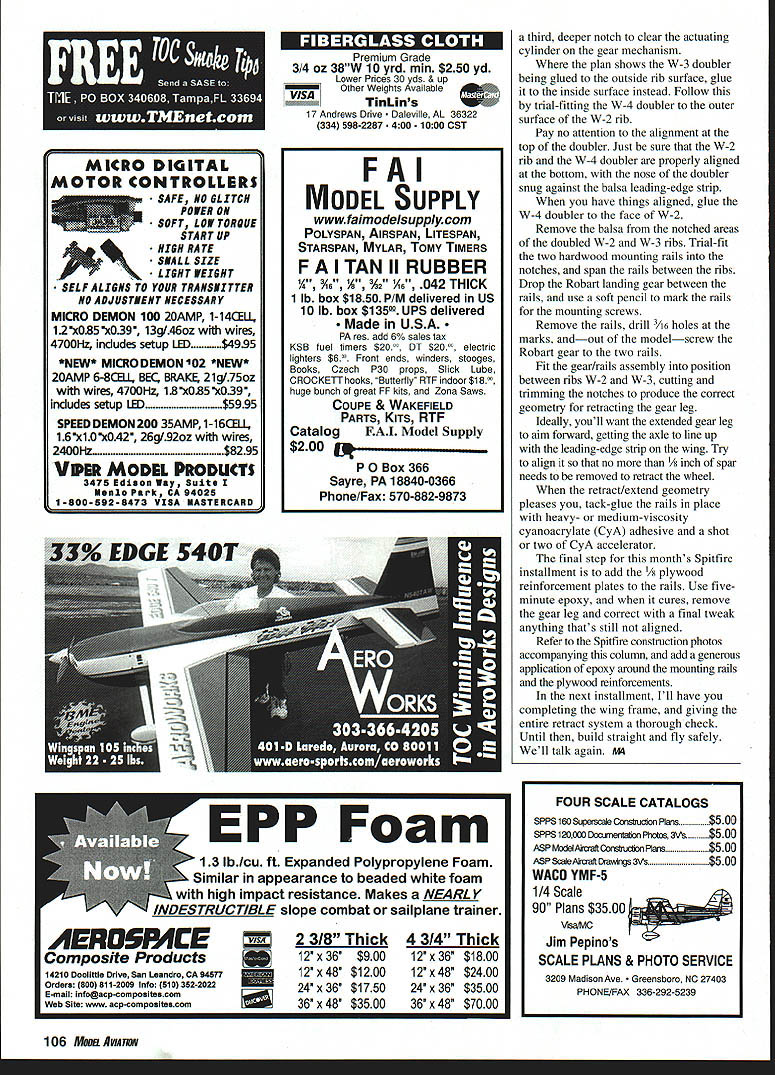
Now Ikon N’Wst offers the classic Aeronca Champ in 1/4 scale. Emil’s new model spans 106 inches, and flies on a rather wide variety of two-stroke, four-stroke glow, or gasoline engines. Modification for electric flight is easily within the design’s capabilities.
“The Champ is easy to build—really just a large stick model,” Neely says of the graceful nine-foot behemoth.
The kit includes:
- Hand-cut balsa-and-plywood parts
- Bent landing gear
- Full-size ink drawings
- A fiberglass cowl
- A tail logo decal
- Hand-selected wood
For more about the Aeronca Champ and Ikon’s other large scale kits, send $5 to Ikon N’Wst, 3806 Church Rd., Post Falls ID 83854.
Dave Platt — Black Art Video Series
Dave Platt never seems to run out of interesting projects, or the necessary steam to see them through to completion.
Among Dave’s most recent contributions to the RC modeling world is his Black Art series of instructional videotapes, which consists of six short, instructional video presentations that will leave you absolutely breathless from useful-information overload.
The series includes:
- Building & Fiberglassing Techniques, Volume 1
- Fixture-building
- A fuselage
- Strip planking
- Tricks to getting the engine and muffler right
- Building & Fiberglassing Techniques, Volume 2
- Making the wing true
- Flaps
- Landing-gear doors
- Building & Fiberglassing Techniques, Volume 3
- How he covers his models with glass cloth
- Priming surfaces for paint
- Detailing & Painting, Volume 1
- Panel lines
- Rivets
- Hatches
- Inside tips on surface detailing
- Detailing & Painting, Volume 2
- How to mix paint to match color chips
- The entire painting procedure—from base color to scheme and markings
- Detailing & Painting, Volume 3
- Platt weathering secrets and techniques
Check these out, my friends. Dave has taught me more in 10-minute conversations than I could have learned on my own in a year.
The six video presentations in Dave Platt’s Black Art series are available in whatever quantity you like, from single tapes to the full set.
Tapes are shipped Priority Mail, postage paid. For pricing, contact Dave Platt Models, Inc., 1308 Havre N.W., Palm Bay FL 32907.
Spitfire Build-Along
It’s retract time, and the installation of the Robart main gear was not nearly as time-consuming as I thought it might be.
If you’ve been following this series (didn’t I start this model about a hundred years ago?), and you want to add operating landing gear that retracts outward—as any proper Spitfire’s gear must do—you probably already know that Robart has a special set of Spitfire main gear retracts available.
This Spitfire project has been on hold for more than a year, so I’ll take for granted that anyone who wanted to add the gear to his or her airplane has already got the system in the reserves collection. Go hunt them down; it’s time you got to work on this model again!
Dynaflite’s sporty design has the gear retracting inward, as that of a sport or Pattern airplane. This configuration allows a wider distance between the tires, increasing ground-handling stability, but drastically reducing the scale credibility factor of the model; a Spitfire just doesn’t do that.
The kit’s right wing plan shows the hardwood mounting rails for the gear legs between ribs W3 and W4. These must be moved to the bay between ribs W2 and W3, but doing that is a simple matter.
Steps to relocate and install the Robart main gear:
- Locate the two plywood rib doublers.
- The doubler for W-4 has two notches to accommodate the two hardwood gear-mounting rails.
- The W-3 rib doubler has three notches—two for the rails, and a third, deeper notch to clear the actuating cylinder on the gear mechanism.
- Glue the W-3 doubler to the inside surface of the W-3 rib instead of the outside surface as shown on the plan.
- Trial-fit the W-4 doubler to the outer surface of the W-2 rib.
- Pay no attention to the alignment at the top of the doubler.
- Be sure that the W-2 rib and the W-4 doubler are properly aligned at the bottom, with the nose of the doubler snug against the balsa leading-edge strip.
- When aligned, glue the W-4 doubler to the face of W-2.
- Remove the balsa from the notched areas to the doubled W-2 and W-3 ribs.
- Trial-fit the two hardwood mounting rails into the notches, and span the rails between the ribs.
- Drop the Robart landing gear between the rails, and use a soft pencil to mark the rails for the mounting screws.
- Remove the rails, drill 3/16" holes at the marks, and—out of the model—screw the Robart gear into the two rails.
- Fit the gear/rails assembly into position between ribs W-2 and W-3, cutting and trimming the notches to produce the correct geometry for retracting the gear leg.
- Ideally, you'll want the extended gear leg to aim forward, getting the axle to line up with the leading-edge strip on the wing.
- Try to align it so that no more than 1/8" of spar needs to be removed to retract the wheel.
- When the retract/extend geometry pleases you, tack-glue the rails in place with heavy- or medium-viscosity cyanoacrylate (CYA) adhesive and a shot or two of CYA accelerator.
- Add the 1/8" plywood reinforcement plates to the rails using five-minute epoxy. When it cures, remove the gear leg and correct with a final tweak anything that is still not aligned.
Refer to the Spitfire construction photos accompanying this column, and add a generous application of epoxy around the mounting rails and the plywood reinforcements.
In the next installment, I'll have you completing the wing frame, and giving the entire retract system a thorough check. Until then, build straight and fly safely.
We'll talk again. MA
Transcribed from original scans by AI. Minor OCR errors may remain.

