
RADIO CONTROL SCALE AEROBATICS
Paul Kopp, 1013 S. Sedona Ln., Anaheim CA 92808
AS STATED in the May column, Scale Aerobatics airplanes are radio control (RC) models of dedicated full-scale competition airplanes.
It was also stated that some of the dominant aircraft are Extras, CAPs, Edges, and Gilses—designs that have been attractive to the RC kit companies. There is also interest in more-traditional entry-level aerobatic designs, such as the Decathlon and the Citabria ("airbatic" spelled backward).
One goal of this column is to recognize the diversity within Scale Aerobatics, and not focus strictly on high-performance designs.
Another comment was the benefit of having products or ideas proven in competition before they are introduced to the sport market. Much of the material in future columns will be based on what has been proven in competition, but there will be little emphasis on subject matter limited to Scale Aerobatics competition.
Persons with questions about competitive Scale Aerobatics should visit the IMAC (International Miniature Aerobatic Club) Web site at www.mini-iac.com, which is a huge source of information.
This column is intended to reach and benefit a general audience—the majority of which are sport pilots, flying 60- to 80-inch-wingspan airplanes.
Where possible, I'll discuss topics of interest to competitive and noncompetitive pilots, such as propeller selection or building tips. There is always interest in "how to do it better"—especially where airplane setup or building are concerned.
Issues related to building and flying Scale Aerobatics airplanes increase with wingspan. Most airplanes sold within the Scale Aerobatics market range from 60 to 80 inches in wingspan. Biplanes (which have remained very popular) have slightly shorter wingspans.
The 60- to 80-inch range has an interesting quality, which is less true for smaller or larger airplanes. They can be flown with low- or high-end engine/radio components, and produce very different results, depending on the final selection of equipment.
In addition, the flight characteristics of a 60- to 80-inch-wingspan airplane may be greatly affected by the choice of engine and the capabilities of the radio.
Although the number of suitable engines for a 60-inch-wingspan airplane is extensive, the usable range of engine displacement is narrow. The usable displacement range of airplanes exceeding an 80-inch wingspan may be quite broad, but the number of actual engine choices decreases, compared to smaller glow engines.
Airplanes less than 60 inches in wingspan benefit marginally from features on the higher-end computer radios. Conversely, the setups of larger giant-scale airplanes—at or above 80-inch wingspans—are greatly facilitated by using the features on mid- to high-end computer radios.
One such capability is running dual elevator servos—the subject of this month's column.
Dual Elevator Servos
Many fliers favor dual (or "split") rear-mounted elevator servos, because they provide a number of benefits:
- The extra servo provides redundancy in the event of a servo or control-surface failure.
- They are easy to install, and they eliminate the need and weight of an internal pushrod.
- Two servos provide better trim accuracy than can be accomplished by a single servo.
There are four basic methods of mounting dual-elevator servos:
- Using a reversed servo positioned opposite the other servo.
- Using a "Y" connector, and staggering the servos' arms on opposite sides of the fuselage.
- Using a Y connector with a built-in or external servo reverser, and positioning the servos opposite each other.
- Reversing the servos electronically using transmitter mixes, also with the servos mounted directly opposite each other.
With the exception of the staggered "high-low" mounting, the basic geometry of the installations is the same. There are differences in how well they work.
Some manufacturers sell "reversed" servos, which have rotational movement opposite that of regular servos. Using a reversed servo allows the builder to mount the servos directly opposite each other, and "join" them using a Y connector. The pushrod geometry and movement of the elevator for each servo is the same. Each pushrod can be adjusted mechanically if one needs trim adjustment.
The drawback of this method is availability—many hobby stores do not stock reversed servos, or they may not be available for a particular model servo. Reversed servos are also typically slightly higher in cost than regular servos.
The obvious advantage is that they will work with lower-priced radios.
The next method is using regular servos that have the same rotational direction. The opposing servo cannot merely be turned around. Instead, the servo arms must be offset in a high/low configuration to get the proper direction of travel.
Although this method has been widely used, the geometry of the pushrod changes asymmetrically as the elevator moves, and the result is unequal throw. This may cause trim changes, depending on how much throw is used.
At low or mid throws, the difference is minimal—sometimes not even noticeable. However, the problem becomes apparent when the deflection values go into higher, or "3-D" range.
Many pilots have used this method successfully, but it is best-suited for casual flying—not for precision or 3-D flying.
The next method is using a "Y" cord with a reversing circuit—sometimes including a centering potentiometer. These are available from hobby stores, or from RC companies specializing in electronic components.
The servos can be placed directly opposite with a reversed Y, and the geometry of the servos' arms will be the same, as with the reversed servo described earlier.
If the reverser has a centering pot, small changes can be made to the servo centering to align the servo arms.
This method has worked well for a number of modelers. The reversers are relatively inexpensive, and they work with virtually any radio.
Reversers that use a centering pot may need an occasional adjustment to correct "drift" (change from neutral). The reverser should be mounted where it can be reached with a small screwdriver.
The last method requires using a transmitter program mix that slaves the second servo to the primary channel.
This requires a transmitter with a mix that provides for independent program mixes, and allows the same trim to control the master and the slave channel. (If it does not have the latter, the elevator trim will only affect one side of the elevator.)
It isn't always clear in the radio literature if a particular radio has this capability, or how to set it up, so do some research before you invest. (Questions such as this are well-suited for competitive pilots, since most of them use independent setups for rear servos.)
Using a transmitter mix allows the two servos to be set up independently, but to be driven by the same stick. The independent control provides accurate positioning of the arms. Furthermore, this setup offers precise alignment of the servo geometry by using the travel adjustment for each servo.
Regardless of which installation method is used, the control response of rear servos is far superior to a single servo and a "V-end" pushrod.
The problem with the single pushrod is that as the servo arm moves in a radial motion, so do the pushrod ends. As the servo throw is deflected into high ranges, one side of the V is displaced, causing unequal throws in the elevators.
Some modelers try to overcome the radial movement with rear-mounted fuselage guides, but they are not practical on larger airplanes.
Fortunately, the kit modifications for rear servos are minor, requiring only the building of a small servo mount on each side of the fuselage.
Servos are connected to the receiver with a single extension if a single Y is used, and two independent extensions if transmitter mixing is used.
AMA Convention 2000
Although the show is several months old, the sights are still fresh. Having attended the show for the last few years, this year definitely marked a turnaround in attendance and product representation.
A variety of Scale Aerobatics airplanes represented by a number of different companies dominated the kit and ARF (Almost Ready to Fly) landscape. Moreover, a number of companies were first-timers or recent entrants in the industry.
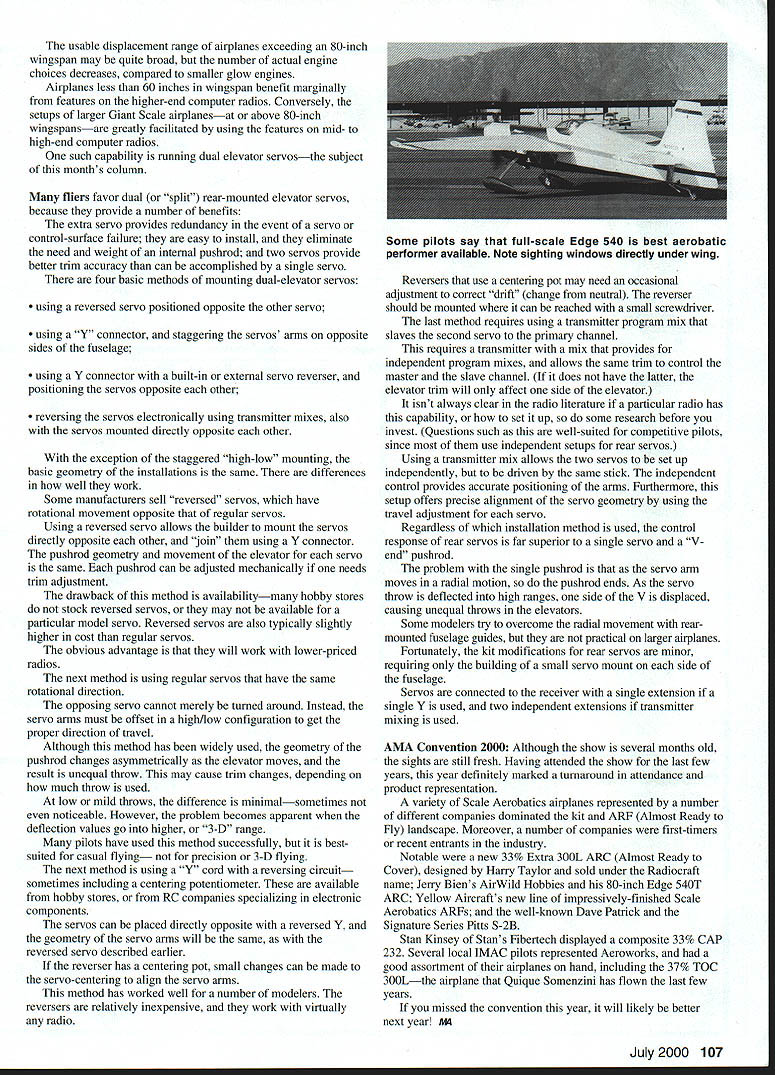
Notable were a new 33% Extra 300L ARC (Almost Ready to Cover), designed by Harry Taylor and sold under the Radiocraft name; Jerry Bien's AirWild Hobbies and his 80-inch Edge 540T ARC; Yellow Aircraft's new line of impressively finished Scale Aerobatics ARFs; and the well-known Dave Patrick and Signature Series Pitts S-2B.
Stan Kinsey of Stan's Fibertech displayed a composite 33% CAP 232. Several local IMAC pilots represented Aeroworks, and had a good assortment of their airplanes on hand, including the 37% TOC 300L—the airplane that Quique Somenzini has flown the last few years.
If you missed the convention this year, it will likely be better next year! M4
Transcribed from original scans by AI. Minor OCR errors may remain.

