
Learn how to prevent flutter
by John Glezellis [email protected]
In recent years, competition International Miniature Aerobatic Club (IMAC) freestyle routines have become more aggressive and demanding on the airframe compared to years past. Most manufacturers design these competition airplanes to have large control surfaces so pilots can perform extreme maneuvers such as hyper-rate rolls and tight, knife-edge spins. However, by having such large control surfaces and highly overpowered airplanes, flutter—a condition of oscillation of an aerodynamic surface—can become catastrophic to an airplane.
I will discuss some steps for how a pilot can prevent flutter. In particular, I will review the use of multiple servos on a given control surface and how to properly balance a control surface to limit the amount of servos needed and decrease the servos' workload. Let's begin!
Multiple Servo Benefits Defined
Depending on the amount of servo torque, it may be necessary to have multiple servos per surface to give the pilot a consistent feel of the aircraft. If a servo is too weak, an internal gear may strip and cause flutter on the airframe in flight. To test an aircraft for adequate servo torque, perform the following flight tests:
- For the rudder, roll the airplane to knife-edge at full throttle and apply the proper rudder amount, as needed, to sustain altitude. Then, increase the rudder input and see how the aircraft responds. If the airplane can't consistently maintain altitude, either the servo is not powerful enough for that surface or some slop exists in the linkage's mechanical setup.
- Regarding the ailerons, apply maximum roll input at full throttle and pay attention to the roll rate of the aircraft. If the rate decreases with higher throttle settings and increases at lower settings, the servo isn't driving the ailerons to the maximum travel amount. More servos should be added to eliminate this or a more powerful servo should be used.
- On the elevator, apply full power and execute a few constant pulls and pushes to ensure that the aircraft consistently performs.
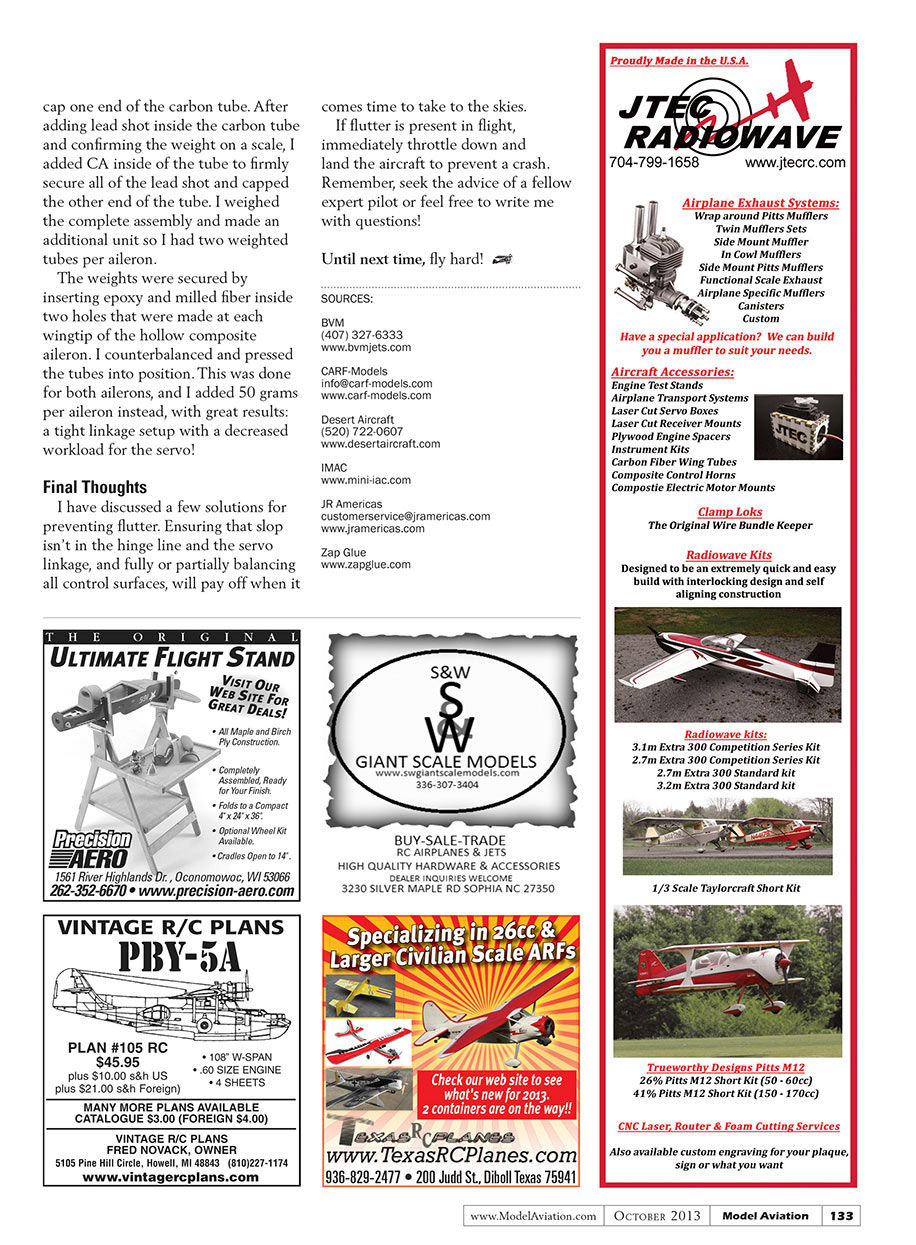
When two servos are used on a given control surface, the end user must ensure that the servos work together. They must not fight each other at the center or end-point positions. If this is not the case, the servos may stop functioning after drawing an unnecessary amount of current from the battery pack(s).
These settings can be changed via the transmitter if the receiver has enough channels to mix these servos to work on one channel, or by using a servo synchronizer.
Servos can develop slop within their gear trains. Slop may also come from the servo arm and/or linkage. Regardless of where the slop is coming from, this could result in flutter because the servo can oscillate!
Often, a servo responds to a slight bump and a rapid oscillation develops. When force is applied to the servo, this will stop but can also cause flutter. In this instance, counterbalancing a surface can be beneficial.
Counterbalancing 101
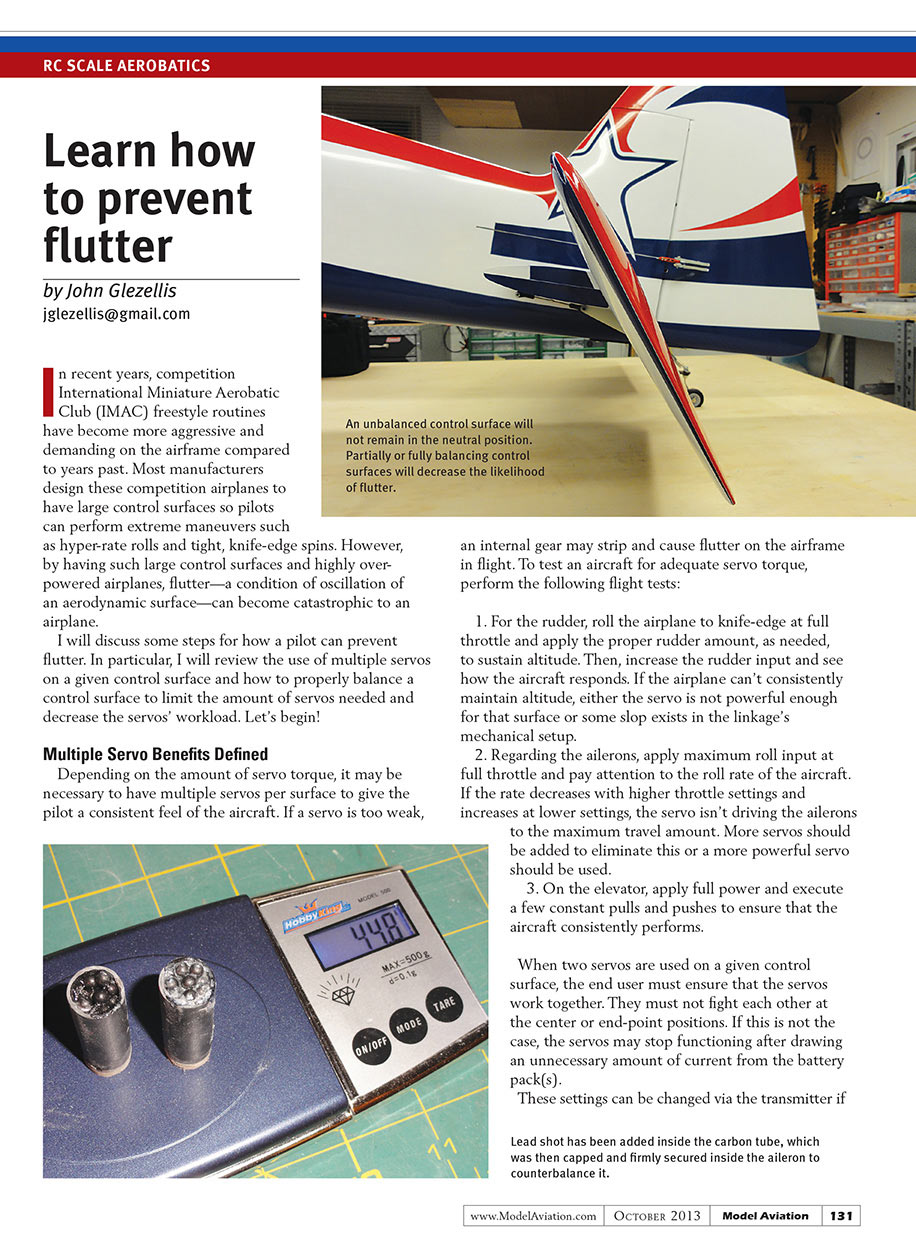
A builder can mass balance a control surface by adding weight in front of the hinge line on the counterbalance. Depending on the size of the control surface, as well as the size of the aerodynamic counterbalance, a considerable amount of added weight may be needed.
The reason for this is simple: the control surface’s small area of the counterbalance, located in front of the hinge line, can add weight and is small compared with the size of the actual control surface.
If you disconnected the servos from the control surface, the balanced surface should remain level with the flying surface. At that point, you should be able to lift or push the control surface to any position and it will return to the neutral position.
Unbalanced Surfaces Fall
I decided to use one JR8911HV servo per aileron—which gives nearly 500 inch-ounces of servo torque—for my Desert Aircraft 120cc-powered CARF-Models Edge 540. CARF-Models advises the builder to partially balance the elevators and the ailerons by adding 15 and 20 grams of weight in each respectively, especially when using one servo. Any gear slop can result in flutter at high speeds.
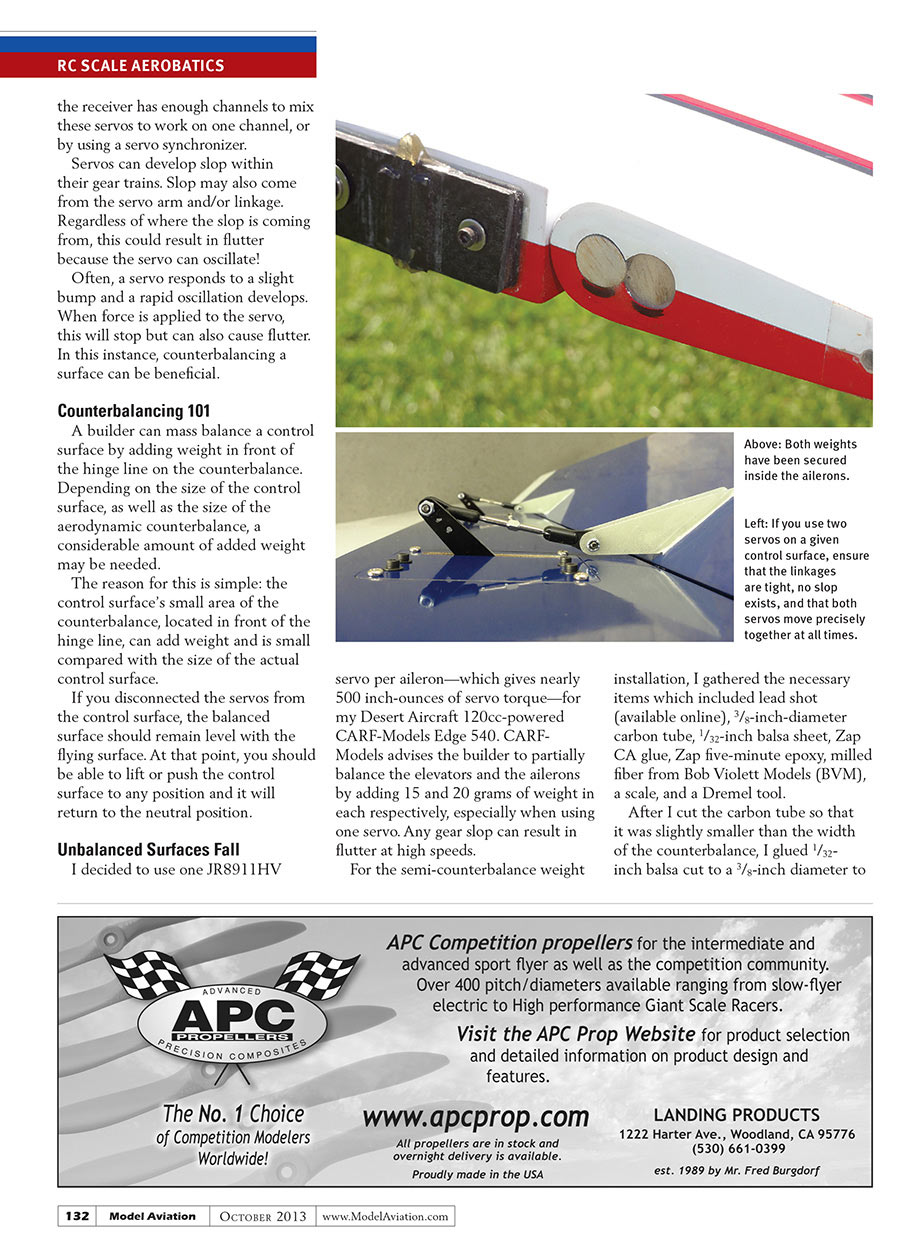
For the semi-counterbalance weight installation, I gathered the necessary items which included lead shot (available online), 3/8-inch-diameter carbon tube, 1/32-inch balsa sheet, Zap CA glue, Zap five-minute epoxy, milled fiber from Bob Viollett Models (BVM), a scale, and a Dremel tool.
After I cut the carbon tube so that it was slightly smaller than the width of the counterbalance, I glued 1/32-inch balsa cut to a 3/8-inch diameter to cap one end of the carbon tube. After adding lead shot inside the carbon tube and confirming the weight on a scale, I added CA inside of the tube to firmly secure all of the lead shot and capped the other end of the tube. I weighed the complete assembly and made an additional unit so I had two weighted tubes per aileron.
The weights were secured by inserting epoxy and milled fiber inside two holes that were made at each wingtip of the hollow composite aileron. I counterbalanced and pressed the tubes into position. This was done for both ailerons, and I added 50 grams per aileron instead, with great results: a tight linkage setup with a decreased workload for the servo!
Final Thoughts
I have discussed a few solutions for preventing flutter. Ensuring that slop isn't in the hinge line and the servo linkage, and fully or partially balancing all control surfaces, will pay off when it comes time to take to the skies.
If flutter is present in flight, immediately throttle down and land the aircraft to prevent a crash. Remember, seek the advice of a fellow expert pilot or feel free to write me with questions!
Until next time, fly hard! ✈
SOURCES:
BVM (407) 327-6333 www.bvmjets.com
CARF-Models [email protected] www.carf-models.com
Desert Aircraft (520) 722-0607 www.desertaircraft.com
IMAC www.mini-imac.com
JR Americas [email protected] www.jramericas.com
Zap Glue www.zapglue.com
Transcribed from original scans by AI. Minor OCR errors may remain.

