

REICHARD MODELSPORT CUMULUS 2.5M
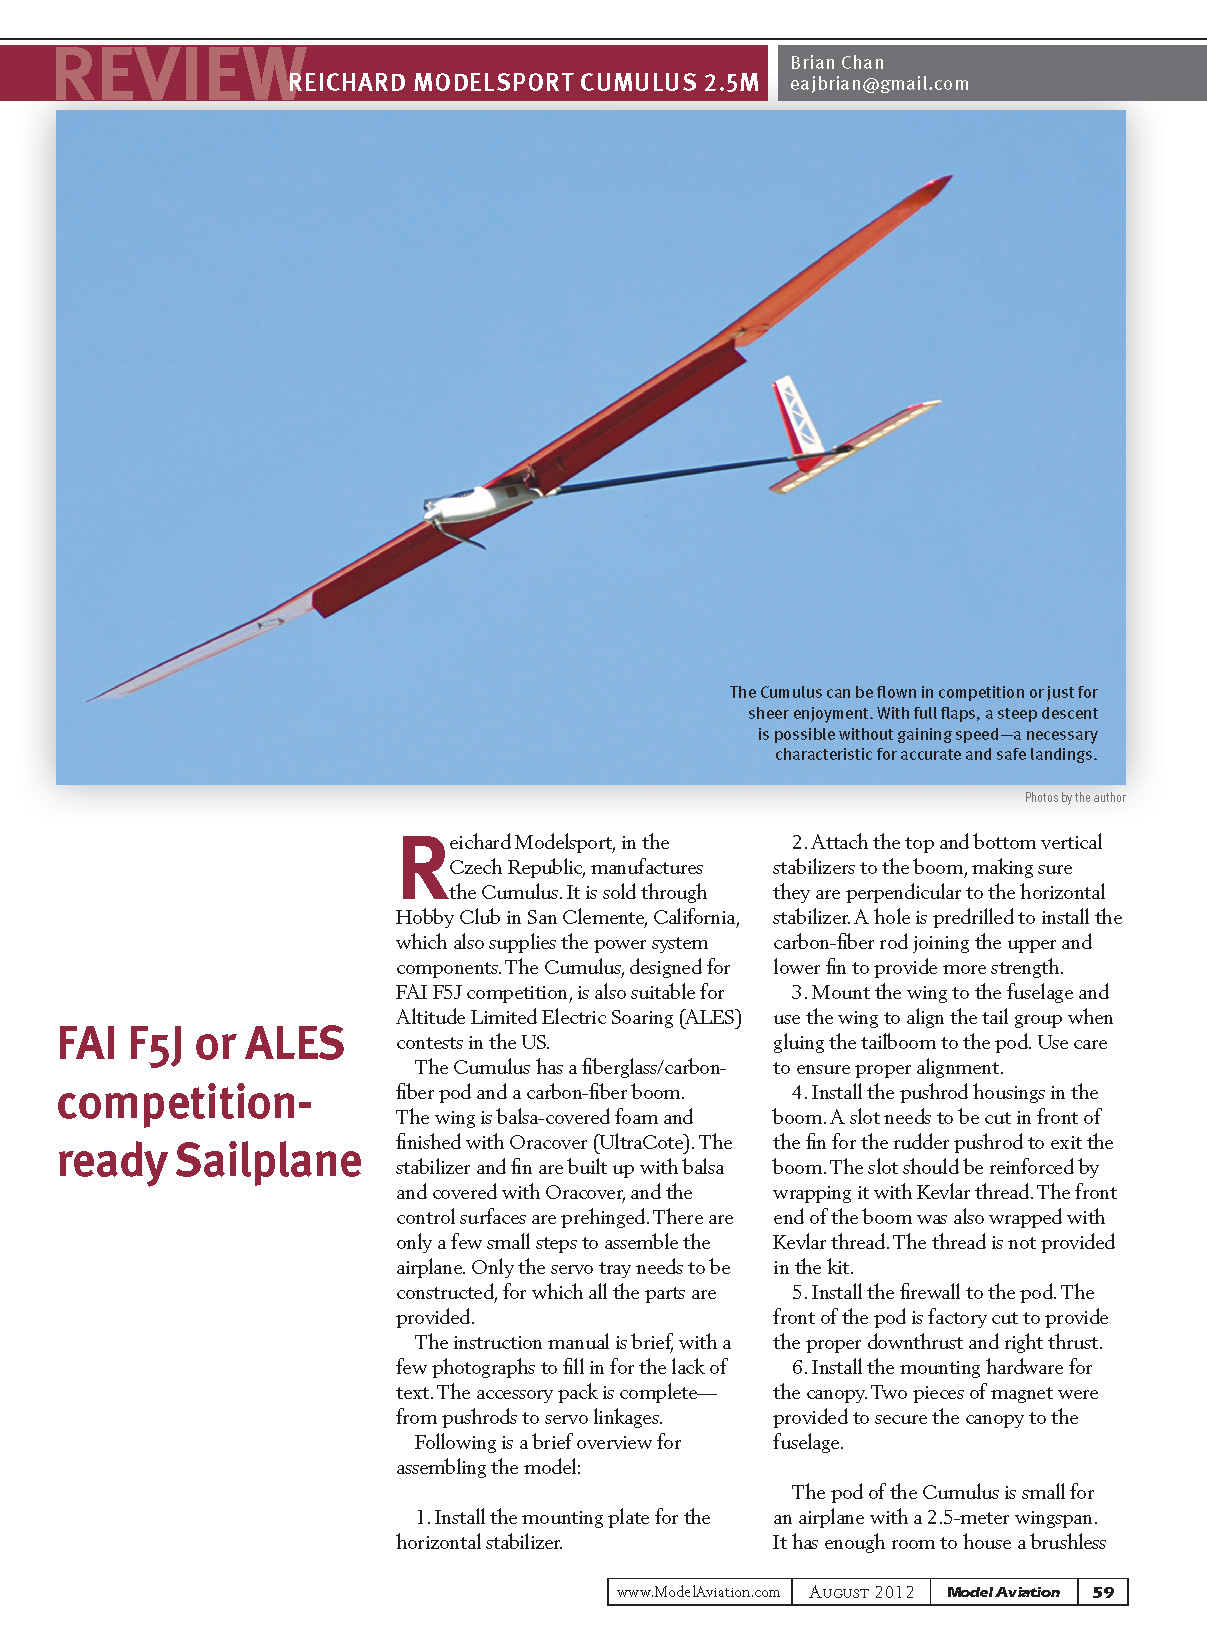
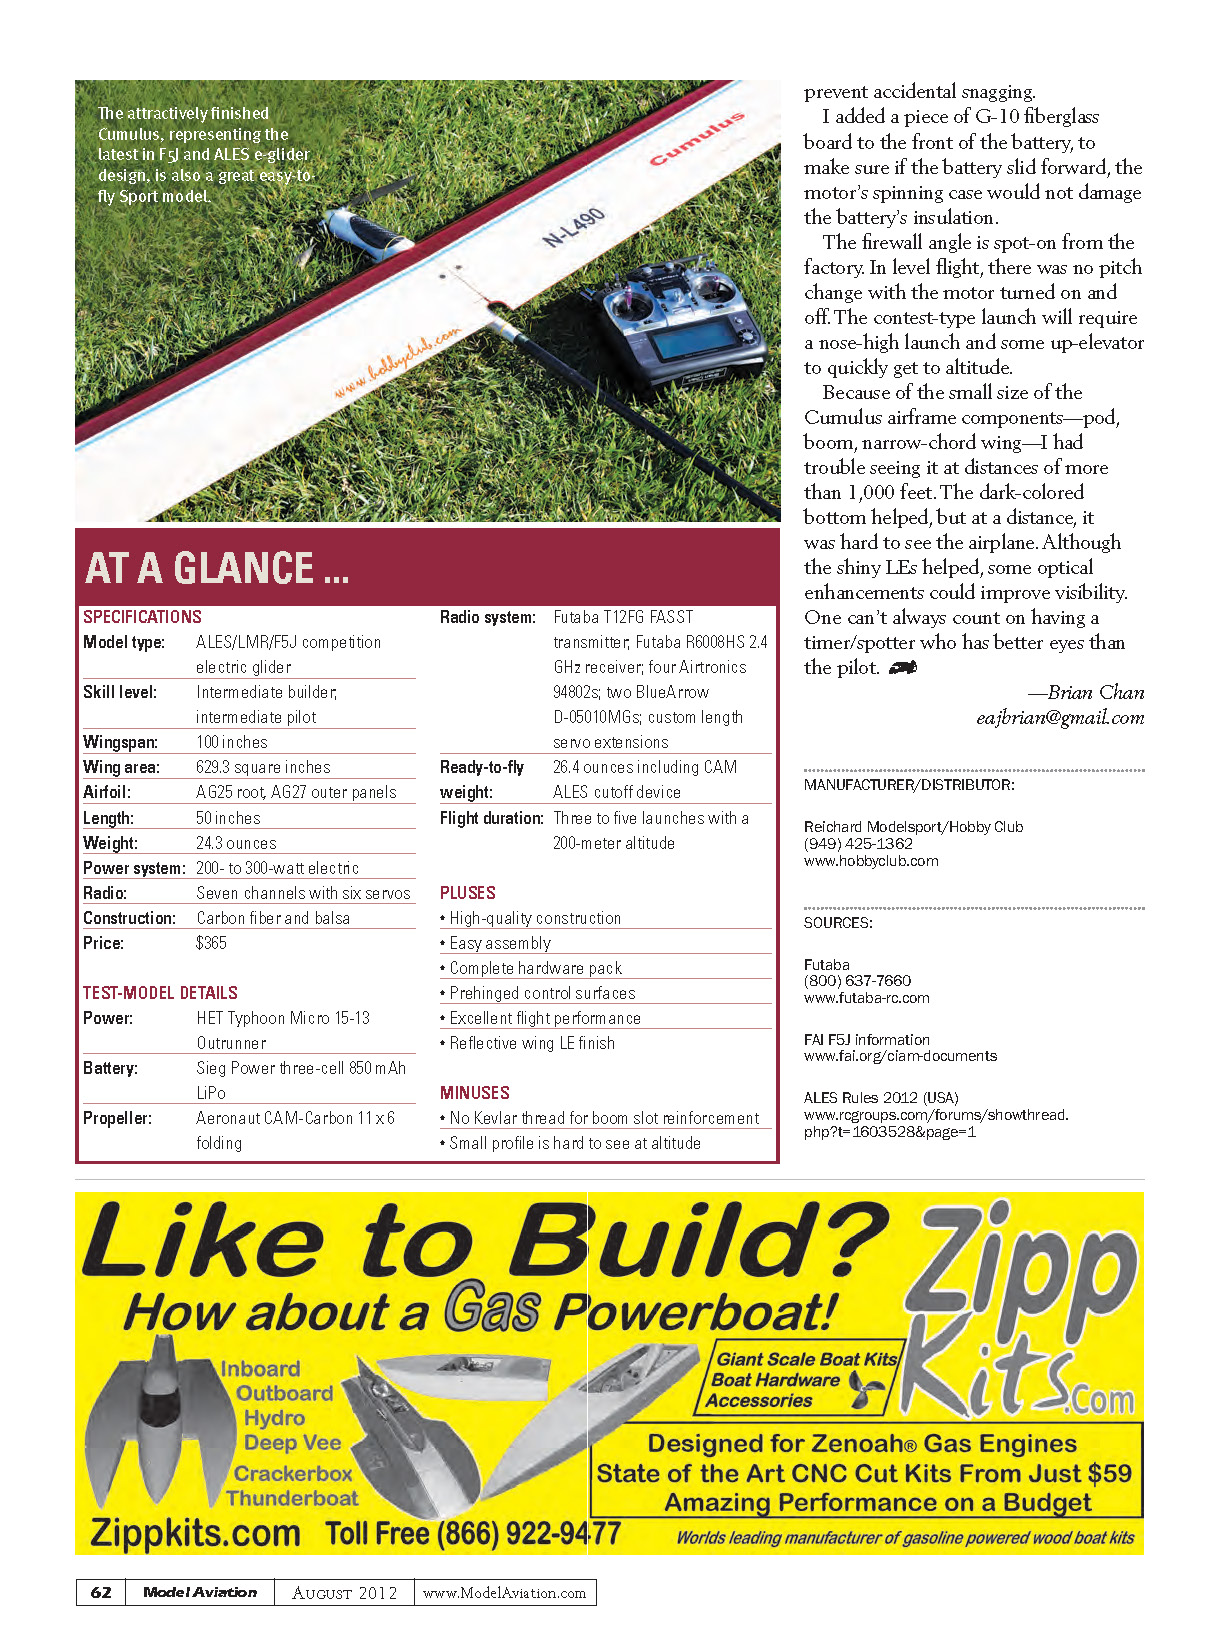
Reichard Modelsport, in the Czech Republic, manufactures the Cumulus. It is sold through Hobby Club in San Clemente, California, which also supplies the power-system components. The Cumulus, designed for FAI F5J competition, is also suitable for Altitude Limited Electric Soaring (ALES) contests in the US.
The Cumulus has a fiberglass/carbon-fiber pod and a carbon-fiber boom. The wing is balsa-covered foam and finished with Oracover (UltraCote). The stabilizer and fin are built up with balsa and covered with Oracover, and the control surfaces are prehinged. There are only a few small steps to assemble the airplane. Only the servo tray needs to be constructed, and all the parts for it are provided.
The instruction manual is brief, with a few photographs to supplement the lack of text. The accessory pack is complete—from pushrods to servo linkages.
Following is a brief overview for assembling the model:
- Install the mounting plate for the horizontal stabilizer.
- Attach the top and bottom vertical stabilizers to the boom, making sure they are perpendicular to the horizontal stabilizer. A hole is predrilled to install the carbon-fiber rod joining the upper and lower fin to provide additional strength.
- Mount the wing to the fuselage and use the wing to align the tail group when gluing the tailboom to the pod. Use care to ensure proper alignment.
- Install the pushrod housings in the boom. A slot needs to be cut in front of the fin for the rudder pushrod to exit the boom. The slot should be reinforced by wrapping it with Kevlar thread. The front end of the boom was also wrapped with Kevlar thread. The Kevlar thread is not provided in the kit.
- Install the firewall to the pod. The front of the pod is factory cut to provide the proper downthrust and right thrust.
- Install the mounting hardware for the canopy. Two pieces of magnet were provided to secure the canopy to the fuselage.
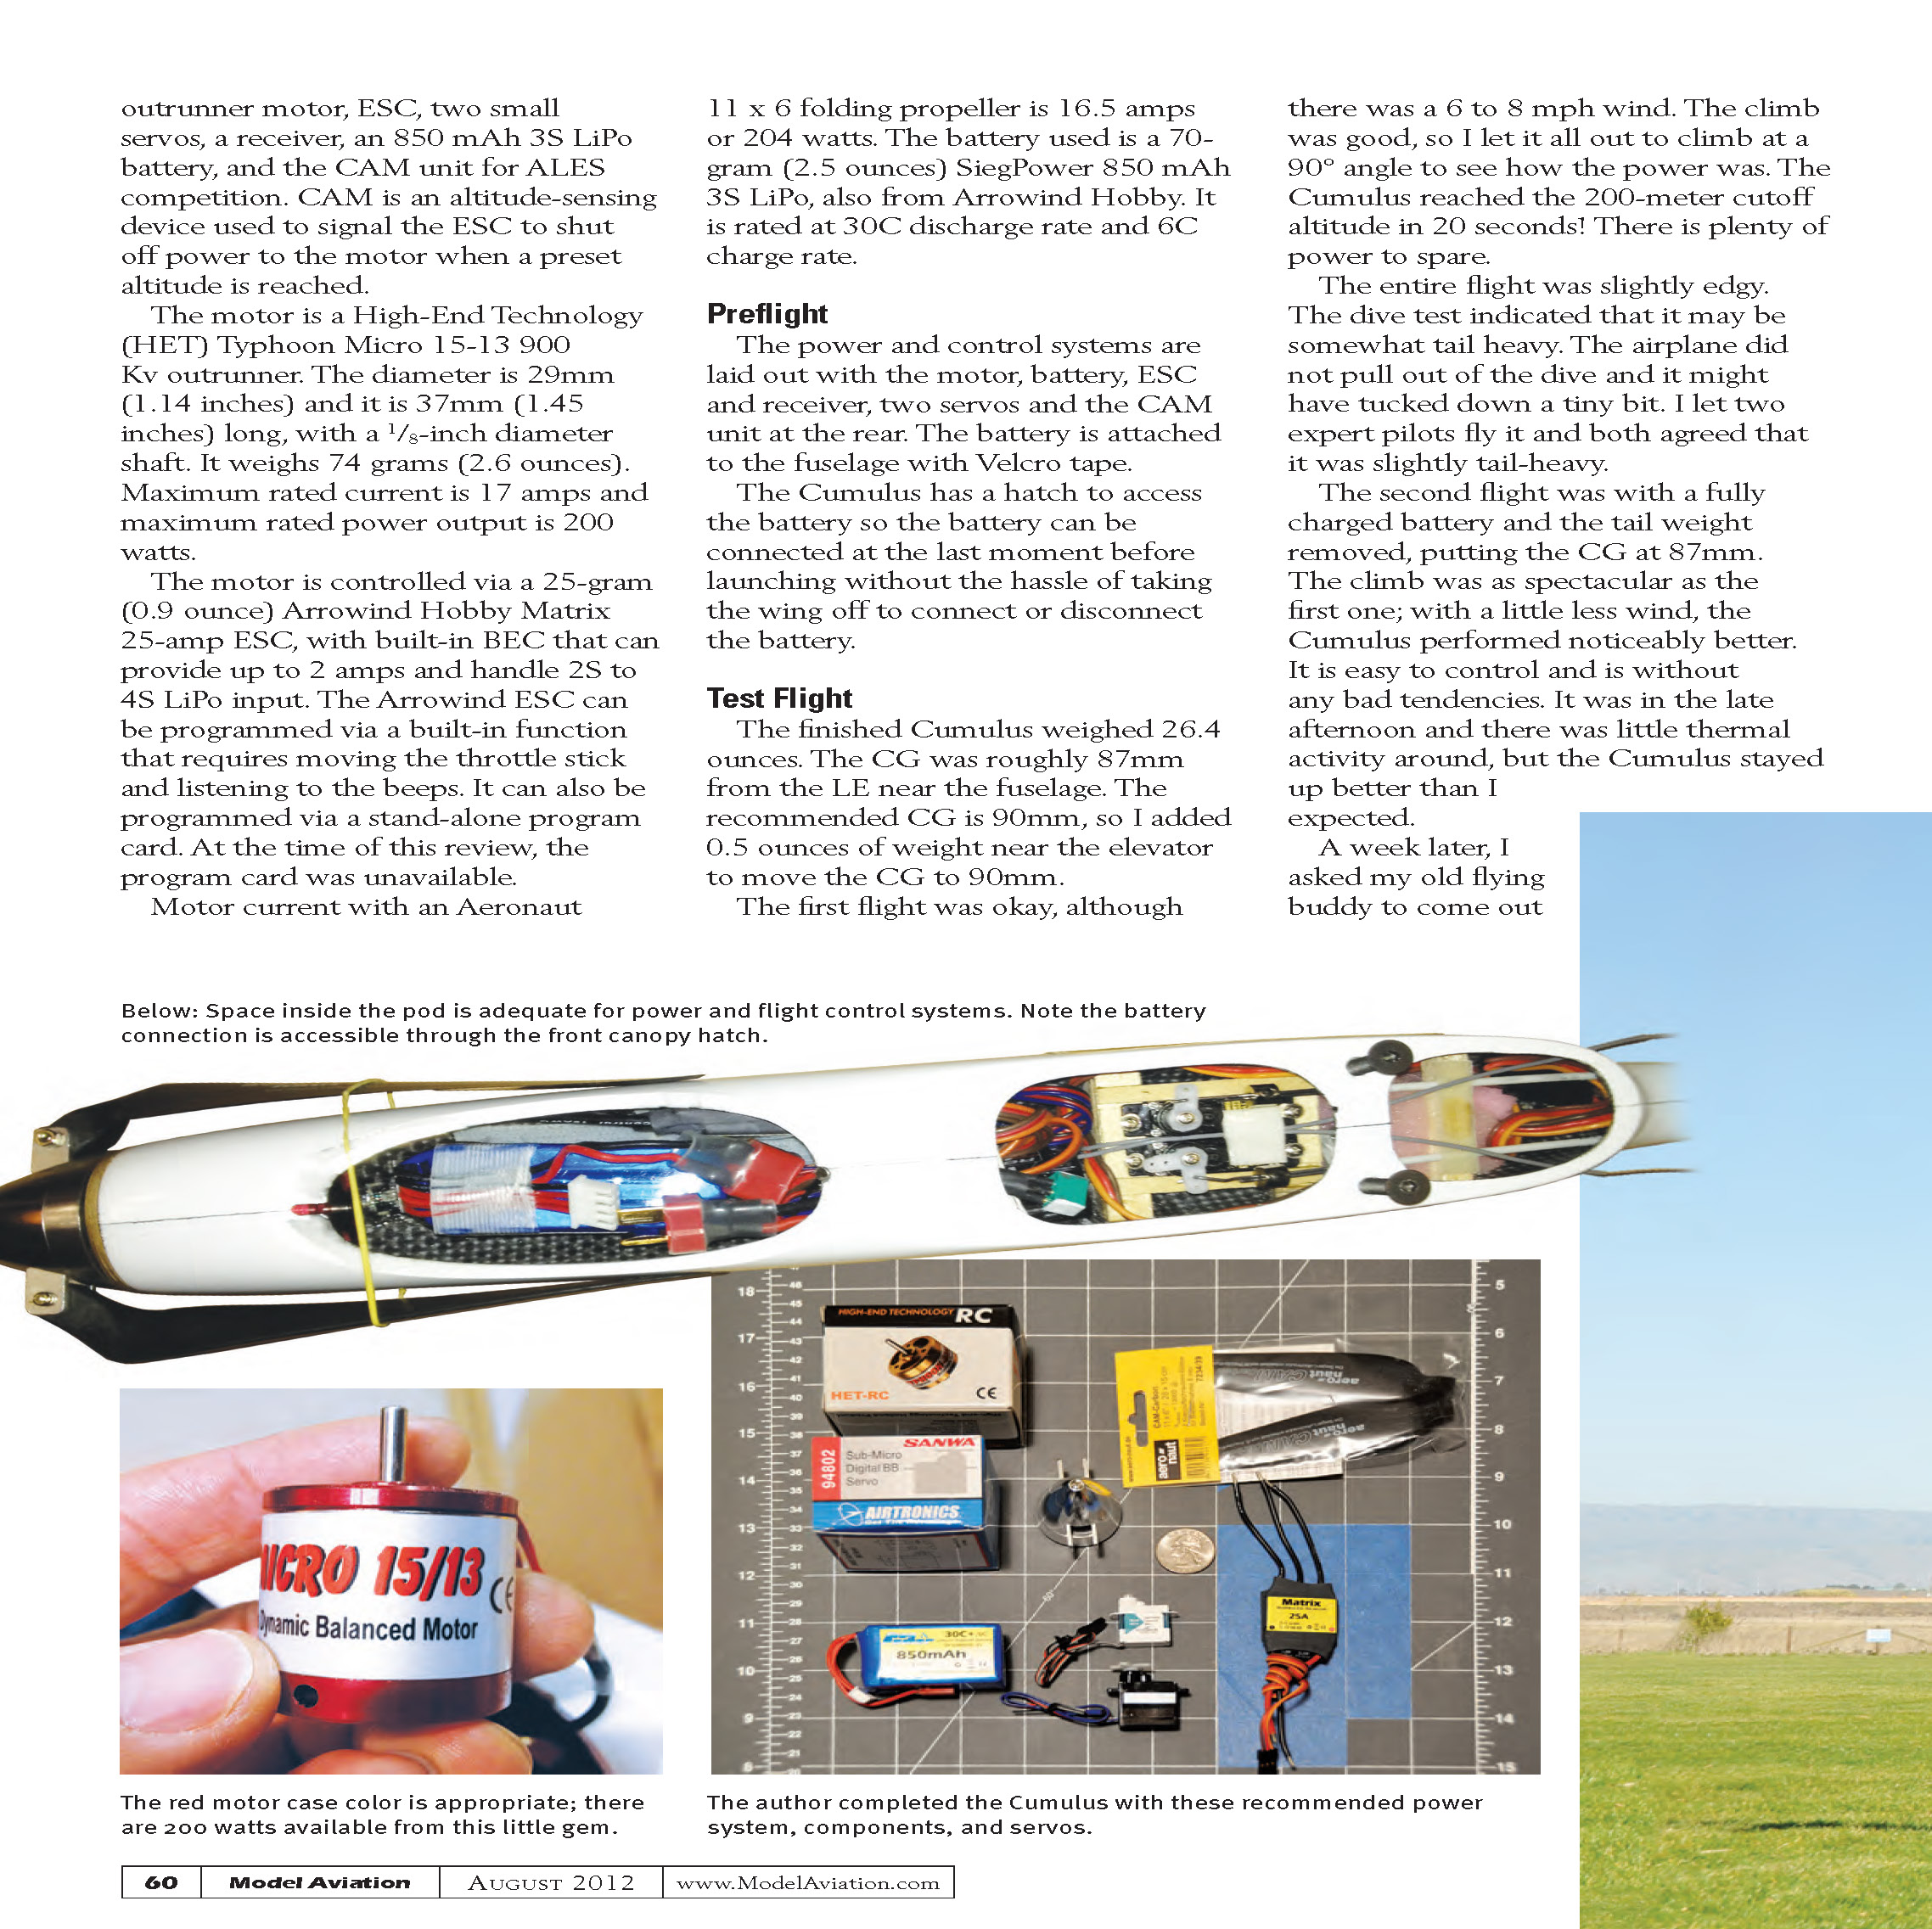
The pod of the Cumulus is small for an airplane with a 2.5-meter wingspan. It has enough room to house a brushless outrunner motor, ESC, two small servos, a receiver, an 850 mAh 3S LiPo battery, and the CAM unit for ALES competition. CAM is an altitude-sensing device used to signal the ESC to shut off power to the motor when a preset altitude is reached.
The motor is a High-End Technology (HET) Typhoon Micro 15-13 900 Kv outrunner. The diameter is 29 mm (1.14 in) and it is 37 mm (1.45 in) long, with a 1/8-inch diameter shaft. It weighs 74 grams (2.6 oz). Maximum rated current is 17 amps and maximum rated power output is 200 watts.
The motor is controlled via a 25-gram (0.9 oz) Arrowind Hobby Matrix 25-amp ESC, with built-in BEC that can provide up to 2 amps and handle 2S to 4S LiPo input. The Arrowind ESC can be programmed via a built-in function that requires moving the throttle stick and listening to the beeps. It can also be programmed via a stand-alone program card; at the time of this review, the program card was unavailable. Motor current with an Aeronaut 11 x 6 folding propeller is 16.5 amps (204 watts).
The battery used is a 70-gram (2.5 oz) SiegPower 850 mAh 3S LiPo, also from Arrowind Hobby. It is rated at a 30C discharge rate and 6C charge rate.
Preflight
The power and control systems are laid out with the motor, battery, ESC and receiver, two servos and the CAM unit at the rear. The battery is attached to the fuselage with Velcro tape. The Cumulus has a hatch to access the battery so the battery can be connected at the last moment before launching without the hassle of removing the wing to connect or disconnect the battery.
Test Flight
The finished Cumulus weighed 26.4 ounces. The CG was roughly 87 mm from the leading edge near the fuselage. The recommended CG is 90 mm, so I added 0.5 ounce of weight near the elevator to move the CG to 90 mm. The first flight was conducted in a 6 to 8 mph wind and the climb was very good. I tested full power climb at a 90° angle and the Cumulus reached the 200-meter cutoff altitude in 20 seconds. There is plenty of power to spare.
The entire flight was slightly edgy. The dive test indicated that it may be somewhat tail-heavy: the airplane did not cleanly pull out of the dive and it might have tucked down a tiny bit. I let two expert pilots fly it and both agreed that it was slightly tail-heavy.
On the second flight I used a fully charged battery and removed the tail weight, putting the CG at 87 mm. The climb was as spectacular as the first one; with a little less wind, the Cumulus performed noticeably better. It is easy to control and exhibited no bad tendencies. In the late afternoon, with little thermal activity, the Cumulus stayed up better than I expected.
My buddy helped me fly and take the obligatory photographs for the review and also timed a climb. On that launch—into a 10 to 12 mph wind—the Cumulus reached the 200-meter cutoff altitude in 25 seconds. The wind felt stronger at 200 meters than near the ground.
I proceeded to push the airplane harder to see how it handled the wind. It was no problem at all and easy to read when lift was detected. After a couple of "high-altitude" landings, I felt comfortable enough to attempt a contest-style landing. With maximum flaps and about 3/8 inch down-elevator compensation, the model came in at approximately a 30° nose-down attitude with no increase in speed. Landing was easy even with an 8 to 10 mph wind. With practice, contest landings with top marks should be easily achievable.
Post-Flight Comments
I glued a piece of sandpaper on both sides of the fuselage to create a better grip for launching the airplane.
I generally do not prefer outrunner motors for glider power because the spinning case can snag wires or lose parts in the fuselage, but in this case the fuselage has so little space that an inrunner with a gearbox is out of the question. The wires from the motor are taped down to the side of the fuselage to prevent accidental snagging.
I added a piece of G-10 fiberglass board to the front of the battery to ensure that if the battery slid forward the motor's spinning case would not damage the battery's insulation.
The firewall angle is spot-on from the factory. In level flight there was no pitch change with the motor turned on or off. The contest-type launch will require a nose-high launch and some up-elevator to quickly get to altitude.
Because of the small size of the Cumulus airframe components—pod, boom, narrow-chord wing—I had trouble seeing it at distances beyond about 1,000 feet. The dark-colored bottom helped, but at a distance it was hard to see the airplane. Although the shiny leading edges helped, some optical enhancements could improve visibility. One can't always count on having a timer/spotter who has better eyes than the pilot.
—Brian Chan [email protected]
AT A GLANCE ...
SPECIFICATIONS
- Model type: ALES/LMR/F5J competition electric glider
- Skill level: Intermediate builder, intermediate pilot
- Wingspan: 100 inches (2.5 m)
- Wing area: 629.3 square inches
- Airfoil: AG25 root, AG27 outer panels
- Length: 50 inches
- Weight: 24.3 ounces (model specification)
- Power system: 200–300 watt electric
- Radio: Seven channels with six servos
- Construction: Carbon fiber and balsa
- Price: $365
- Radio system: Futaba T12FG FASST transmitter; Futaba R6008HS 2.4 GHz receiver; four Airtronics 94802s; two BlueArrow D-05010MGs; custom-length servo extensions
- Ready-to-fly weight: 26.4 ounces including CAM ALES cutoff device
- Flight duration: Three to five launches to a 200-meter altitude
TEST-MODEL DETAILS
- Power: HET Typhoon Micro 15-13 Outrunner
- Battery: SiegPower 3-cell 850 mAh LiPo
- Propeller: Aeronaut CAM-Carbon 11 x 6 folding
PLUSES
- High-quality construction
- Easy assembly
- Complete hardware pack
- Prehinged control surfaces
- Excellent flight performance
- Reflective wing leading-edge finish
MINUSES
- No Kevlar thread provided for boom slot reinforcement
- Small profile is hard to see at altitude
MANUFACTURER/DISTRIBUTOR:
- Reichard Modelsport / Hobby Club
- Phone: (949) 425-1362
- Website: www.hobbyclub.com
SOURCES:
- Futaba: (800) 637-7660 — www.futaba-rc.com
- FAI F5J information: www.fai.org/ciam-documents
- ALES Rules 2012 (USA): www.rcgroups.com/forums/showthread.php?t=1603528&page=1
Transcribed from original scans by AI. Minor OCR errors may remain.

