
Resurrecting a Dead Glow Plug Igniter
A step-by-step guide to replacing the battery
by Clancy Arnold
Glow-plug igniters can range from easy to repair to not repairable. The difficulty in removing the battery can be as simple as opening the igniter and slipping out the old battery, or as complicated as going through several steps only to realize that the only option is to replace the unit.
A selection of glow-plug igniters is pictured in the opening photo. They are shown left to right, from easiest to repair to irreparable.
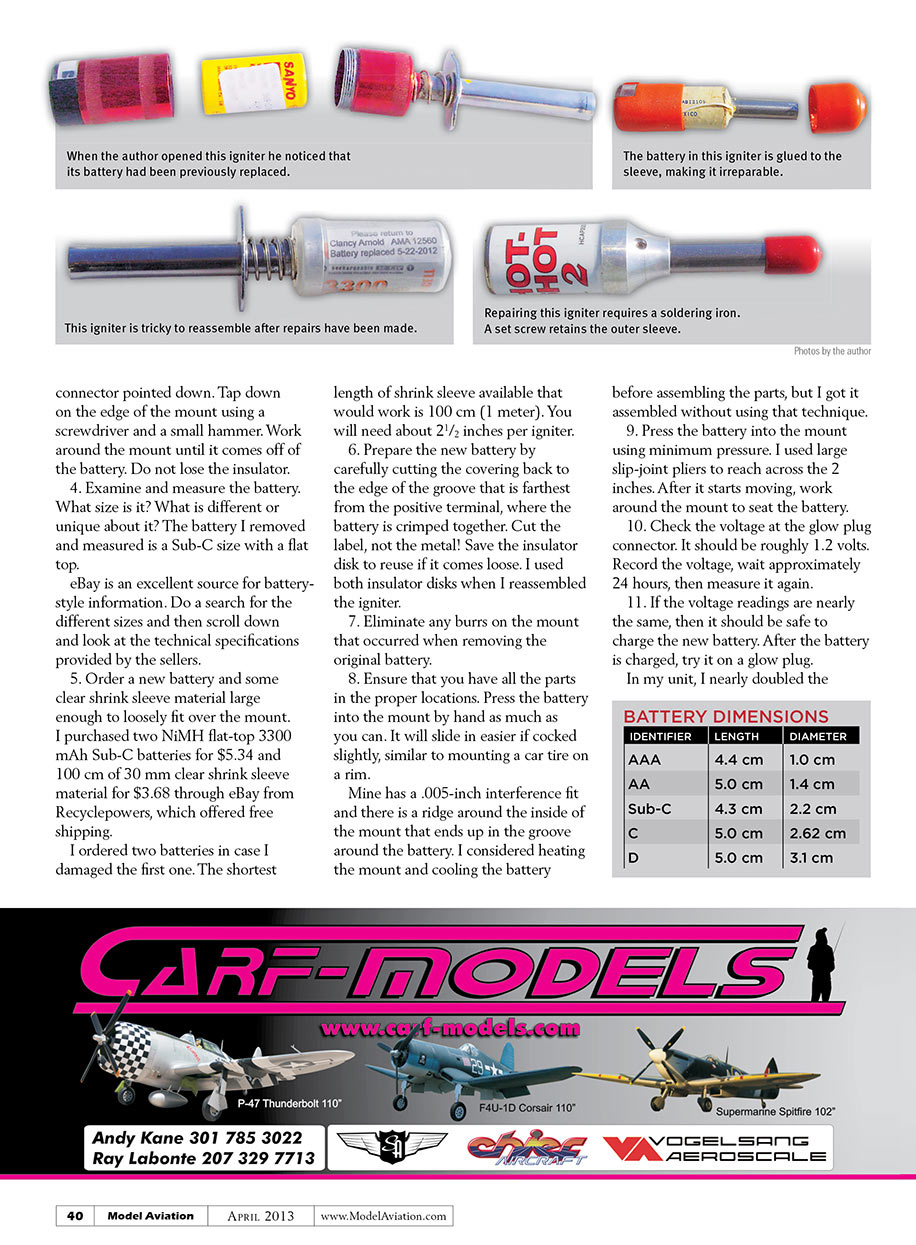
- The first one has a machined aluminum case, and to repair it you simply unscrew the case halves, drop out the old battery, insert the new battery, and screw the case halves back together. The repair is complete and the battery is ready to be charged. When I opened this one, I discovered that its battery had been previously replaced.
- The second igniter is also repairable. I recharged the igniter and used it to start my new O.S. FS91 engine. The next day, it would not heat the glow plug. I recharged it and it was again dead after sitting overnight. This time I noticed that the charger and the igniter were hot when the charging was complete.
It was time to replace the battery, but how? Look at the one you have and try to figure out how it comes apart. I disassembled the igniter slowly, remembering how it fit together.
- The third igniter can also be repaired, but the center wire from the glow-plug connector must be soldered to the flat top of the battery using stainless-steel flux. Neutralize the flux with baking soda and water after soldering. Use a large soldering iron and keep the time that heat is applied to the battery brief (5 to 6 seconds). This igniter has a set screw in the side of the mount that retains the outer sleeve of the connector. I had one come loose and the igniter fell apart in my hand at a contest!
- The fourth igniter is irreparable; the glow-plug connector's sleeve is glued to the negative end of the battery with conductive epoxy.
Following are the steps to replace a battery, which can be used for igniters similar to the second one.
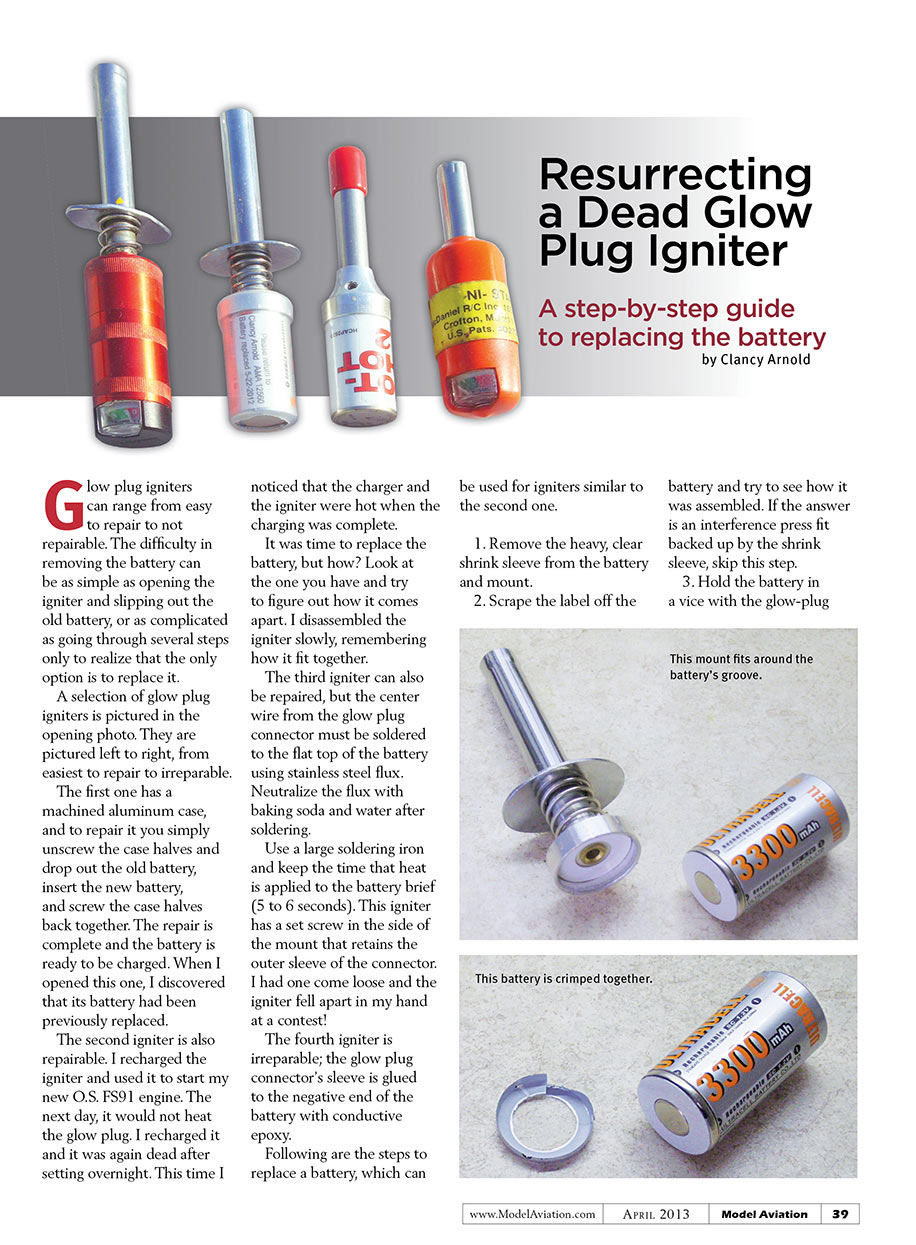
- Remove the heavy, clear shrink sleeve from the battery and mount.
- Scrape the label off the battery and try to see how it was assembled. If the answer is an interference press fit backed up by the shrink sleeve, skip this step.
- Hold the battery in a vice with the glow-plug connector pointed down. Tap down on the edge of the mount using a screwdriver and a small hammer. Work around the mount until it comes off the battery. Do not lose the insulator.
- Examine and measure the battery. What size is it? What is different or unique about it? The battery I removed and measured is a Sub-C size with a flat top. eBay is an excellent source for battery-style information. Do a search for the different sizes and then scroll down and look at the technical specifications provided by the sellers.
- Order a new battery and some clear shrink-sleeve material large enough to loosely fit over the mount. I purchased two NiMH flat-top 3300 mAh Sub-C batteries for $5.34 and 100 cm of 30 mm clear shrink sleeve material for $3.68 through eBay from Recyclepowers, which offered free shipping. I ordered two batteries in case I damaged the first one. The shortest length of shrink sleeve available that would work is 100 cm (1 meter). You will need about 2 1/2 inches per igniter.
- Prepare the new battery by carefully cutting the covering back to the edge of the groove that is farthest from the positive terminal, where the battery is crimped together. Cut the label, not the metal. Save the insulator disk to reuse if it comes loose. I used both insulator disks when I reassembled the igniter.
- Eliminate any burrs on the mount that occurred when removing the original battery.
- Ensure that you have all the parts in the proper locations. Press the battery into the mount by hand as much as you can. It will slide in easier if cocked slightly, similar to mounting a car tire on a rim.
Mine has a 0.005-inch interference fit and there is a ridge around the inside of the mount that ends up in the groove around the battery. I considered heating the mount and cooling the battery before assembling the parts, but I got it assembled without using that technique.
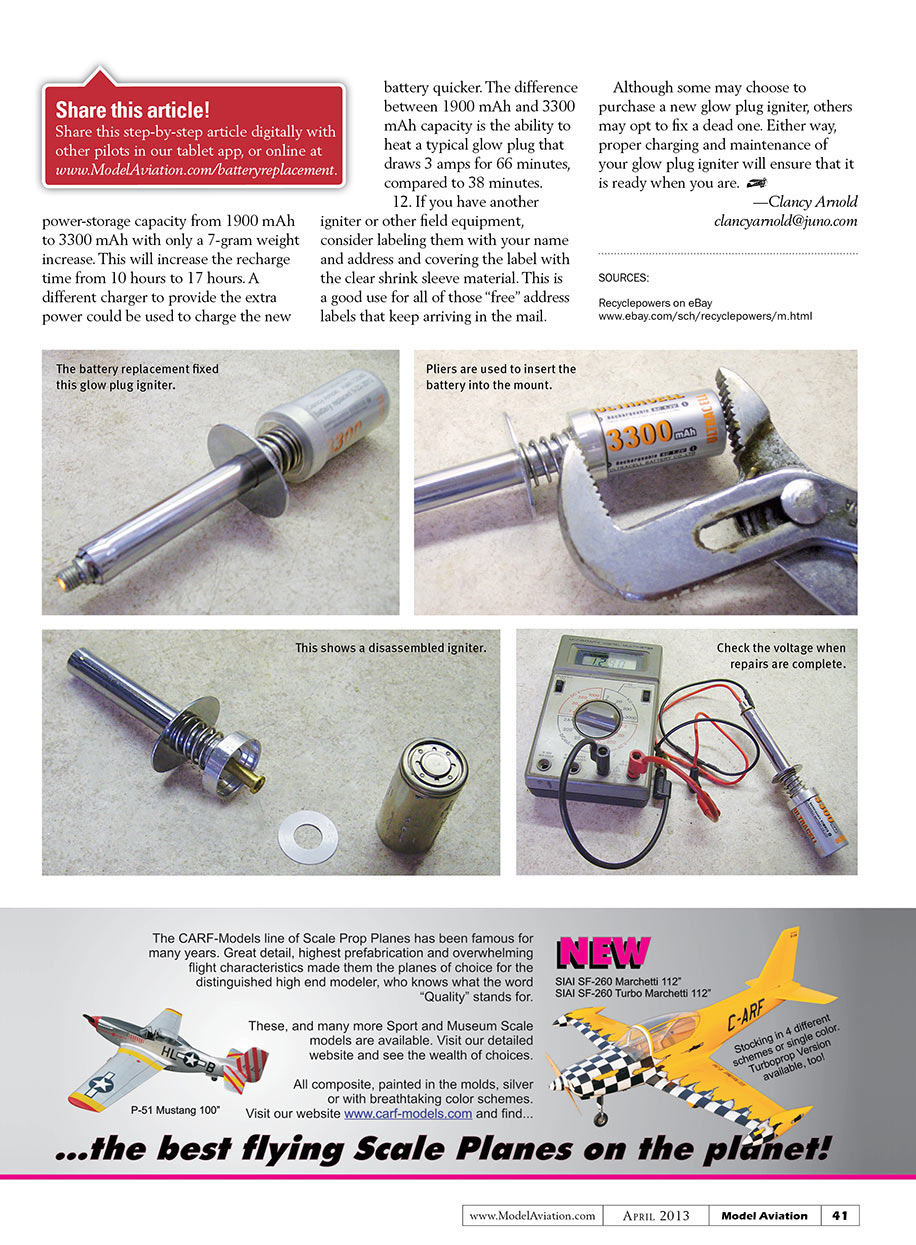
- Press the battery into the mount using minimum pressure. I used large slip-joint pliers to reach across the 2 inches. After it starts moving, work around the mount to seat the battery.
- Check the voltage at the glow-plug connector. It should be roughly 1.2 volts. Record the voltage, wait approximately 24 hours, then measure it again.
- If the voltage readings are nearly the same, then it should be safe to charge the new battery. After the battery is charged, try it on a glow plug.
In my unit, I nearly doubled the power-storage capacity from 1900 mAh to 3300 mAh with only a 7-gram weight increase. This will increase the recharge time from about 10 hours to about 17 hours. A different charger capable of providing more current could be used to charge the new battery more quickly. The difference between 1900 mAh and 3300 mAh capacity is the ability to heat a typical glow plug that draws 3 amps for 66 minutes, compared to 38 minutes.
BATTERY DIMENSIONS
- IDENTIFIER | LENGTH | DIAMETER
- AAA | 4.4 cm | 1.0 cm
- AA | 5.0 cm | 1.4 cm
- Sub-C | 4.3 cm | 2.2 cm
- C | 5.0 cm | 2.62 cm
- D | 5.0 cm | 3.1 cm
- If you have another igniter or other field equipment, consider labeling them with your name and address and covering the label with the clear shrink-sleeve material. This is a good use for all of those "free" address labels that keep arriving in the mail.
Although some may choose to purchase a new glow-plug igniter, others may opt to fix a dead one. Either way, proper charging and maintenance of your glow-plug igniter will help ensure that it is ready when you are.
—Clancy Arnold [email protected]
SOURCES
- Recyclepowers on eBay
- www.ebay.com/sch/recyclepowers/m.html
Transcribed from original scans by AI. Minor OCR errors may remain.

