
Retro RC camp e’Racer
Joe Hass
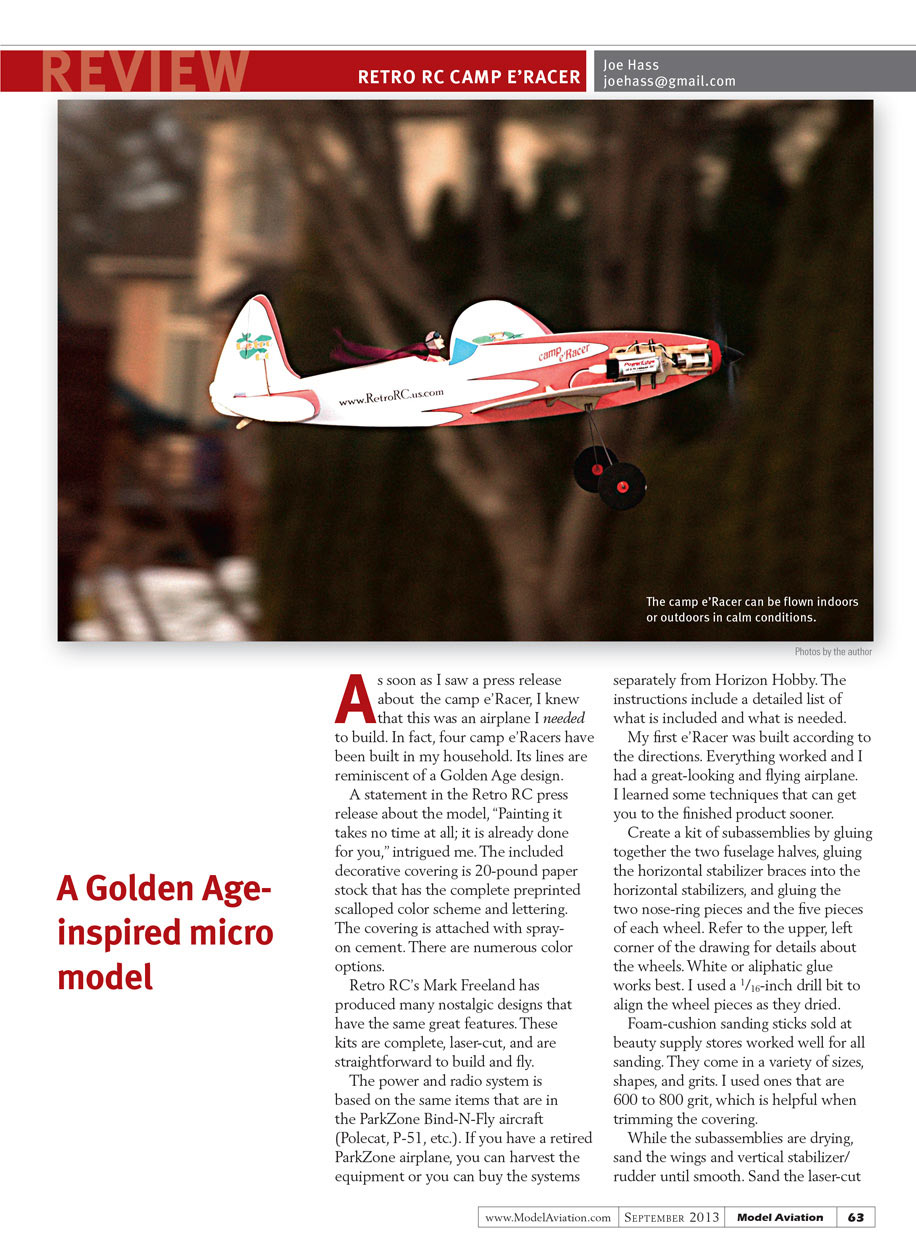
As soon as I saw a press release about the camp e’Racer, I knew that this was an airplane I needed to build. In fact, four camp e’Racers have been built in my household. Its lines are reminiscent of a Golden Age design.
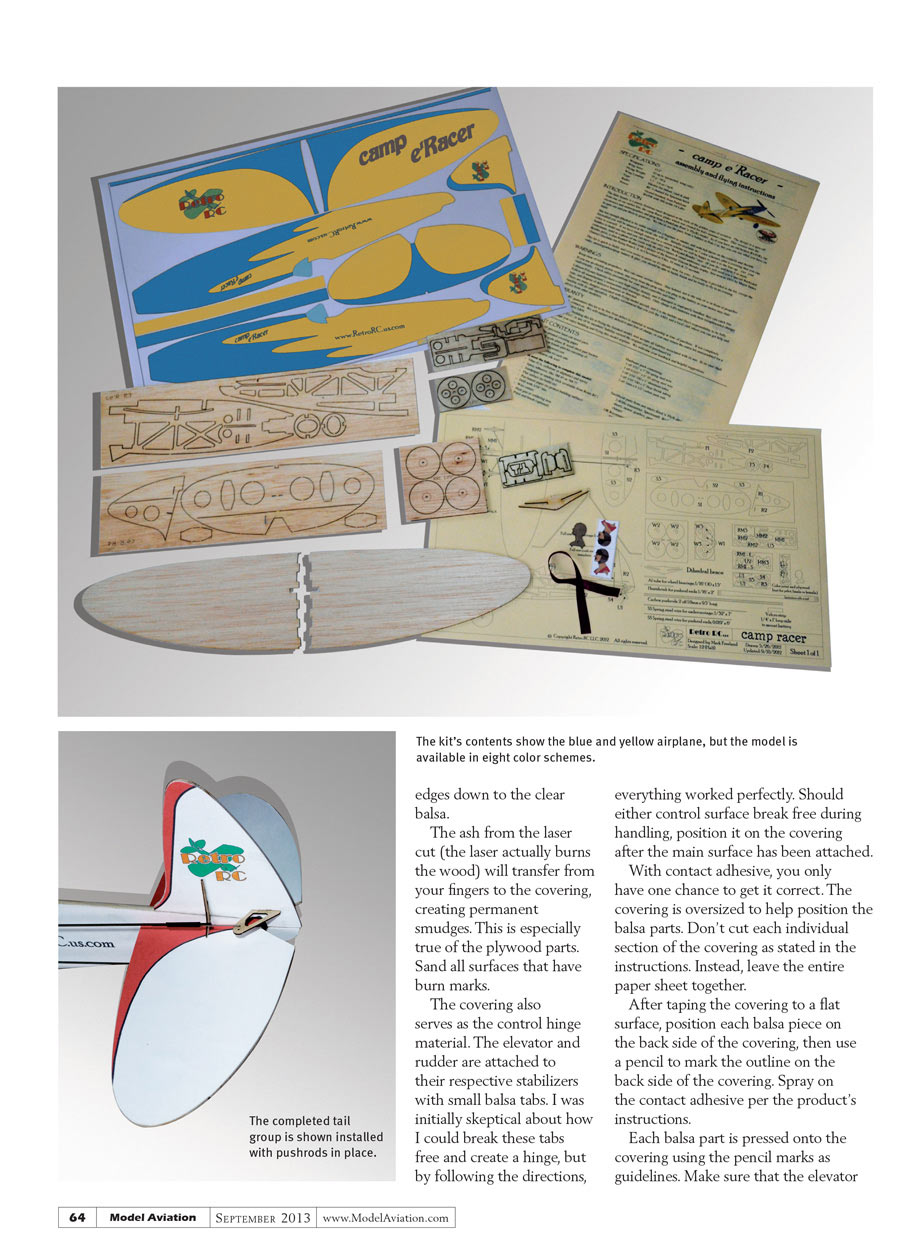
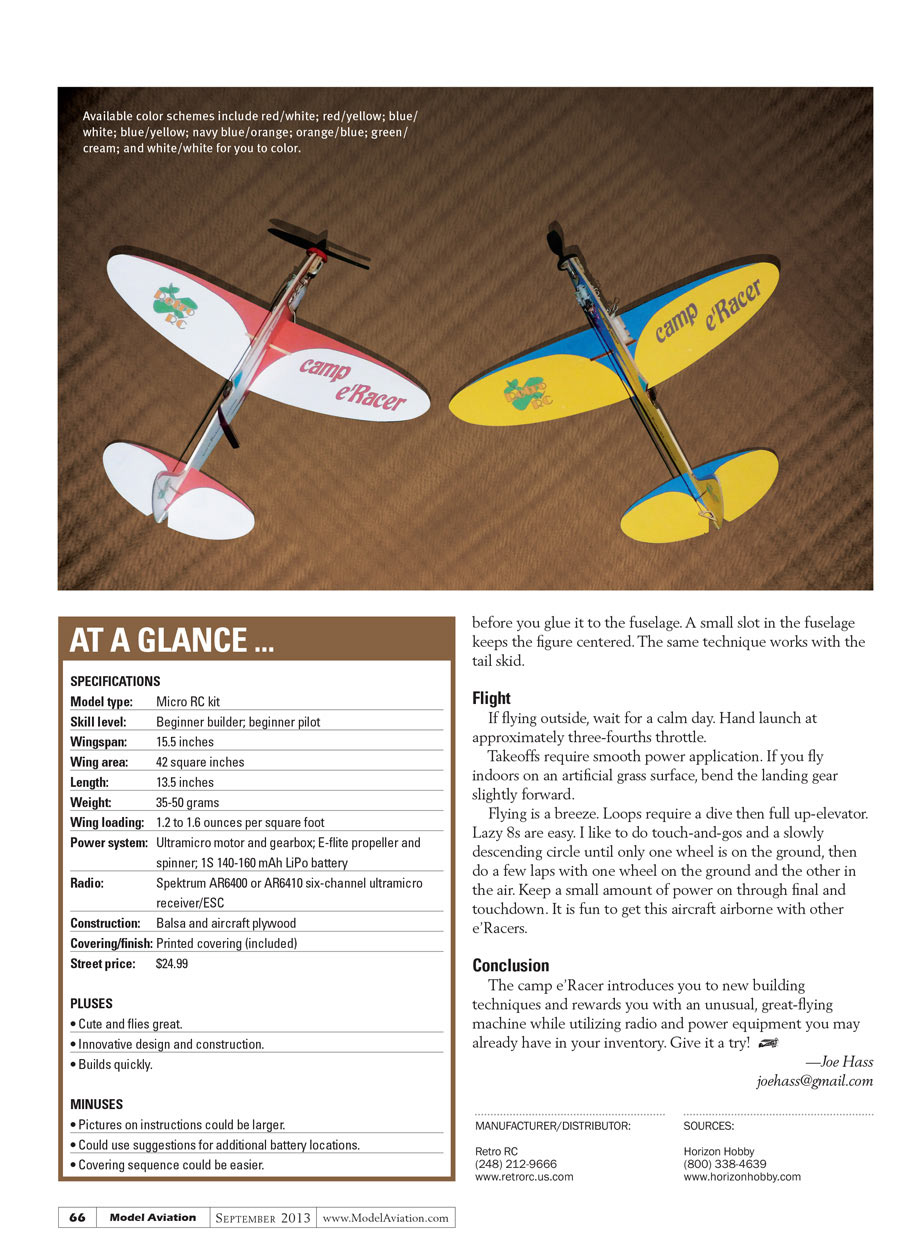
A statement in the Retro RC press release about the model, "Painting it takes no time at all; it is already done for you," intrigued me. The included decorative covering is 20-pound paper stock that has the complete preprinted scalloped color scheme and lettering. The covering is attached with spray-on cement. There are numerous color options.
Retro RC's Mark Freeland has produced many nostalgic designs that have the same great features. These kits are complete, laser-cut, and are straightforward to build and fly.
The power and radio system is based on the same items that are in the ParkZone Bind-N-Fly aircraft (Polecat, P-51, etc.). If you have a retired ParkZone airplane, you can harvest the equipment or you can buy the systems separately from Horizon Hobby. The instructions include a detailed list of what is included and what is needed.
My first e'Racer was built according to the directions. Everything worked and I had a great-looking and flying airplane. I learned some techniques that can get you to the finished product sooner.
Create a kit of subassemblies by gluing together the two fuselage halves, gluing the horizontal stabilizer braces into the horizontal stabilizers, and gluing the two nose-ring pieces and the five pieces of each wheel. Refer to the upper left corner of the drawing for details about the wheels. White or aliphatic glue works best. I used a 1/16-inch drill bit to align the wheel pieces as they dried.
Foam-cushion sanding sticks sold at beauty supply stores worked well for all sanding. They come in a variety of sizes, shapes, and grits. I used ones that are 600 to 800 grit, which is helpful when trimming the covering.
While the subassemblies are drying, sand the wings and vertical stabilizer/rudder until smooth. Sand the laser-cut edges down to the clear balsa.
The ash from the laser cut (the laser actually burns the wood) will transfer from your fingers to the covering, creating permanent smudges. This is especially true of the plywood parts. Sand all surfaces that have burn marks.
The covering also serves as the control hinge material. The elevator and rudder are attached to their respective stabilizers with small balsa tabs. I was initially skeptical about how I could break these tabs free and create a hinge, but by following the directions, everything worked perfectly. Should either control surface break free during handling, position it on the covering after the main surface has been attached.
With contact adhesive, you only have one chance to get it correct. The covering is oversized to help position the balsa parts. Don't cut each individual section of the covering as stated in the instructions. Instead, leave the entire paper sheet together.
After taping the covering to a flat surface, position each balsa piece on the back side of the covering, then use a pencil to mark the outline on the back side of the covering. Spray on the contact adhesive per the product's instructions.
Each balsa part is pressed onto the covering using the pencil marks as guidelines. Make sure that the elevator
Retro RC camp e’Racer
Joe Hass
control horn slot is on the left side as you put the horizontal stabilizer/elevator on the covering.
Use a sharp blade to cut out the wings, horizontal stabilizer/elevator, one side of the vertical stabilizer/rudder, and fuselage from the covering sheet. Cut out the covering on the fuselage where the wing, horizontal stabilizer, and motor mounts will go, then flip the vertical stabilizer/rudder and the fuselage over and press them onto the covering, following the pencil marks.
Cut the covering close to the balsa. Use a 600 to 800 foam-cushion sanding stick to sand the covering to match the balsa parts.
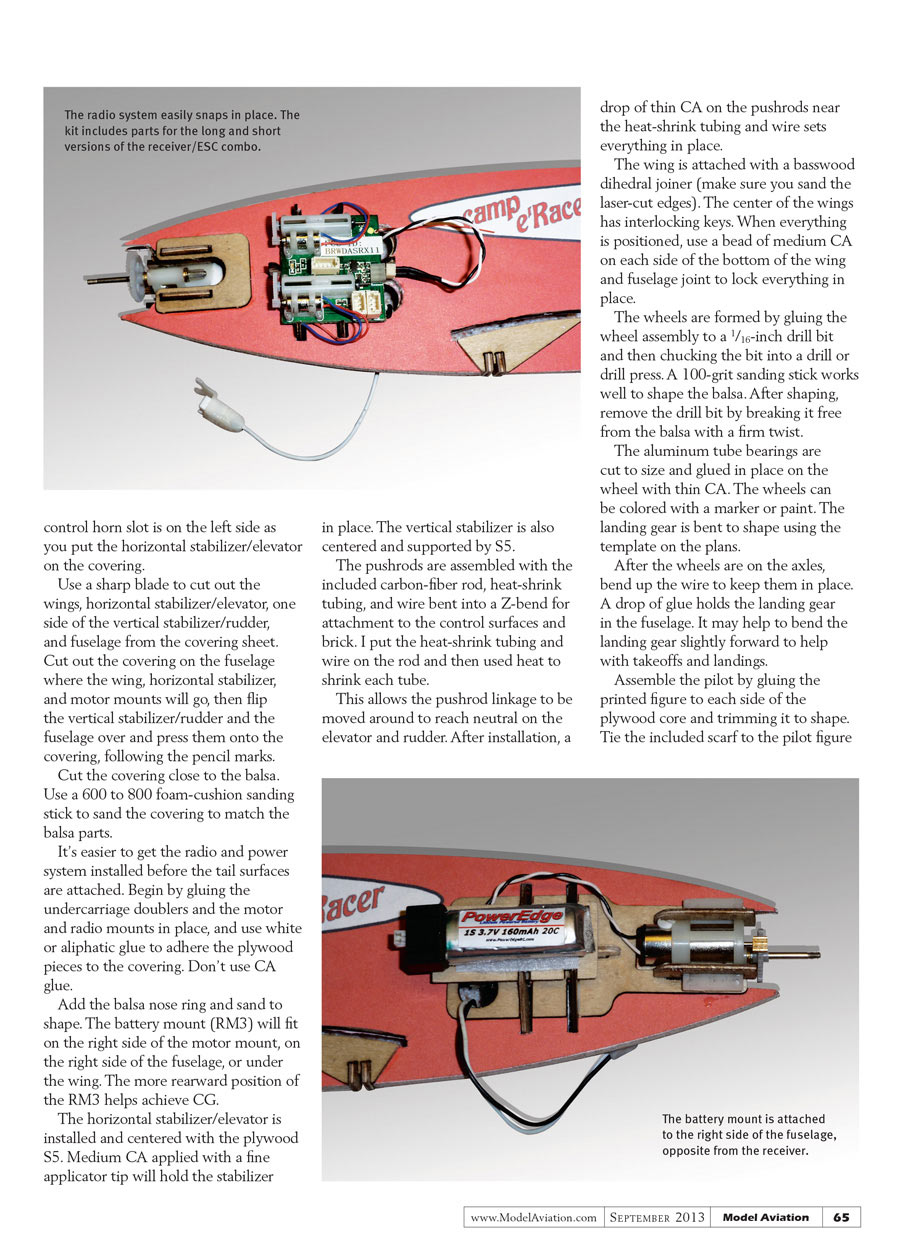
It's easier to get the radio and power system installed before the tail surfaces are attached. Begin by gluing the undercarriage doublers and the motor and radio mounts in place, and use white or aliphatic glue to adhere the plywood pieces to the covering. Don't use CA glue.
Add the balsa nose ring and sand to shape. The battery mount (RM3) will fit on the right side of the motor mount, on the right side of the fuselage, or under the wing. The more rearward position of the RM3 helps achieve CG.
The horizontal stabilizer/elevator is installed and centered with the plywood S5. Medium CA applied with a fine applicator tip will hold the stabilizer in place. The vertical stabilizer is also centered and supported by S5.
The pushrods are assembled with the included carbon-fiber rod, heat-shrink tubing, and wire bent into a Z-bend for attachment to the control surfaces and brick. I put the heat-shrink tubing and wire on the rod and then used heat to shrink each tube.
This allows the pushrod linkage to be moved around to reach neutral on the elevator and rudder. After installation, a drop of thin CA on the pushrods near the heat-shrink tubing and wire sets everything in place.
The wing is attached with a basswood dihedral joiner (make sure you sand the laser-cut edges). The center of the wings has interlocking keys. When everything is positioned, use a bead of medium CA on each side of the bottom of the wing and fuselage joint to lock everything in place.
The wheels are formed by gluing the wheel assembly to a 1/16-inch drill bit and then chucking the bit into a drill or drill press. A 100-grit sanding stick works well to shape the balsa. After shaping, remove the drill bit by breaking it free from the balsa with a firm twist.
The aluminum tube bearings are cut to size and glued in place on the wheel with thin CA. The wheels can be colored with a marker or paint. The landing gear is bent to shape using the template on the plans.
After the wheels are on the axles, bend up the wire to keep them in place. A drop of glue holds the landing gear in the fuselage. It may help to bend the landing gear slightly forward to help with takeoffs and landings.
Assemble the pilot by gluing the printed figure to each side of the plywood core and trimming it to shape. Tie the included scarf to the pilot figure before you glue it to the fuselage. A small slot in the fuselage keeps the figure centered. The same technique works with the tail skid.
AT A GLANCE ...
SPECIFICATIONS Model type: Micro RC kit Skill level: Beginner builder; beginner pilot Wingspan: 15.5 inches Wing area: 42 square inches Length: 13.5 inches Weight: 35-50 grams Wing loading: 1.2 to 1.6 ounces per square foot Power system: Ultramicro motor and gearbox; E-flite propeller and spinner; 1S 140-160 mAh LiPo battery Radio: Spektrum AR6400 or AR6410 six-channel ultramicro receiver/ESC Construction: Balsa and aircraft plywood Covering/finish: Printed covering (included) Street price: $24.99
PLUSES
- Cute and flies great.
- Innovative design and construction.
- Builds quickly.
MINUSES
- Pictures on instructions could be larger.
- Could use suggestions for additional battery locations.
- Covering sequence could be easier.
Flight
If flying outside, wait for a calm day. Hand launch at approximately three-fourths throttle.
Takeoffs require smooth power application. If you fly indoors on an artificial grass surface, bend the landing gear slightly forward.
Flying is a breeze. Loops require a dive then full up-elevator. Lazy 8s are easy. I like to do touch-and-gos and a slowly descending circle until only one wheel is on the ground, then do a few laps with one wheel on the ground and the other in the air. Keep a small amount of power on through final and touchdown. It is fun to get this aircraft airborne with other e’Racers.
Conclusion
The camp e’Racer introduces you to new building techniques and rewards you with an unusual, great-flying machine while utilizing radio and power equipment you may already have in your inventory. Give it a try!
— Joe Hass <REDACTED>
MANUFACTURER/DISTRIBUTOR: Retro RC (248) 212-9666 www.retrorc.us.com
SOURCES: Horizon Hobby (800) 338-4639 www.horizonhobby.com
Transcribed from original scans by AI. Minor OCR errors may remain.

