10ArrowMaster.lt1.doc
[Headline: Alien Aircraft ArrowMaster 55
[Subhead: A biplane as enjoyable to build as it is to fly]
[Author: Jerry Smith]
[Photos by the author]
[Sidebars in text file]
[No additional callouts]
Specifications
Model type: Laser-cut sport biplane
Skill level: Intermediate pilot; intermediate builder
Wingspan: 55 inches
Wing area: 996 square inches
Length: 50 inches
Weight: 7-8 pounds
Power: .65-.90 glow; .70-1.10 four-cycle glow; or 15cc gas engine
Construction: Balsa and plywood
Street price: $199.95
Test-Model Details
Power system: Evolution 15GX 15cc gas engine
Battery: LiFe 6.6-volt for receiver, 2s 1,600 mAh LiPo for ignition
Propeller: APC 13 x 6 or APC 14 x 6
Radio system: Spektrum DX9 transmitter; AR8000 Spektrum receiver; four Futaba 3152 digital servos; one Futaba S148 on throttle
Ready-to-fly weight: 8.1 pounds
Flight duration: 10-15 minutes
Pluses
• High performance, semisymmetrical airfoil.
• Excellent online instruction manual.
• 3-D CAD design for precision parts fit.
• Wide flight envelope.
• Easy to transport.
Minuses
• Could of have had more included hardware.
[make ed. note part of spec box]
(Editor’s note: By the time you read this, the ArrowMaster 55 will have been upgraded to IMAA-legal size, according to the manufacturer. The kit will feature all of the parts required to construct it with either a 55- or 60-inch wingspan.)
Many of you may remember the Lou Andrews AeroMaster. Lou had a passion for model airplanes and excelled in competition as well as designing, building, and experimenting. He also started Andrews Aircraft Model Company, Inc. and produced such kits as the S-Ray, H-Ray, AeroMaster, SportsMaster, TrainerMaster, and A-Ray.
The AeroMaster, with lock-box construction, appeared on the scene in 1966. It was a well-respected design and still is. It is still possible to find and buy an AeroMaster kit that someone has stashed away for years. The Lou Andrew AeroMaster is still thought of and loved by many modelers as a classic biplane.
The Alien Aircraft ArrowMaster 55, designed by Tom Herr, reminds you of the original AeroMaster. The mere fact that it’s called ArrowMaster, with the same sounding name, ties it in even stronger. However it is different.
The Alien Aircraft version has a larger, 55-inch wingspan and is built with modern, laser-cut materials and construction methods that permit easier and faster construction. The front has a different shape with the spinner faired in with the fuselage, and the vertical stabilizer is rounded.
This is a builder’s kit, so someone with average building experience should have no trouble with it. The kit is well organized with an excellent online assembly manual. Coupled with good, clear full-size plans, you simply can’t go wrong assembling this model, but read through the manual before you start so you will know what to expect.
The kit arrives in a plain cardboard box. Upon opening, you can expect to find a neatly packaged stack of 35 sheets of laser-cut parts in a plastic bag, strip wood, and sheeting. Three sets of plans, a bag of hardware, and excellent-quality metal cabane struts and landing gear are also included.
The kit’s hardware is not enough to complete the model. You’ll need to purchase tail and aileron hinges, tail pushrods, aileron pushrods, main wheels, tail wheel, fuel tank, and spinner. Tom says these were left out to keep the kit price within reason.
All of the recommended additional accessories are readily available from Du-Bro products. You won’t go wrong using them. Although the ArrowMaster 55 is shown on the company’s website with wheel pants, they are not included in the kit. However, there is a nice set of epoxy glass wheel pants available from Fiberglass Specialties (part no. 23) that look great, are rugged, and fit perfectly if you decide you want them. Tom has offered to those who email him a copy of the receipt for the pants a free set of hardware to mount them.
Get ready for a great building experience!
Assembly
First, identify and mark the part numbers on the laser-cut parts using the drawings in the manual. This step is a must.
The manual starts you out building the tail feathers. They build fast with an inner core of laser-cut balsa, sheeted on both sides. I found my inner core pieces were soft and flexible. Having built many airplanes, I know that making the grain in the wood go in opposite directions makes things stronger without adding weight.
Building your own airplane allows you to incorporate your own ideas. I cut all the vertical pieces out of the core and replaced them with 1/2-inch strips with the grain in the opposite direction of the sheeting. There is plenty of scrap wood in the kit to accomplish this. It did wonders for the stiffness to prevent warping and I was pleased with the results.
The ArrowMaster 55’s wings are built using the traditional method of construction: pin down a spar, add the ribs, the LE, and the top spar. The LE is sheeted on both sides with shear webbing between the spars, making a strong D-tube section. The TE is located in slots in the ribs with spacers below supporting the wing level during construction.
If your building board is long enough (5 feet), you can build the top wing in one piece. The lower wing is built in two panels, epoxied together with glass tape over the joint.
All of the wing’s parts fit perfectly and I had no problem assembling them. Follow the manual so you don’t do a step out of sequence. Things are hard to get apart once they are glued together.
The fuselage is built mainly of 3 mm poplar plywood with some balsa. After splicing the sides together and adding doublers, formers are located in the sides with tab and slots. The aft top and bottom of the fuselage are added, forming a box on which formers are adjoined to the turtle deck and front end. Balsa stringers complete the turtle deck, while the formers in front are sheeted.
The metal cabanes and landing gear are epoxied into slots located in the fuselage. I questioned Tom about the way the landing gear was mounted. He was satisfied with the mounting, but I will reserve comment until I have flown the airplane for a while. Normally landing gear is bolted on and can be removed if necessary.
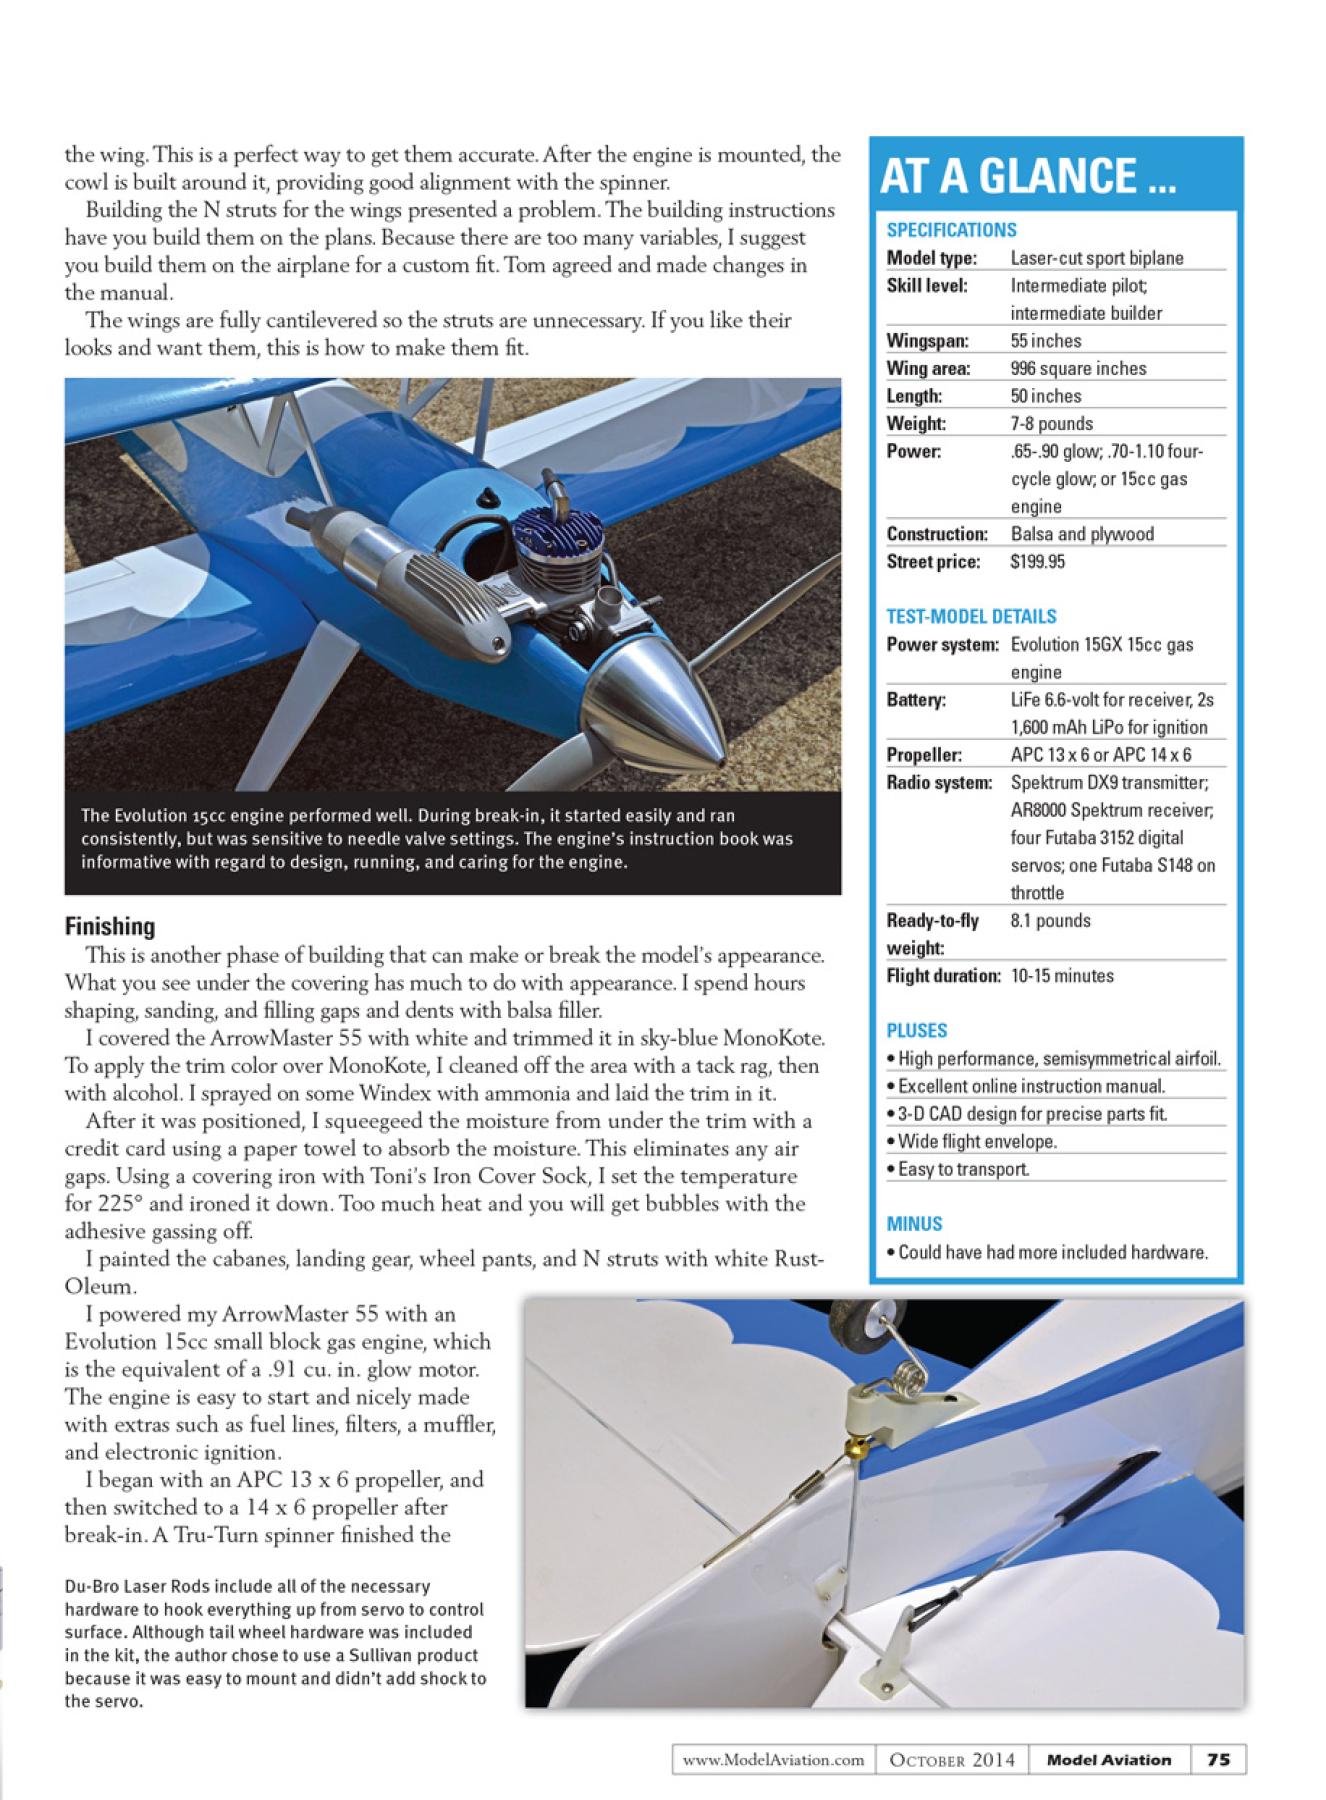
With the lower wing placed on the fuselage, the accessible wing dowel holes allow you to match drill them to the wing. This is a perfect way to get them accurate. After the engine is mounted, the cowl is built around it providing good alignment with the spinner.
Building the N struts for the wings presented a problem. The building instructions have you build them on the plans. One size fits all doesn’t work here because of too many variables. I suggest you build them on the airplane for a custom fit. Tom agreed with me and made changes in the manual.
The wings are fully cantilevered so the struts are unnecessary. If you like their looks and want them, this is how to make them fit.
Finishing
This is another phase of building that can make or break the appearance of your model. What you see under the covering has much to do with appearance. I spend hours shaping, sanding, and filling gaps and dents with balsa filler until I am satisfied.
I covered the ArrowMaster 55 with white and trimmed it in sky-blue MonoKote. To apply the trim color over MonoKote, I clean off the area with a tack rag then with alcohol. I spray on some Windex with ammonia and lay the trim in it.
After it is positioned, I squeegee the moisture from under the trim with a credit card using a paper towel to absorb the moisture. This eliminates any air gaps. Using a covering iron with Toni’s Iron Cover Sock, I set the temperature for 225° and iron it down. Too much heat and you will get bubbles with the adhesive gassing off.
I painted the cabanes, landing gear, wheel pants, and N struts with white Rust-Oleum.
I power my ArrowMaster 55 with an Evolution 15cc small block gas engine, which is the equivalent of a .91 cubic inch glow motor. The engine is friendly, easy to start, and nicely made with extras such as fuel line, filters, muffler and electronic ignition. I began with an APC 13 x 6 propeller, and then switched to a 14 x 6 propeller after break-in. A Tru-Turn spinner finished the front end. This spinner works well with an electric starter and it runs true!
How Does It Fly?
Before heading to the flying field there are several things to consider for success. Is the engine performing at its best? Are batteries fully charged? Are the control surfaces moving properly and at the right rate? Above all, is the CG correct? All of this went through my mind as I prepared the model for flight.
I am always apprehensive on the first flight, not because I don’t think it will fly, but because of what could happen. After the model leaves the ground in flight, my nervousness goes away.
Because I used a gas engine with ignition and battery, my ArrowMaster 55 came out on the top end of the weight range at 8 pounds. With 995.6 square inches of wing area, I wasn’t worried about it lifting off the ground. The model needed little trim, flew nicely at half throttle, and didn’t fly heavy.
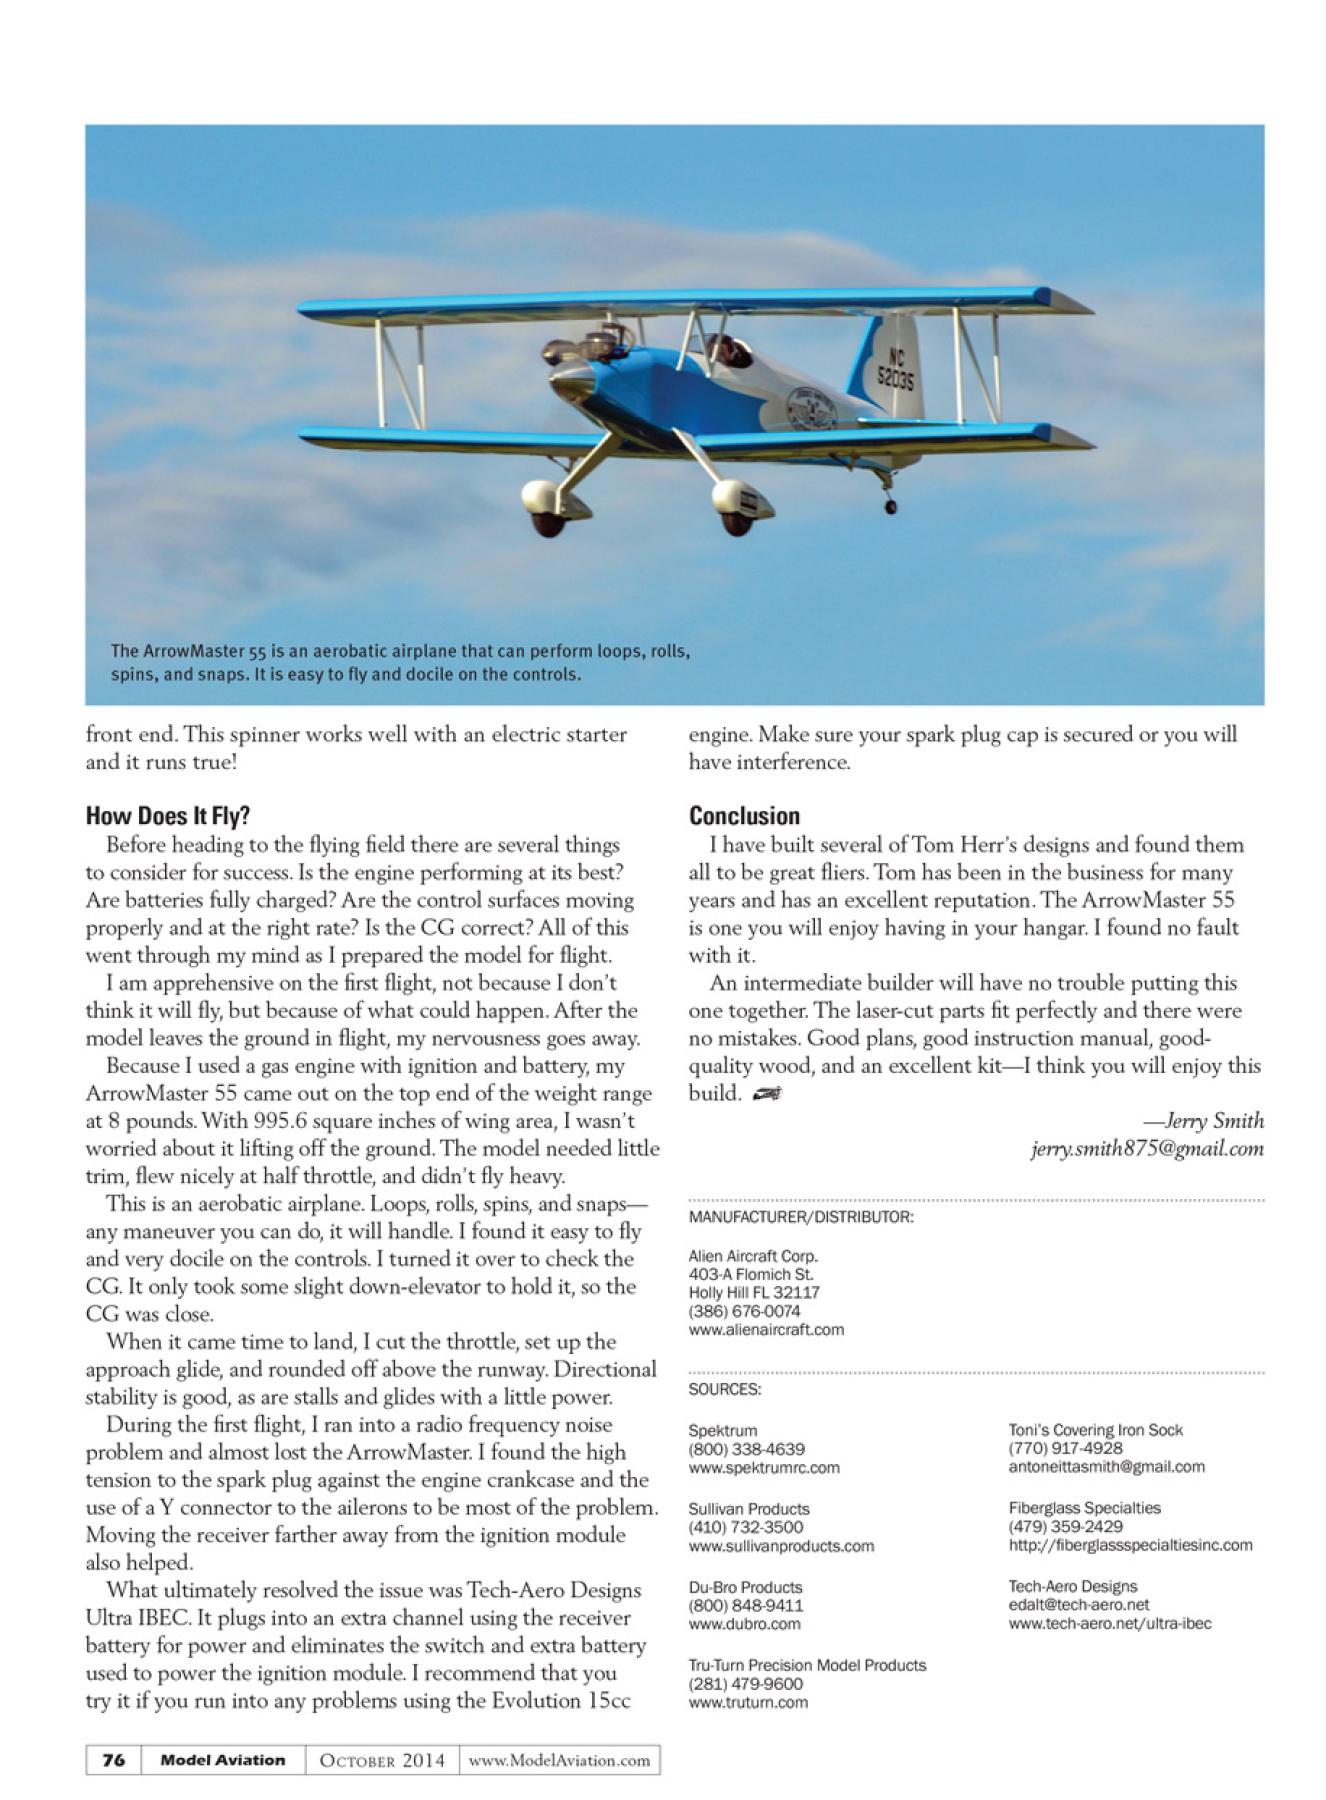
This is an aerobatic airplane. Loops, rolls, spins, and snaps—anything maneuver you can do, it will take. I found it easy to fly and very docile on the controls. I turned it over to check the CG. It only took some slight down-elevator to hold it, so the CG was close.
When it came time to land, I cut the throttle, set up the approach glide, and rounded off above the runway. Directional stability is good, as are stalls and glides with a little power.
During the first flight, I ran into a radio frequency noise problem and almost lost the ArrowMaster. I found the high tension to the spark plug against the engine crankcase. Employing a Y connector to the ailerons solved most of the problem. Moving the receiver farther away from the ignition module also helped.
Ultimately what resolved the issue was Tech-Aero Design Ultra IBEC. It plugs into an extra channel using the receiver battery for power and eliminates the switch and extra battery used to power the ignition module. I recommend that you try it if you run into any issues using the Evolution 15cc engine. Make sure your spark plug cap is on securely or you will have an interference problem.
Conclusion
I have built several of Tom Herr’s designs and found them all excellent fliers. Tom has been in the business for many years and has an excellent reputation. The ArrowMaster 55 is one you will enjoy having in your hangar. I found no fault with it.
An intermediate builder will have no trouble putting this one together. The laser-cut parts fit perfectly and there were no mistakes. Good plans, good instruction manual, good quality wood, and an excellent kit—I think you will enjoy putting this build together.[dingbat]
—Jerry Smith
[email protected]
MANUFACTURER/DISTRIBUTOR:
Alien Aircraft Corp.
403-A Flomich St.
Holly Hill FL 32117
(386) 676-0074
www.alienaircraft.com
SOURCES:
Spektrum
(800) 338-4639
www.spektrumrc.com
Sullivan Products
(410) 732-3500
www.sullivanproducts.com
Du-Bro Products
(800) 848-9411
www.dubro.com
Tru-Turn Precision Model Products
(281) 479-9600
www.truturn.com
Toni’s Covering Iron Sock
(770) 917-4928
[email protected]
Fiberglass Specialties
(479) 359-2429
http://fiberglassspecialtiesinc.com
Tech-Aero Designs
www.tech-aero.net/ultra-ibec