
ROCHOBBY F2G SUPER CORSAIR
Jay Smith [email protected]
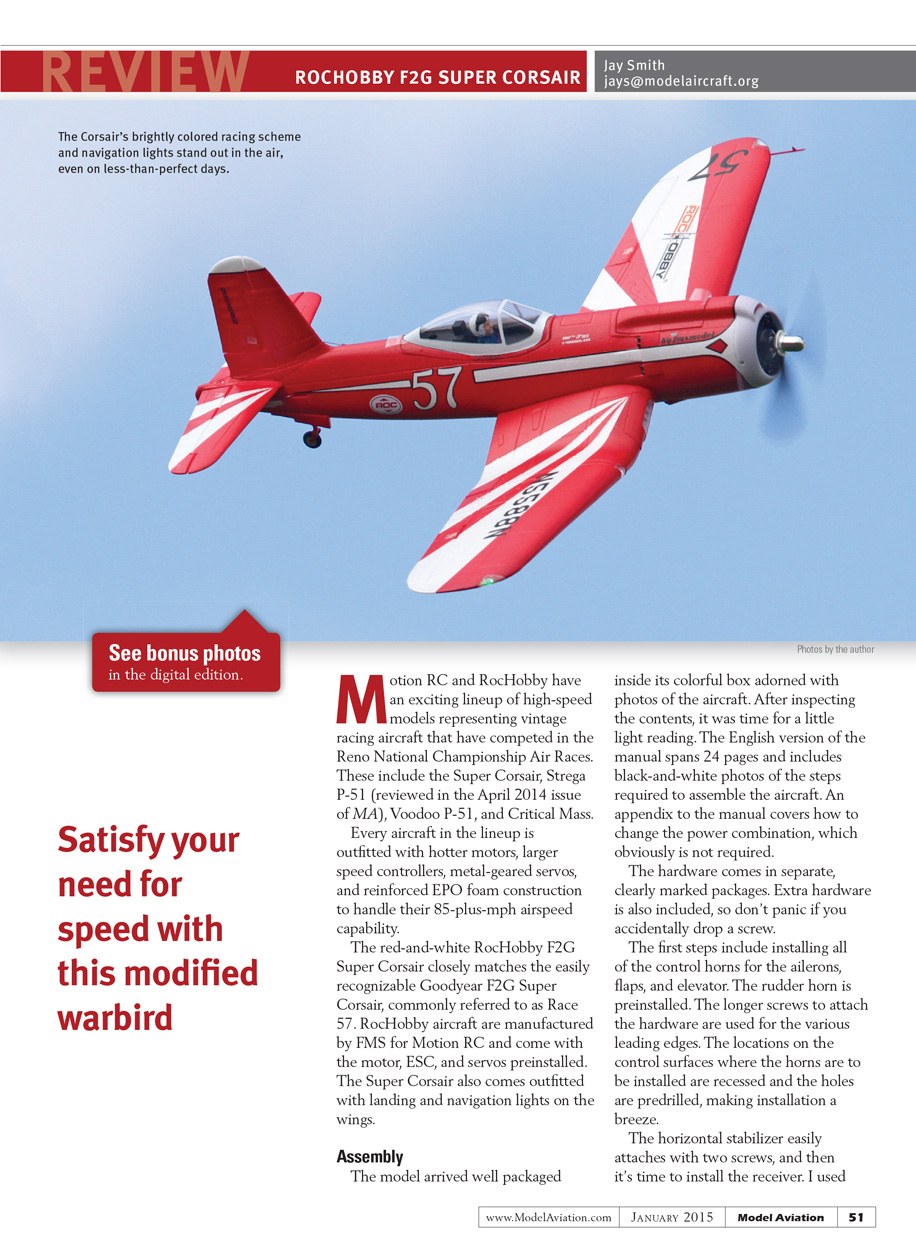
Satisfy your need for speed with this modified warbird
Motion RC and RocHobby have an exciting lineup of high-speed models representing vintage racing aircraft that have competed in the Reno National Championship Air Races. These include the Super Corsair, Strega P-51 (reviewed in the April 2014 issue of MA), Voodoo P-51, and Critical Mass.
Every aircraft in the lineup is outfitted with hotter motors, larger speed controllers, metal-geared servos, and reinforced EPO foam construction to handle their 85-plus-mph airspeed capability.
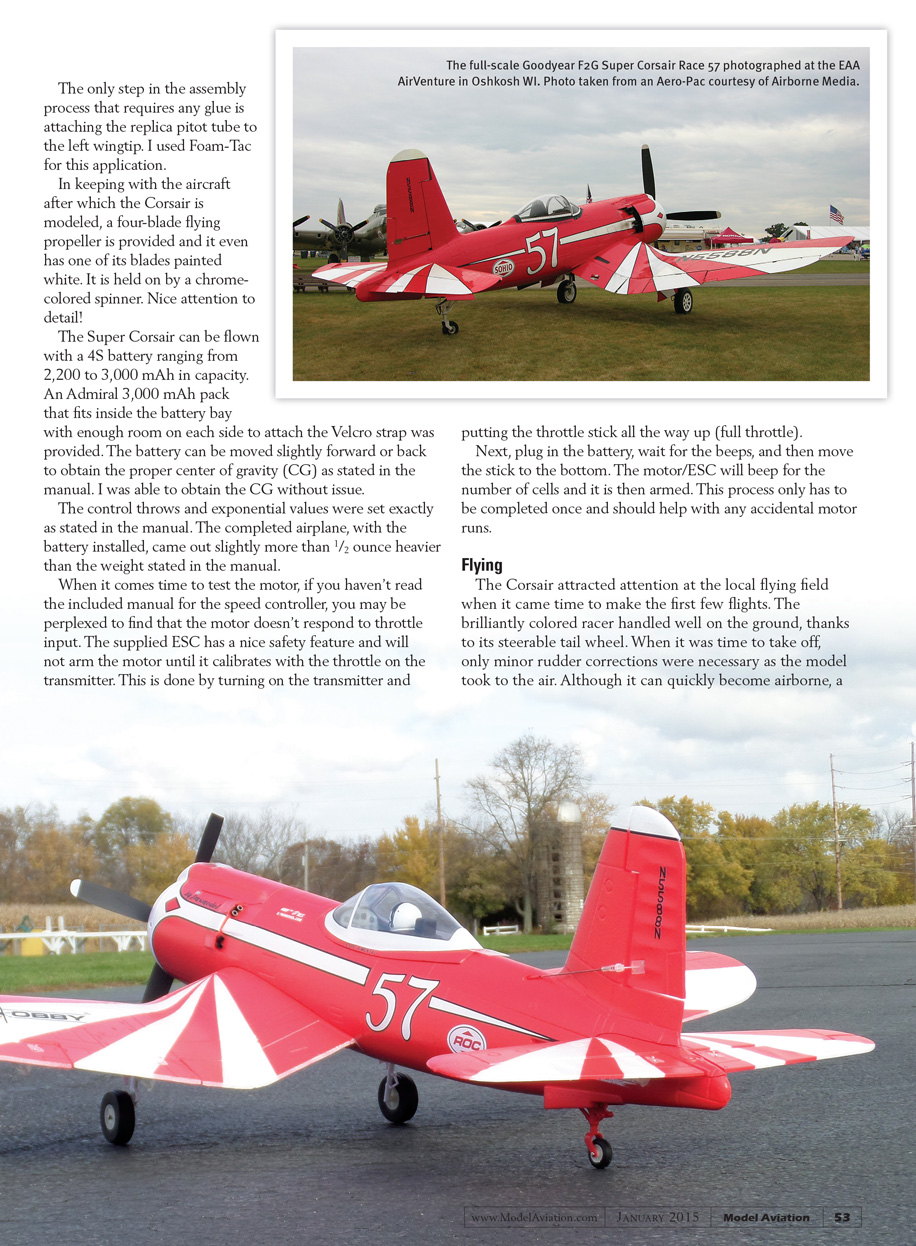
The red-and-white RocHobby F2G Super Corsair closely matches the easily recognizable Goodyear F2G Super Corsair, commonly referred to as Race 57. RocHobby aircraft are manufactured by FMS for Motion RC and come with the motor, ESC, and servos preinstalled. The Super Corsair also comes outfitted with landing and navigation lights on the wings.
Assembly
The model arrived well packaged inside its colorful box adorned with photos of the aircraft. After inspecting the contents, I consulted the manual. The English version spans 24 pages and includes black-and-white photos of the steps required to assemble the aircraft. An appendix covers how to change the power combination, which obviously is not required.
The hardware comes in separate, clearly marked packages. Extra hardware is also included, so don’t panic if you accidentally drop a screw.
The first steps include installing all of the control horns for the ailerons, flaps, and elevator. The rudder horn is preinstalled. The longer screws to attach the hardware are used for the various leading edges. The locations on the control surfaces where the horns are to be installed are recessed and the holes are predrilled, making installation a breeze.
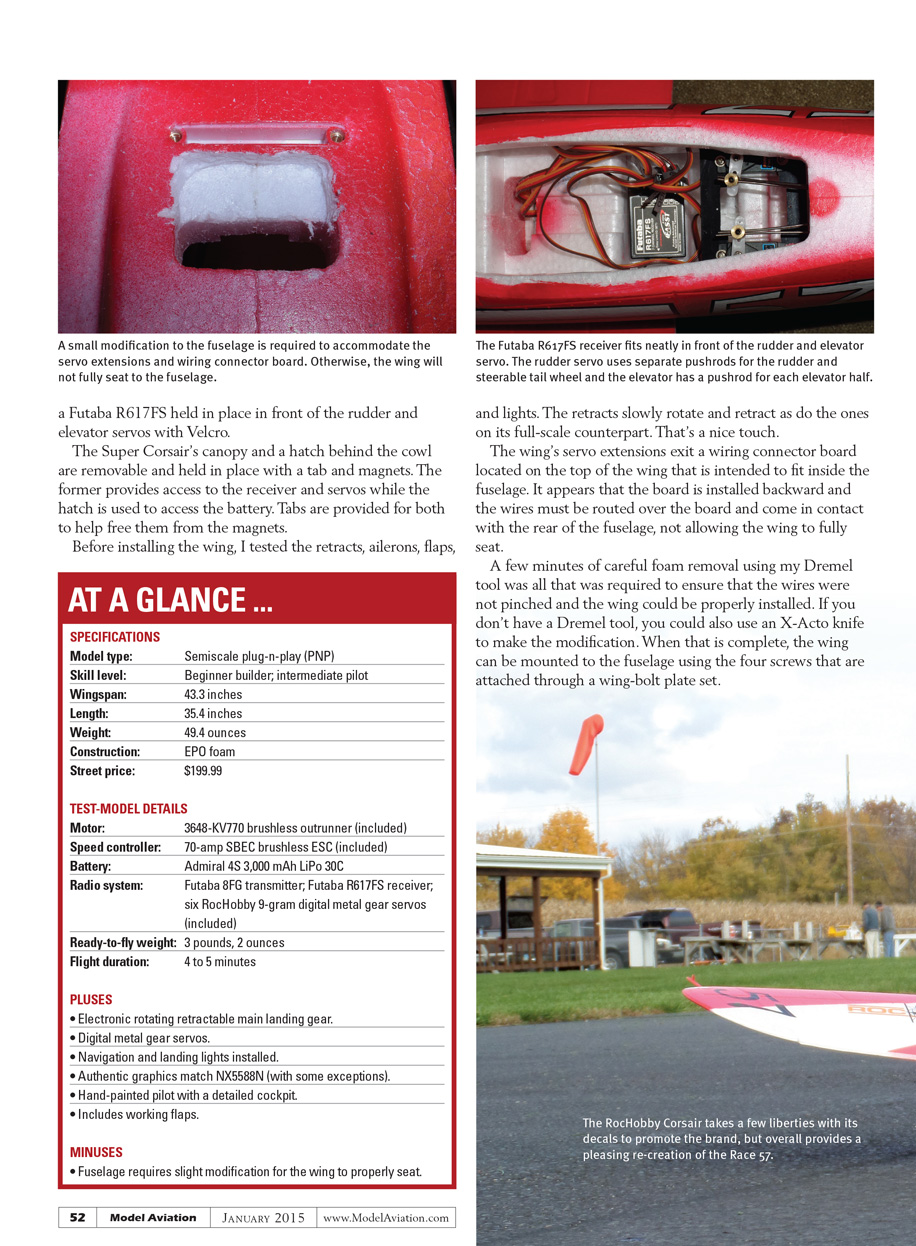
The horizontal stabilizer easily attaches with two screws, and then it’s time to install the receiver. I used a Futaba R617FS receiver that is held in place in front of the rudder and elevator servos with Velcro. The Super Corsair’s canopy and a hatch behind the cowl are removable and are held in place with a tab and magnets. The former provides access to the receiver and servos while the latter is used to access the battery. Tabs are provided for both to help free them from the magnets when you need to remove them.
Before installing the wing, I tested the retracts, ailerons, flaps, and lights. The retracts slowly rotate and retract like those on the full-scale counterpart — a nice touch.
The wing’s servo extensions exit a wiring connector board located on the top of the wing that is intended to fit inside the fuselage. It appears that the board is installed backward and the wires must be routed over the board and come in contact with the rear of the fuselage, not allowing the wing to fully seat. A few minutes of careful foam removal using my Dremel tool was all that was required to ensure that the wires were not pinched and the wing could be properly installed. If you don't have a Dremel tool, you could also use an X-Acto knife to make the modification. When that is complete, the wing can be mounted to the fuselage using the four screws that attach through a wing-bolt plate set.
The only step in the assembly process that requires any glue is attaching the replica pitot tube to the left wingtip. I used Foam-Tac for this application.
In keeping with the aircraft after which the Corsair is modeled, a four-blade propeller is provided and one of its blades is painted white. It is held on by a chrome-colored spinner — nice attention to detail!
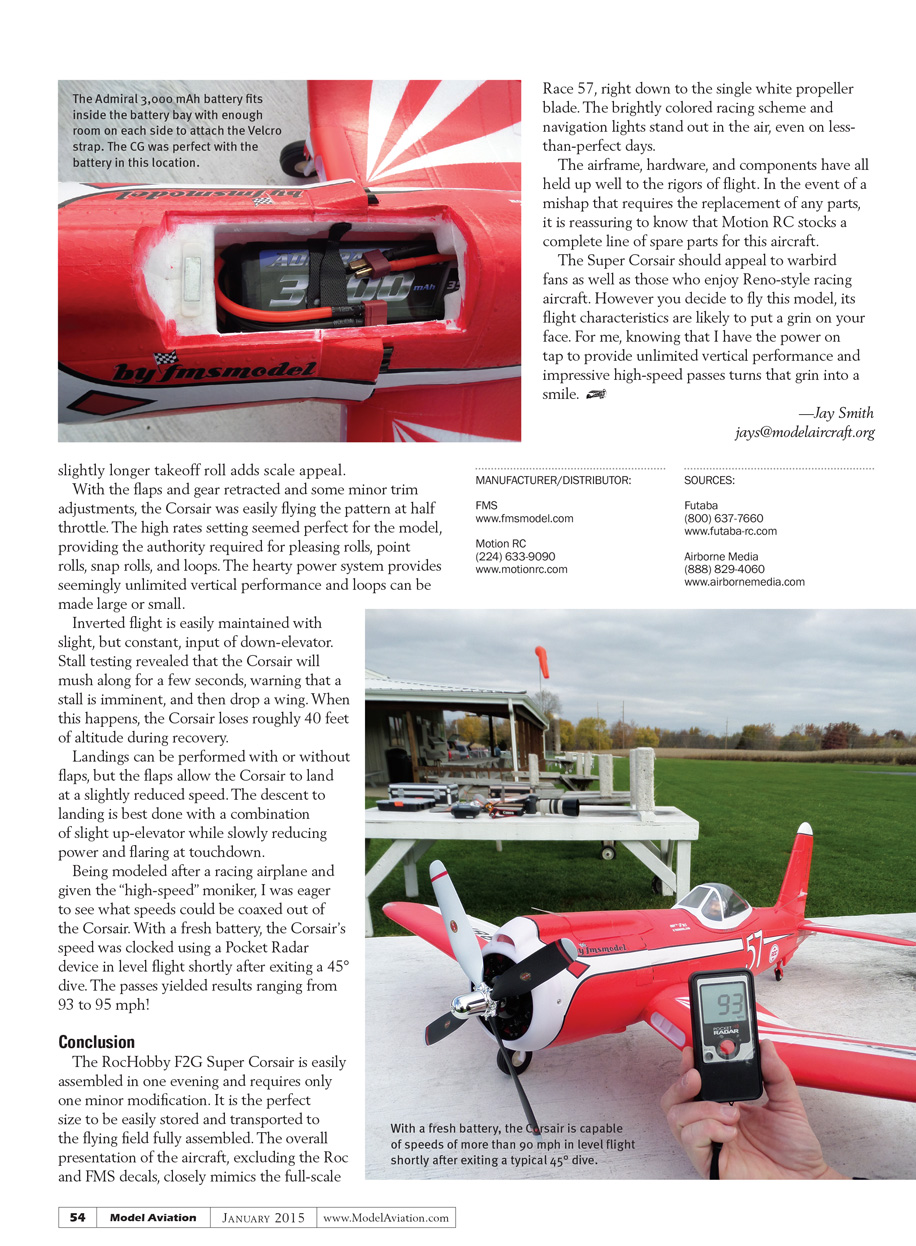
The Super Corsair can be flown with a 4S battery ranging from 2,200 to 3,000 mAh. An Admiral 3,000 mAh pack fits inside the battery bay with enough room on each side to attach the Velcro strap. The battery can be moved slightly forward or back to obtain the proper center of gravity (CG) as stated in the manual. I was able to obtain the CG without issue.
The control throws and exponential values were set exactly as stated in the manual. The completed airplane, with the battery installed, came out slightly more than 1/2 ounce heavier than the weight stated in the manual.
When it comes time to test the motor, if you haven't read the included manual for the speed controller, you may be perplexed to find that the motor doesn't respond to throttle input. The supplied ESC has a safety feature and will not arm the motor until it calibrates with the throttle on the transmitter. To arm it: turn on the transmitter and put the throttle stick all the way up (full throttle). Next, plug in the battery, wait for the beeps, and then move the stick to the bottom. The motor/ESC will beep for the number of cells and is then armed. This process only has to be completed once and should help prevent accidental motor runs.
Flying
The Corsair attracted attention at the local flying field when it came time to make the first few flights. The brilliantly colored racer handled well on the ground, thanks to its steerable tail wheel. When it was time to take off, only minor rudder corrections were necessary as the model climbed. Although it can quickly become airborne, a slight amount of elevator is required to get the tail up and for the model to establish a climb. The roll rate is quick and a bit faster than expected for a model of this size. The ailerons are powerful and the flaps are effective for lowering the landing speed. A slightly longer takeoff roll adds scale appeal.
With the flaps and gear retracted and some minor trim adjustments, the Corsair flew the pattern easily at half throttle. The high-rates setting seemed perfect, providing the authority required for pleasing rolls, point rolls, snap rolls, and loops. The hearty power system provides seemingly unlimited vertical performance and loops can be made large or small.
Inverted flight is easily maintained with slight, but constant, down-elevator input. Stall testing revealed that the Corsair will mush along for a few seconds, warning that a stall is imminent, and then drop a wing. When this happens, the Corsair loses roughly 40 feet of altitude during recovery.
Landings can be performed with or without flaps, but the flaps allow the Corsair to land at a slightly reduced speed. The descent to landing is best done with a combination of slight up-elevator while slowly reducing power and flaring at touchdown.
Being modeled after a racing airplane and given the "high-speed" moniker, I was eager to see what speeds could be coaxed out of the Corsair. With a fresh battery, the Corsair's speed was clocked using a Pocket Radar device in level flight shortly after exiting a 45° dive. The passes yielded results ranging from 93 to 95 mph.
Conclusion
The RocHobby F2G Super Corsair is easily assembled in one evening and requires only one minor modification. It is the perfect size to be easily stored and transported to the flying field fully assembled. The overall presentation of the aircraft, excluding the RocHobby and FMS decals, closely mimics the full-scale Race 57, right down to the single white propeller blade. The brightly colored racing scheme and navigation lights stand out in the air, even on less-than-perfect days.
The airframe, hardware, and components have all held up well to the rigors of flight. In the event of a mishap that requires the replacement of any parts, it is reassuring to know that Motion RC stocks a complete line of spare parts for this aircraft.
The Super Corsair should appeal to warbird fans as well as those who enjoy Reno-style racing aircraft. However you decide to fly this model, its flight characteristics are likely to put a grin on your face. For me, knowing that I have the power on tap to provide unlimited vertical performance and impressive high-speed passes turns that grin into a smile.
—Jay Smith [email protected]
Manufacturer/Distributor
- FMS — www.fmsmodel.com
- Motion RC — (224) 633-9090, www.motionrc.com
Sources
- Futaba — (800) 637-7660, www.futaba-rc.com
- Airborne Media — (888) 829-4060, www.airbornemedia.com
Transcribed from original scans by AI. Minor OCR errors may remain.

