
HOBBY PEOPLE VQ MODELS P-47D EP
Greg Gimlick [email protected]
Warbird excitement at a surplus price
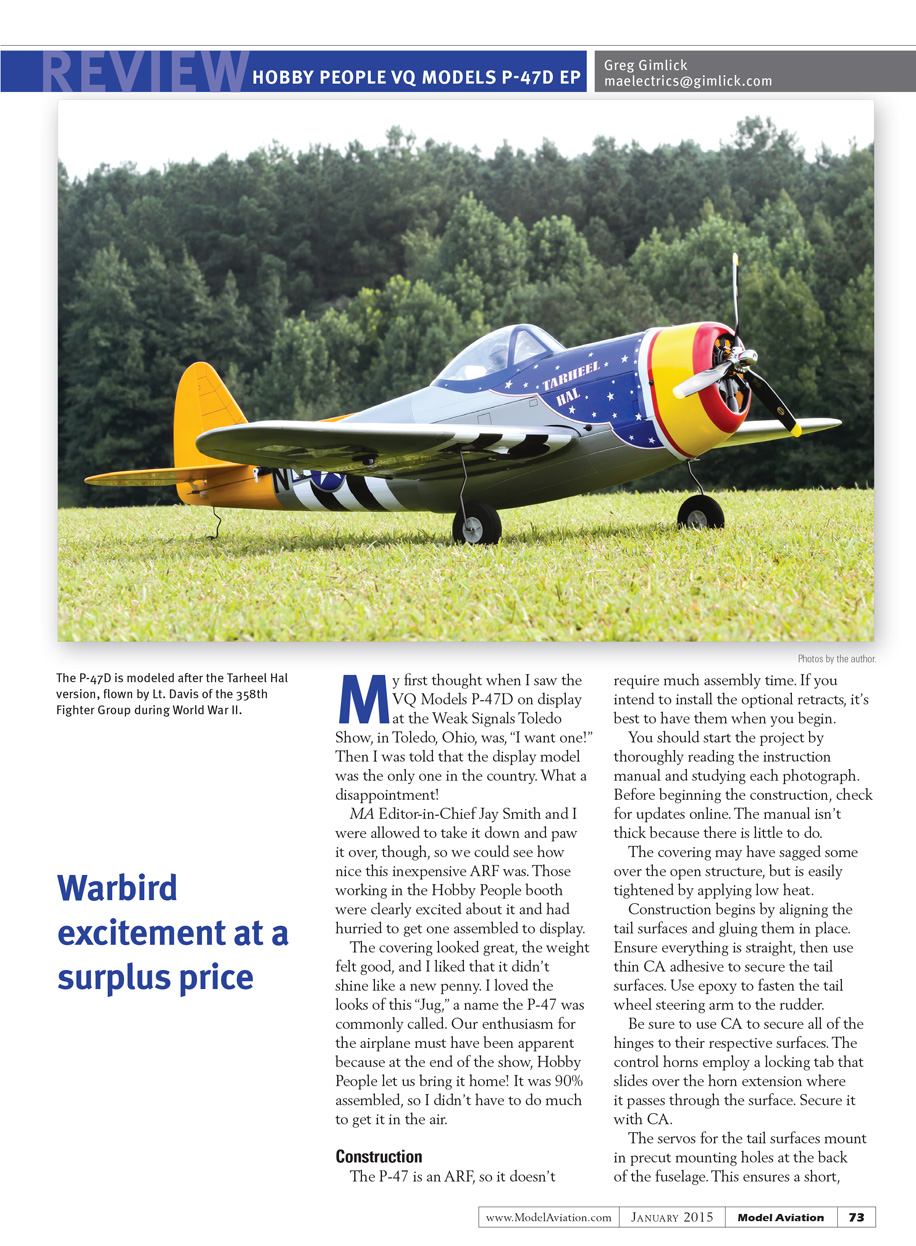
My first thought when I saw the VQ Models P-47D on display at the Weak Signals Toledo Show in Toledo, Ohio, was, "I want one!" Then I was told that the display model was the only one in the country. What a disappointment!
MA Editor-in-Chief Jay Smith and I were allowed to take it down and paw it over, though, so we could see how nice this inexpensive ARF was. Those working in the Hobby People booth were clearly excited about it and had hurried to get one assembled to display. The covering looked great, the weight felt good, and I liked that it didn't shine like a new penny. I loved the looks of this "Jug," a name the P-47 was commonly called. Our enthusiasm for the airplane must have been apparent because at the end of the show, Hobby People let us bring it home! It was 90% assembled, so I didn't have to do much to get it in the air.
Construction
The P-47 is an ARF, so it doesn't require much assembly time. If you intend to install the optional retracts, it's best to have them when you begin.
Start the project by thoroughly reading the instruction manual and studying each photograph. Before beginning construction, check for updates online. The manual isn't thick because there is little to do.
The covering may have sagged some over the open structure, but it is easily tightened by applying low heat.
Construction begins by aligning the tail surfaces and gluing them in place. Ensure everything is straight, then use thin CA adhesive to secure the tail surfaces. Use epoxy to fasten the tail-wheel steering arm to the rudder.
Be sure to use CA to secure all of the hinges to their respective surfaces. The control horns employ a locking tab that slides over the horn extension where it passes through the surface. Secure it with CA.
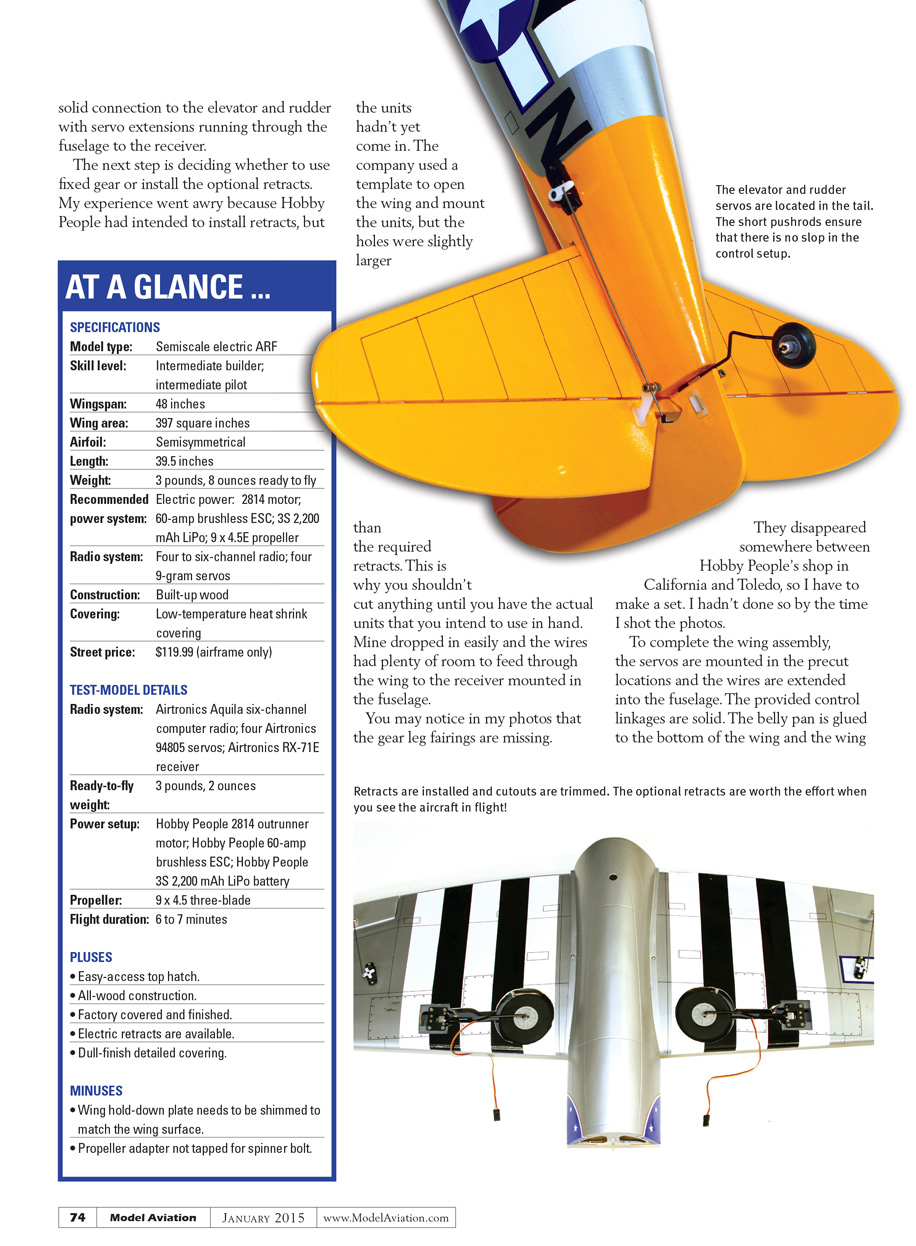
The servos for the tail surfaces mount in precut mounting holes at the back of the fuselage. This ensures a short, solid connection to the elevator and rudder, with servo extensions running through the fuselage to the receiver.
The next step is deciding whether to use fixed gear or install the optional retracts. My experience went awry because Hobby People had intended to install retracts, but the units hadn't yet come in. The company used a template to open the wing and mount the units, but the holes were slightly larger than the required retracts. This is why you shouldn't cut anything until you have the actual units that you intend to use in hand. Mine dropped in easily and the wires had plenty of room to feed through the wing to the receiver mounted in the fuselage.
You may notice in my photos that the gear-leg fairings are missing. They disappeared somewhere between Hobby People's shop in California and Toledo, so I had to make a set. I hadn't done so by the time I shot the photos.
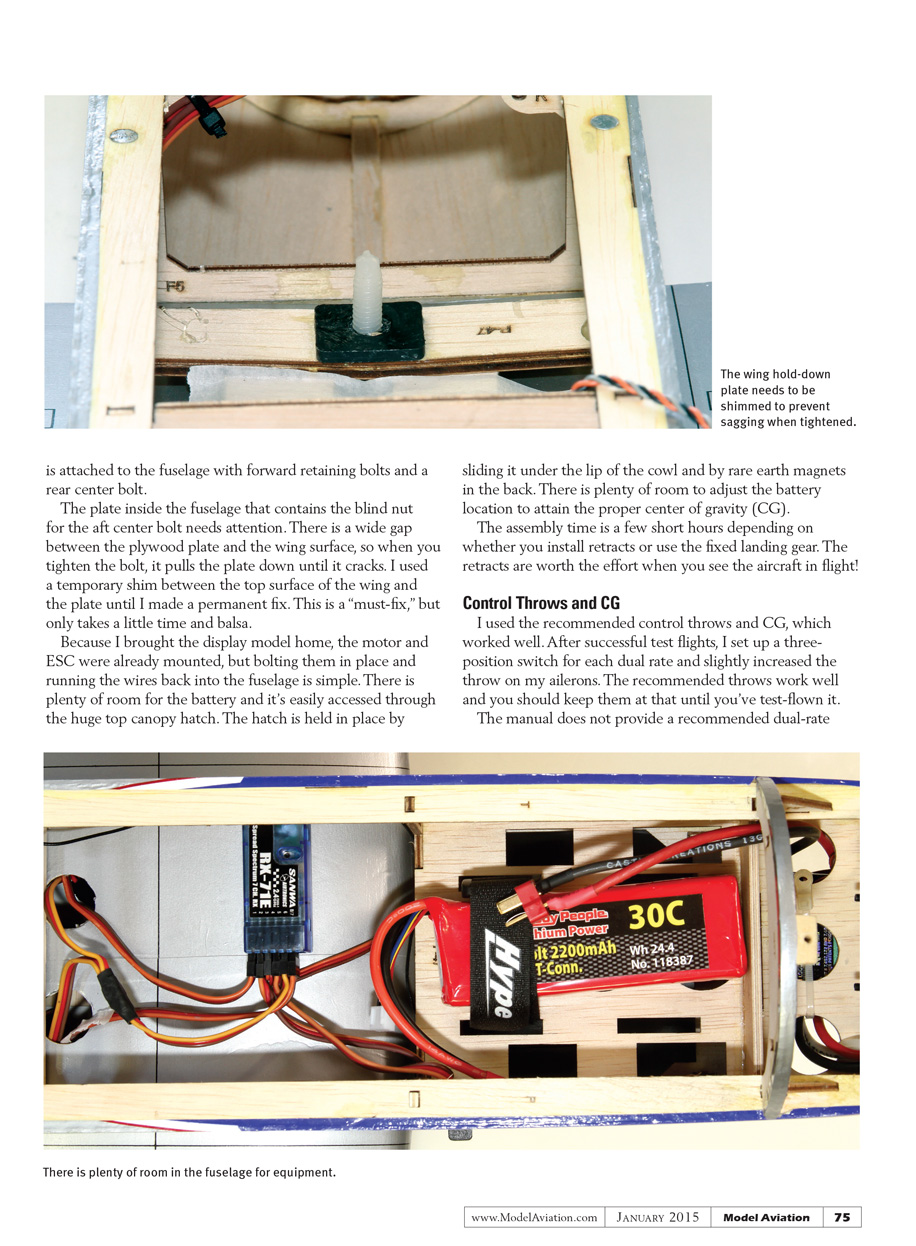
To complete the wing assembly, mount the servos in the precut locations and extend the wires into the fuselage. The provided control linkages are solid. The belly pan is glued to the bottom of the wing and the wing is attached to the fuselage with forward retaining bolts and a rear center bolt.
The plate inside the fuselage that contains the blind nut for the aft center bolt needs attention. There is a wide gap between the plywood plate and the wing surface, so when you tighten the bolt, it pulls the plate down until it cracks. I used a temporary shim between the top surface of the wing and the plate until I made a permanent fix. This is a "must-fix," but only takes a little time and balsa.
Because I brought the display model home, the motor and ESC were already mounted, but bolting them in place and running the wires back into the fuselage is simple. There is plenty of room for the battery and it's easily accessed through the huge top canopy hatch. The hatch is held in place by sliding it under the lip of the cowl and by rare-earth magnets in the back. There is ample room to adjust the battery location to attain the proper center of gravity (CG).
Assembly time is a few short hours depending on whether you install retracts or use the fixed landing gear. The retracts are worth the effort when you see the aircraft in flight!
Control Throws and CG
I used the recommended control throws and CG, which worked well. After successful test flights, I set up a three-position switch for each dual rate and slightly increased the throw on my ailerons. The recommended throws work well and you should keep them at that until you've test-flown it.
The manual does not provide a recommended dual-rate setting, but I set mine at 65% of full rate and used 25% exponential on all surfaces. I set my CG at the forward setting of 85 mm and I don’t suggest moving it back any farther, although the company stated that 90 mm is acceptable. I didn’t like the way mine felt at the aft CG limits.
Flying
The moment of truth finally arrived after waiting (what seemed like) an eternity for good weather. The Jug rolled down my grass field and I was able to keep the tail planted with full elevator until I was ready to take off. Easing the elevator had it leaping into the air, and off I went. The retracts came up nicely and I knew that I would like watching this airplane fly almost as much as I would enjoy flying it.
During the second flight, I moved the CG slightly forward to land on the forward setting of 85 mm and it calmed things down. The control throws felt fine on high rate and remained controllable on the low-rate setting that I chose. I prefer the high rates and have increased my aileron throws slightly to 10 mm from the suggested 8 mm. There is nothing wrong with the recommended throw, but I wanted the rolls to be faster. The original roll rate was likely more scale-like, but it felt as though it wanted more.
Stalls were a pleasant surprise. The wings look stubby on the chubby fuselage, but they are nicely proportioned and don’t abruptly stall. The Jug mushed along and gently dropped its nose without any indication that it might snap. Recovery was easy and I was confident that landings wouldn’t be suspenseful now that I knew it would slow down well.
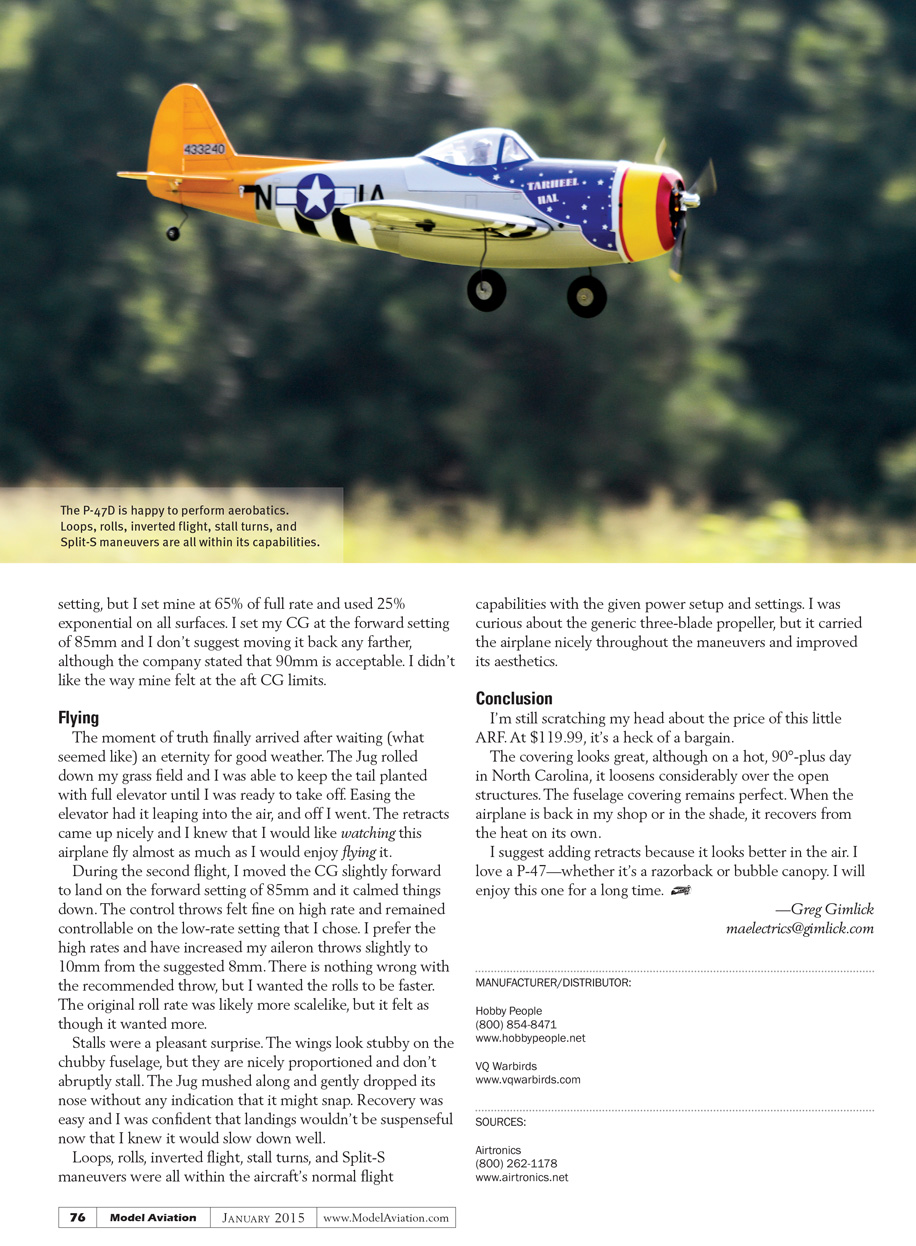
Loops, rolls, inverted flight, stall turns, and Split-S maneuvers were all within the aircraft’s normal flight capabilities with the given power setup and settings. I was curious about the generic three-blade propeller, but it carried the airplane nicely throughout the maneuvers and improved its aesthetics.
Conclusion
I’m still scratching my head about the price of this little ARF. At $119.99, it’s a heck of a bargain.
The covering looks great, although on a hot, 90°-plus day in North Carolina, it loosens considerably over the open structures. The fuselage covering remains perfect. When the airplane is back in my shop or in the shade, it recovers from the heat on its own.
I suggest adding retracts because it looks better in the air. I love a P-47—whether it’s a razorback or bubble canopy. I will enjoy this one for a long time.
— Greg Gimlick [email protected]
MANUFACTURER/DISTRIBUTOR
- Hobby People
(800) 854-8471 www.hobbypeople.net
- VQ Warbirds
SOURCES
- Airtronics
(800) 262-1178 www.airtronics.net
Transcribed from original scans by AI. Minor OCR errors may remain.

