
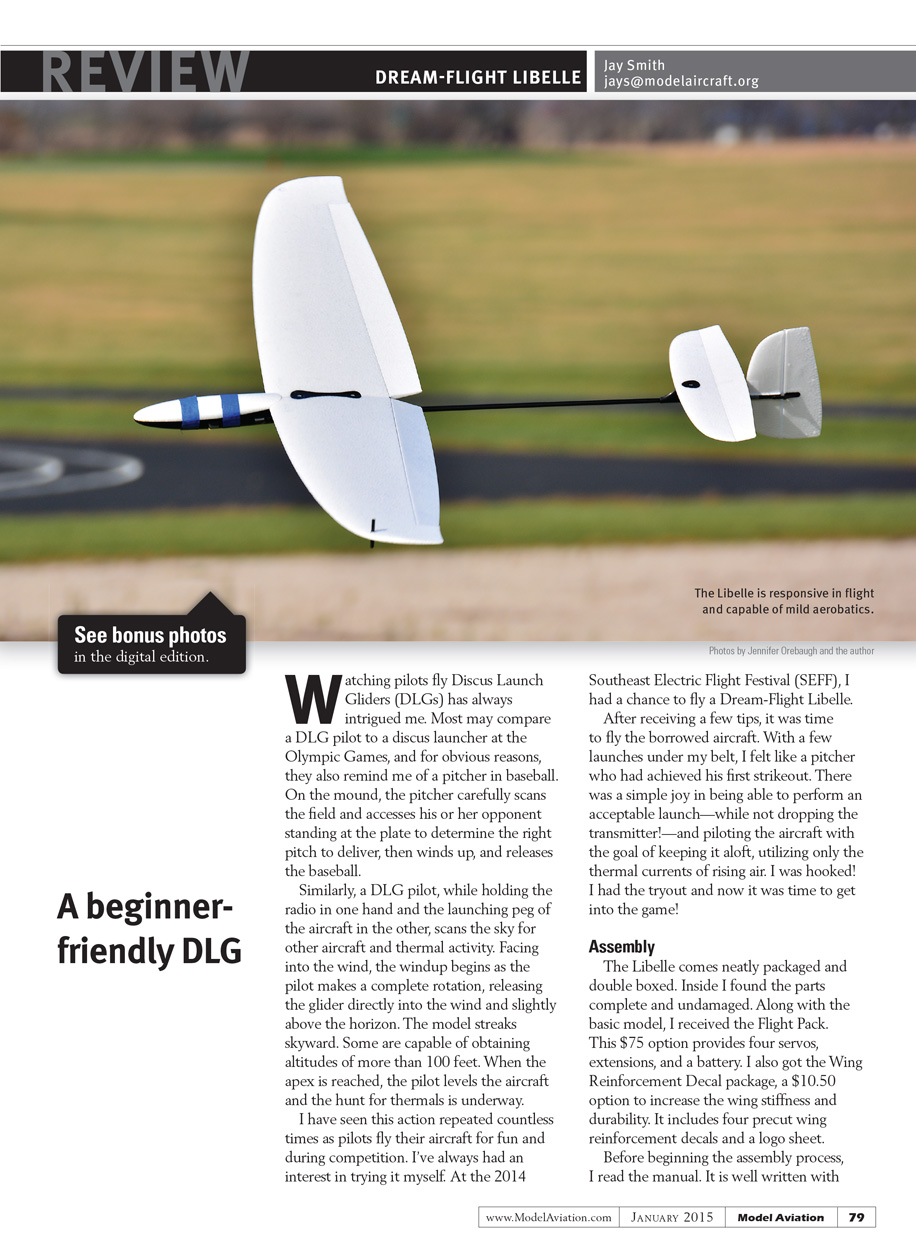
DREAM-FLIGHT LIBELLE
Jay Smith [email protected]
A beginner-friendly DLG
Watching pilots fly Discus Launch Gliders (DLGs) has always intrigued me. Most may compare a DLG pilot to a discus launcher at the Olympic Games, and for obvious reasons, they also remind me of a pitcher in baseball. On the mound, the pitcher carefully scans the field and assesses his or her opponent standing at the plate to determine the right pitch to deliver, then winds up, and releases the baseball.
Similarly, a DLG pilot, while holding the radio in one hand and the launching peg of the aircraft in the other, scans the sky for other aircraft and thermal activity. Facing into the wind, the windup begins as the pilot makes a complete rotation, releasing the glider directly into the wind and slightly above the horizon. The model streaks skyward. Some are capable of obtaining altitudes of more than 100 feet. When the apex is reached, the pilot levels the aircraft and the hunt for thermals is underway.
I have seen this action repeated countless times as pilots fly their aircraft for fun and during competition. I've always had an interest in trying it myself. At the 2014 Southeast Electric Flight Festival (SEFF), I had a chance to fly a Dream-Flight Libelle.
After receiving a few tips, it was time to fly the borrowed aircraft. With a few launches under my belt, I felt like a pitcher who had achieved his first strikeout. There was a simple joy in being able to perform an acceptable launch—while not dropping the transmitter!—and piloting the aircraft with the goal of keeping it aloft, utilizing only the thermal currents of rising air. I was hooked! I had the tryout and now it was time to get into the game!
Assembly
The Libelle comes neatly packaged and double boxed. Inside I found the parts complete and undamaged. Along with the basic model, I received the Flight Pack. This $75 option provides four servos, extensions, and a battery. I also got the Wing Reinforcement Decal package, a $10.50 option to increase the wing stiffness and durability. It includes four precut wing reinforcement decals and a logo sheet.
Before beginning the assembly process, I read the manual. It is well written with great details about building and flying the Libelle. Black-and-white photos complement its 25 pages of instruction. Beginners should have no problem with assembly. The manual covers the basics without assuming the reader understands how to complete the steps required to build the model.
The process begins with setting up the radio and configuring the servos and servo arms. After configuring and testing the Dream-Flight 4.3-gram digital servos, it’s time to move on to the wing.
The manual recommends using a medium CA adhesive for all steps requiring the application of glue. I chose instead to use Beacon Foam-Tac, except as noted, because it provides a slightly longer working time and remains flexible even after it has cured.
The wing halves are attached using two plastic dihedral braces that fit into molded slots in the wing. As the name implies, this sets the dihedral angle and strengthens the wing joint. They are glued into the left wing first, and then the right as the wing is joined together with the help of two alignment tabs and recesses.
The plastic wing centerplate is then pressed into the top of the wing and glued in place. It provides additional support to the wing joint and wing mounting bolts.
The next step is the aileron control horns, which are inserted and glued into a recess in the underside of each aileron.
On the bottom of the wing, each aileron servo is provided its own pocket and channel to run the servo wire and extension to the center of the wing at the leading edge (LE). The servos fit perfectly, but I was concerned that the top of the servo arm might rub against the foam. To determine if I had enough clearance, I tested the servos and found that they moved freely. There was sufficient room that a single piece of paper could fit between the top of the servo arm and the foam.
The channels for the servo leads and extensions are a nice touch, but I found the opening that accommodated the servo extension needed to be slightly enlarged. This could be because I was using the Dream-Flight servos and not the Hitec HS-35 and the length of the leads could be slightly different. I carefully extended each pocket until the servo extension seated into the wing.
If using the wing reinforcement decals, they are applied next. The four decals that are used are specific to not only the top and bottom of the wing, but also right and left. The ones used for the bottom have three holes to accommodate the launching peg, servo arm, and wing mount. The top two forgo the servo arm hole.
The instructions recommend misting the foam wing surface with a spray bottle filled with water and four drops of dish soap to allow the decals to "float" into position. I recommend using this method, but it helps to have someone assist.
After the decals were positioned, a combination of fingers, a squeegee, and some paper towels finished the process. If the decals are not used, it is recommended to use Scotch tape to cover the servo leads and keep them from slipping out of the channel.
The supplied clevises for use with the ailerons, elevator, and rudder work well and only require that the sides be folded together to create a slot where the pushrod will be clamped using the supplied clamping screw. This provides for adjustments in the linkage to center the control surfaces.
The fuselage and tail assembly starts with gluing the elevator and rudder servos in place. For this step, I applied a drop of CA glue through all four mounting tabs. The servos fit securely and the servo wires are easily routed under the servo mounts to the receiver.
The horizontal stabilizer can be mounted using a nylon bolt and the elevator pushrod can be attached. It is important to ensure that the pushrod is under the servo arm when attaching the Z-bend ends of the elevator and rudder pushrods to their respective servos. This allows for proper clearance after the canopy is attached. The manual also includes correct orientation of the elevator and rudder clevises to prevent any binding.
The vertical stabilizer/rudder has a groove in which to mount the tailboom. Located in the groove is a foam index tab that mates up with the opening in the tailboom for proper alignment. The cutout in my tailboom was off center, resulting in the stabilizer not squarely mounting. This concern has been addressed in the second run of production kits that are now shipping. Because of this issue, I opted to use 5-minute epoxy to allow for additional working time so that I could ensure proper alignment. I lightly sanded the tailboom where it contacts the stabilizer and then glued it in place.
Because the vertical stabilizer/rudder contacts the ground when landing, I followed the manual's recommendation to add a small strip of clear tape over the tailboom and onto the fin for added strength.
The wing attaches to the fuselage with two nylon bolts; the longer of the two is used for the forward hole. A molded-foam channel in the fuselage beneath the wing's LE ensures the servo wires are not pinched and are routed to the receiver location.
The Libelle has adequate room for the radio gear and flight battery, but it is by no means spacious. As is the rest of the aircraft, this area is well designed. It provides a recessed area for the battery and its wires run through a channel. There is also space dedicated for the receiver and wiring.
I chose to use the Hitec Minima 6L receiver, one of two recommended receivers in the manual. Because of its end-pin orientation, it was easily mounted in the forward location. I oriented the receiver so that the connection for the battery was on top for easy access, using servo tape to keep it in place. The 6L has two 6-inch antenna wires. I ran one on the outside of the fuselage and the other inside the aircraft.
Three steel balance weights—1/2 ounce total—were used to obtain the center of gravity (CG) at 5 mm behind the wing spar at the sides of the fuselage. One weight was affixed in a cutout below the battery and the other two were placed fully forward on each side of the battery.
High-rate control surface deflections for ailerons, elevator, and rudder were used. Because I fly most of my aircraft on high rates, I didn't program low rates.
The carbon-fiber launching peg can be installed in either wingtip, depending on the pilot's preference. Mine needed to be sanded to get it to fit, but it stays put and can be removed if needed.
Finishing
The Libelle is like an artist's canvas—with the EPO foam wing and tail ready to accept a splash of paint, colored tape, or even some Sharpie art. My goal was to keep the Libelle as lightweight as possible, so I chose not to add additional color (with one exception).
Although the canopy attaches firmly with the included magnets, I witnessed a launch that shed the canopy and battery, turning the Libelle into a tail-heavy free-flight model.
To ensure that didn't happen to mine, I wrapped the canopy with blue painter's tape after powering on the radio. This provides a little added color to the black-and-white model and the security of knowing the battery will stay put. The slight added weight assists with the CG. [Editor's note: Dream-Flight has updated its manual and now recommends using tape or hot glue to keep the battery in place.]
Flying
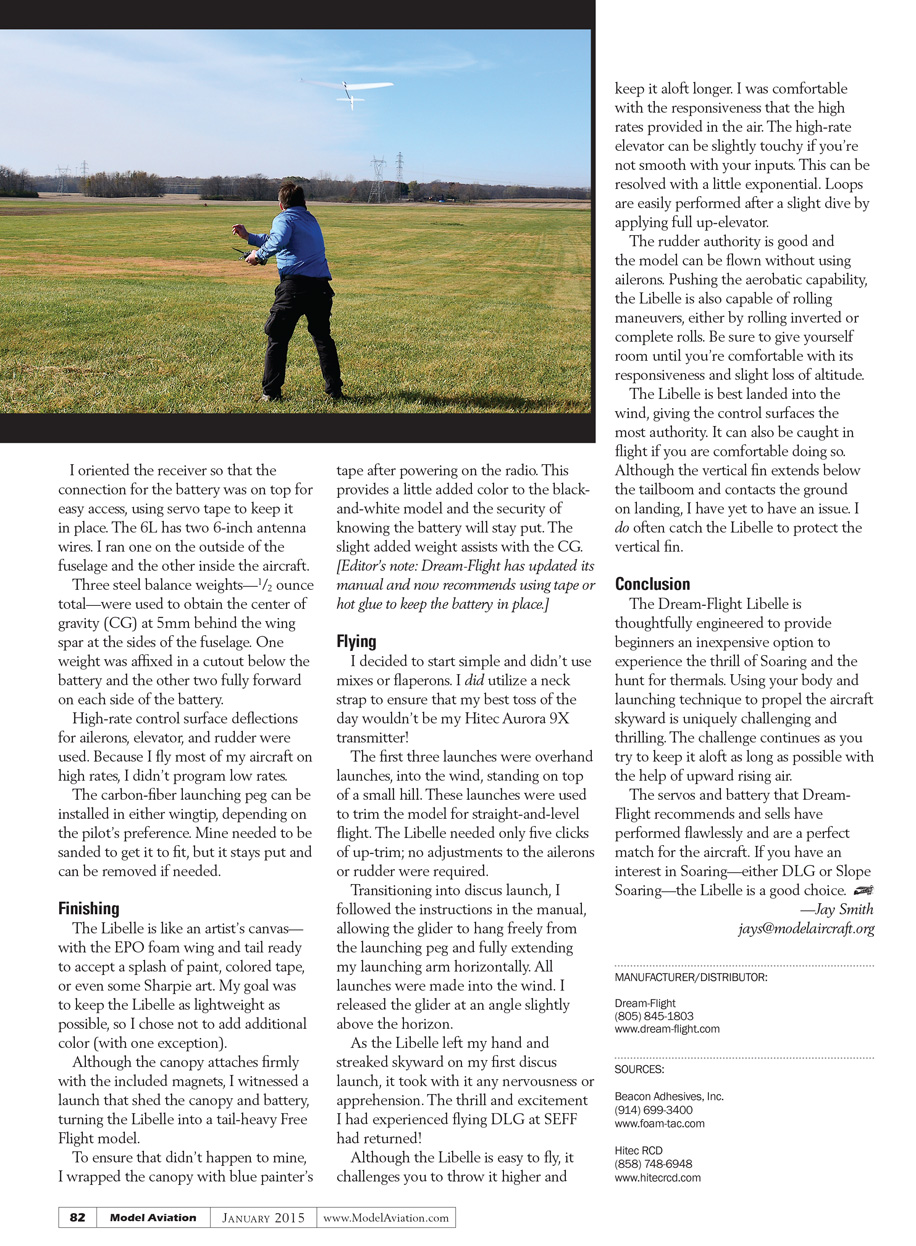
I decided to start simple and didn't use mixes or flaperons. I did utilize a neck strap to ensure that my best toss of the day wouldn't be my Hitec Aurora 9X transmitter!
The first three launches were overhand launches, into the wind, standing on top of a small hill. These launches were used to trim the model for straight-and-level flight. The Libelle needed only five clicks of up-trim; no adjustments to the ailerons or rudder were required.
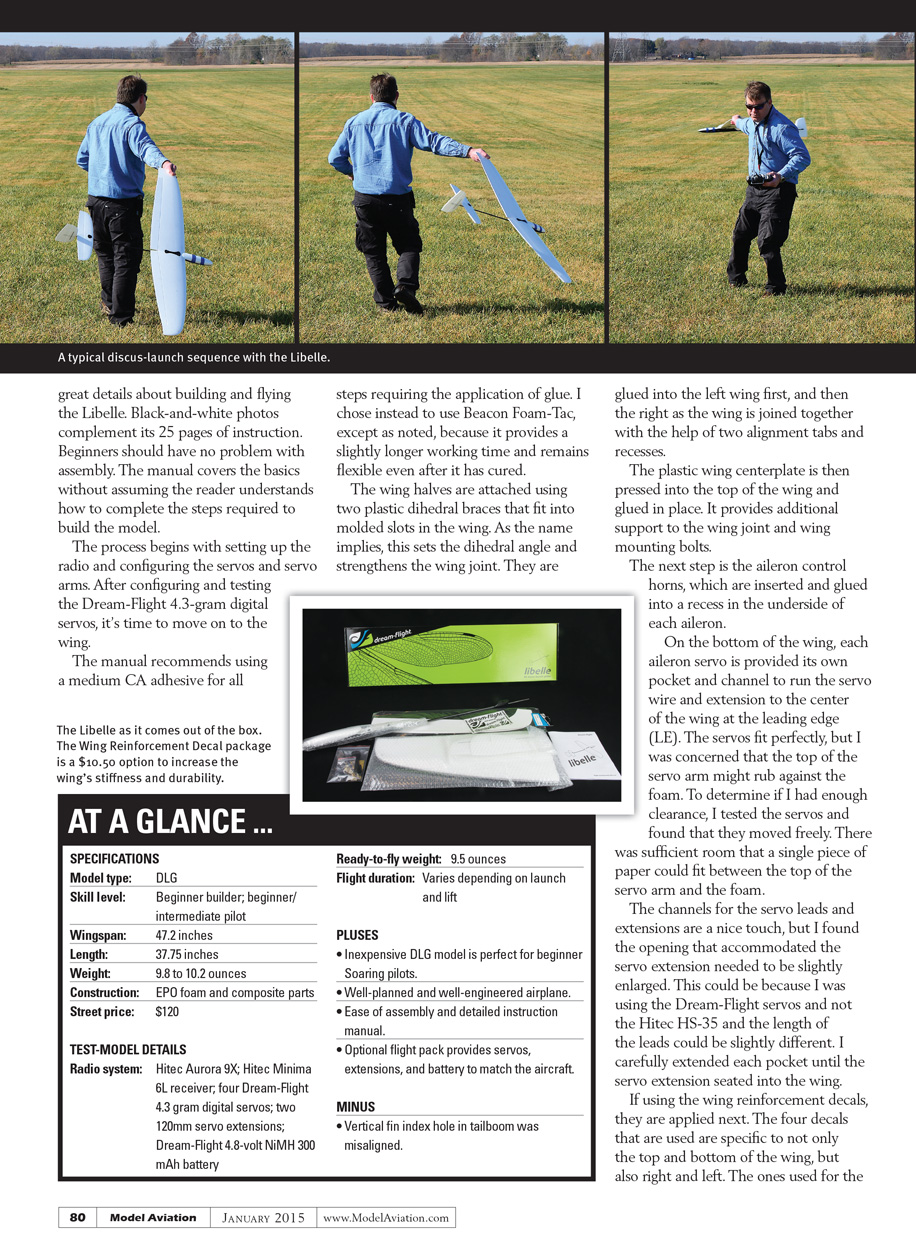
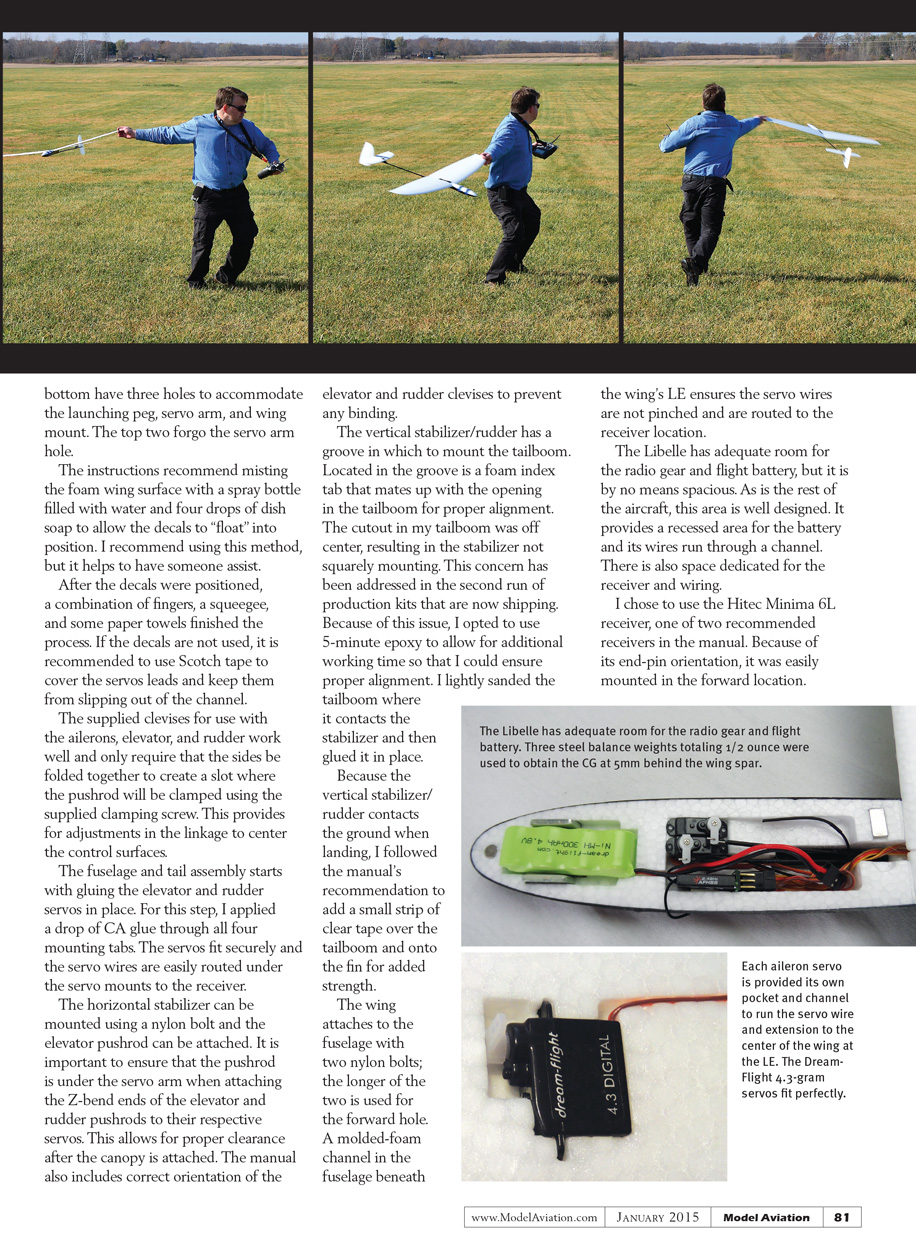
Transitioning into discus launch, I followed the instructions in the manual, allowing the glider to hang freely from the launching peg and fully extending my launching arm horizontally. All launches were made into the wind. I released the glider at an angle slightly above the horizon.
As the Libelle left my hand and streaked skyward on my first discus launch, it took with it any nervousness or apprehension. The thrill and excitement I had experienced flying DLG at SEFF had returned!
Although the Libelle is easy to fly, it challenges you to throw it higher and keep it aloft longer. I was comfortable with the responsiveness that the high rates provided in the air. The high-rate elevator can be slightly touchy if you're not smooth with your inputs. This can be resolved with a little exponential. Loops are easily performed after a slight dive by applying full up-elevator.
The rudder authority is good and the model can be flown without using ailerons. Pushing the aerobatic capability, the Libelle is also capable of rolling maneuvers, either by rolling inverted or complete rolls. Be sure to give yourself room until you're comfortable with its responsiveness and slight loss of altitude.
The Libelle is best landed into the wind, giving the control surfaces the most authority. It can also be caught in flight if you are comfortable doing so. Although the vertical fin extends below the tailboom and contacts the ground on landing, I have yet to have an issue. I do often catch the Libelle to protect the vertical fin.
Conclusion
The Dream-Flight Libelle is thoughtfully engineered to provide beginners an inexpensive option to experience the thrill of soaring and the hunt for thermals. Using your body and launching technique to propel the aircraft skyward is uniquely challenging and thrilling. The challenge continues as you try to keep it aloft as long as possible with the help of upward rising air.
The servos and battery that Dream-Flight recommends and sells have performed flawlessly and are a perfect match for the aircraft. If you have an interest in soaring—either DLG or slope soaring—the Libelle is a good choice.
—Jay Smith [email protected]
Manufacturer / Distributor
- Dream-Flight
- (805) 845-1803
- www.dream-flight.com
Sources
- Beacon Adhesives, Inc.
- (914) 699-3400
- www.foam-tac.com
- Hitec RCD
- (858) 748-6948
- www.hitecrcd.com
Transcribed from original scans by AI. Minor OCR errors may remain.

