
ESPRIT MODEL SUPER EASY 2E RX-R
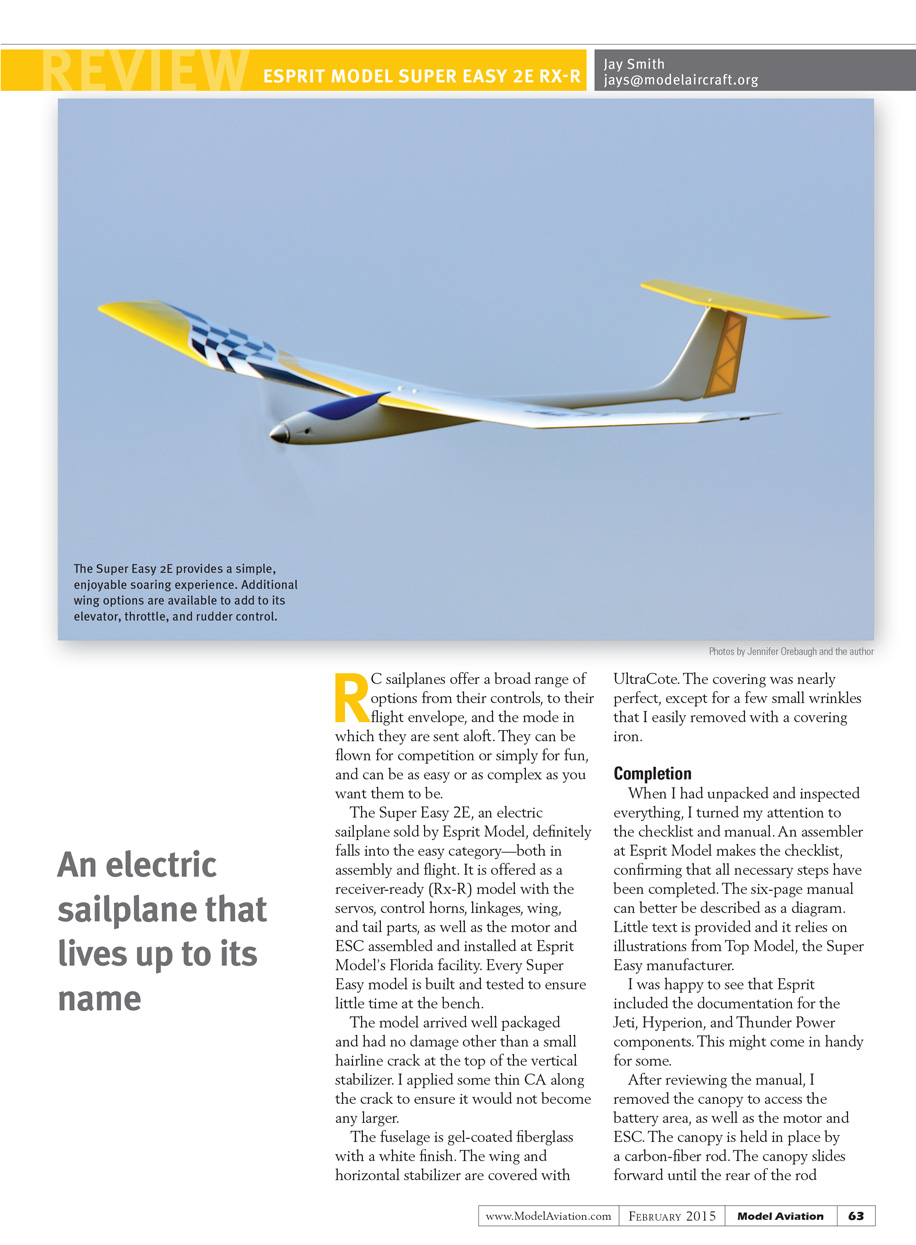
An electric sailplane that lives up to its name
RC sailplanes offer a broad range of options from their controls to their flight envelope and the mode in which they are sent aloft. They can be flown for competition or simply for fun, and can be as easy or as complex as you want them to be.
The Super Easy 2E, an electric sailplane sold by Esprit Model, definitely falls into the easy category—both in assembly and flight. It is offered as a receiver-ready (Rx-R) model with the servos, control horns, linkages, wing, and tail parts, as well as the motor and ESC assembled and installed at Esprit Model’s Florida facility. Every Super Easy model is built and tested to ensure little time at the bench.
The model arrived well packaged and had no damage other than a small hairline crack at the top of the vertical stabilizer. I applied some thin CA along the crack to ensure it would not become any larger.
The fuselage is gel-coated fiberglass with a white finish. The wing and horizontal stabilizer are covered with UltraCote. The covering was nearly perfect, except for a few small wrinkles that I easily removed with a covering iron.
Completion
When I had unpacked and inspected everything, I turned my attention to the checklist and manual. An assembler at Esprit Model makes the checklist, confirming that all necessary steps have been completed. The six-page manual can better be described as a diagram. Little text is provided and it relies on illustrations from Top Model, the Super Easy manufacturer.
I was happy to see that Esprit included the documentation for the Jeti, Hyperion, and Thunder Power components. This might come in handy for some.
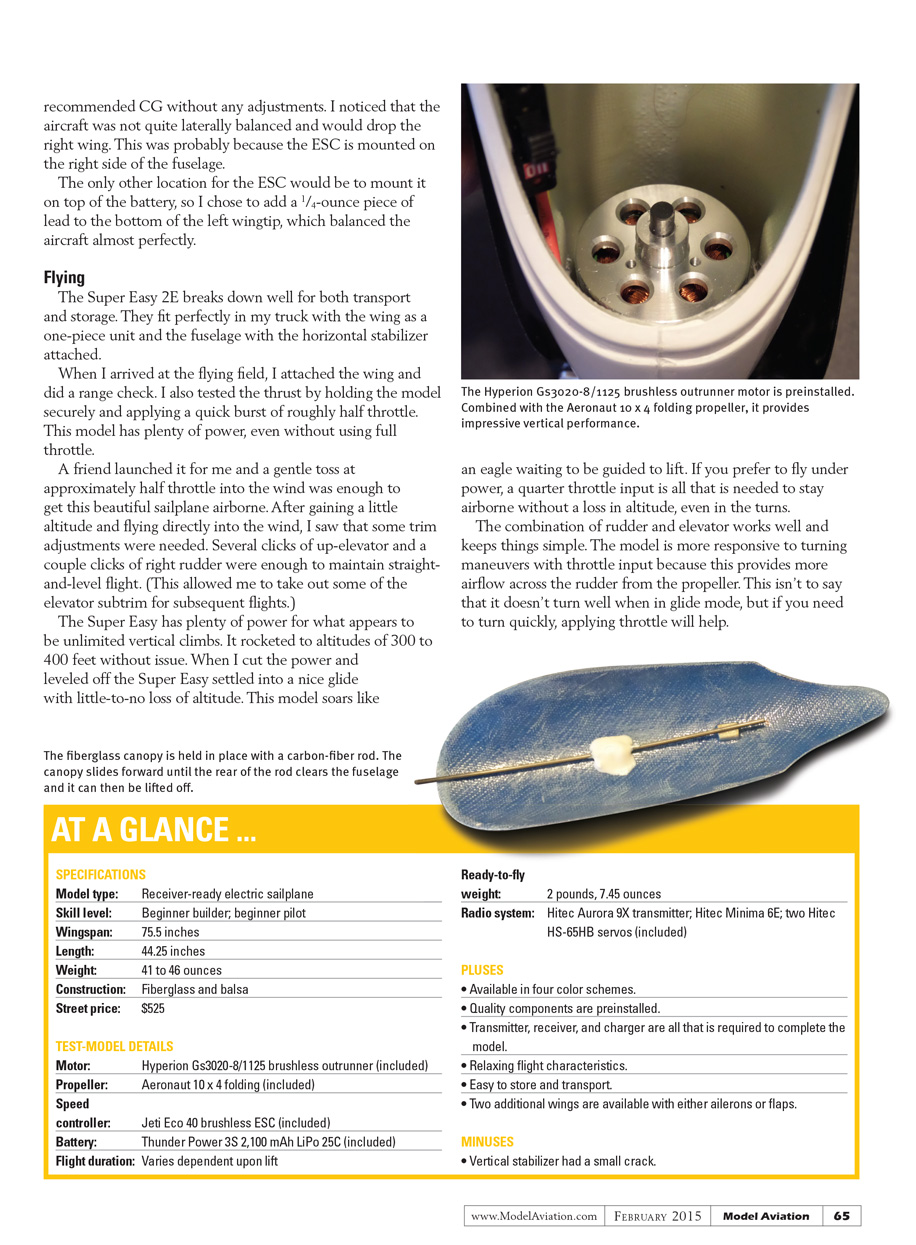
After reviewing the manual, I removed the canopy to access the battery area, as well as the motor and ESC. The canopy is held in place by a carbon-fiber rod. The canopy slides forward until the rear of the rod is accessible.
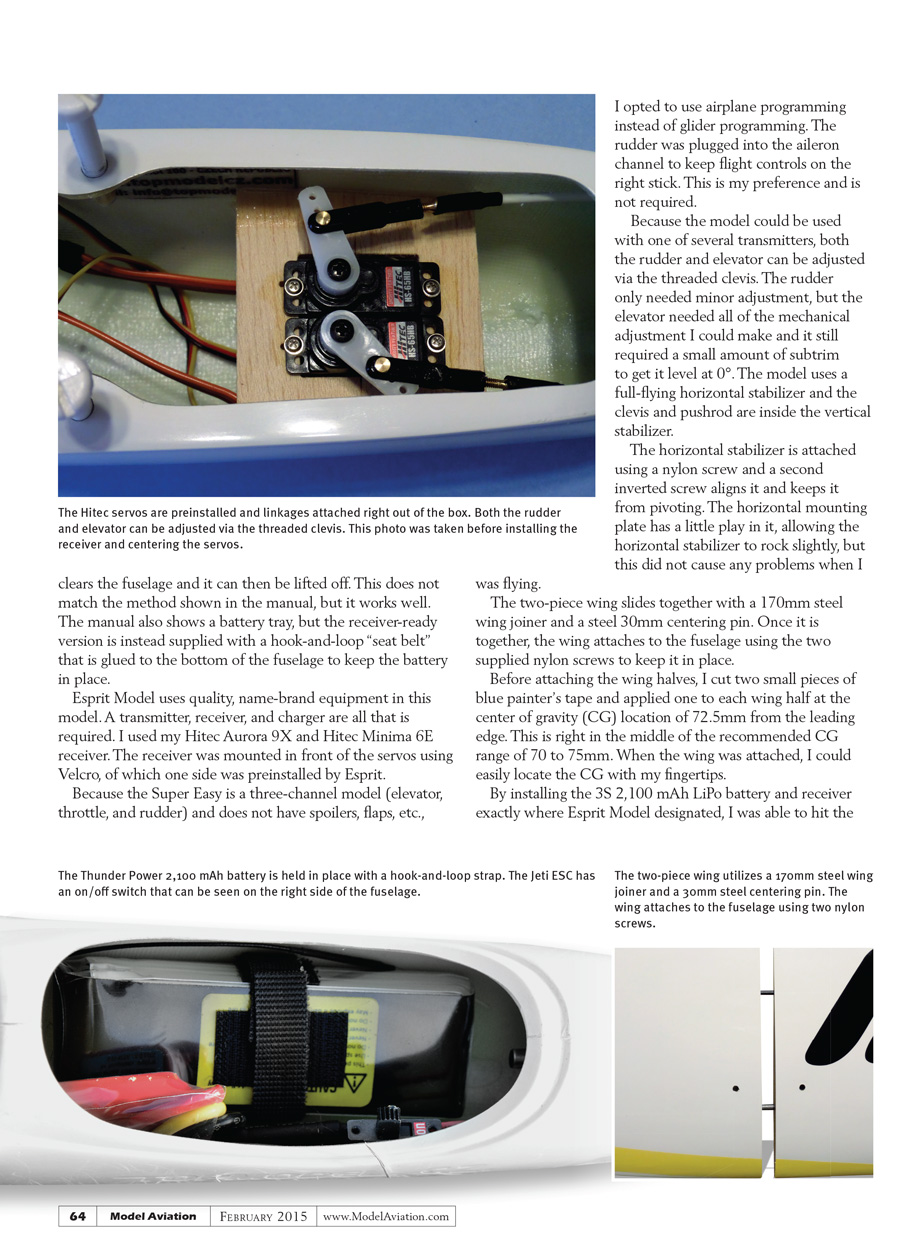
Because the model could be used with one of several transmitters, both the rudder and elevator can be adjusted via the threaded clevis. The rudder only needed minor adjustment, but the elevator needed all of the mechanical adjustment I could make and it still required a small amount of subtrim to get it level at 0°. The model uses a full-flying horizontal stabilizer and the clevis and pushrod are inside the vertical stabilizer.
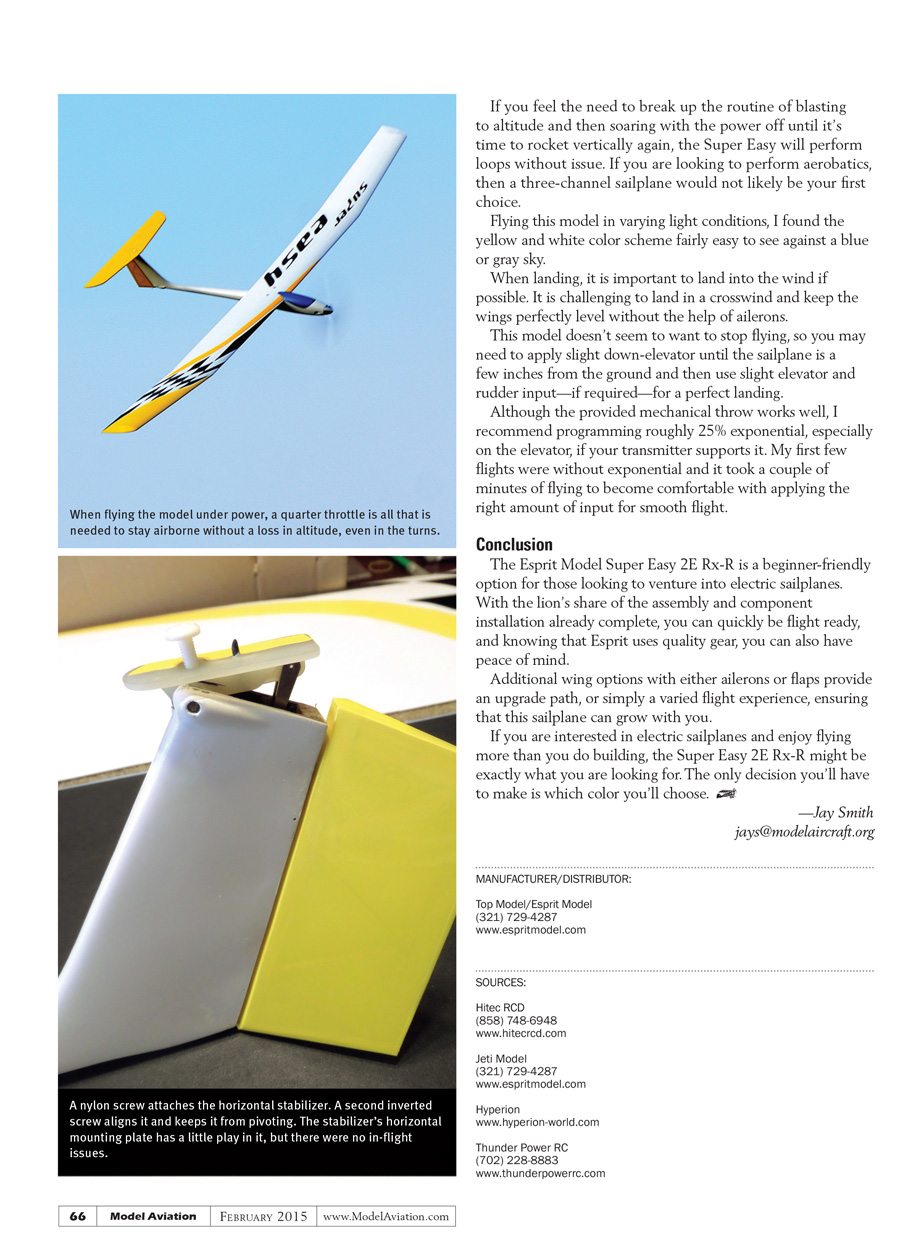
The horizontal stabilizer is attached using a nylon screw and a second inverted screw aligns it and keeps it from pivoting. The horizontal mounting plate has a little play in it, allowing the horizontal stabilizer to rock slightly, but this did not cause any problems when I was flying.
The two-piece wing slides together with a 170 mm steel wing joiner and a steel 30 mm centering pin. Once it is together, the wing attaches to the fuselage using the two supplied nylon screws to keep it in place.
Before attaching the wing halves, I cut two small pieces of blue painter’s tape and applied one to each wing half at the center of gravity (CG) location of 72.5 mm from the leading edge. This is right in the middle of the recommended CG range of 70 to 75 mm. When the wing was attached, I could easily locate the CG with my fingertips.
By installing the 3S 2,100 mAh LiPo battery and receiver exactly where Esprit Model designated, I was able to hit the balance point with only a minimal amount of additional weight in the nose.
Flying
The Super Easy 2E breaks down well for both transport and storage. It fits perfectly in my truck with the wing as a one-piece unit and the fuselage with the horizontal stabilizer attached.
When I arrived at the flying field, I attached the wing and did a range check. I also tested the thrust by holding the model securely and applying a quick burst of roughly half throttle. This model has plenty of power, even without using full throttle.
A friend launched it for me and a gentle toss at approximately half throttle into the wind was enough to get this beautiful sailplane airborne. After gaining a little altitude and flying directly into the wind, I saw that some trim adjustments were needed. Several clicks of up-elevator and a couple clicks of right rudder were enough to maintain straight-and-level flight. This allowed me to take out some of the elevator subtrim for subsequent flights.
The Super Easy has plenty of power for what appears to be unlimited vertical climbs. It rocketed to altitudes of 300 to 400 feet without issue. When I cut the power and leveled off the Super Easy settled into a nice glide with little-to-no loss of altitude. This model soars like an eagle waiting to be guided to lift. If you prefer to fly under power, a quarter throttle input is all that is needed to stay airborne without a loss in altitude, even in the turns.
The combination of rudder and elevator works well and keeps things simple. The model is more responsive to turning maneuvers with throttle input because this provides more airflow across the rudder. This isn't to say that it doesn't turn well when in glide mode, but if you need to turn quickly, applying throttle will help.
If you feel the need to break up the routine of blasting to altitude and then soaring with the power off until it's time to rocket vertically again, the Super Easy will perform loops without issue. If you are looking to perform aerobatics, then a three-channel sailplane would not likely be your first choice.
Flying this model in varying light conditions, I found the yellow and white color scheme fairly easy to see against a blue or gray sky.
When landing, it is important to land into the wind if possible. It is challenging to land in a crosswind and keep the wings perfectly level without the help of ailerons.
This model doesn't seem to want to stop flying, so you may need to apply slight down-elevator until the sailplane is a few inches from the ground and then use slight elevator and rudder input—if required—for a perfect landing.
Although the provided mechanical throw works well, I recommend programming roughly 25% exponential, especially on the elevator, if your transmitter supports it. My first few flights were without exponential and it took a couple of minutes of flying to become comfortable with applying the right amount of input for smooth flight.
Conclusion
The Esprit Model Super Easy 2E Rx-R is a beginner-friendly option for those looking to venture into electric sailplanes. With the lion's share of the assembly and component installation already complete, you can quickly be flight ready, and knowing that Esprit uses quality gear, you can also have peace of mind.
Additional wing options with either ailerons or flaps provide an upgrade path, or simply a varied flight experience, ensuring that this sailplane can grow with you.
If you are interested in electric sailplanes and enjoy flying more than you do building, the Super Easy 2E Rx-R might be exactly what you are looking for. The only decision you'll have to make is which color you'll choose.
—Jay Smith [email protected]
Transcribed from original scans by AI. Minor OCR errors may remain.

