

Review — Flyzone Sensei
My first flight of the Sensei was with the one Dan Landis brought to the Arizona Electric Festival. I was impressed with its flight characteristics. It is a nice size, tracks straight, and the wing supplies great lift.
Assembly
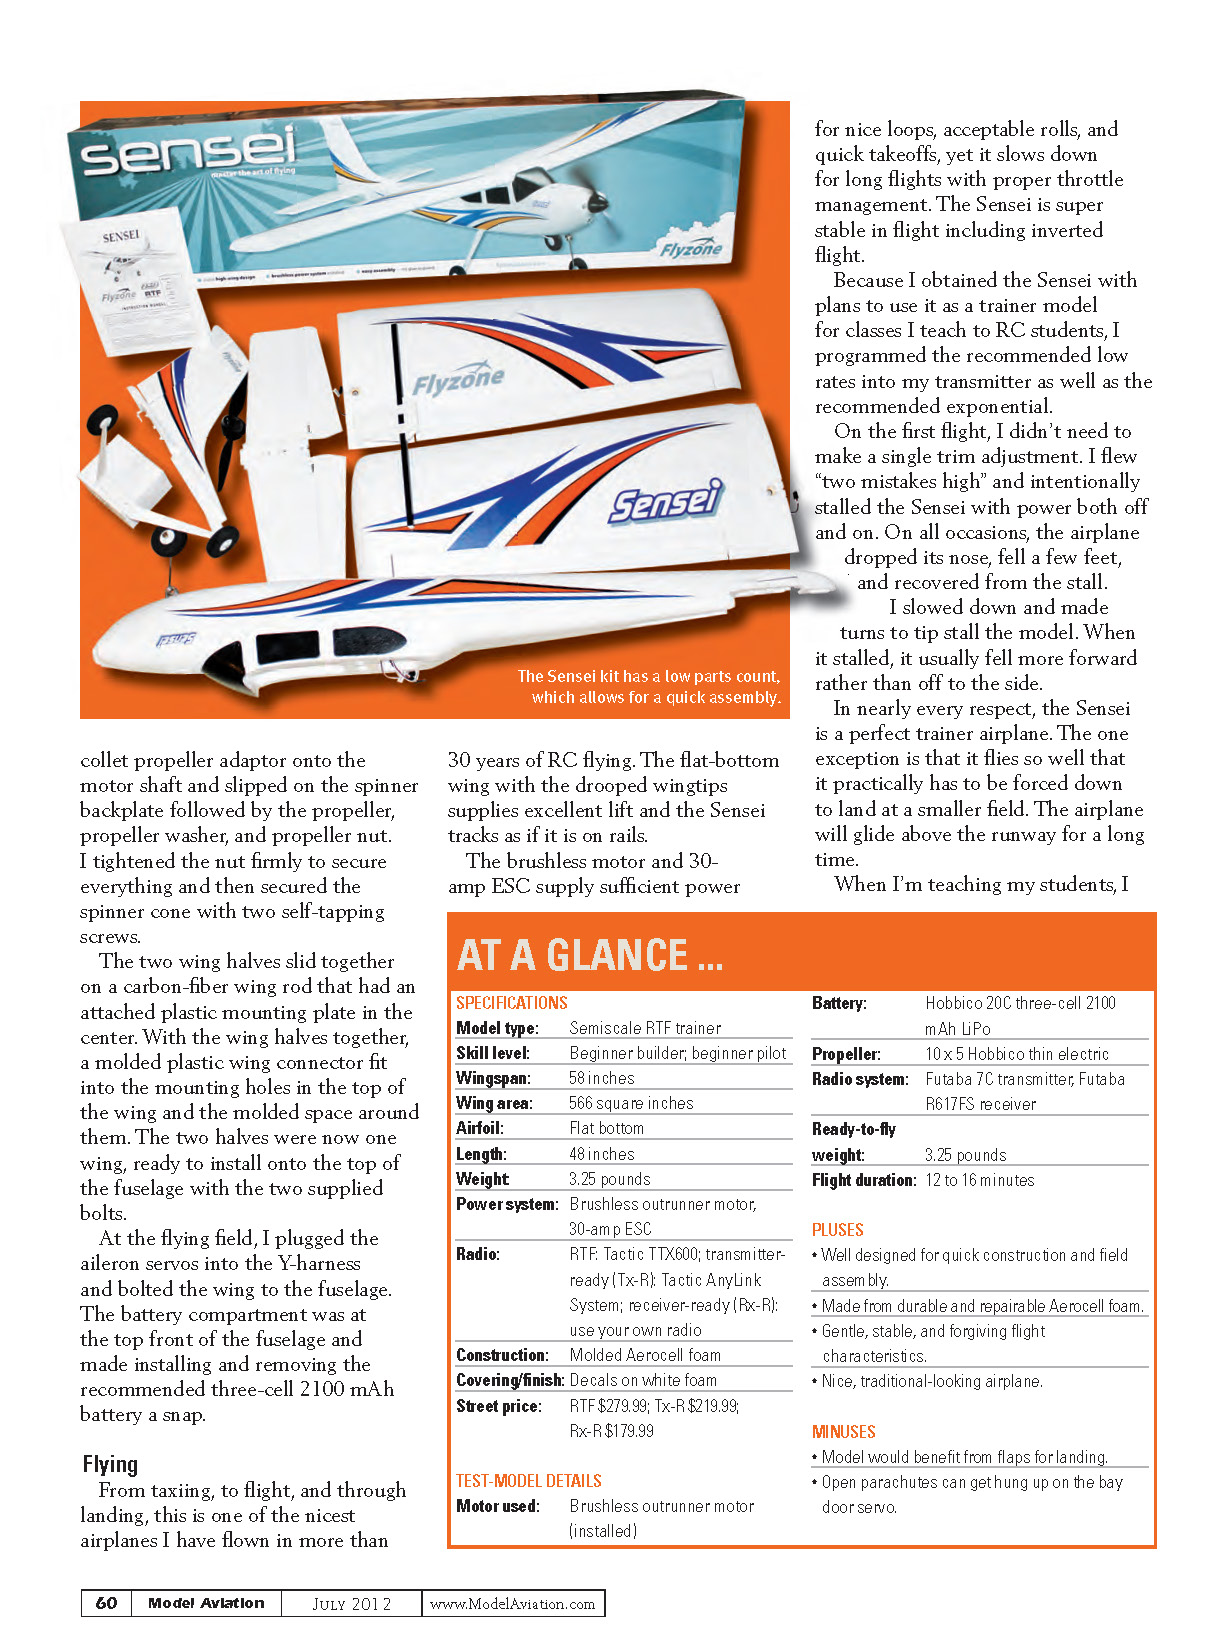
The Sensei is a true RTF model with only minor final assembly required to put the large parts together. I didn't need glue, and construction required only two screwdrivers.
What's preinstalled / included
- Steerable front wheel came installed on the fuselage.
- Main landing gear attached with two supplied screws.
- All five microservos came installed: rudder, elevator, drop-door, and two aileron servos.
- Motor and 30-amp speed controller (ESC) came preinstalled in the fuselage.
- Collet propeller adaptor, spinner backplate, propeller, washer, and nut supplied.
- Carbon-fiber wing rod with attached plastic mounting plate and molded wing connector.
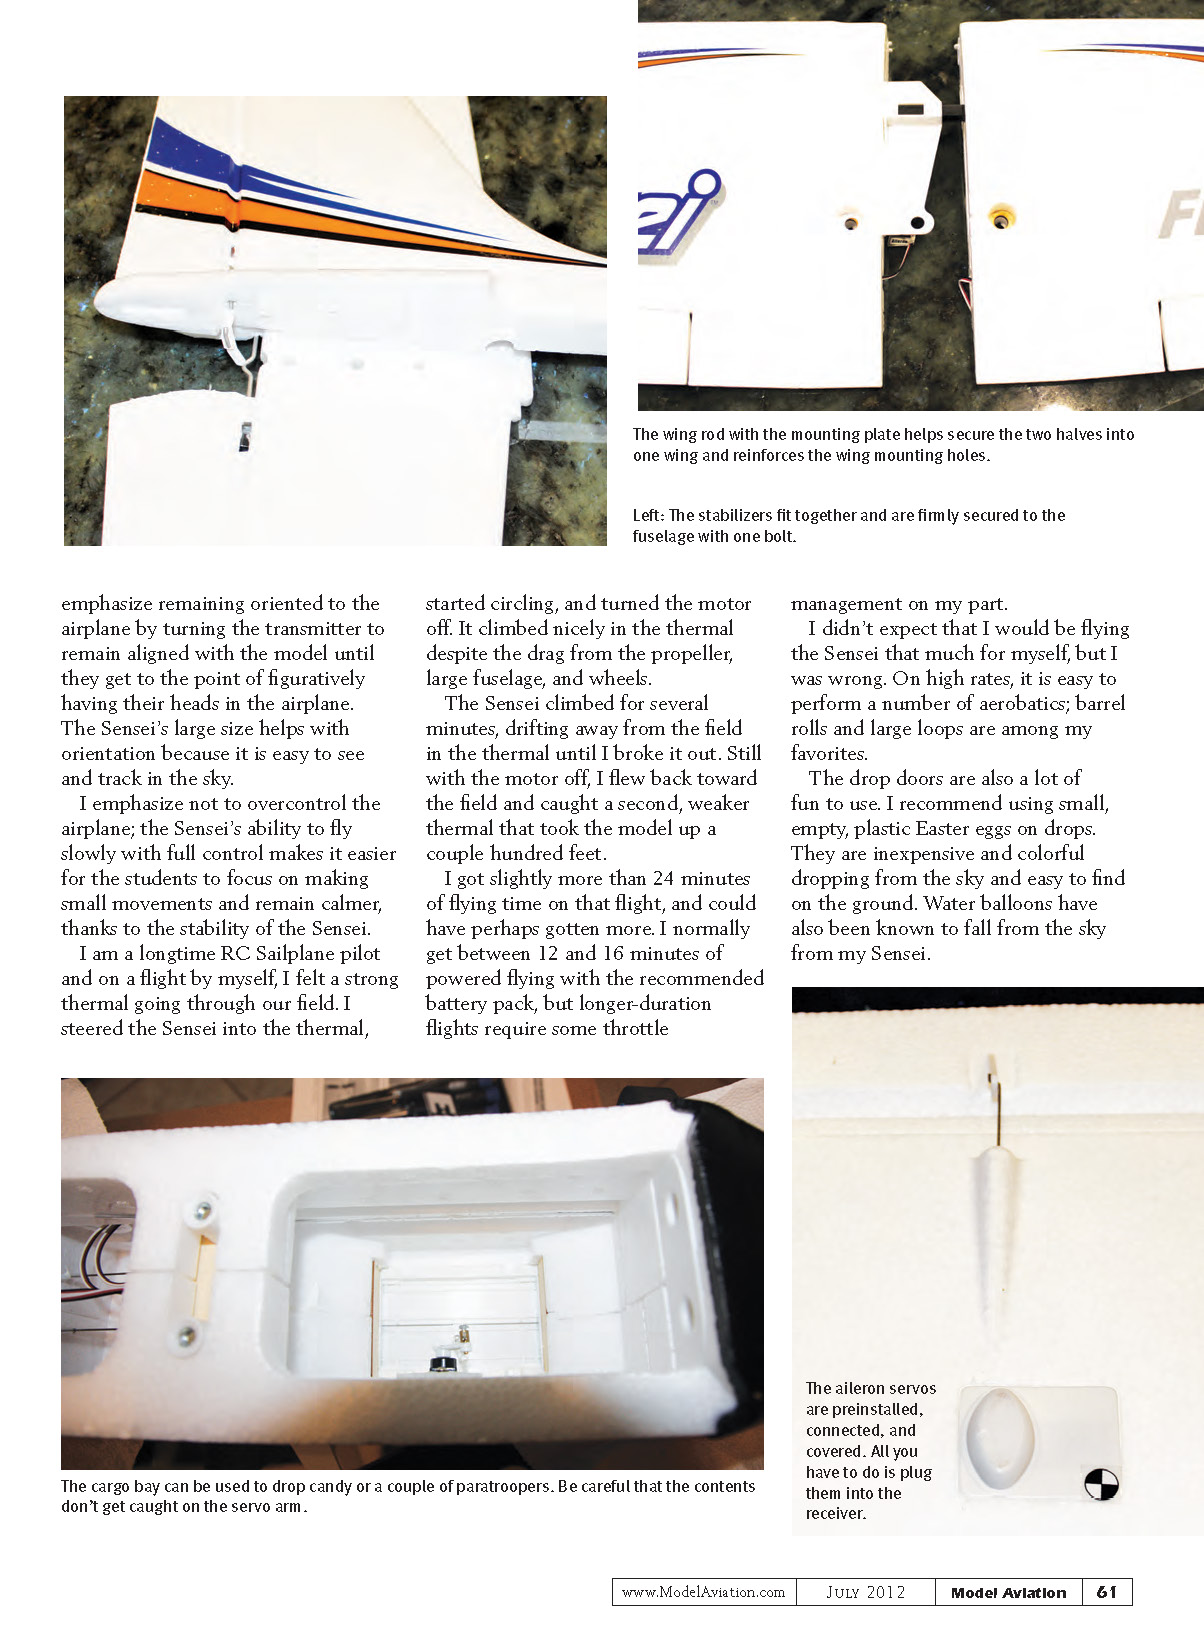
I received the receiver-ready (Rx-R) model, so I installed my Futaba receiver and connected the speed controller and the tail servos to their proper channels, and connected the drop-door servo to the gear channel. I plugged the supplied Y-harness into the aileron slot and ran the ends into the wing saddle.
Tail assembly
The rudder and elevators came attached to the stabilizers. Following the instructions, I worked them to loosen them up. The vertical stabilizer has three guide posts that insert into a slot in the top of the horizontal stabilizer and they install as one interlocking unit into a recess in the top rear of the fuselage.
The tail assembly was secured with one large machine screw, thanks to the molded fittings that positioned the stabilizers for proper self-alignment. The last step was connecting the rudder and elevator clevises to their respective control arms. After ensuring they were properly centered, I tightened the quick connects on the servo arms.
I appreciated the design of the tail parts. It made construction easy while providing a strong tail assembly.
Propeller, spinner, wings and battery
To secure the propeller to the front of the fuselage, I slid the provided collet propeller adaptor onto the motor shaft and slipped on the spinner backplate followed by the propeller, propeller washer, and propeller nut. I tightened the nut firmly and secured the spinner cone with two self-tapping screws.
The two wing halves slid together on the carbon-fiber wing rod that had an attached plastic mounting plate in the center. With the wing halves together, a molded plastic wing connector fit into the mounting holes in the top of the wing and the molded space around them. The two halves were now one wing, ready to install onto the top of the fuselage with the two supplied bolts. At the flying field, I plugged the aileron servos into the Y-harness and bolted the wing to the fuselage.
The battery compartment at the top front of the fuselage made installing and removing the recommended 3‑cell 2100 mAh battery a snap.
Flying
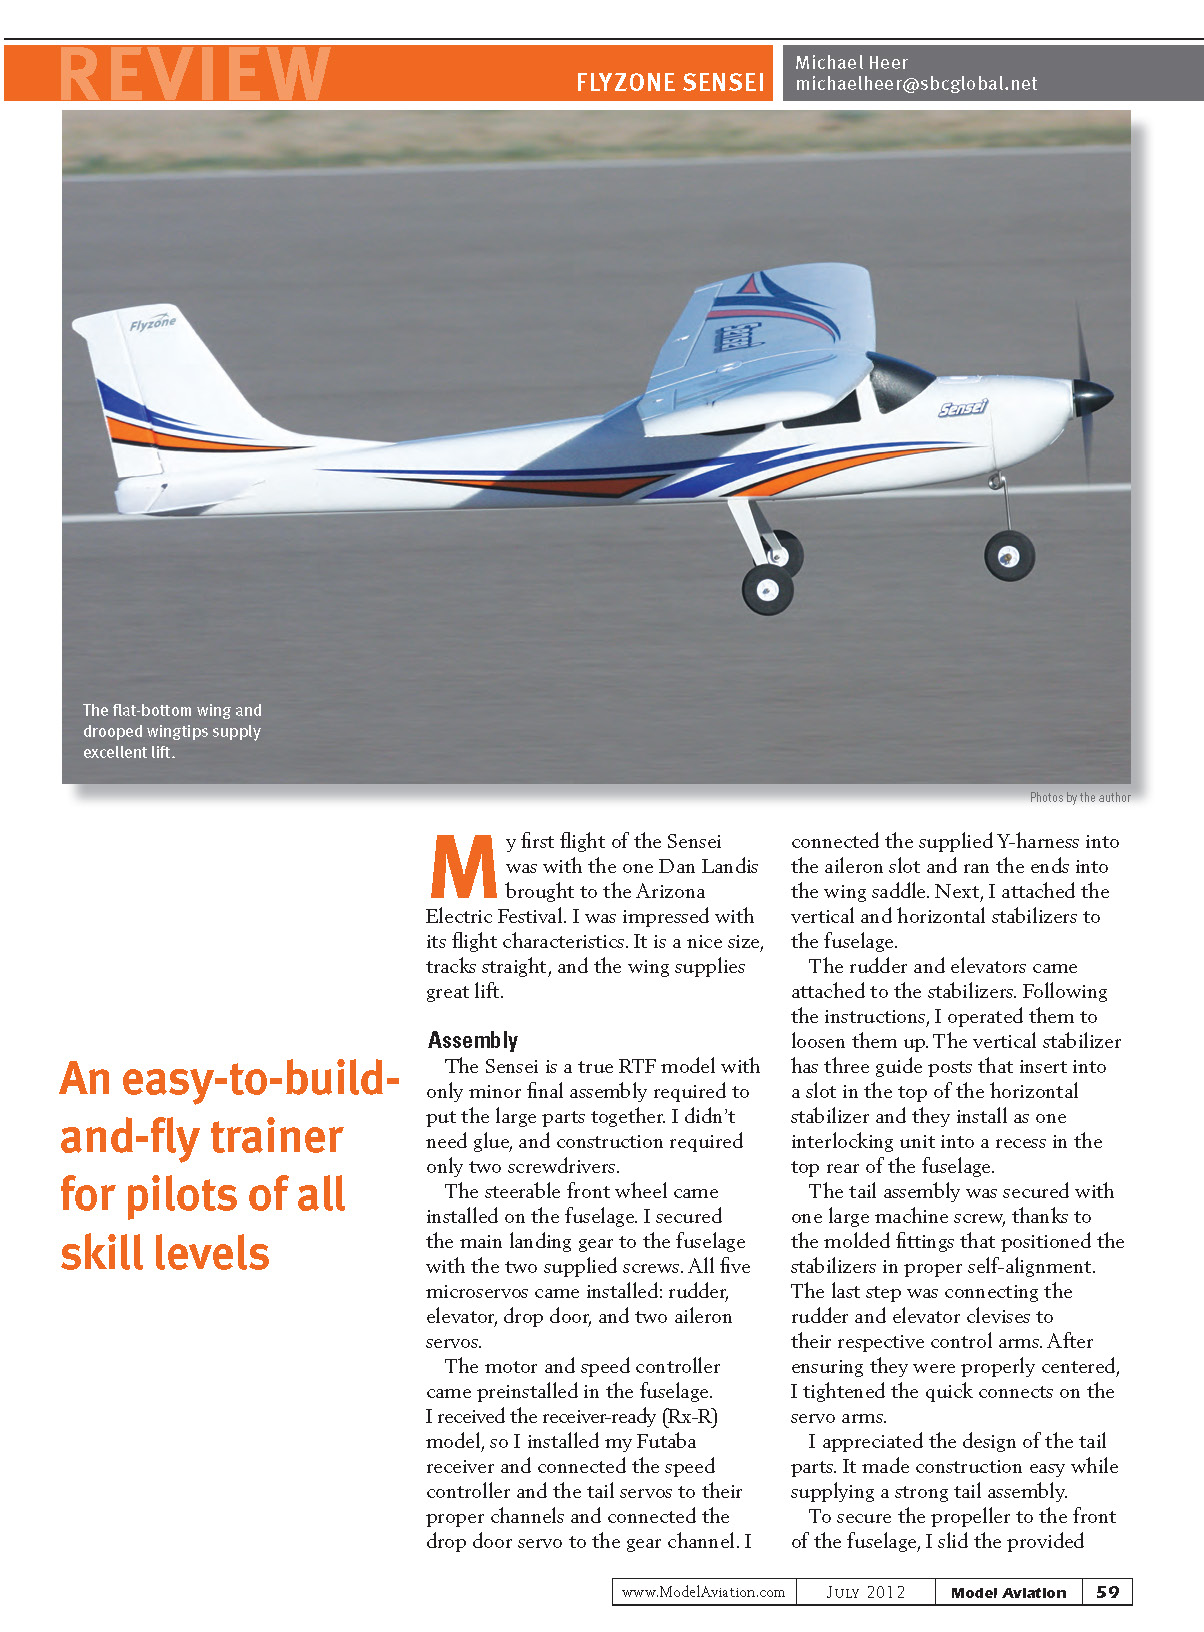
From taxiing to flight and through landing, this is one of the nicest airplanes I have flown in more than 30 years of RC flying. The flat-bottom wing with drooped wingtips supplies excellent lift and the Sensei tracks as if it is on rails. The brushless motor and 30-amp ESC supply sufficient power for nice loops, acceptable rolls, and quick takeoffs, yet it slows down for long flights with proper throttle management. The Sensei is super stable in flight, including inverted flight.
Because I intended to use the Sensei as a trainer model for classes I teach to RC students, I programmed the recommended low rates and exponential into my transmitter. On the first flight I didn't need to make a single trim adjustment.
I flew "two mistakes high" and intentionally stalled the Sensei with power both off and on. On all occasions, the airplane dropped its nose, fell a few feet, and recovered from the stall. I slowed and made turns to tip-stall the model. When it stalled, it usually fell more forward rather than off to the side. In nearly every respect, the Sensei is a perfect trainer airplane. The one exception is that it flies so well that it practically has to be forced down to land at a smaller field — the airplane will glide above the runway for a long time.
When I'm teaching my students, I emphasize remaining oriented to the airplane by turning the transmitter to remain aligned with the model until they get to the point of figuratively having their heads in the airplane. The Sensei's large size helps with orientation because it is easy to see and track in the sky.
I also emphasize not to overcontrol the airplane; the Sensei's ability to fly slowly with full control makes it easier for students to focus on making small movements and remain calmer, thanks to the model's stability.
I am a longtime RC sailplane pilot and on a solo flight I felt a strong thermal go through our field. I steered the Sensei into the thermal, started circling, and turned the motor off. It climbed nicely in the thermal despite the drag from the propeller, large fuselage, and wheels. The Sensei climbed for several minutes, drifting away from the field in the thermal until I broke out. Still with the motor off, I flew back toward the field and caught a second, weaker thermal that took the model up a couple hundred feet.
I got slightly more than 24 minutes of flying time on that flight, and could have perhaps gotten more. I normally get between 12 and 16 minutes of powered flying with the recommended battery pack, but longer-duration flights require some throttle management on my part.
I didn't expect that I would be flying the Sensei that much for myself, but I was wrong. On high rates, it is easy to perform a number of aerobatics; barrel rolls and large loops are among my favorites.
The drop doors are also a lot of fun to use. I recommend using small, empty plastic Easter eggs on drops — they are inexpensive, colorful dropping from the sky, and easy to find on the ground. Water balloons have also been known to fall from the sky from my Sensei.
Transcribed from original scans by AI. Minor OCR errors may remain.

