

Review: Horizon Hobby E-Flite UMX Gee Bee
Joe Malinchak <[email protected]>
The Granville Brothers of the Granville Brothers Aircraft Company built some of the most impressive and famous racing airplanes in the 1930s, known as Gee Bees. They used state-of-the-art design concepts to produce some of the best racing airplanes of that period.
The Gee Bee R2 was designed to compete in the 1932 air races. It was built primarily for cross-country racing, but it was also considered a strong pylon-racing contender.
The full-scale airplane was dangerous and challenging to fly, but in the hands of a skilled pilot it was exhilarating. Delmar Benjamin built a replica of the Gee Bee R2 and first flew it in 1991. He learned how to overcome the Gee Bee’s bad habits and accumulated more than 1,500 hours in the airplane, thrilling crowds at air shows across the country.
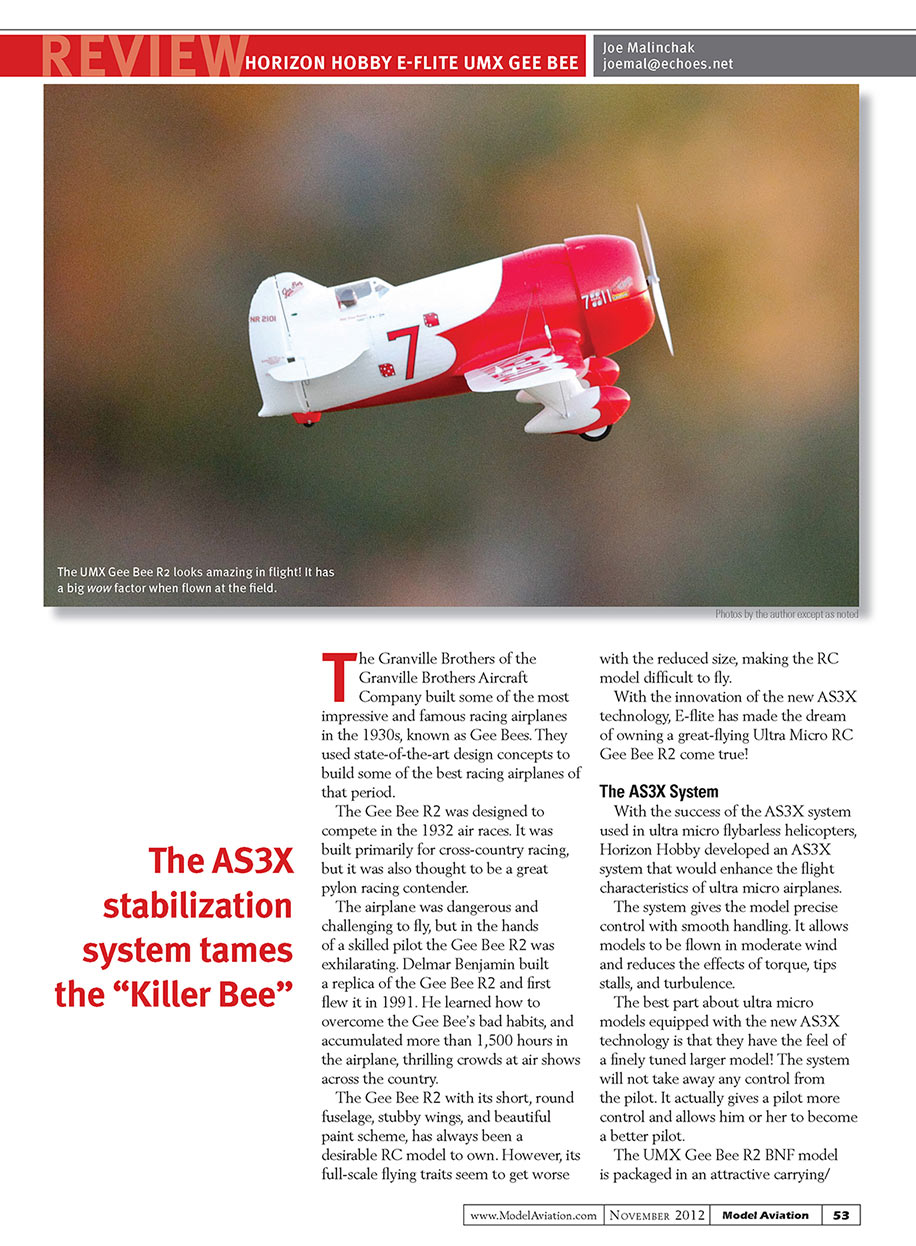
The Gee Bee R2—with its short, round fuselage, stubby wings, and beautiful paint scheme—has always been a desirable RC model. However, the full-scale flying traits often scale poorly, making many RC versions difficult to fly.
With the innovation of the new AS3X technology, E-flite has made the dream of owning a great-flying Ultra-Micro RC Gee Bee R2 come true.
The AS3X System
Horizon Hobby adapted the successful AS3X system from ultra-micro flybarless helicopters to enhance the flight characteristics of ultra-micro airplanes.
The system gives the model precise control with very smooth handling. It allows models to be flown in moderate wind and reduces the effects of torque, tip stalls, and turbulence. The best part is that ultra-micro models equipped with the AS3X technology have the feel of a finely tuned larger model. The system does not take control away from the pilot; it actually refines the airplane’s responses and helps the pilot fly better.
The UMX Gee Bee R2 BNF model is packaged in an attractive carrying/storage case and includes:
- a 200 mAh 2S LiPo battery
- a balance charger (Celectra 2S 7.4 V DC charger)
- instructions
All that is needed to fly the model is any DSM2/DSMX-compatible transmitter with four channels or more.
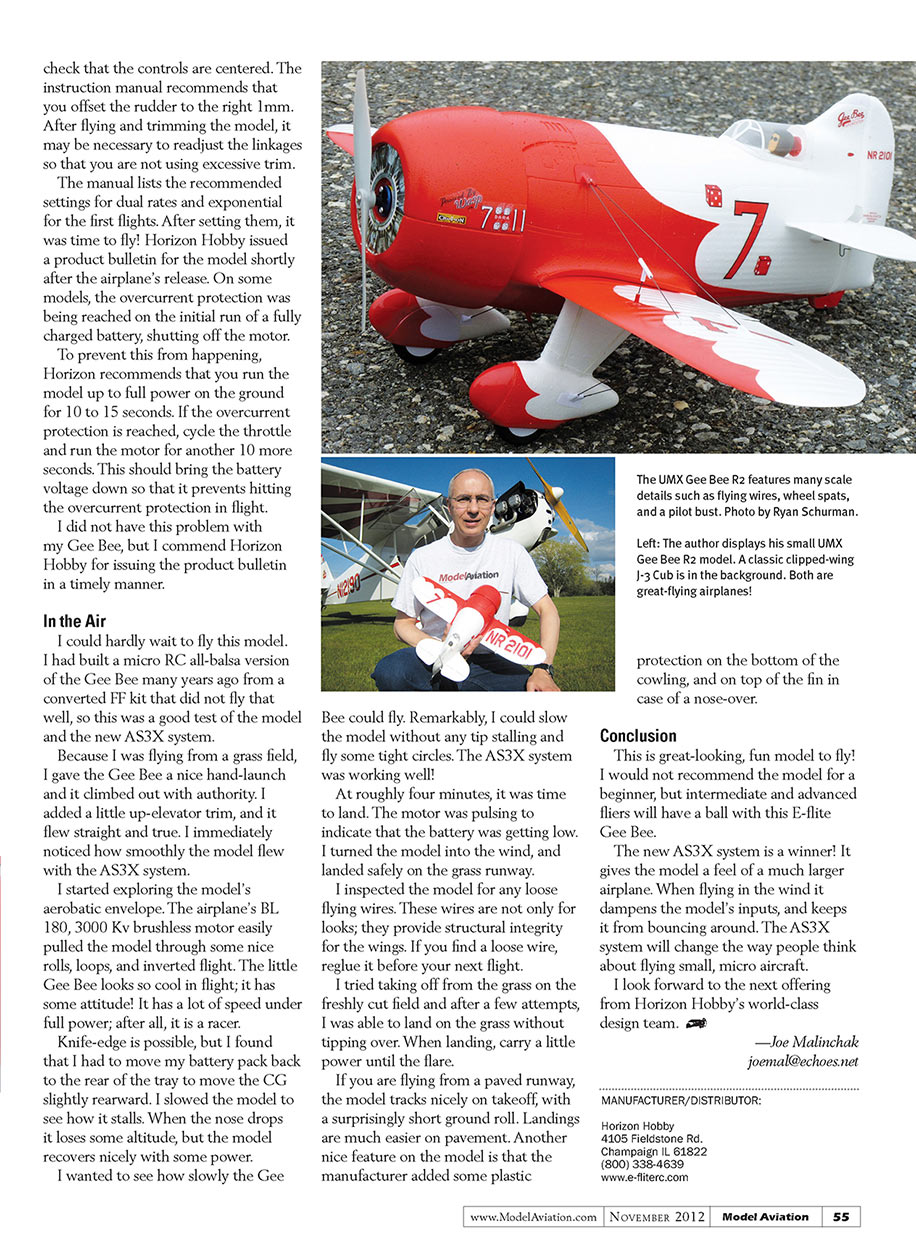
The airplane has a 20.1-inch wingspan and weighs only 3.60 ounces ready to fly. The model is constructed from nicely molded foam and includes scale features such as flying wires, wheel spats, and a pilot bust.
Power and electronics:
- BL180, 3,000 Kv brushless outrunner motor with a 5.25 x 3.5 propeller
- Six-channel DSM2 Ultra-Micro AS3X receiver / servo / BL ESC unit (all integrated)
- Two 2.3-gram performance linear long-throw servos mounted in the wings for aileron control (designed to meet AS3X demands)
The motor and battery are accessed through a magnetic cowling hatch that blends with the fuselage. The battery tray and electronics are contained in a large compartment beneath that hatch.
Flight Preparation
After reading the instruction manual, I charged the battery. The included Celectra 2S 7.4 V DC LiPo charger requires a 12 V DC power source; I used a 12 V gel-cell battery that I use for most charging needs.
Binding the receiver to a Spektrum DX7 transmitter was straightforward. With the transmitter off, I connected the battery and waited for the receiver LED to flash rapidly. Then I turned the transmitter on in bind mode, made sure the controls were centered and that the throttle and throttle trim were at their lowest positions. After a few seconds the transmitter was bound and ready.
For the first flight I mounted the battery at the front edge of the battery tray as recommended. The manual lists the proper CG at 26 mm back from the leading edge (LE) of the wing at the root.
To arm the ESC:
- Turn your transmitter on with throttle and throttle trim at their lowest positions.
- Connect the battery.
- Keep the model immobile for at least 5 seconds to allow the AS3X system to initialize.
After initialization, check flight controls for correct direction and full movement. Also confirm that controls are centered. The manual recommends offsetting the rudder 1 mm to the right. After trimming in flight it may be necessary to readjust linkages so you are not using excessive radio trim.
The manual lists recommended dual-rate and exponential settings for initial flights—use those as a starting point.
Product bulletin (overcurrent protection): Horizon Hobby issued a bulletin noting that some models reached overcurrent protection on the initial run of a fully charged battery, shutting off the motor. To prevent this, run the model at full power on the ground for 10–15 seconds. If overcurrent protection is reached, cycle the throttle and run the motor for another 10 seconds. This will lower the battery voltage slightly and reduce the chance of hitting overcurrent protection in flight. I did not experience this problem, but the bulletin was a timely and useful precaution.
In the Air
I was eager to fly this model. Years ago I built an all-balsa micro Gee Bee that did not fly well, so this was a good test of the model and the AS3X system.
Because I was operating from a grass field, I hand-launched the Gee Bee. It climbed out with authority. I added a touch of up-elevator trim and it flew straight and true. The smoothness imparted by the AS3X system was immediately noticeable.
I explored the model’s aerobatic envelope. The BL180, 3,000 Kv motor easily pulled the airplane through rolls, loops, and inverted flight. The little Gee Bee looks very striking in flight—it has attitude—and it has a lot of speed under full power; after all, it’s a racer.
Knife-edge flight is possible, but I had to move the battery pack rearward in the tray to shift the CG slightly rearward for better knife-edge performance. I slowed the model to test stalls: when the nose dropped it lost altitude but recovered nicely with some power.
I wanted to see how slowly the Gee Bee could fly. Remarkably, I was able to slow it without any tip-stalling and fly tight circles. The AS3X system was clearly doing its job.
At roughly four minutes the motor began pulsing to indicate the battery was getting low. I turned the model into the wind and landed safely on the grass runway.
After landing, inspect the flying wires. These wires are not only for looks; they provide structural integrity for the wings. If you find a loose wire, re-glue it before the next flight.
Takeoffs and landings:
- From grass: with a little effort I managed takeoffs and landings on freshly cut grass without tipping over. When landing on grass, carry a little power until the flare.
- From pavement: the model tracks nicely on takeoff with a surprisingly short ground roll, and landings are easier on pavement. The model includes plastic protection on the bottom of the cowling and on top of the fin to help prevent damage from a nose-over.
Conclusion
This is a great-looking, fun model to fly. I would not recommend it for a beginner, but intermediate and advanced flyers will have a ball with this E-flite Gee Bee.
The AS3X system is a winner. It gives the model the feel of a much larger airplane—dampening inputs in windy conditions and keeping the model from bouncing around. AS3X will change the way people think about flying small micro aircraft.
I look forward to the next offering from Horizon Hobby’s world-class design team.
— Joe Malinchak [email protected]
Manufacturer/Distributor
Horizon Hobby 4105 Fieldstone Rd. Champaign, IL 61822 (800) 338-4639 www.e-fliterc.com
Transcribed from original scans by AI. Minor OCR errors may remain.

