

REVIEW HORIZON HOBBY HANGAR 9 MERIDIAN 10CC ARF
Tom Sullivan [email protected]
A few issues ago, you may have read a review I wrote about the Hangar 9 Taylorcraft BNF. I mentioned how it is a great choice for a first gasoline-powered model—and it still is.
Now I am reviewing the new Hangar 9 Meridian, powered by the company’s new Evolution 10GX gasoline engine. This combination is a great gas-powered option if you want something slightly smaller and less expensive.
The Meridian can also be powered by alternatives such as a .61 two-stroke or .72 four-stroke glow engine, or by electric power. Let’s explore what the Meridian is all about!
Opening the box, I was surprised to find one thing missing: the miles and miles of packing tape that many manufacturers use to lock everything in place for shipping. Even without tape, the parts were neatly held in place and suffered no damage. The pieces of the airframe were individually protected in polybags. Smaller painted pieces were wrapped in paper then bagged.
The Meridian arrived wrinkled. It’s possible that cold weather caused it. I spent approximately 30 minutes using my heat gun to shrink everything back into place. If your model arrives in the same state, use care in areas where the striping and decals are located so they don’t melt or pull away from the covering.
While tightening the covering, I looked at the airframe’s design and construction. The wings, fuselage, and control surfaces are constructed from laser-cut balsa and plywood. The wings are a traditional rib-and-spar design with sheeting on the LE and capstrips. The fuselage has plywood slab sides and a built-up turtledeck. Lightening holes are strategically placed to save weight.
Several fiberglass pieces are included and help dress up the Meridian. The cowl comes as a single piece that must be cut to suit the type of powerplant you use. The wheel pants are prepainted to match the fuselage. The nose gear pant needs to be drilled to accept the landing gear.
Hardware can make or break an ARF, and the Meridian’s hardware was not only good quality, but complete. From the tank to the control hardware, engine mounts, and landing gear—everything you need is included. The main gear is solid, prepainted metal and the nose gear is a steerable unit.
The test model for this review was powered with the Evolution 10GX gasoline engine. If you want to go a different route—glow or electric—the parts are also included for these options. I was surprised to find a mounting box for electric motors included.
Construction
I won’t review every step of construction. If you’d like to see each of the steps, you can download the Meridian’s manual listed in the “Sources” section.
The aircraft is a standard ARF. The builder will need to do some work with epoxy, CA, drilling, grinding, etc., and that’s a good thing. There’s nothing extraordinary in the steps—only good, basic building skills.
The wing halves are tackled first. CA-type hinges are fitted in the precut slots for the ailerons and flaps, then glued into position. The servos are mounted inside the wing on prebuilt mounts attached to hatches. After routing the servo leads through the wing, the servo hatches are screwed into place.
Next is the installation of the control horns and pushrods. Each control surface has premarked positions where the control horn should be mounted. After drilling the proper holes and stiffening the wood with thin CA, everything is bolted into place. The control rods are precut to the proper lengths and feature a Z-bend on one end and threads on the opposite end where the metal clevis is twisted into place. Run the pushrods through the fuselage and attach clevises and control horns using the same techniques as on the wings.
With the wings finished, work on the fuselage begins. The wing halves are fitted to the fuselage by sliding them into position on the aluminum wing tube. When they are secured, the elevator is attached to the stabilizer and then the stabilizer is epoxied into the fuselage after it is measured to make sure it correctly aligns. The vertical fin is also epoxied into place, and the rudder is attached with more CA hinges.
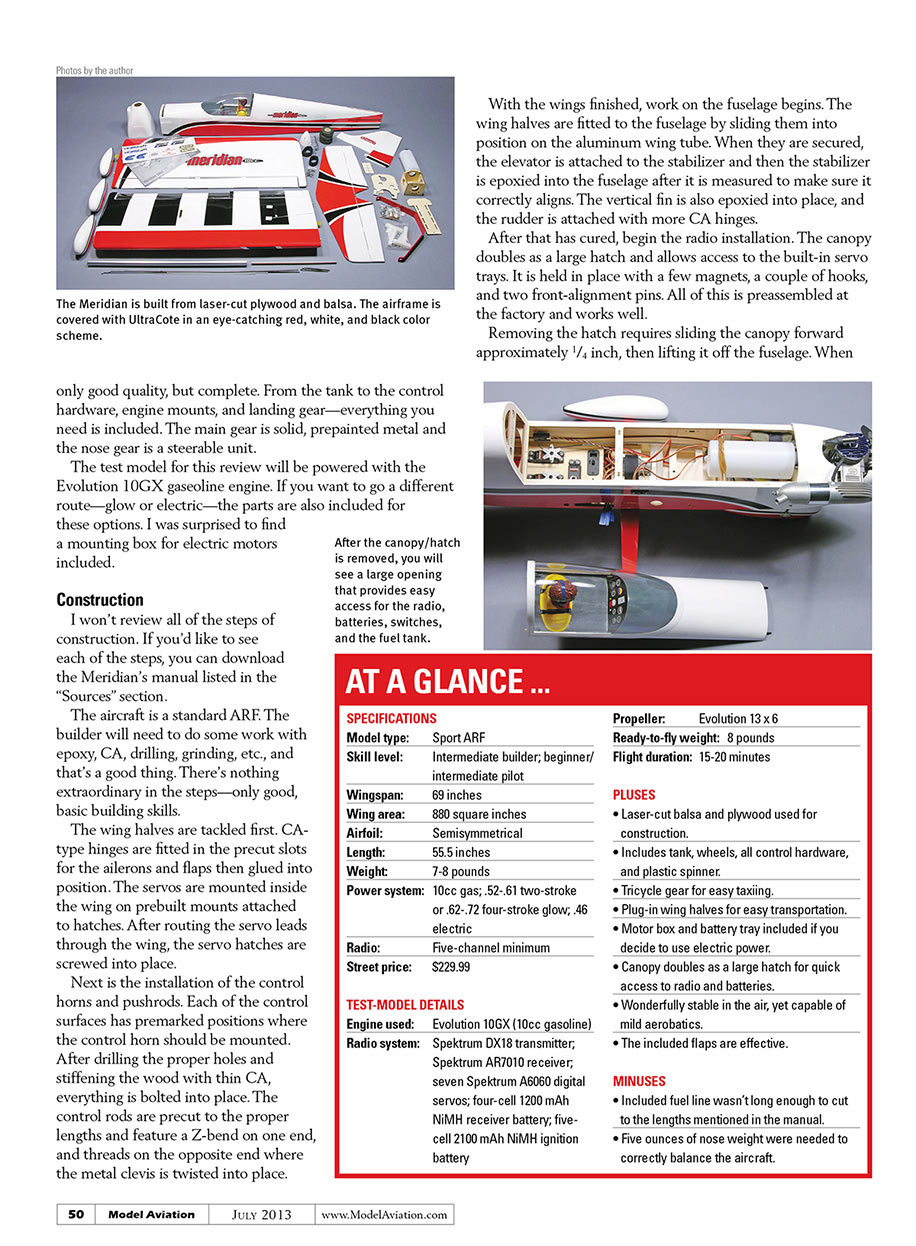
After that has cured, begin the radio installation. The canopy doubles as a large hatch and allows access to the built-in servo trays. It is held in place with a few magnets, a couple of hooks, and two front-alignment pins. All of this is preassembled at the factory and works well.
Removing the hatch requires sliding the canopy forward approximately 1/4 inch, then lifting it off the fuselage. When the canopy/hatch is removed, you will see a large opening that provides easy access for the radio, batteries, switches, and the fuel tank.
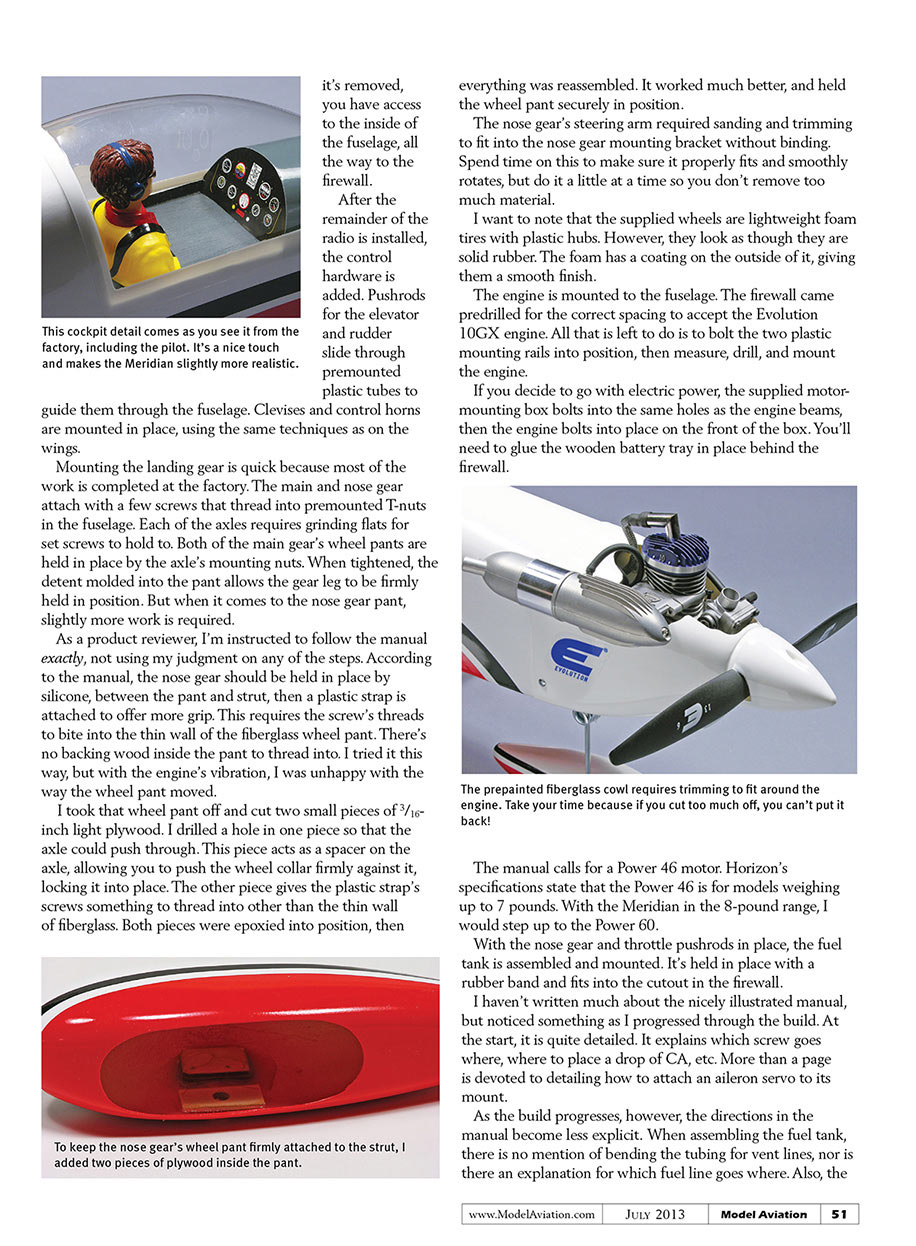
Mounting the landing gear is quick because most of the work is completed at the factory. The main and nose gear attach with a few screws that thread into premounted T-nuts in the fuselage. Each of the axles requires grinding flats for set screws to hold to. Both main gear wheel pants are held in place by the axle's mounting nuts. When tightened, the detent molded into the pant allows the gear leg to be firmly held in position. The nose gear pant, however, requires slightly more work.
As the manual instructs, the nose gear should be held in place by silicone between the pant and strut, then a plastic strap is attached to offer more grip. This requires the screw's threads to bite into the thin wall of the fiberglass wheel pant—there's no backing wood inside the pant to thread into. I tried it this way, but with engine vibration I was unhappy with how the wheel pant moved.
I removed the wheel pant and cut two small pieces of 3/16-inch light plywood. I drilled a hole in one piece so the axle could push through; this piece acts as a spacer on the axle, allowing the wheel collar to be pushed firmly against it, locking it into place. The other piece gives the plastic strap's screws something to thread into other than the thin fiberglass wall. Both pieces were epoxied into position and everything was reassembled. It worked much better and held the wheel pant securely.
The nose gear's steering arm required sanding and trimming to fit into the nose gear mounting bracket without binding. Spend time on this to make sure it properly fits and smoothly rotates—remove material a little at a time so you don't take off too much.
The supplied wheels are lightweight foam tires with plastic hubs, but they look like solid rubber due to a coating on the outside that gives a smooth finish.
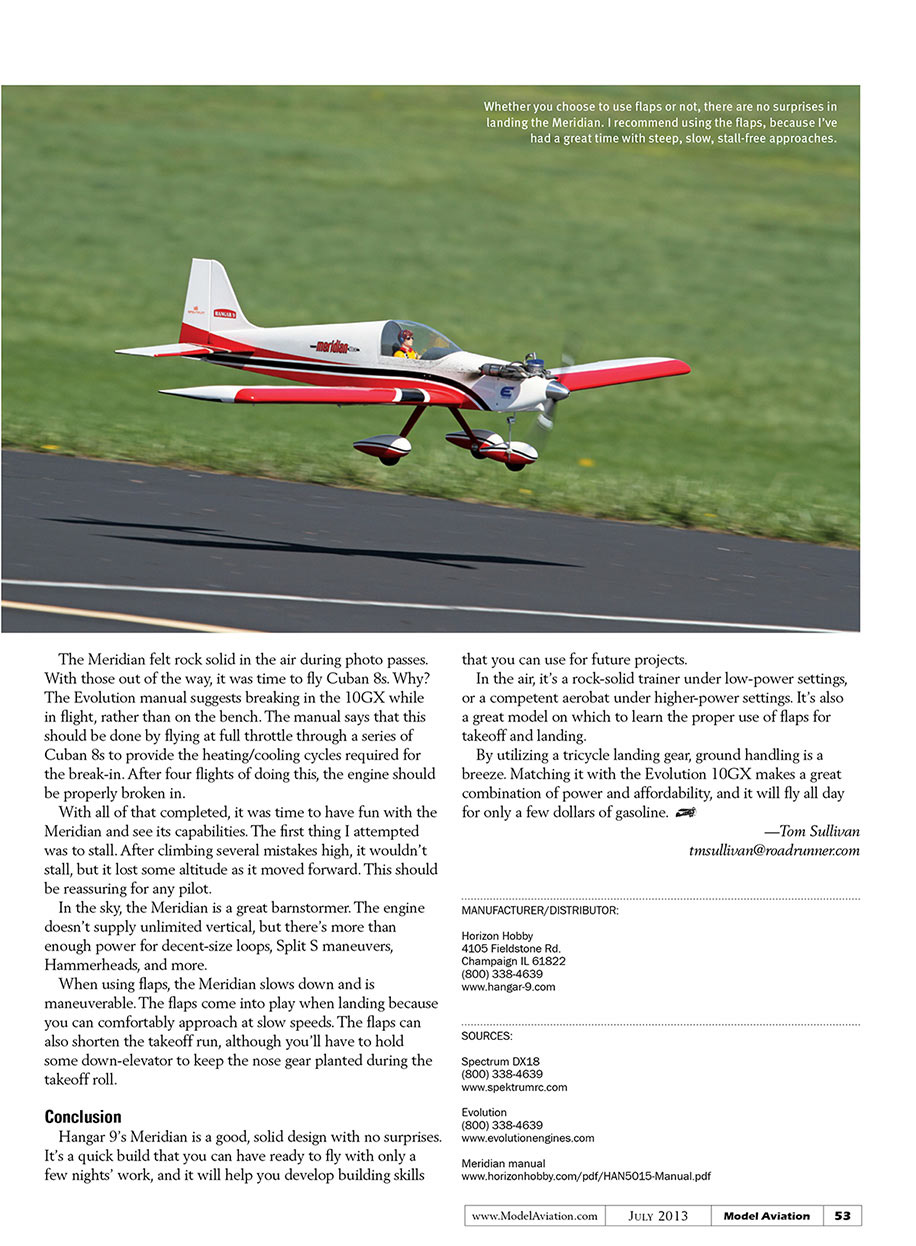
The engine is mounted to the fuselage. The firewall came predrilled for the correct spacing to accept the Evolution 10GX engine. Bolt the two plastic mounting rails into position, then measure, drill, and mount the engine.
If you decide to go with electric power, the supplied motor-mounting box bolts into the same holes as the engine beams, then the motor bolts into place on the front of the box. You'll need to glue the wooden battery tray in place behind the firewall.
The manual calls for a Power 46 motor. Horizon's specifications state that the Power 46 is for models weighing up to 7 pounds. With the Meridian in the 8-pound range, I would step up to the Power 60.
With the nose gear and throttle pushrods in place, the fuel tank is assembled and mounted. It's held in place with a rubber band and fits into the cutout in the firewall.
The manual is nicely illustrated and quite detailed at the start, explaining which screw goes where, where to place a drop of CA, etc. More than a page is devoted to detailing how to attach an aileron servo to its mount. As the build progresses, however, the directions become less explicit. For example, when assembling the fuel tank there is no mention of bending the tubing for vent lines, nor an explanation for which fuel line goes where. The tank comes as a three-line system with no information about what to do with the third line.
None of this was a problem for me, but if this is your first glow/gas build, study the photos or consult an experienced modeler to make sure everything is in the correct spot or fuel could spew everywhere.
The cowl needs to be mounted to finish the Meridian. If you're using an electric motor, simply slide it on and drill the mounting holes. For glow- or gas-powered engines, cut the cowl so that it fits around the engine.
The cowl comes with dimples on the rear to mark where the mounting holes should be drilled. The two dimples on the port side of the cowl won't align with the firewall. Instead, drill into the fuselage side. This isn't a problem as long as you strengthen the holes with CA.
When everything was in place, I checked the CG for proper balance. Even with the range of 3.3–3.8 inches from the LE, it was tail heavy with the supplied batteries mounted as instructed. I exchanged the supplied lightweight LiPo batteries for larger (and heavier) NiMH packs.
I upgraded the receiver pack's capacity to 1,200 mAh NiMH and the ignition pack to 2,100 mAh. Both were mounted as far forward as possible underneath and beside the fuel tank and against the firewall. Doing all this added approximately 5 ounces to the total weight and allowed the model to balance at the 3.5-inch mark.
AT A GLANCE ...
SPECIFICATIONS
- Model type: Sport ARF
- Skill level: Intermediate builder; beginner/intermediate pilot
- Wingspan: 69 inches
- Wing area: 880 square inches
- Airfoil: Semisymmetrical
- Length: 55.5 inches
- Weight: 7–8 pounds
- Power system: 10cc gas; .52–.61 two-stroke or .62–.72 four-stroke glow; .46 electric
- Radio: Five-channel minimum
- Street price: $229.99
- Propeller: Evolution 13 x 6
- Ready-to-fly weight: 8 pounds
- Flight duration: 15–20 minutes
TEST-MODEL DETAILS
- Engine used: Evolution 10GX (10cc gasoline)
- Radio system: Spektrum DX18 transmitter; Spektrum AR7010 receiver; seven Spektrum A6060 digital servos; four-cell 1200 mAh NiMH receiver battery; five-cell 2100 mAh NiMH ignition battery
PLUSES
- Laser-cut balsa and plywood used for construction
- Includes tank, wheels, all control hardware, and plastic spinner
- Tricycle gear for easy taxiing
- Plug-in wing halves for easy transportation
- Motor box and battery tray included if you decide to use electric power
- Canopy doubles as a large hatch for quick access to radio and batteries
- Wonderfully stable in the air, yet capable of mild aerobatics
- The included flaps are effective
MINUSES
- Included fuel line wasn’t long enough to cut to the lengths mentioned in the manual
- Five ounces of nose weight were needed to correctly balance the aircraft
Flying
After testing the engine at home to make sure it would start, it was time to head to the field and put the Meridian through its paces. When the engine was started and warm, I taxied around to adjust the nose gear so that it would track straight.
For the first flight, I chose to take off without flaps. Throttling up to three-quarters power, the Meridian used approximately 100 feet of runway then gently rose into the air with a slight amount of up-elevator. I threw in a small amount of aileron trim during the first few passes, and the Meridian was dialed in.
The Meridian felt rock solid in the air during photo passes. With those out of the way, it was time to fly Cuban 8s. The Evolution manual suggests breaking in the 10GX while in flight, rather than on the bench. The manual says this should be done by flying at full throttle through a series of Cuban 8s to provide the heating/cooling cycles required for the break-in. After four flights of doing this, the engine should be properly broken in.
With that completed, it was time to have fun with the Meridian and see its capabilities. The first thing I attempted was to stall. After climbing several hundred feet, it wouldn't fully stall but did lose some altitude while moving forward. This should be reassuring for any pilot.
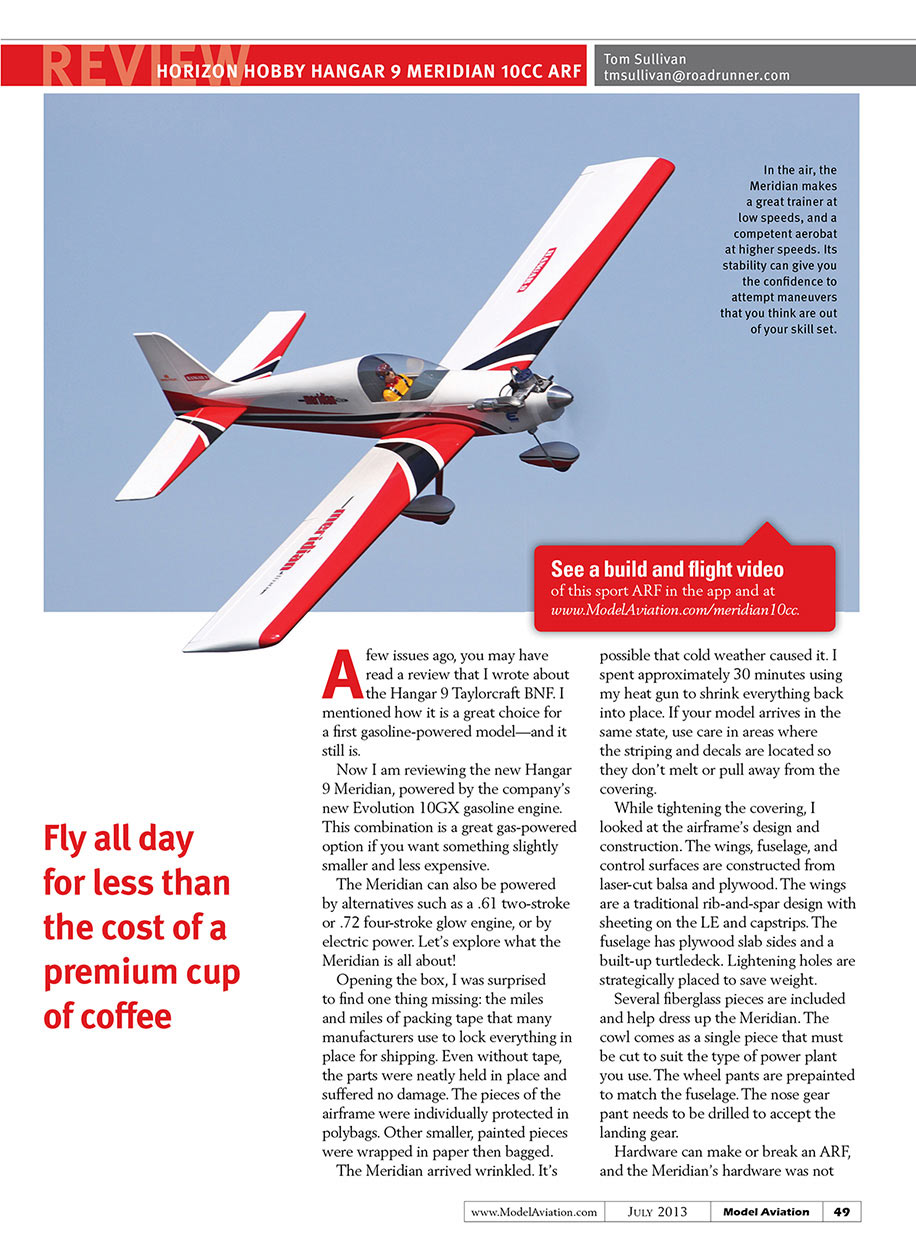
In the sky, the Meridian is a great barnstormer. The engine doesn't supply unlimited vertical, but there's more than enough power for decent-size loops, Split S maneuvers, Hammerheads, and more.
When using flaps, the Meridian slows down and remains maneuverable. The flaps are particularly useful on landing because you can comfortably approach at slow speeds. The flaps can also shorten the takeoff run, although you'll have to hold some down-elevator to keep the nose gear planted during the takeoff roll.
Conclusion
Hangar 9's Meridian is a good, solid design with no surprises. It's a quick build that you can have ready to fly with only a few nights' work, and it will help you develop building skills that you can use for future projects.
In the air, it's a rock-solid trainer under low-power settings, or a competent aerobat under higher-power settings. It's also a great model on which to learn the proper use of flaps for takeoff and landing.
By utilizing a tricycle landing gear, ground handling is a breeze. Matching it with the Evolution 10GX makes a great combination of power and affordability, and it will fly all day for only a few dollars of gasoline.
—Tom Sullivan [email protected]
MANUFACTURER/DISTRIBUTOR:
- Horizon Hobby
- 4105 Fieldstone Rd.
- Champaign, IL 61822
- (800) 338-4639
- www.hangar-9.com
SOURCES:
- Spectrum DX18 — (800) 338-4639 — www.spektrumrc.com
- Evolution — (800) 338-4639 — www.evolutionengines.com
- Meridian manual — www.horizonhobby.com/pdf/HAN5015-Manual.pdf
Transcribed from original scans by AI. Minor OCR errors may remain.

