
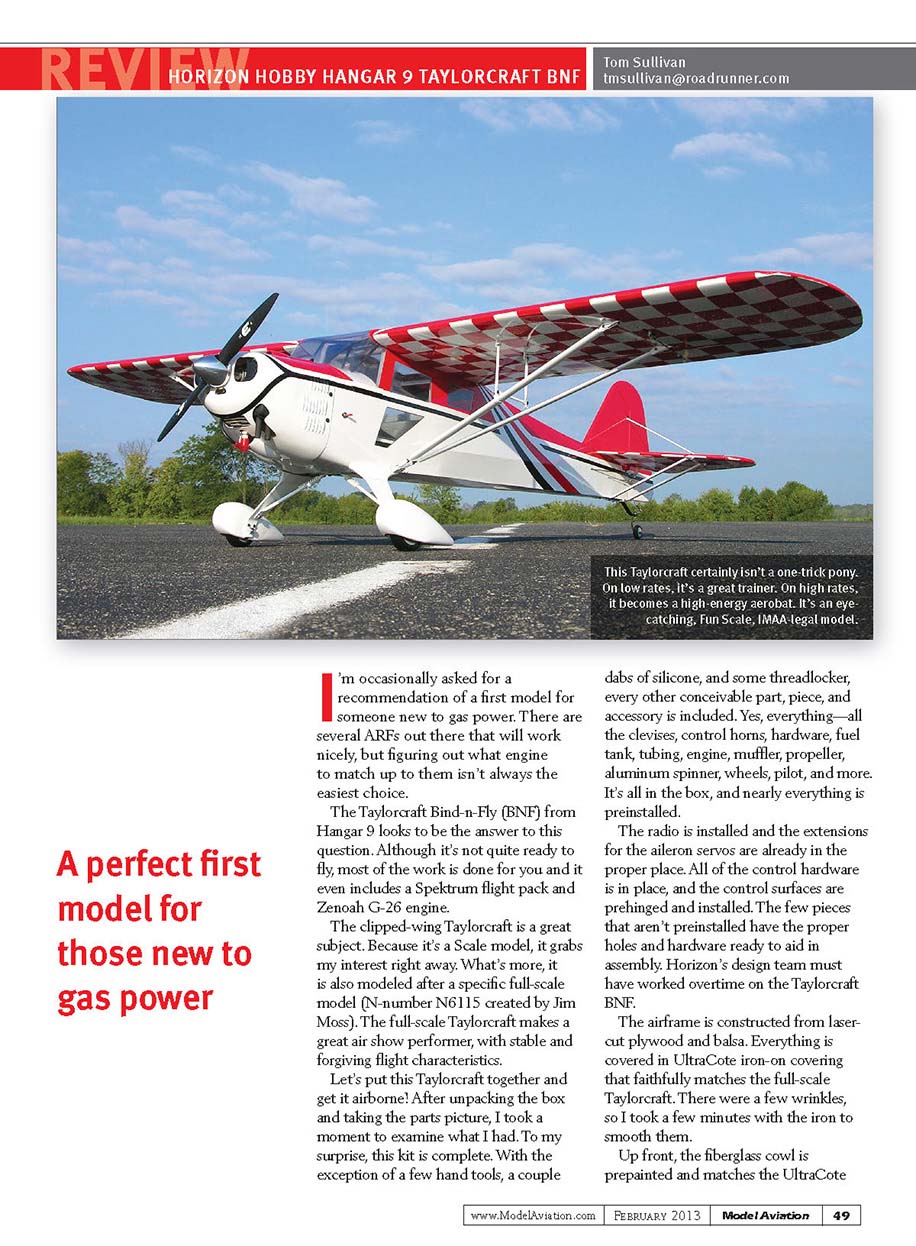
Review: Horizon Hobby Hangar 9 Taylorcraft BNF-2013/02
I'm occasionally asked to recommend a first model for someone new to gas power. There are several ARFs that work nicely, but matching the right engine isn't always an easy choice. The Taylorcraft Bind-N-Fly (BNF) from Hangar 9 looks to be the answer. Although it's not completely ready to fly out of the box, most of the work is done for you and it even includes a Spektrum flight pack and a Zenoah G-26 engine.
The clipped-wing Taylorcraft is a great subject. Because it's a scale model and is modeled after a specific full-scale airplane (N6115, created by Jim Moss), it grabs my interest immediately. The full-scale Taylorcraft is a great airshow performer with stable, forgiving flight characteristics.
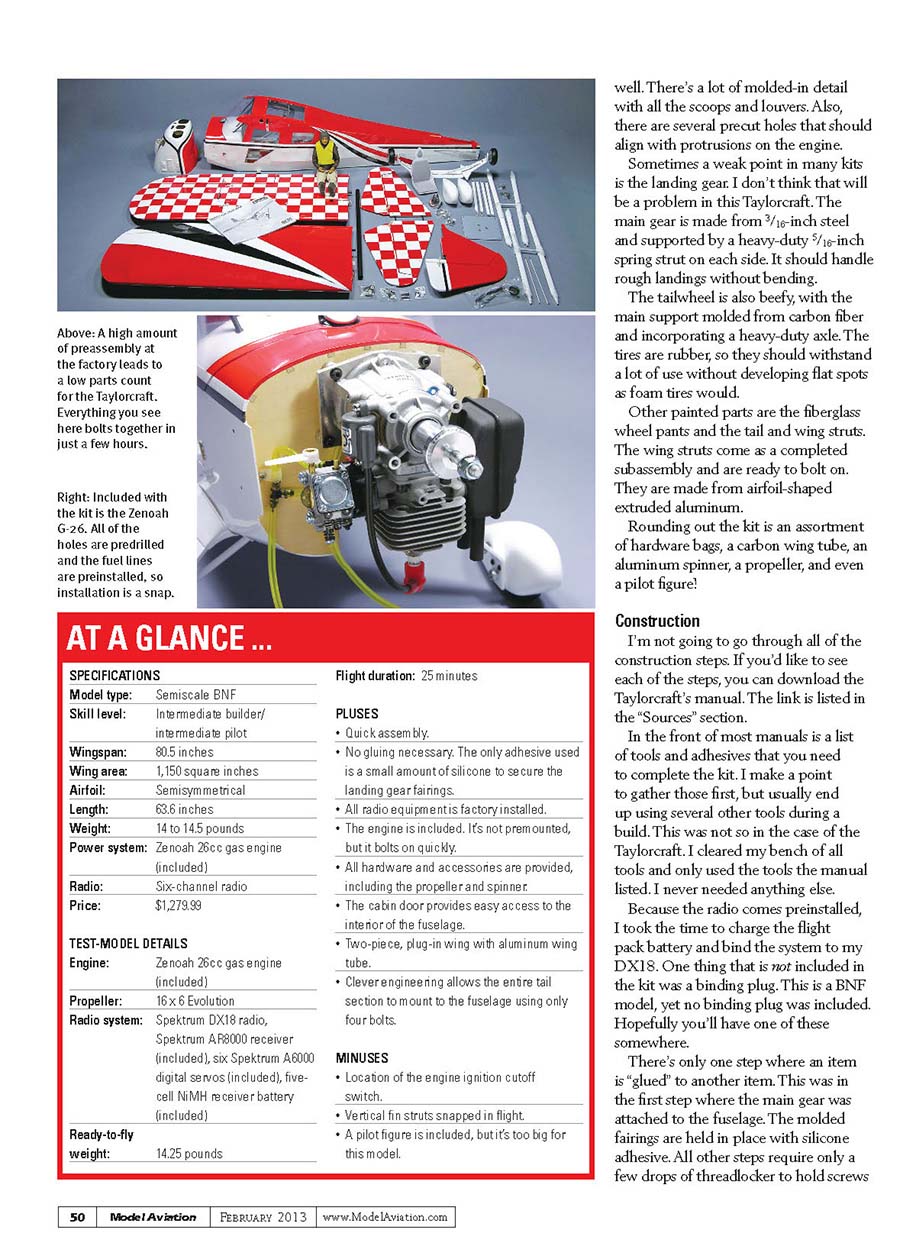
After unpacking the box and taking a parts picture, I examined the contents. To my surprise, the kit is complete. With the exception of a few hand tools, a couple dabs of silicone, and some threadlocker, every conceivable part, piece, and accessory is included. Everything is in the box, and nearly everything is preinstalled.
Highlights of what’s included and preinstalled:
- Spektrum flight pack and radio installed
- Zenoah G-26 engine and muffler
- Fuel tank and tubing
- Propeller and aluminum spinner
- Wheels, rubber tires, and fiberglass wheel pants
- Pilot figure
- Carbon wing tube
- Wing struts (preassembled)
- All clevises, control horns, hardware, and precut holes
- Prehinged and installed control surfaces
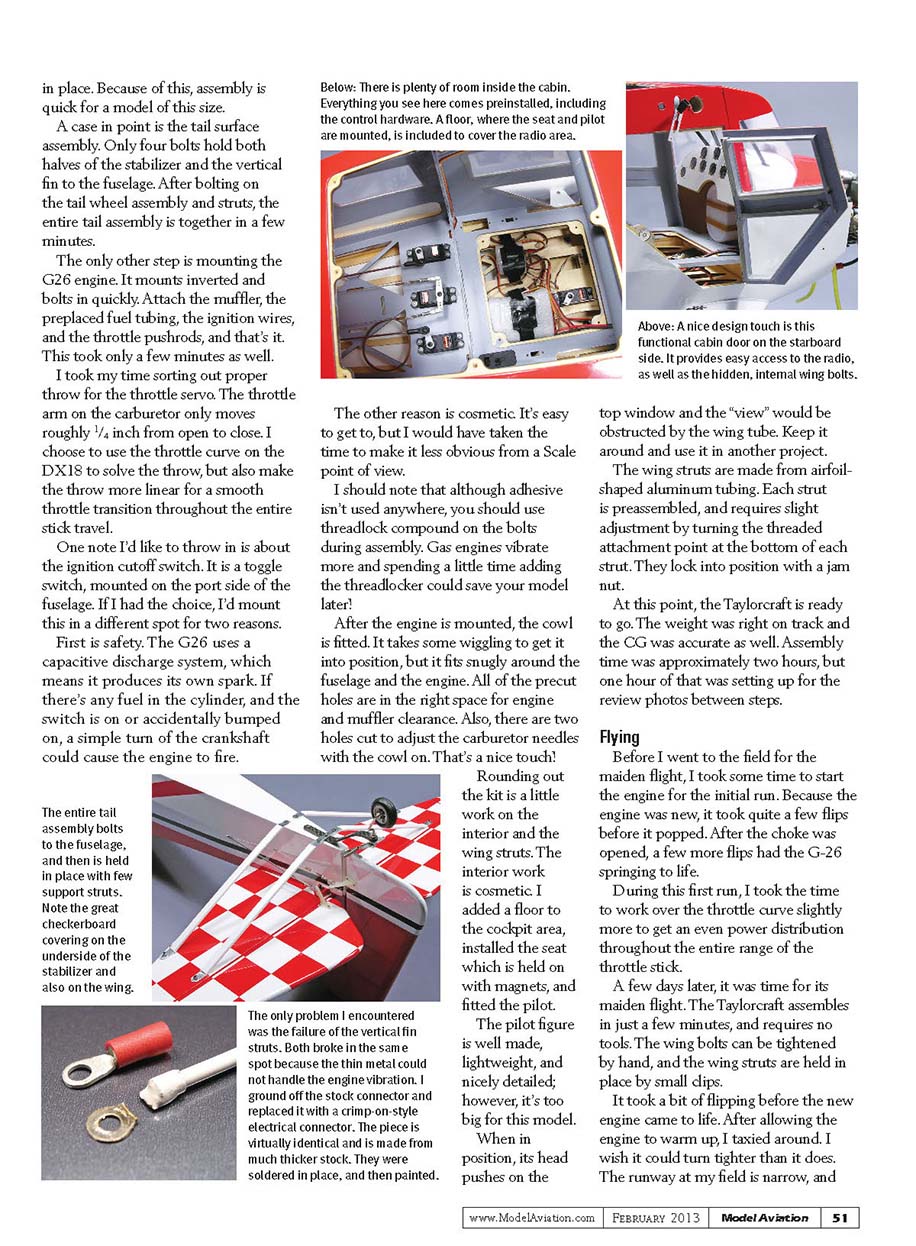
The radio is installed and the aileron servo extensions are already routed. Horizon’s design team clearly put a lot of effort into making assembly straightforward.
The airframe is built from laser-cut plywood and balsa and covered in UltraCote iron-on film that faithfully matches the full-scale Taylorcraft. I smoothed a few wrinkles with an iron. The fiberglass cowl is prepainted and matches the covering. It has molded-in scoops and louvers and several precut holes that align with the engine protrusions.
Landing gear is often a weak point in kits, but not here. The main gear is 3/16-inch steel supported by a heavy-duty 5/16-inch spring strut on each side. The tailwheel assembly uses carbon-fiber main support and a heavy-duty axle. The rubber tires should resist flat spots much better than foam tires.
Other painted parts include fiberglass wheel pants and the tail and wing struts. The wing struts come as completed subassemblies made from airfoil-shaped extruded aluminum. Also included are assorted hardware bags, a carbon wing tube, an aluminum spinner, and a pilot figure.
Construction
I won't detail every construction step here — the full manual covers them and is listed in the Sources section. The manual includes a list of required tools and adhesives; I gathered those first and ended up using only what the manual listed. There was no need for extra tools.
Because the radio comes preinstalled, I charged the flight pack and bound the system to my Spektrum DX18. One thing missing from the kit: a binding plug. This is a BNF model, yet no binding plug was included, so you’ll need to have one on hand.
Most assembly requires no adhesive. The only step that uses silicone adhesive is attaching the molded fairings around the main gear. All other steps require only a few drops of threadlocker on screws. Because adhesive is minimal, assembly is quick for a model of this size.
A few construction details:
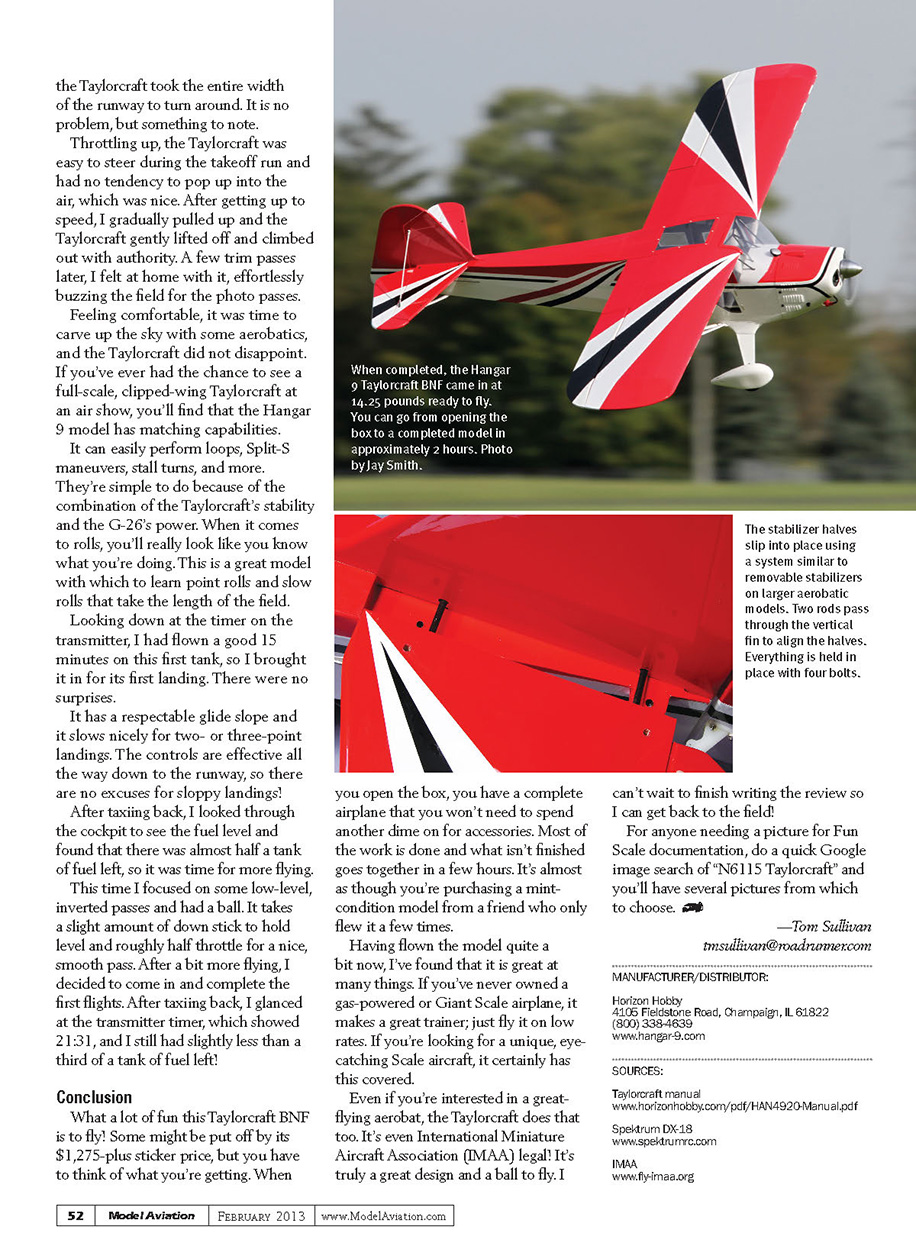
- Tail assembly: four bolts hold both halves of the stabilizer and the vertical fin to the fuselage. After bolting on the tailwheel and struts, the entire tail is assembled in minutes.
- Engine: the G-26 mounts inverted and bolts in quickly. Attach the muffler, preplaced fuel tubing, ignition wires, and throttle pushrods — this took only a few minutes.
- Throttle setup: the carburetor throttle arm moves only about 1/4 inch from open to closed. I used a throttle curve on the DX18 to linearize the throttle response and provide smooth transition throughout stick travel.
- Ignition cutoff switch: the toggle switch is mounted on the port side of the fuselage. Two concerns with this placement:
- Safety — the G-26 uses a capacitive discharge ignition, so if there’s fuel in the cylinder and the switch is on (or accidentally bumped), turning the crankshaft could cause the engine to fire.
- Scale appearance — the switch is easy to access but visually conspicuous; a more concealed mounting would be preferable.
- Threadlocker: use threadlocker on bolts during assembly — gas engines vibrate more and this can prevent later problems.
The cowl fits snugly around the fuselage and engine after some wiggling. All precut holes align for engine and muffler clearance, and there are two holes to adjust the carburetor needles with the cowl installed — a nice touch.
Interior and final touches:
- I added a cockpit floor, installed a seat (held by magnets), and fitted the pilot figure. The pilot is well-made and lightweight but is too large for this model: in position its head pushes the top window and the view is obstructed by the wing tube. Keep the figure for another project.
- The wing struts are airfoil-shaped aluminum tubing, preassembled and adjustable via a threaded attachment with a jam nut.
At this point the Taylorcraft was ready to fly. Weight and CG were on target. Assembly time was approximately two hours; about one hour of that was spent setting up and taking review photos.
Flying
Before the maiden flight I started the engine for an initial run. Being new, the engine took quite a few flips before it fired. After opening the choke it started and I refined the throttle curve for even power distribution.
The Taylorcraft assembles at the field in minutes and requires no tools — the wing bolts can be tightened by hand and struts are secured with small clips. The new engine took a bit of flipping to start; after warming up I taxied. Turning radius is somewhat wide — the Taylorcraft required nearly the full width of the narrow runway at my field to turn around. Not a problem, but worth noting.
During takeoff the model was easy to steer and did not tend to pop up unexpectedly. It lifted off gently and climbed out with authority. After a few trim passes I was comfortable and ran photo passes over the field.
Aerobatics: the Taylorcraft is capable and fun. It performs loops, Split-S, stall turns, and more with a combination of the airframe’s stability and the G-26’s power. Rolls are effective; this is a great model for learning point rolls and slow rolls that take the length of the field.
Flight durations and fuel:
- First tank: about 15 minutes before the first landing; nearly half the tank remained afterward.
- Later flight: inverted low passes required slight down elevator and roughly half throttle. After a flight where I focused on inverted passes, the transmitter timer read 21:31 and there was still slightly less than a third of a tank remaining.
Landing: the Taylorcraft has a respectable glide slope and slows nicely for two- or three-point landings. Controls remain effective down to the runway, so you can land precisely.
Conclusion
This Taylorcraft BNF is a lot of fun to fly. The $1,275-plus price might seem high, but consider what you receive: a complete airplane with almost everything preinstalled and no additional accessories required. It’s nearly like buying a mint-condition model from a friend who barely flew it.
Use cases:
- New to gas power or giant-scale: it makes a great trainer on low rates.
- Scale enthusiast: it’s eye-catching and faithful to the full-scale subject.
- Aerobatics: it handles aerobatic maneuvers well and is IMAA legal.
It's a well-designed, enjoyable airplane. I’m eager to get back to the field with it.
—Tom Sullivan [email protected]
MANUFACTURER/DISTRIBUTOR
Horizon Hobby 4105 Fieldstone Road, Champaign, IL 61822 (800) 338-4639 www.hangar-9.com
SOURCES
- Taylorcraft manual: www.horizonhobby.com/pdf/HAN4920-Manual.pdf
- Spektrum DX-18: www.spektrumrc.com
- IMAA: www.fly-imaa.org
Transcribed from original scans by AI. Minor OCR errors may remain.

