
REVIEW: Maxford USA Globe/Temco Swift — 2012/08
I count myself lucky enough to be in a position as a product reviewer for MA for the past several years. I've covered several sport models, but the main focus of my reviews seems to be scale models. Most have been Mustangs, Extras, Wacos, Cubs, Stearmans, and many other mainstream designs.
However, occasionally I'm offered something that makes me take notice and I can hear myself quoting that famous line from Monty Python, "Now for something completely different."
Such is the case with this Globe/Temco Swift ARF from Maxford. I'm sure someone has penned plans for it at some point, but I'm hard-pressed to think of any manufacturer that has ever kitted one. Because of that, there's not much danger of running into a swarm of similar versions at the field!
The full-scale Swift was designed in 1940 and was the first low-wing, two-place aircraft with retractable landing gear. It was also one of the first all-metal aircraft available for civilian pilots.
If you'd like to learn more about the full-scale Swift, I'd suggest visiting the Globe Swift/Temco Swift website listed in "Sources."
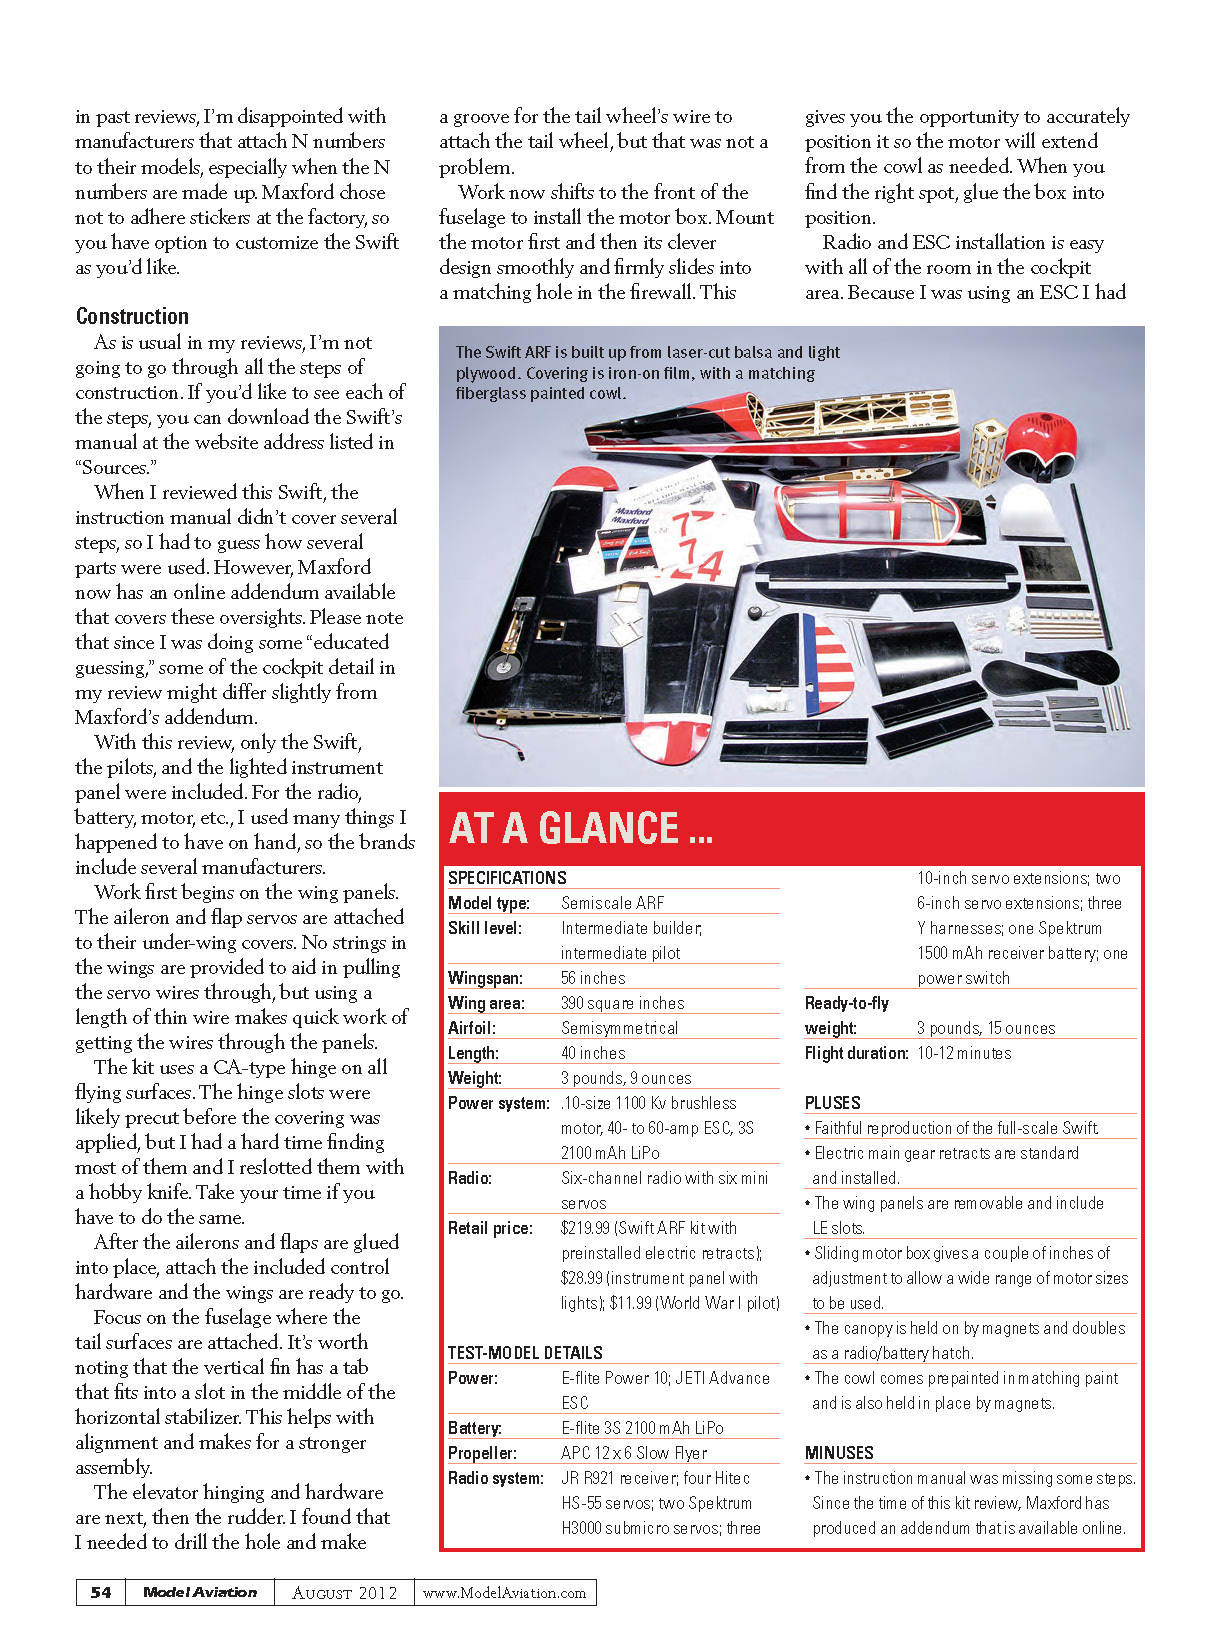
Enough about history—let's get to work. Opening the kit for inspection and the initial parts layout photos, I was pleasantly surprised to see that the Swift is completely built-up from balsa and light plywood.
Everything appears to be laser cut, and popping the canopy off of the fuselage gives you a good idea of just how much thought went into this Swift's design.
In the fuselage alone, there are nearly 100 separate openings cut into the various formers and trays. This kind of work is normally seen only in 3-D aerobatic designs.
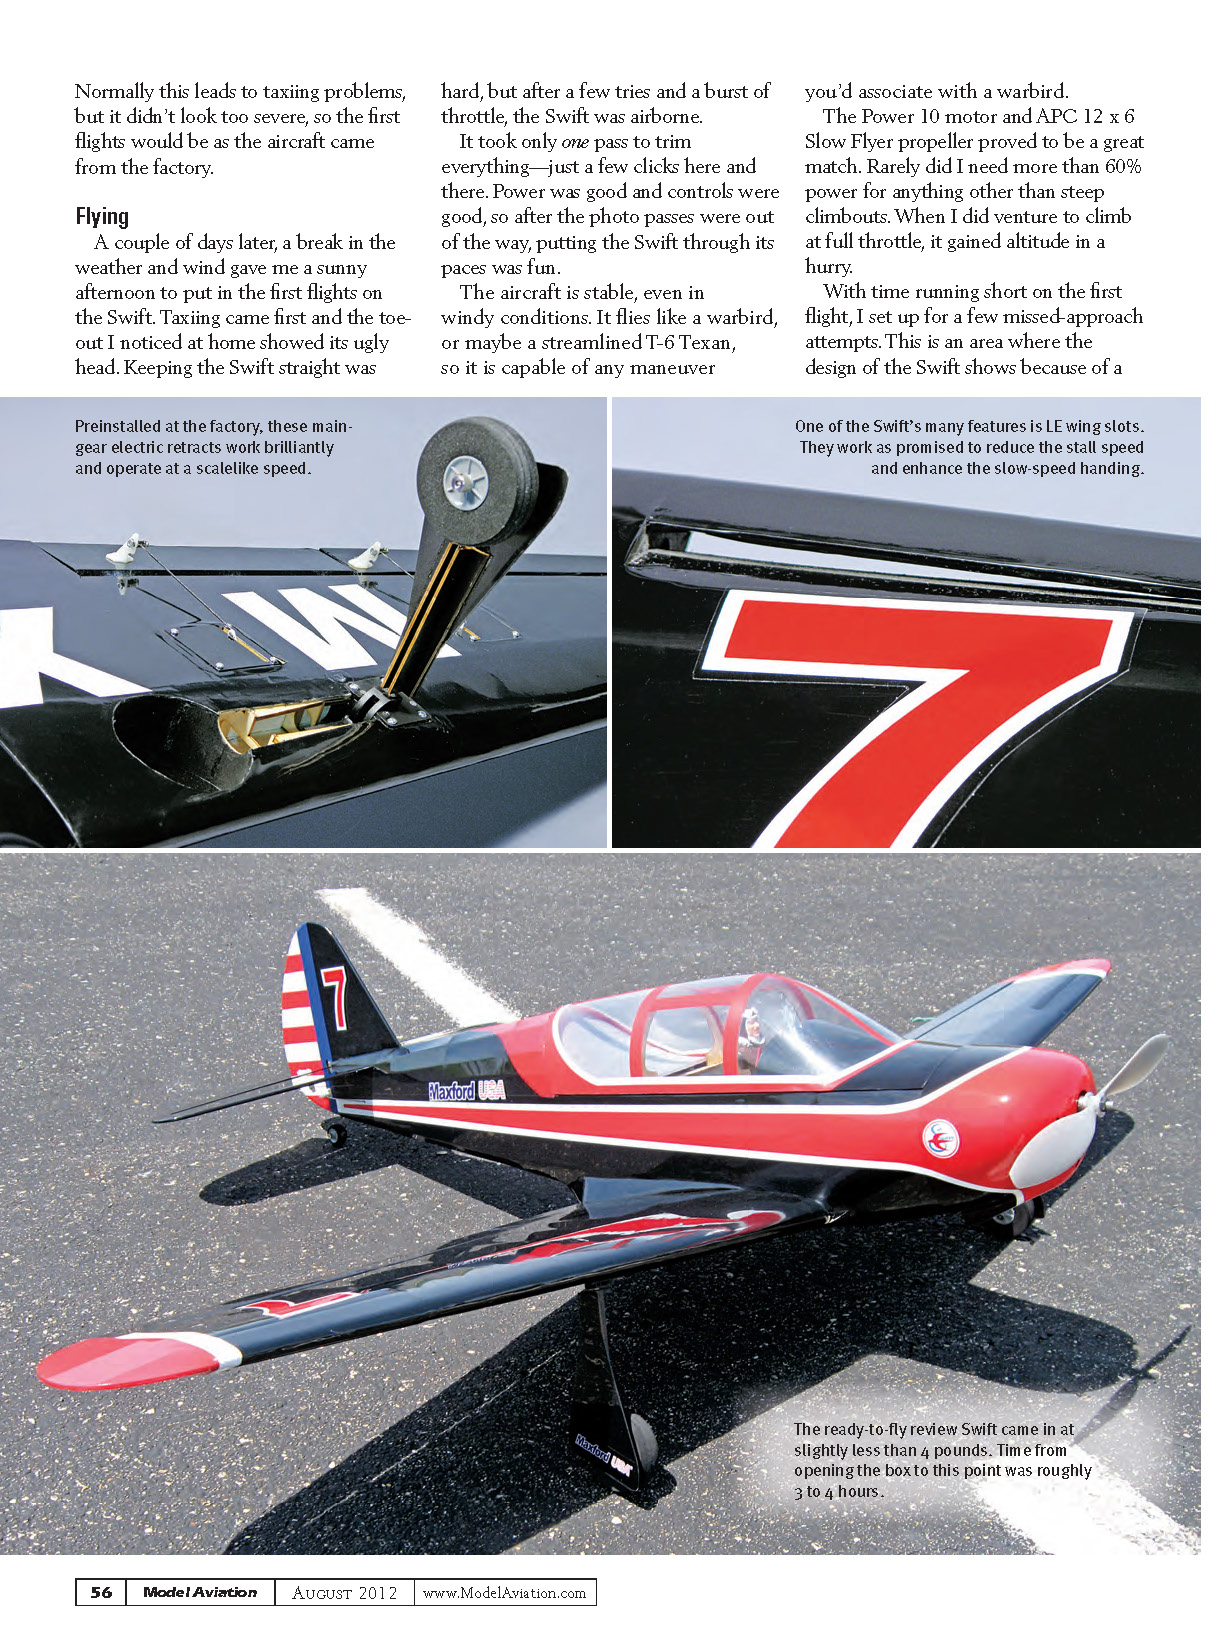
The wing comes in two panels and is a plug-in design with a carbon-fiber tube to align everything. Built-in LE slots mimic the full-scale Swift. Also, each wing panel has an electric main-gear retract installed. I took a few minutes to check out the operation of each of them and they work quite well. With scalelike speed, they have a securely locked feel when extended.
Rounding out the kit are various other pieces, hardware, stickers, and the instruction manual. As mentioned in past reviews, I'm disappointed with manufacturers that attach N numbers to their models, especially when the N numbers are made up. Maxford chose not to adhere stickers at the factory, so you have the option to customize the Swift as you'd like.
Construction
As is usual in my reviews, I'm not going to go through all the steps of construction. If you'd like to see each of the steps, you can download the Swift's manual at the website address listed in "Sources." When I reviewed this Swift, the instruction manual didn't cover several steps, so I had to guess how several parts were used. However, Maxford now has an online addendum available that covers these oversights. Please note that since I was doing some "educated guessing," some of the cockpit detail in my review might differ slightly from Maxford's addendum.
With this review, only the Swift, the pilots, and the lighted instrument panel were included. For the radio, battery, motor, etc., I used many things I happened to have on hand, so the brands include several manufacturers.
Work first begins on the wing panels. The aileron and flap servos are attached to their under-wing covers. No strings in the wings are provided to aid in pulling the servo wires through, but using a length of thin wire makes quick work of getting the wires through the panels. The kit uses a CA-type hinge on all flying surfaces. The hinge slots were likely precut before the covering was applied, but I had a hard time finding most of them and I reslotted them with a hobby knife. Take your time if you have to do the same. After the ailerons and flaps are glued into place, attach the included control hardware and the wings are ready to go.
Focus on the fuselage where the tail surfaces are attached. It's worth noting that the vertical fin has a tab that fits into a slot in the middle of the horizontal stabilizer. This helps with alignment and makes for a stronger assembly.
The elevator hinging and hardware are next, then the rudder. I found that I needed to drill the hole and make a groove for the tail-wheel wire to attach the tail wheel, but that was not a problem.
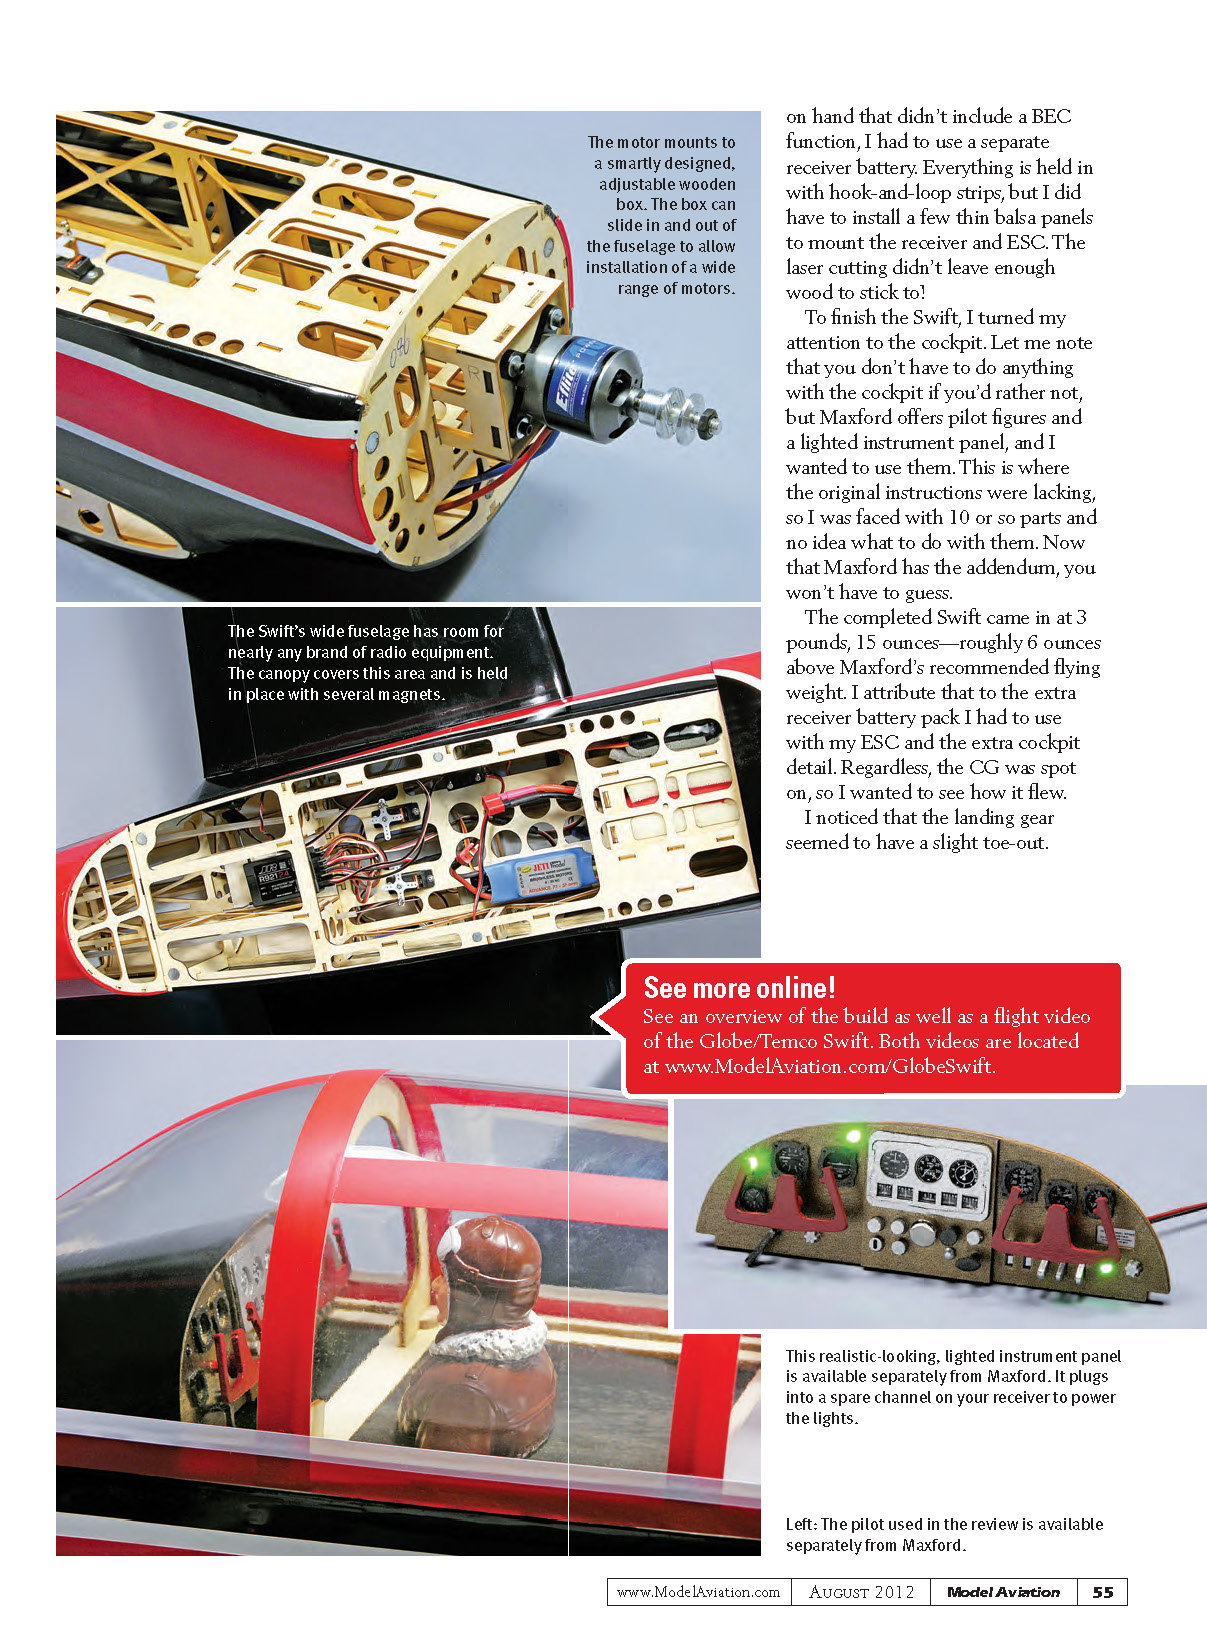
Work now shifts to the front of the fuselage to install the motor box. Mount the motor first and then its clever design smoothly and firmly slides into a matching hole in the firewall. This gives you the opportunity to accurately position it so the motor will extend from the cowl as needed. When you find the right spot, glue the box into position.
Radio and ESC installation is easy with all of the room in the cockpit area. Because I was using an ESC I had on hand that didn't include a BEC function, I had to use a separate receiver battery. Everything is held in with hook-and-loop strips, but I did have to install a few thin balsa panels to mount the receiver and ESC. The laser cutting didn't leave enough wood to stick to!
To finish the Swift, I turned my attention to the cockpit. Let me note that you don't have to do anything with the cockpit if you'd rather not, but Maxford offers pilot figures and a lighted instrument panel, and I wanted to use them. This is where the original instructions were lacking, so I was faced with 10 or so parts and no idea what to do with them. Now that Maxford has the addendum, you won't have to guess.
The completed Swift came in at 3 pounds, 15 ounces—roughly 6 ounces above Maxford's recommended flying weight. I attribute that to the extra receiver battery pack I had to use with my ESC and the extra cockpit detail. Regardless, the CG was spot on, so I wanted to see how it flew. I noticed that the landing gear seemed to have a slight toe-out. Normally this leads to taxiing problems, but it didn't look too severe, so the first flights would be as the aircraft came from the factory.
Flying
A couple of days later, a break in the weather and wind gave me a sunny afternoon to put in the first flights on the Swift. Taxiing came first and the toe-out I noticed at home showed its ugly head. Keeping the Swift straight was hard, but after a few tries and a burst of throttle, the Swift was airborne.
It took only one pass to trim everything—just a few clicks here and there. Power was good and controls were good, so after the photo passes were out of the way, putting the Swift through its paces was fun.
The aircraft is stable, even in windy conditions. It flies like a warbird, or maybe a streamlined T-6 Texan, so it is capable of any maneuver you'd associate with a warbird.
The Power 10 motor and APC 12 x 6 Slow Flyer propeller proved to be a great match. Rarely did I need more than 60% power for anything other than steep climbouts. When I did venture to climb at full throttle, it gained altitude in a hurry.
With time running short on the first flight, I set up for a few missed-approach attempts. This is an area where the design of the Swift shows because of a combination of things. First are the flaps. I used half flaps for each of the attempts, and because I had programmed in a scalelike (slow) servo speed, it kept the Swift level when deploying them.
Next was the propeller. The Slow Flyer's wide-blade propeller design acts like an airbrake when turning slowly. Because of the LE's wing slots, I found that once I turned on final, the Swift "locked" into a gentle glide slope. If you're slightly short, just throttle up a little. If you're somewhat off-center, the flying surfaces will still be effective; the model showed no tendency to tip stall.
After touching down, the rollout was short because of the toe-out problem, so I went home to correct this. Removing the gear from the fuselage, I found that a single screw holds the gear struts in. I removed the struts, recut the flats for a better angle, then reinstalled the struts, but this created another problem.
Although I filed off only enough metal to alter the angle of the flat, it was enough that the factory screw was too short to hold the strut in place. I dug through my collection of odd screws and found a couple of matching metric screws that were approximately 1/8 inch longer, and they did the trick. I reassembled everything and now taxiing, takeoffs, and landings are much better.
I've made quite a few flights with the Swift and have become comfortable with it. It handles 10 to 15 mph winds well, although it can bounce slightly. It's not what I'd call a speedster, but it sure looks good buzzing the field on a high-speed low pass.
The electric retracts work flawlessly and it's nice not having to worry about them. The gear's wide stance helps in crosswind landings.
In Conclusion
Maxford has done a great job with this Globe/Temco Swift ARF. Its scalelike appearance and lightweight construction are top notch. It can accept a wide range of radio and power equipment.
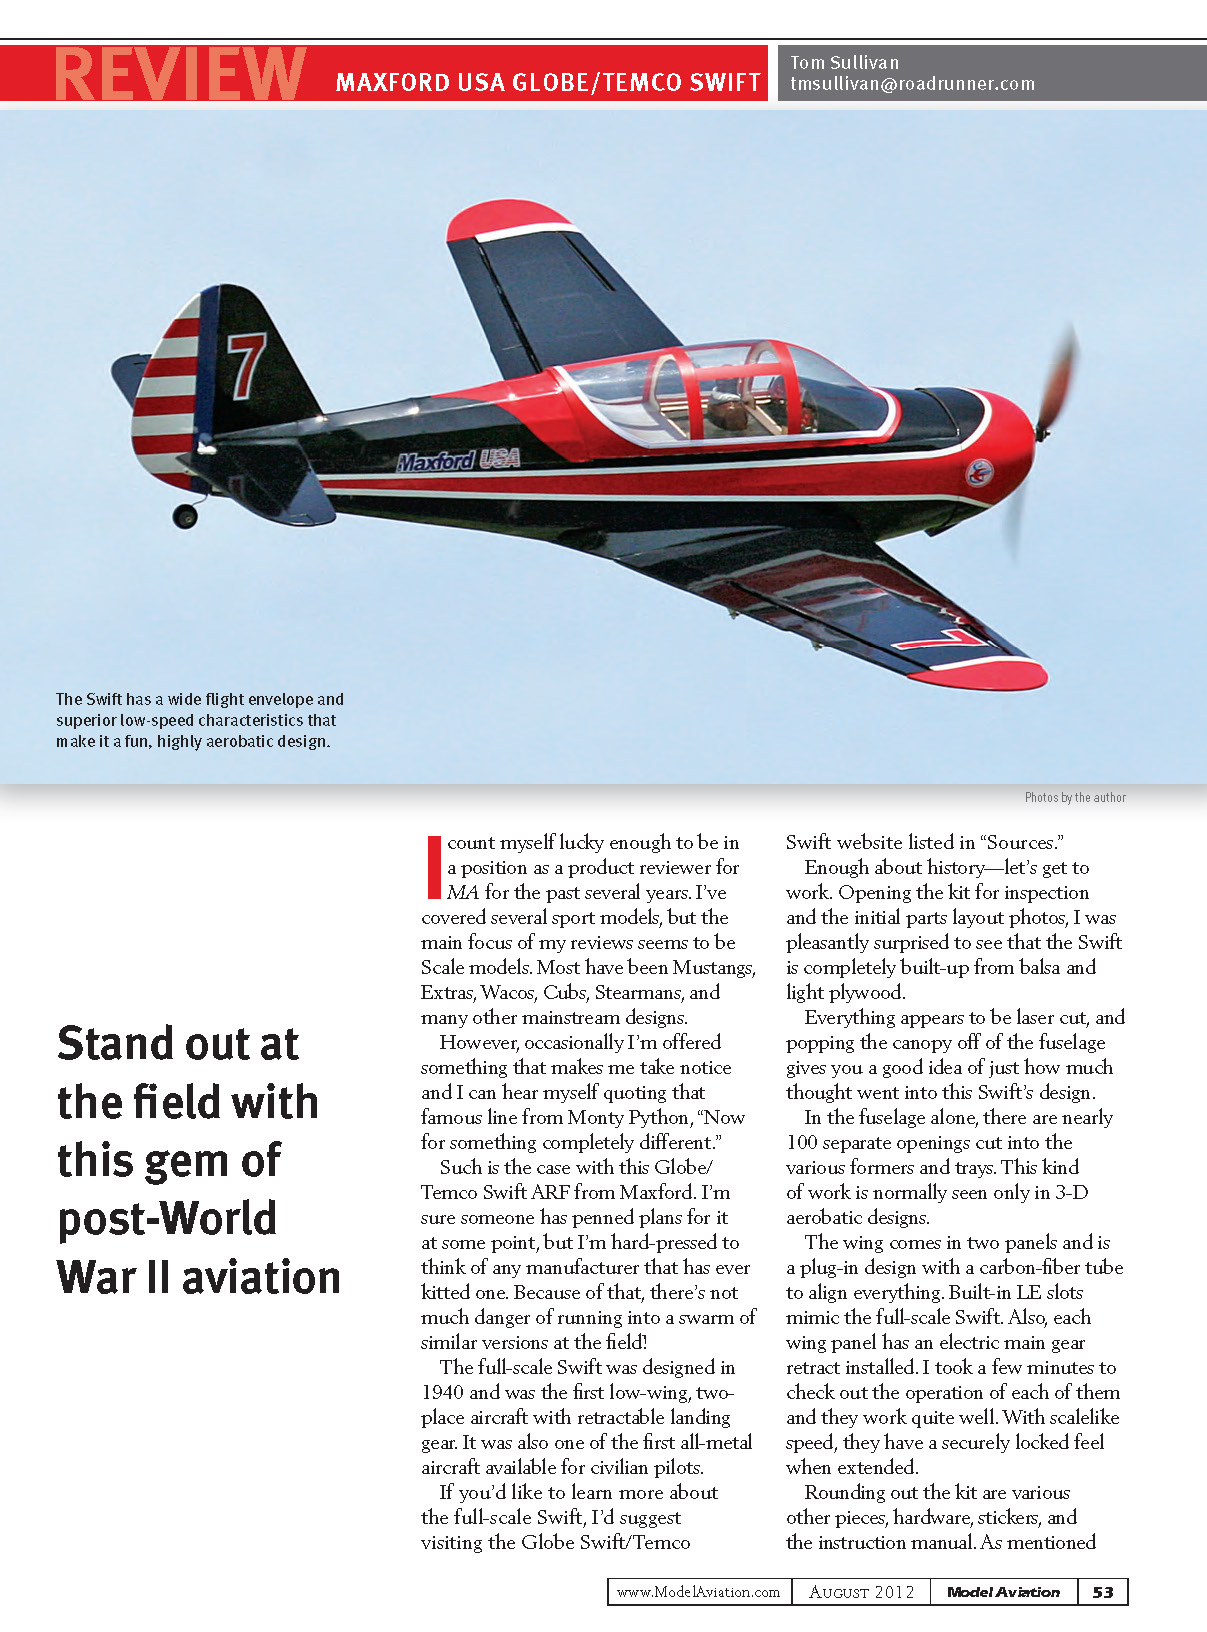
The Swift has a wide flight envelope and superior low-speed characteristics that make it a fun, highly aerobatic design. Throw in the facts that it will stand out at the field and you can get close to 12 minutes of aerobatic flight time, and I feel that Maxford's Swift is something to think about if you are looking to add a new model to your hangar.
—Tom Sullivan [email protected]
Manufacturer / Distributor
- Maxford USA
15939 Illinois Ave #C Paramount, CA 90723 (562) 529-3988 www.maxfordusa.com/globetemcoswift.aspx
Sources
- Globe Swift/Temco Swift: www.saginawwings.com
- Maxford USA Globe Swift instruction manual: www.maxfordusa.com/manual/GlobeSwiftInstructionManual.pdf
- Hitec RCD: (858) 748-6948 — www.hitecrcd.com
- Horizon Hobby: (800) 338-4639 — www.horizonhobby.com
- E-flite: (800) 338-4639 — www.e-fliterc.com
- Hobby Lobby International: (866) 512-1444 — www.hobby-lobby.com
- Landing Products: (530) 661-0399 — www.apcprop.com
Transcribed from original scans by AI. Minor OCR errors may remain.

