
PARKZONE ICON A5 BNF
Jay Smith [email protected]
Overview
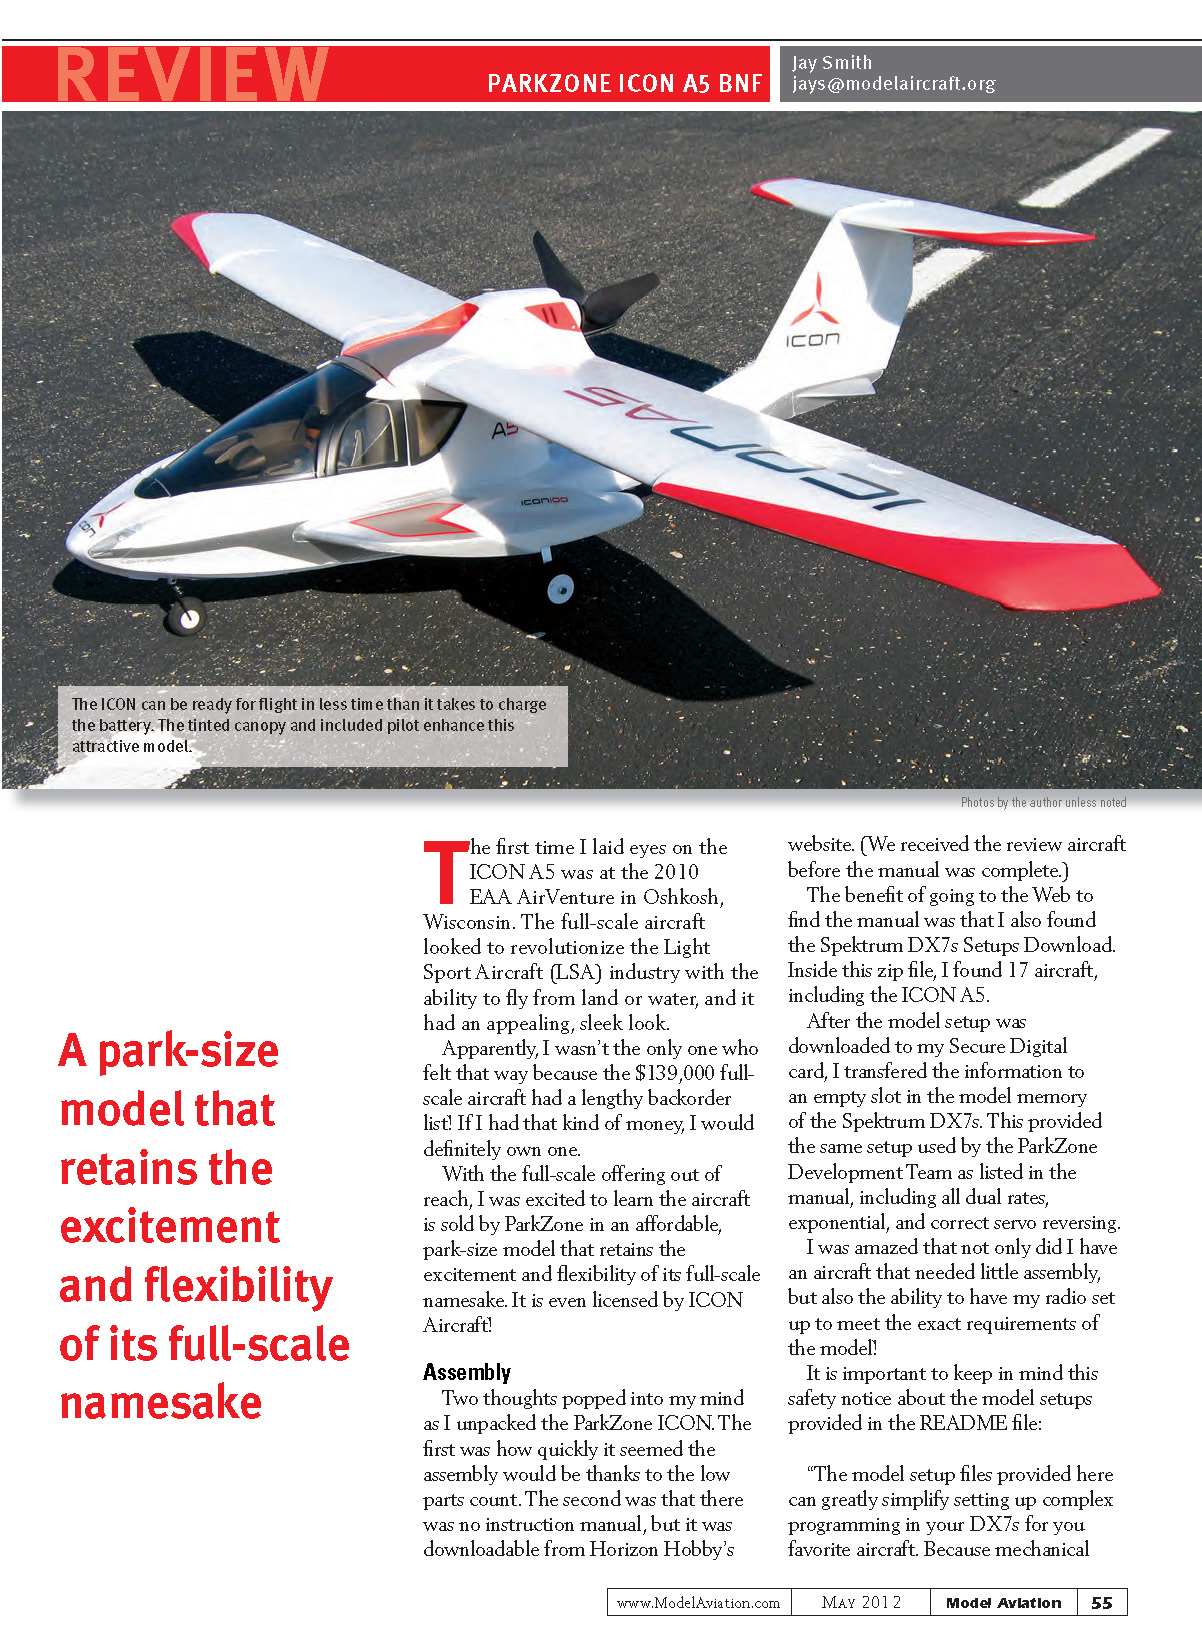
The first time I laid eyes on the ICON A5 was at the 2010 EAA AirVenture in Oshkosh, Wisconsin. The full-scale aircraft looked to revolutionize the Light Sport Aircraft (LSA) industry with the ability to fly from land or water, and it had an appealing, sleek look.
Apparently I wasn't the only one who felt that way — the $139,000 full-scale aircraft had a lengthy backorder list. With the full-scale offering out of reach, I was excited to learn the aircraft is sold by ParkZone in an affordable, park-size model that retains the excitement and flexibility of its full-scale namesake. It is even licensed by ICON Aircraft.
Assembly
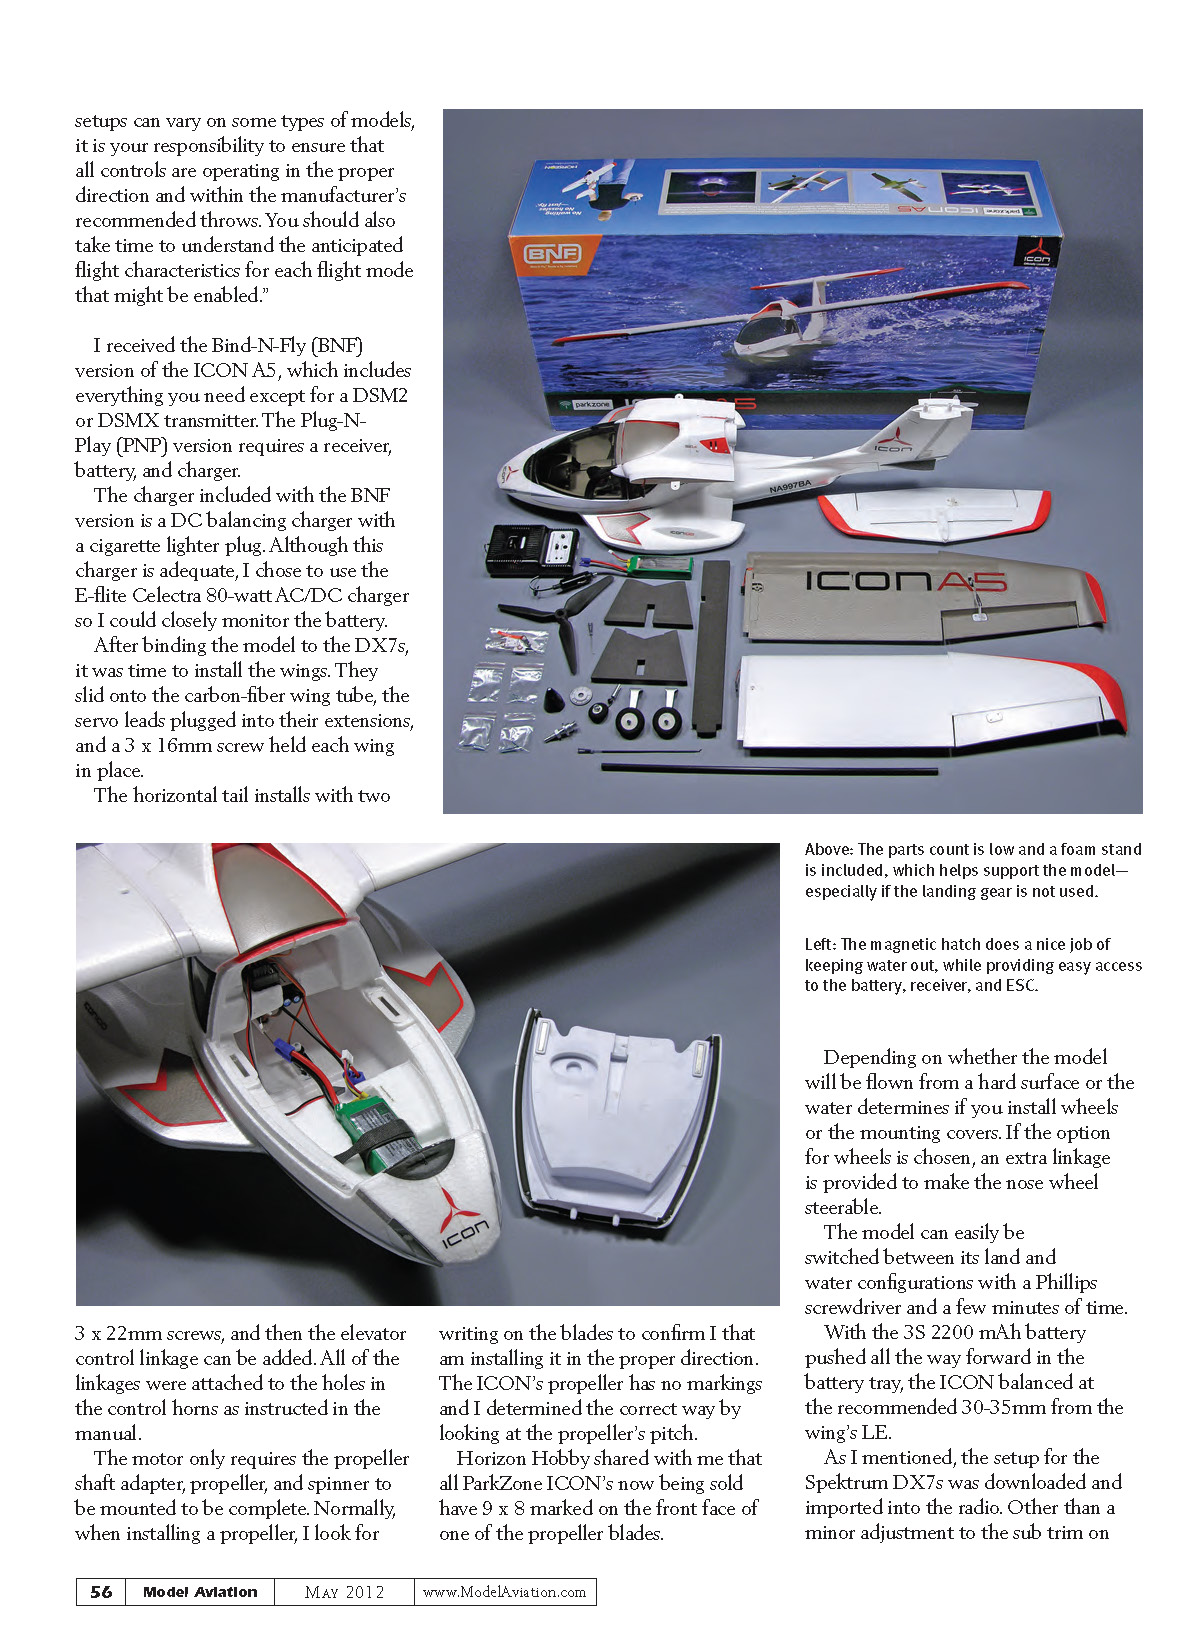
Two thoughts popped into my mind as I unpacked the ParkZone ICON. The first was how quickly assembly would proceed thanks to the low parts count. The second was that there was no printed instruction manual in the box — the manual was downloadable from Horizon Hobby's website. (We received the review aircraft before the manual was complete.)
Going to the web also turned up the Spektrum DX7s setups download. Inside the zip file I found 17 aircraft setups, including the ICON A5. After copying the model setup to a Secure Digital card, I transferred the information to an empty slot in the Spektrum DX7s model memory. This provided the same setup used by the ParkZone development team as listed in the manual, including dual rates, exponential, and correct servo reversing.
A safety notice in the README file is worth repeating: the model setup files can greatly simplify programming your DX7s, but mechanical setups can vary. It is your responsibility to ensure all controls operate in the proper direction and within the manufacturer's recommended throws. Take time to understand the anticipated flight characteristics for each flight mode that might be enabled.
I received the Bind-N-Fly (BNF) version of the ICON A5, which includes everything you need except a DSM2 or DSMX transmitter. The Plug-N-Play (PNP) version requires a receiver, battery, and charger. The charger included with the BNF version is a DC balancing charger with a cigarette-lighter plug. Although this charger is adequate, I chose to use the E-flite Celectra 80-watt AC/DC charger so I could closely monitor the battery.
After binding the model to the DX7s, I installed the wings. They slide onto a carbon-fiber wing tube, the servo leads plug into their extensions, and a 3 x 16 mm screw holds each wing in place. The horizontal tail installs with two screws and has writing on the blades to confirm correct orientation.
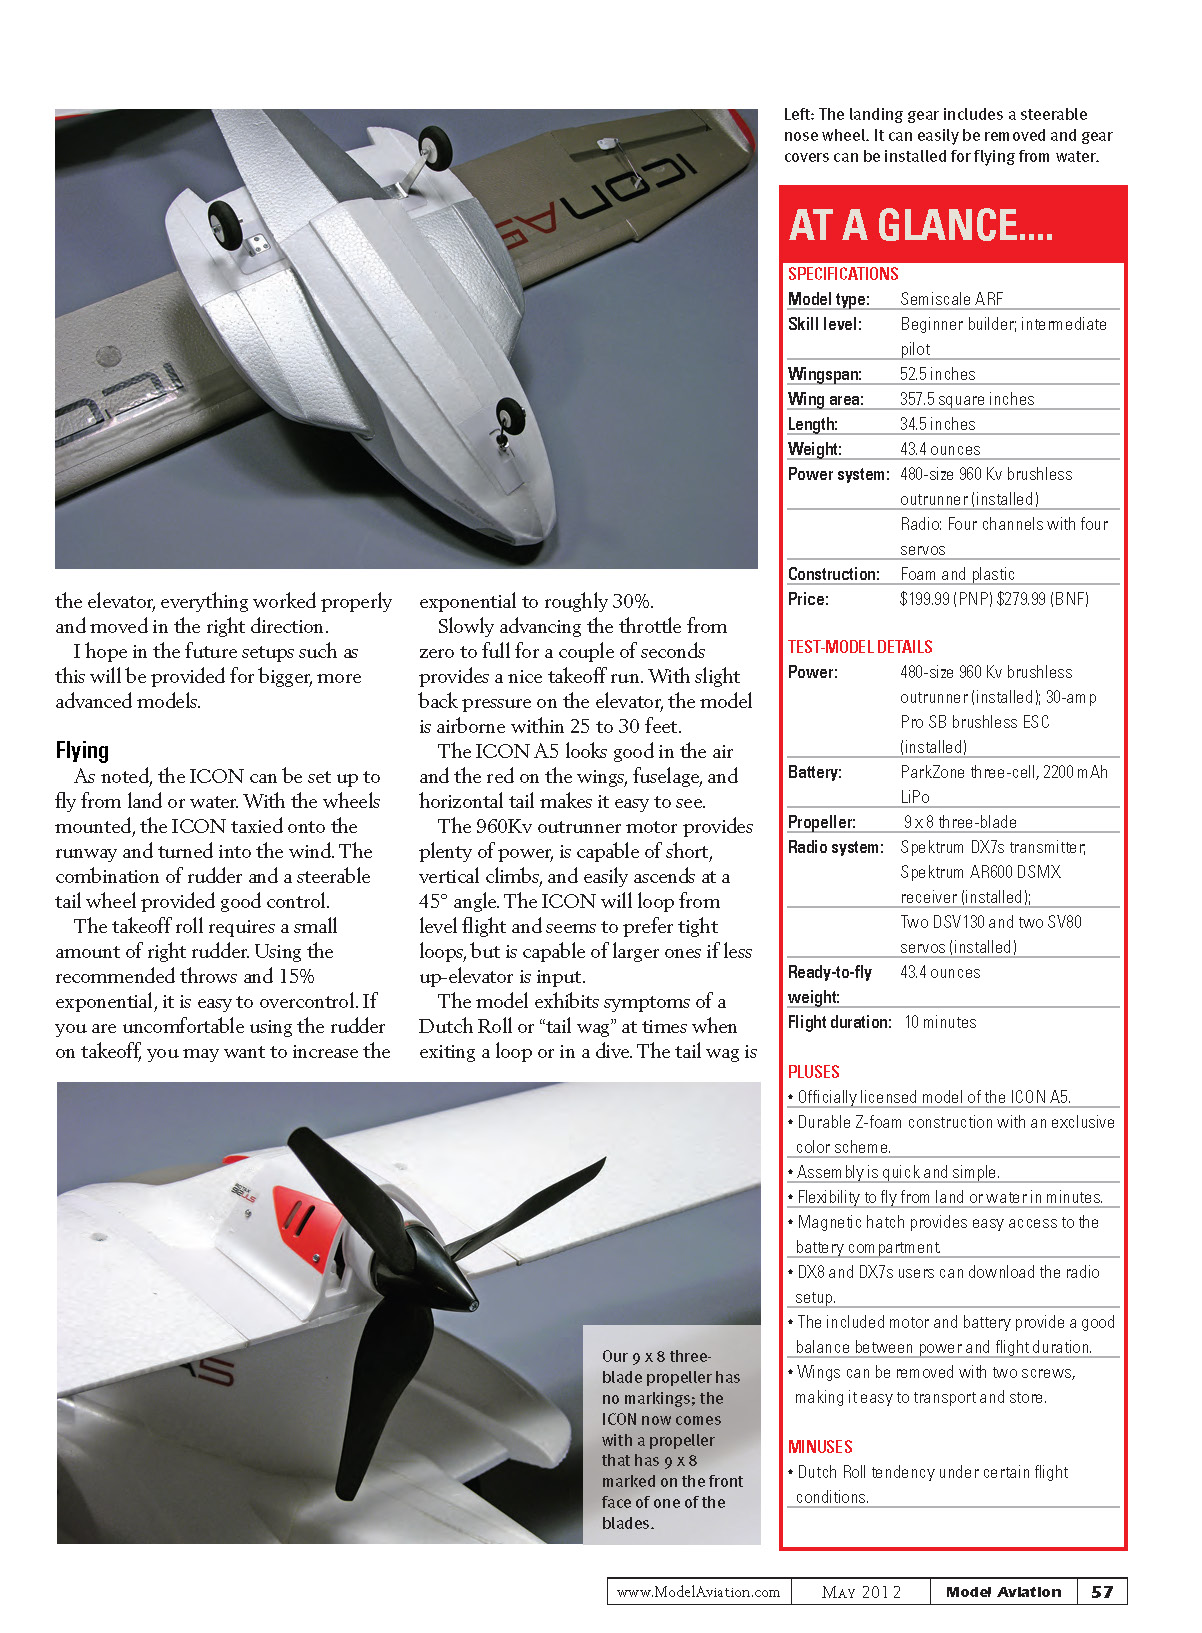
The ICON's propeller originally had no markings, so I determined the correct orientation by the blade pitch. Horizon Hobby shared that all ParkZone ICONs now being sold have "9 x 8" marked on the front face of one propeller blade.
Depending on whether the model will be flown from a hard surface or from water determines whether you install the wheels or the mounting covers. If you choose wheels, an extra linkage is provided to make the nose wheel steerable. The model can be switched between land and water configurations in a few minutes with a Phillips screwdriver.
With the 3S 2200 mAh battery pushed all the way forward in the battery tray, the ICON balanced at the recommended 30–35 mm from the wing’s leading edge. After importing the DX7s setup, other than a minor sub-trim adjustment on the elevator, everything worked properly and moved in the right direction.
I was impressed that the model required little assembly and that my transmitter could be set up to the exact requirements of the model. I hope in the future setups such as this will be provided for bigger, more advanced models.
Flying
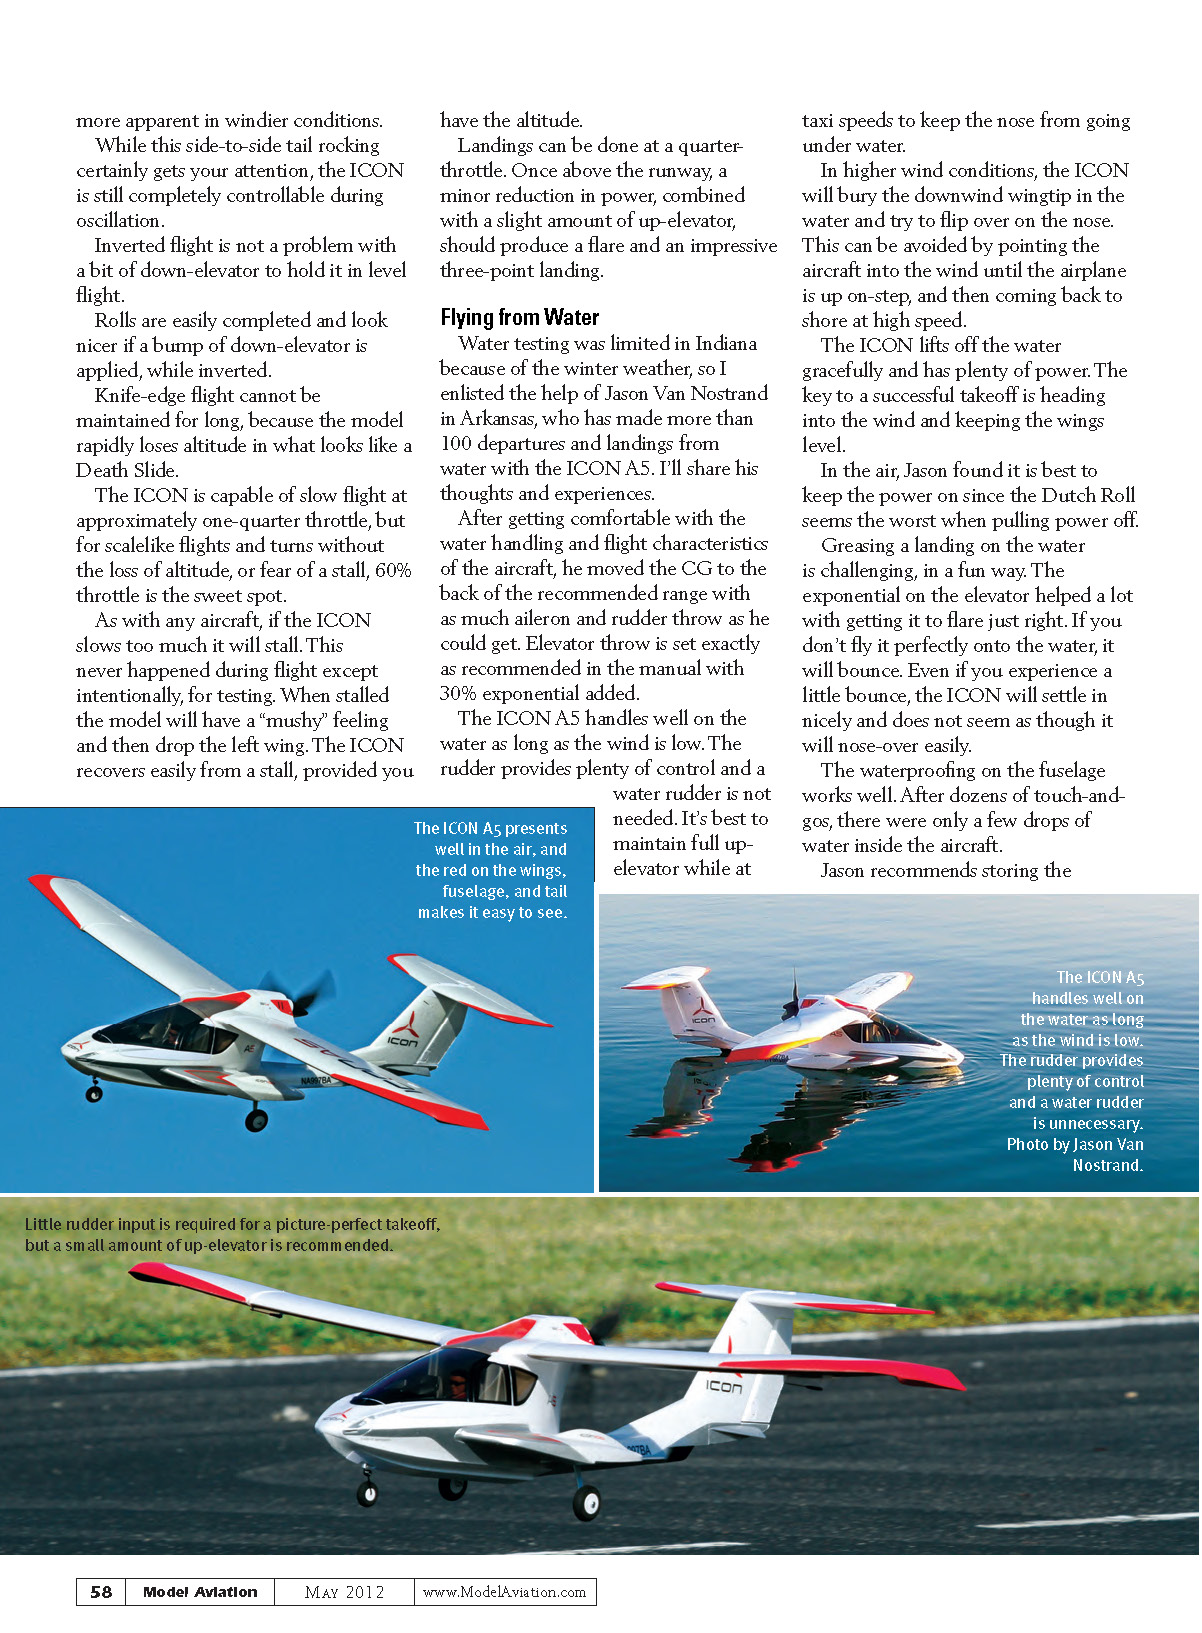
The ICON can be set up to fly from land or water. With the wheels mounted, the ICON taxied onto the runway and turned into the wind. The combination of rudder and a steerable tail wheel provided good ground control.
The takeoff roll requires a small amount of right rudder. Using the recommended throws and 15% exponential, it is easy to overcontrol; if you are uncomfortable using the rudder on takeoff, consider increasing the exponential to roughly 30%. Slowly advancing the throttle from zero to full over a couple of seconds provides a nice takeoff run. With slight back pressure on the elevator, the model is airborne within 25 to 30 feet.
The ICON A5 looks good in the air and the red on the wings, fuselage, and horizontal tail makes it easy to see. The 960Kv outrunner motor provides plenty of power — it is capable of short vertical climbs and easily ascends at a 45° angle. The ICON will loop from level flight and seems to prefer tight loops, but is capable of larger ones with less up-elevator input.
The model exhibits symptoms of a Dutch roll or "tail wag" at times when exiting a loop or in a dive. The tail wag is more pronounced with high rates and aggressive mixing and is more apparent in windier conditions; reducing rates and the amount of coupling in the mixing helps. While the side-to-side tail rocking certainly gets your attention, the ICON remains completely controllable during oscillation.
Inverted flight is not a problem with a bit of down-elevator to hold level. Rolls are easily completed and look nicer if a bump of down-elevator is applied while inverted. Knife-edge flight cannot be maintained for long because the model rapidly loses altitude in what looks like a "death slide."
The ICON is capable of slow flight at approximately one-quarter throttle, but for scale-like flights and turns without loss of altitude (or fear of a stall), 60% throttle is the sweet spot. As with any aircraft, if it slows too much it will stall. This never happened during normal flight except intentionally for testing. When stalled the model has a “mushy” feel and then drops the left wing; it recovers easily if you have altitude.
Landings can be done at about quarter throttle. Once above the runway, a minor reduction in power combined with a slight amount of up-elevator should produce a flare and an impressive three-point landing.
Flying from Water
Water testing was limited in Indiana because of the winter weather, so I enlisted the help of Jason Van Nostrand in Arkansas, who has made more than 100 departures and landings from water with the ICON A5. Here are his experiences.
After getting comfortable with the water handling and flight characteristics, Jason moved the CG to the back of the recommended range and set as much aileron and rudder throw as he could. Elevator throw was set exactly as recommended in the manual with 30% exponential added.
The ICON A5 handles well on the water as long as the wind is low. The rudder provides plenty of control, and a water rudder is not needed. It’s best to maintain full up-elevator while at taxi speeds to keep the nose from going under.
In higher wind conditions the ICON can bury the downwind wingtip and try to flip over on the nose. This can be avoided by pointing the aircraft into the wind until the airplane is up on step, then coming back to shore at high speed.
The ICON lifts off the water gracefully and has plenty of power. The key to a successful takeoff is heading into the wind and keeping the wings level. In the air, Jason found it is best to keep the power on, since the Dutch roll seems worst when power is reduced.
Greasing a landing on the water is challenging in a fun way. The exponential on the elevator helps a lot with getting the flare just right. If you don’t land perfectly, it will bounce, but the ICON will settle in nicely and does not seem likely to nose over. The waterproofing on the fuselage works well — after dozens of touch-and-goes there were only a few drops of water inside the aircraft. Jason recommends storing the airplane with the canopy off because the waterproofing can seal water in while parked as well as seal it out when on the lake.
This is an excellent intermediate airplane that also happens to fly off water. The stock configuration and electronics don't need any modification.
Conclusion
The ICON A5 combines the sleek look and flexibility of its full-scale namesake with the simplicity and support for which ParkZone is known. Add to that the ability to download proper transmitter settings for the Spektrum DX8 or DX7s, and much of the guesswork is removed.
If you are looking for a semi-scale model that has the flight qualities of a trainer, the flexibility of an amphibian, and can be ready to fly faster than you can charge the battery, the ParkZone ICON A5 awaits you.
—Jay Smith [email protected]
Manufacturer / Distributor
- ParkZone / Horizon Hobby
(800) 338-4639 www.parkzone.com
Sources
- Spektrum RC
(800) 338-4639 www.spektrumrc.com
Transcribed from original scans by AI. Minor OCR errors may remain.

