
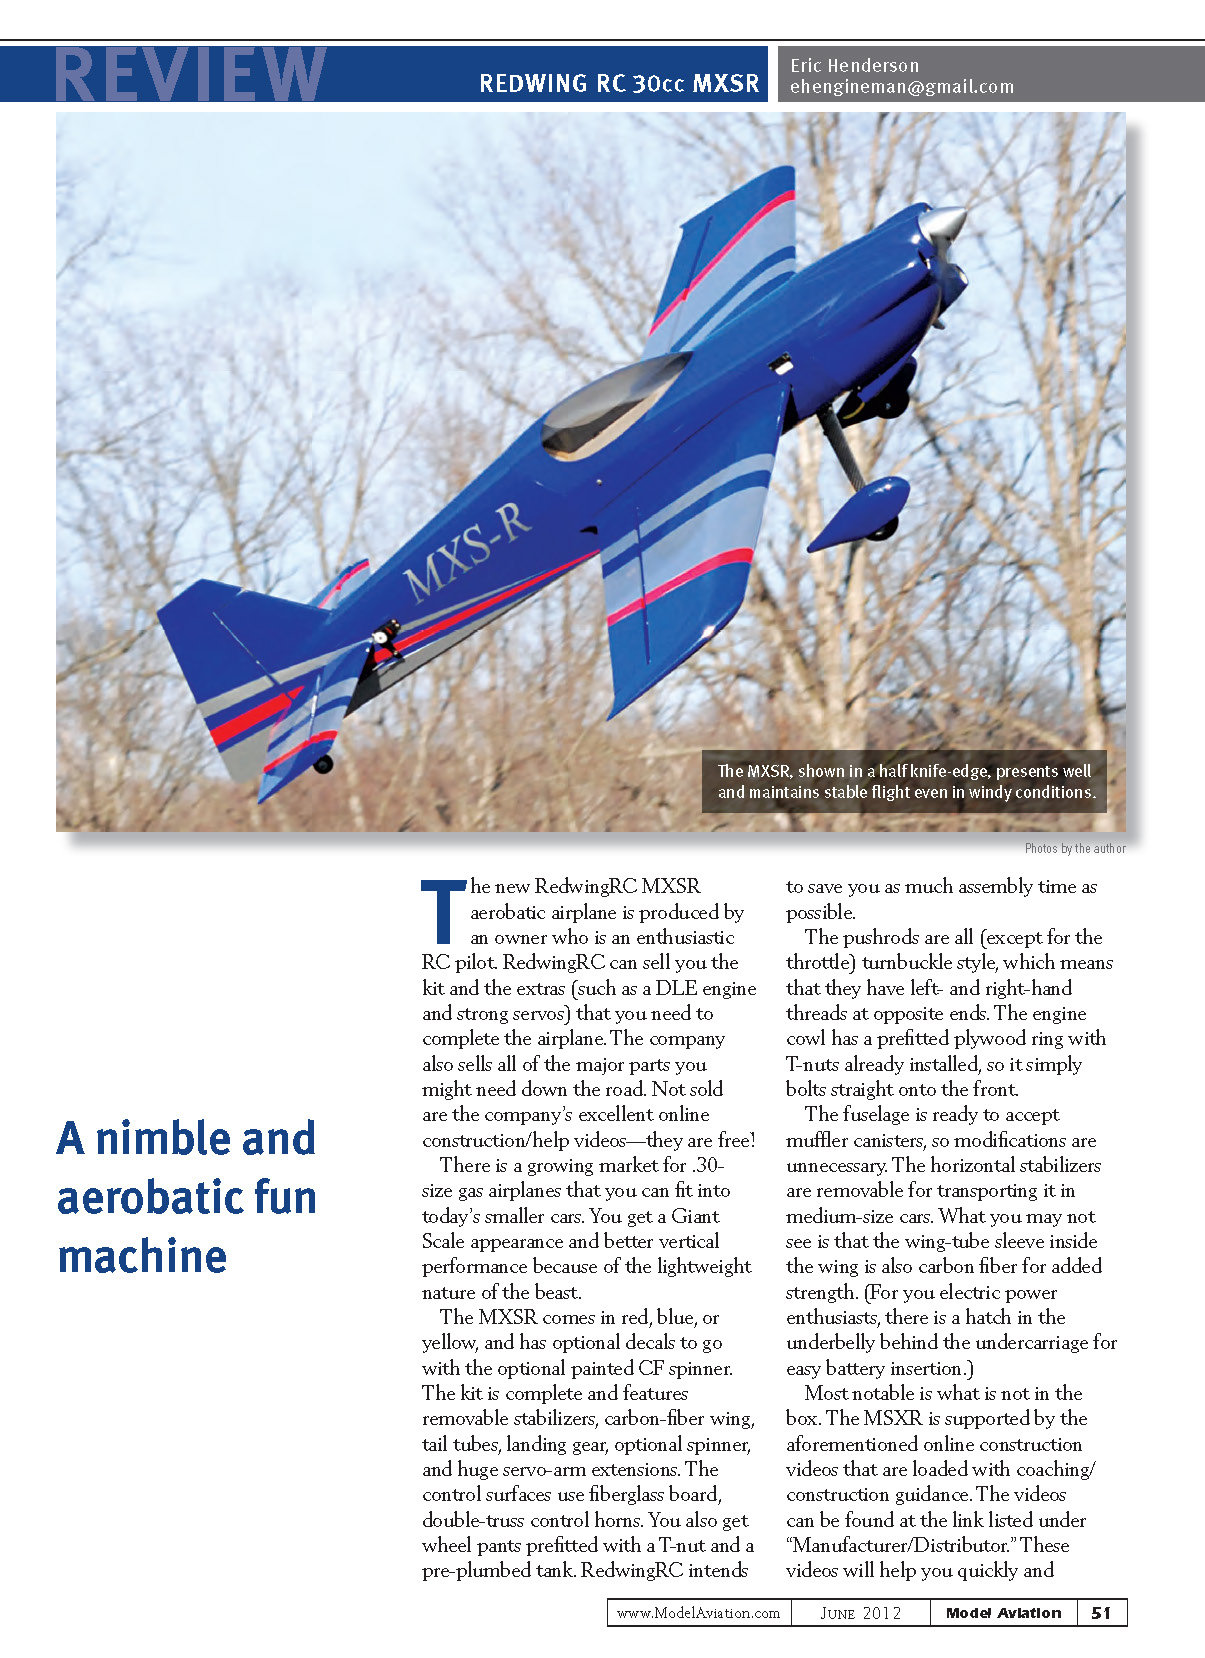
A nimble and aerobatic fun machine
The new RedwingRC MXSR aerobatic airplane is produced by an owner who is an enthusiastic RC pilot. RedwingRC can sell you the kit and the extras (such as a DLE engine and strong servos) that you need to complete the airplane. The company also sells all of the major parts you might need down the road. Not sold are the company's excellent online construction/help videos—they are free!
There is a growing market for .30-size gas airplanes that you can fit into today's smaller cars. You get a Giant Scale appearance and better vertical performance because of the lightweight nature of the beast.
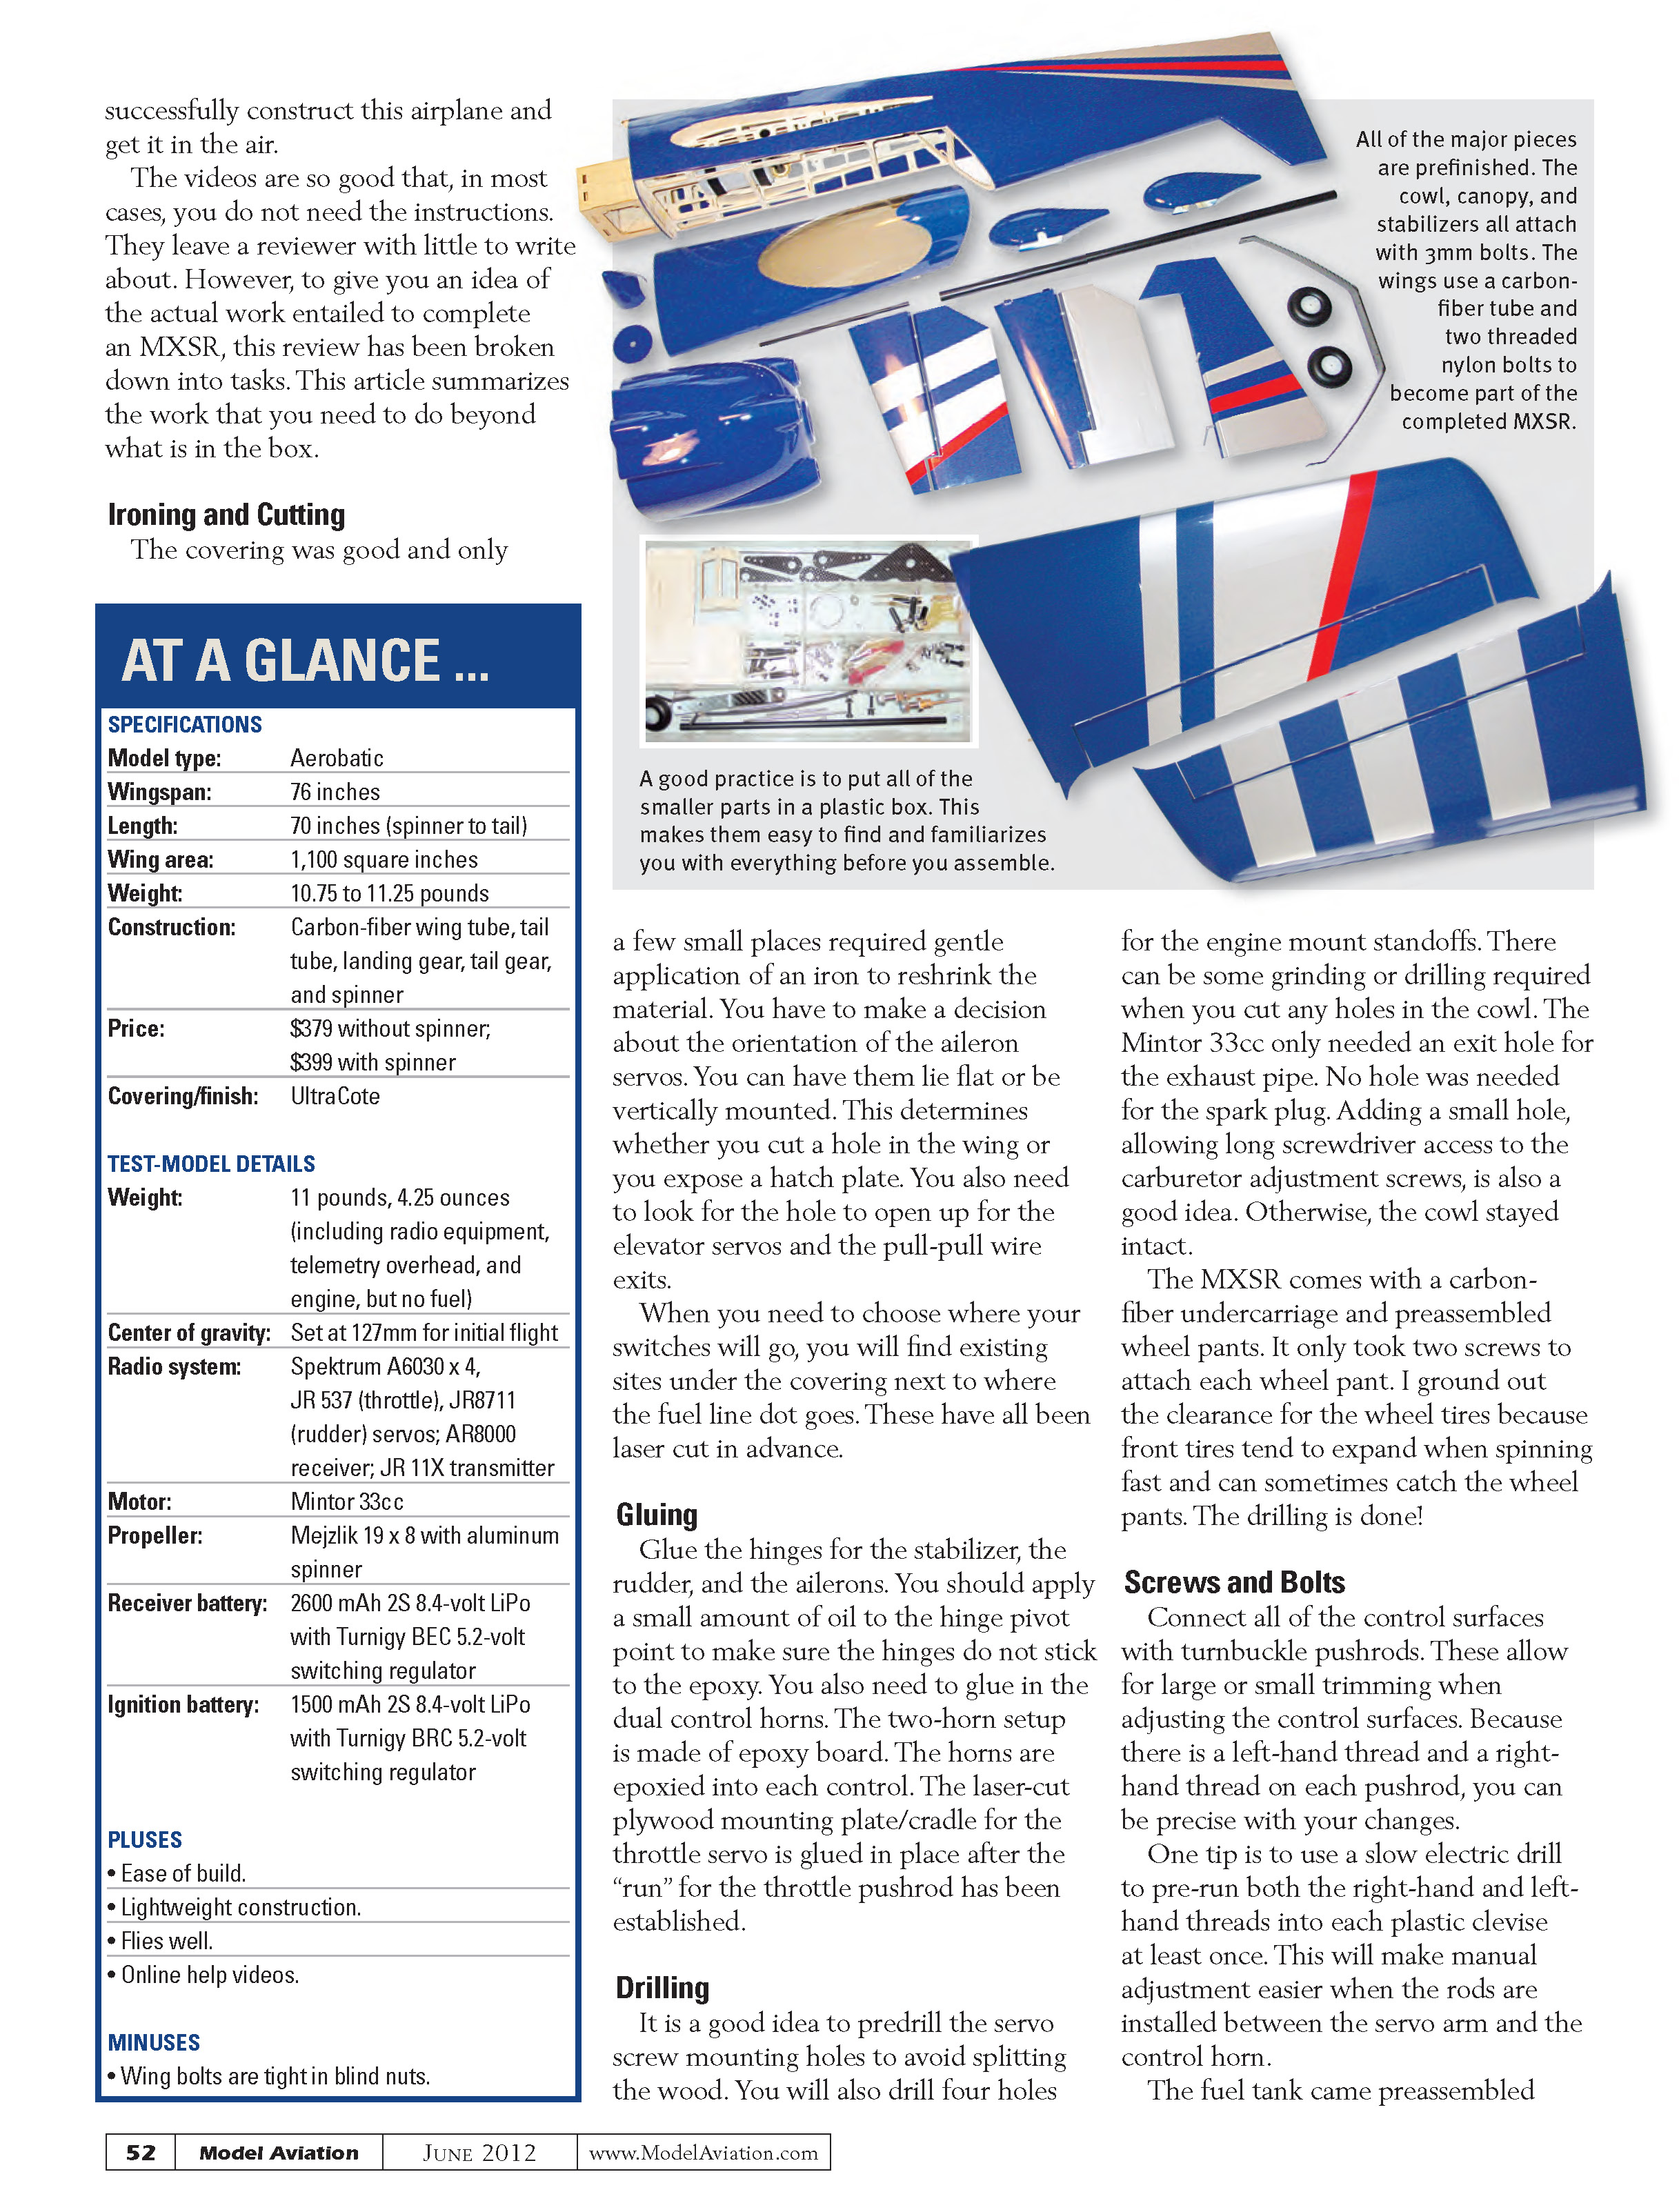
The MXSR comes in red, blue, or yellow, and has optional decals to go with the optional painted carbon-fiber spinner. The kit is complete and features removable stabilizers, carbon-fiber wing and tail tubes, carbon-fiber landing gear, an optional spinner, and huge servo-arm extensions. The control surfaces use fiberglass board and double-truss control horns. You also get wheel pants prefitted with a T-nut and a pre-plumbed tank. RedwingRC intends to save you as much assembly time as possible.
The pushrods are all (except for the throttle) turnbuckle style, which means they have left- and right-hand threads at opposite ends. The engine cowl has a prefitted plywood ring with T-nuts already installed, so it bolts straight onto the front.
The fuselage is ready to accept muffler canisters, so modifications are unnecessary. The horizontal stabilizers are removable for transporting the airplane in medium-size cars. The wing-tube sleeve inside the wing is also carbon fiber for added strength. (For electric-power enthusiasts, there is a hatch in the underbelly behind the undercarriage for easy battery insertion.)
Most notable is what is not in the box. The MXSR is supported by the aforementioned online construction videos that are loaded with coaching and construction guidance. The videos (linked under "Manufacturer/Distributor") will help you quickly and successfully construct this airplane and get it in the air. The videos are so good that, in most cases, you do not need the printed instructions. They leave a reviewer with little to write about. To give you an idea of the actual work entailed to complete an MXSR, this review is broken down into tasks. The sections below summarize the work you need to do beyond what is in the box.
Ironing and Cutting
The covering was good and only a few small places required gentle application of an iron to re-shrink the material. You must decide on the orientation of the aileron servos: lie-flat or vertical mount. This determines whether you cut a hole in the wing or expose a hatch plate. You also need to locate the hole for the elevator servos and the pull-pull wire exits. For switch placement, you will find switch sites under the covering next to the fuel-line dot; these have all been laser cut in advance.
Gluing
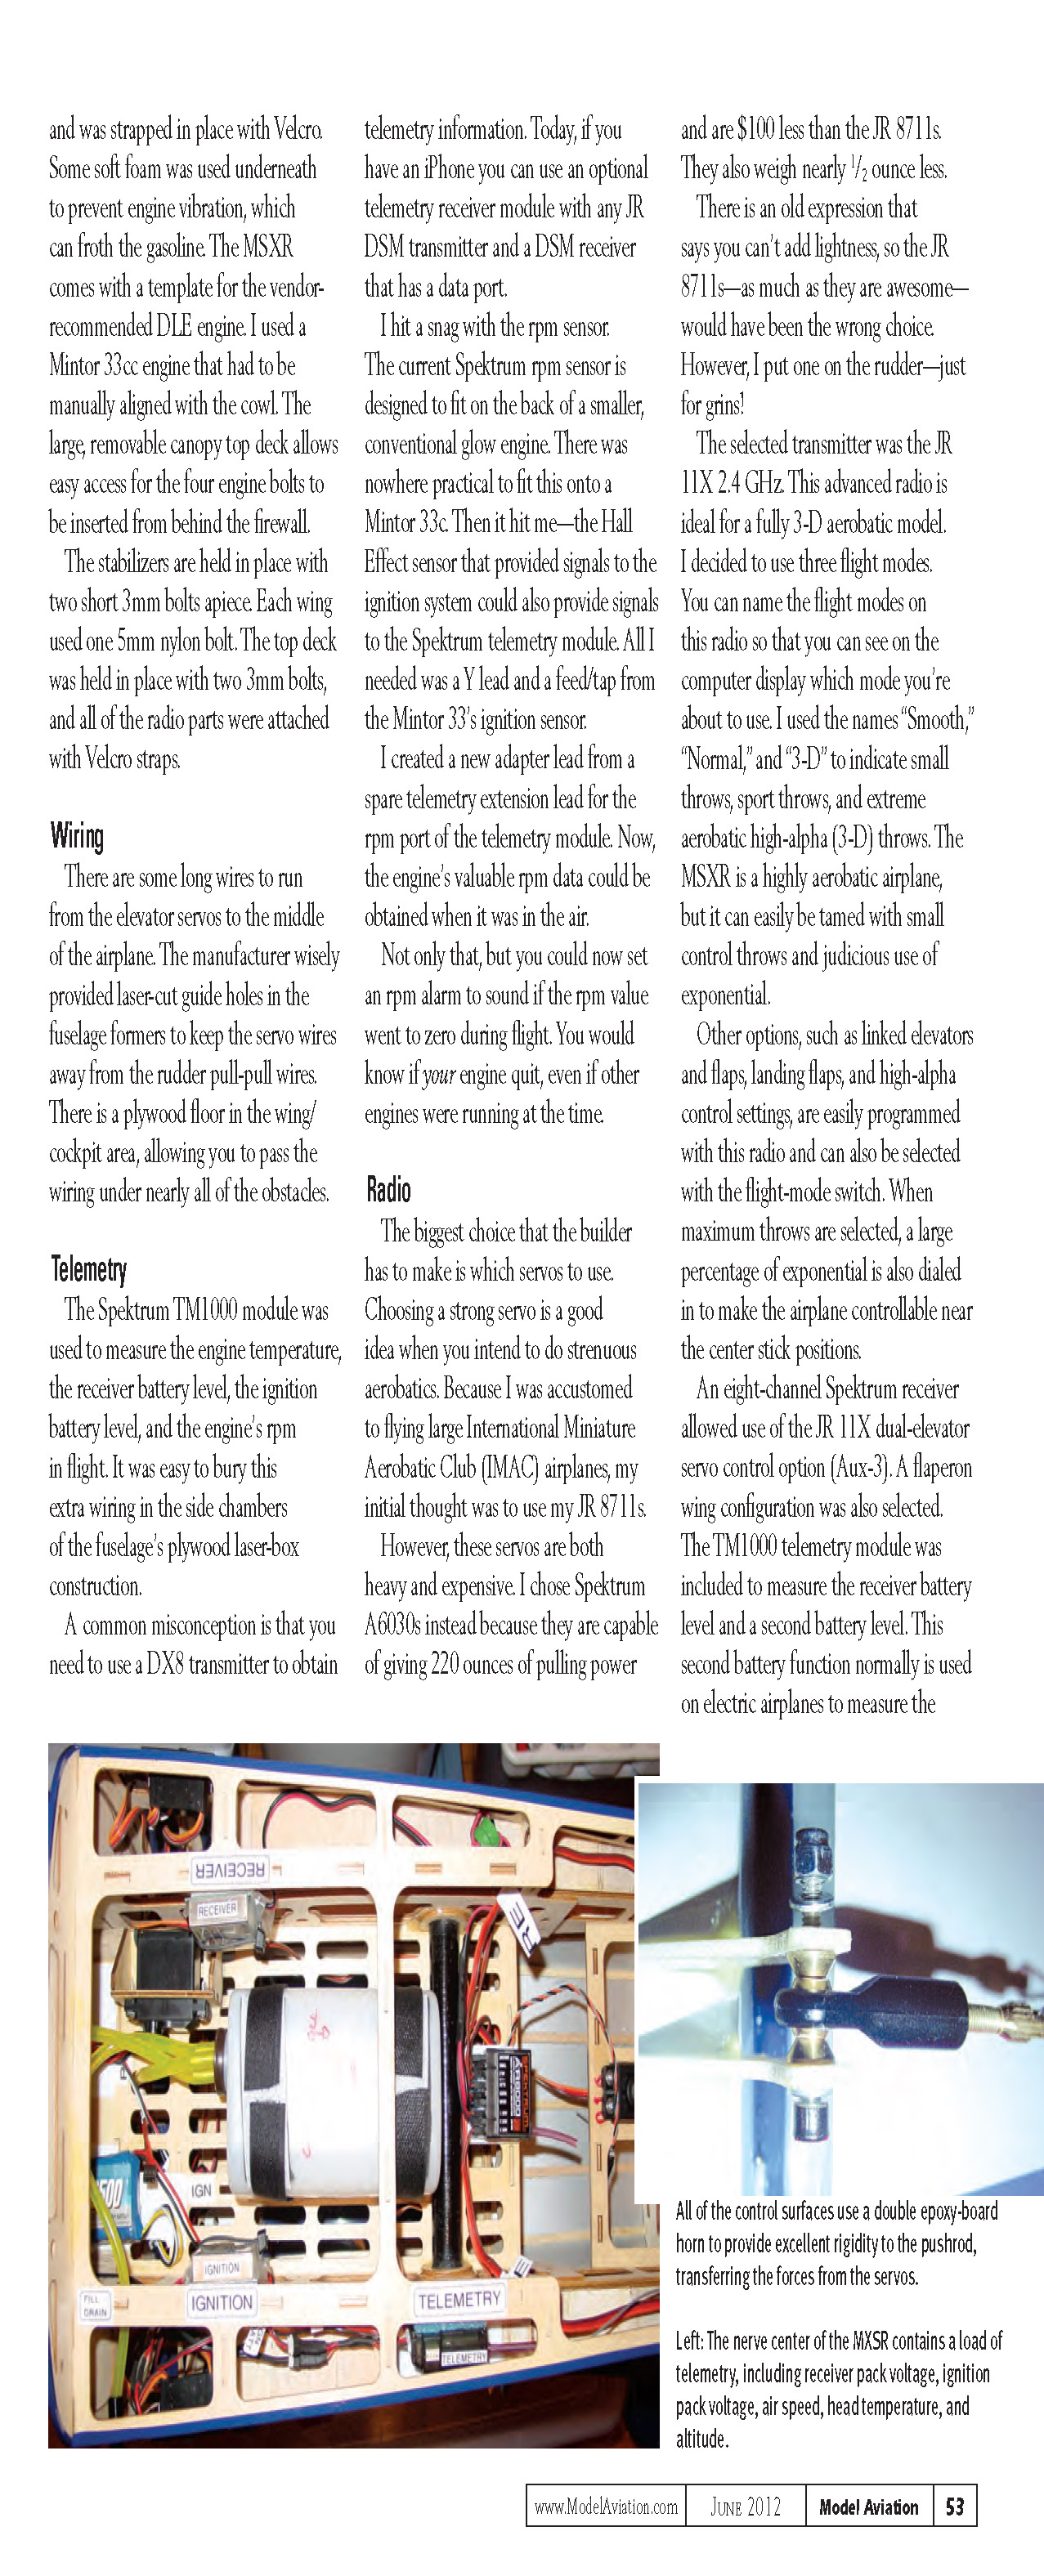
Glue the hinges for the stabilizer, rudder, and ailerons. Apply a small amount of oil to the hinge pivot point to keep the hinges from sticking to the epoxy. Glue in the dual control horns—this two-horn setup is made of epoxy board and the horns are epoxied into each control surface. The laser-cut plywood mounting plate/cradle for the throttle servo is glued in place after the run for the throttle pushrod has been established.
Drilling
Predrill the servo screw mounting holes to avoid splitting the wood. You will also drill four holes for the engine-mount standoffs. Some grinding or drilling may be required when cutting holes in the cowl. The Mintor 33cc used in this review only required an exit hole for the exhaust pipe; no hole was needed for the spark plug. Adding a small access hole to reach the carburetor adjustment screws with a long screwdriver is a good idea. Otherwise, the cowl stayed intact.
The MXSR comes with a carbon-fiber undercarriage and preassembled wheel pants. It only took two screws to attach each wheel pant. I ground out clearance for the wheel tires because front tires tend to expand when spinning fast and can sometimes catch the wheel pants. The drilling is done!
Screws and Bolts
Connect all control surfaces with turnbuckle pushrods. These allow for large or small trimming when adjusting the control surfaces. Because there is a left-hand thread and a right-hand thread on each pushrod, you can be precise with your changes. One tip is to use a slow electric drill to pre-run both the right-hand and left-hand threads into each plastic clevis at least once. This makes manual adjustment easier when the rods are installed between the servo arm and the control horn.
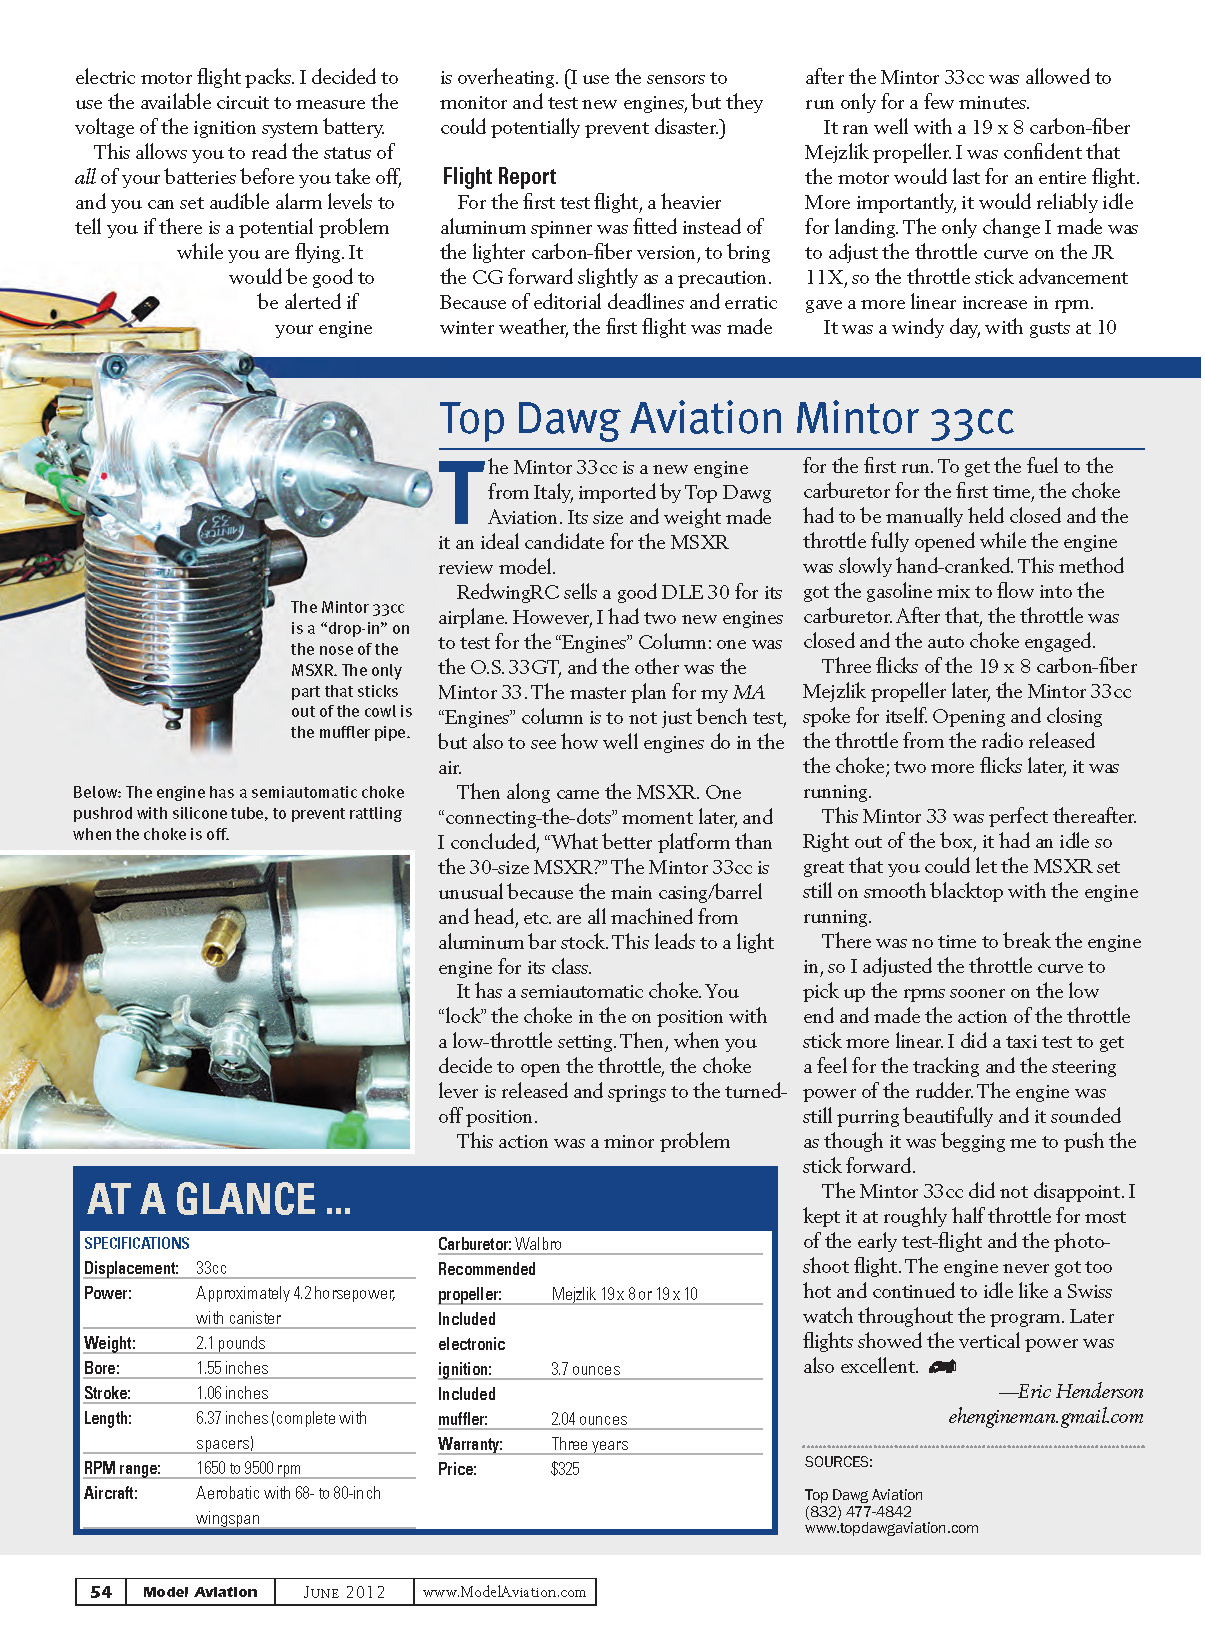
The fuel tank came preassembled and was strapped in place with Velcro. Some soft foam was used underneath to prevent engine vibration, which can froth the gasoline. The MXSR includes a template for the vendor-recommended DLE engine. I used a Mintor 33cc engine that had to be manually aligned with the cowl. The large removable canopy top deck allows easy access for the four engine bolts to be inserted from behind the firewall.
The stabilizers are held in place with two short 3mm bolts apiece. Each wing uses one 5mm nylon bolt. The top deck is held in place with two 3mm bolts, and all of the radio parts were attached with Velcro straps.
Wiring
There are some long wires to run from the elevator servos to the middle of the airplane. The manufacturer wisely provided laser-cut guide holes in the fuselage formers to keep the servo wires away from the rudder pull-pull wires. There is a plywood floor in the wing/cockpit area, allowing you to pass the wiring under nearly all obstacles.
Telemetry
The Spektrum TM1000 module was used to measure engine temperature, the receiver battery level, the ignition battery level, and the engine’s RPM in flight. It was easy to bury this extra wiring in the side chambers of the fuselage’s plywood laser-box construction.
A common misconception is that you need to use a DX8 transmitter to obtain telemetry information. Today, if you have an iPhone you can use an optional telemetry receiver module with any JR DSM transmitter and a DSM receiver that has a data port.
I hit a snag with the RPM sensor. The current Spektrum RPM sensor is designed to fit on the back of a smaller, conventional glow engine, and there was nowhere practical to fit this onto a Mintor 33cc. Then it hit me—the Hall Effect sensor that provides signals to the ignition system could also provide signals to the Spektrum telemetry module. All I needed was a Y lead and a feed/tap from the Mintor 33’s ignition sensor.
I created a new adapter lead from a spare telemetry extension lead for the RPM port of the telemetry module. Now, the engine’s valuable RPM data could be obtained in the air. You can set an RPM alarm to sound if the RPM value goes to zero during flight, so you would know if your engine quit even if other engines were running.
Radio
The biggest choice the builder must make is which servos to use. Choosing strong servos is a good idea when you intend to do strenuous aerobatics. Because I was accustomed to flying large IMAC airplanes, my initial thought was to use my JR 8711s. However, these servos are heavy and expensive. I chose Spektrum A6030s instead because they deliver 220 ounces of pulling power, cost about $100 less than the JR 8711s, and weigh nearly half an ounce less each.
There is an old expression that says you can’t add lightness, so the JR 8711s—as much as they are awesome—would have been the wrong choice for this build. However, I mounted one on the rudder just for grins.
The selected transmitter was the JR 11X 2.4 GHz. This advanced radio is ideal for a fully 3-D aerobatic model. I used three flight modes (named on the transmitter display): “Smooth,” “Normal,” and “3-D,” to indicate small throws, sport throws, and extreme aerobatic high-alpha (3-D) throws. The MXSR is highly aerobatic but can easily be tamed with small control throws and judicious use of exponential.
Other options, such as linked elevators and flaps, landing flaps, and high-alpha control settings, are easily programmed with this radio and can be selected with the flight-mode switch. When maximum throws are selected, a large percentage of exponential is dialed in to make the airplane controllable near the center stick positions.
An eight-channel Spektrum receiver allowed use of the JR 11X dual-elevator servo control option (Aux-3). A flaperon wing configuration was selected. The TM1000 telemetry module was used to measure the receiver battery level and a second battery level (normally used on electric airplanes to measure the ignition-system battery voltage).
This setup lets you read the status of all your batteries before you take off, and you can set audible alarm levels to warn you of potential problems while flying. It would be good to be alerted if your engine is overheating. I use the sensors to monitor and test new engines, but they could potentially prevent disaster.
Flight Report
For the first test flight, a heavier aluminum spinner was fitted instead of the lighter carbon-fiber version to bring the CG forward slightly as a precaution. Because of editorial deadlines and erratic winter weather, the first flight was made after the Mintor 33cc was allowed to run only for a few minutes. It ran well with a 19 x 8 carbon-fiber Mejzlik propeller. I was confident the motor would last an entire flight and that it would reliably idle for landing. The only change I made was to adjust the throttle curve on the JR 11X so the throttle stick advancement gave a more linear increase in RPM.
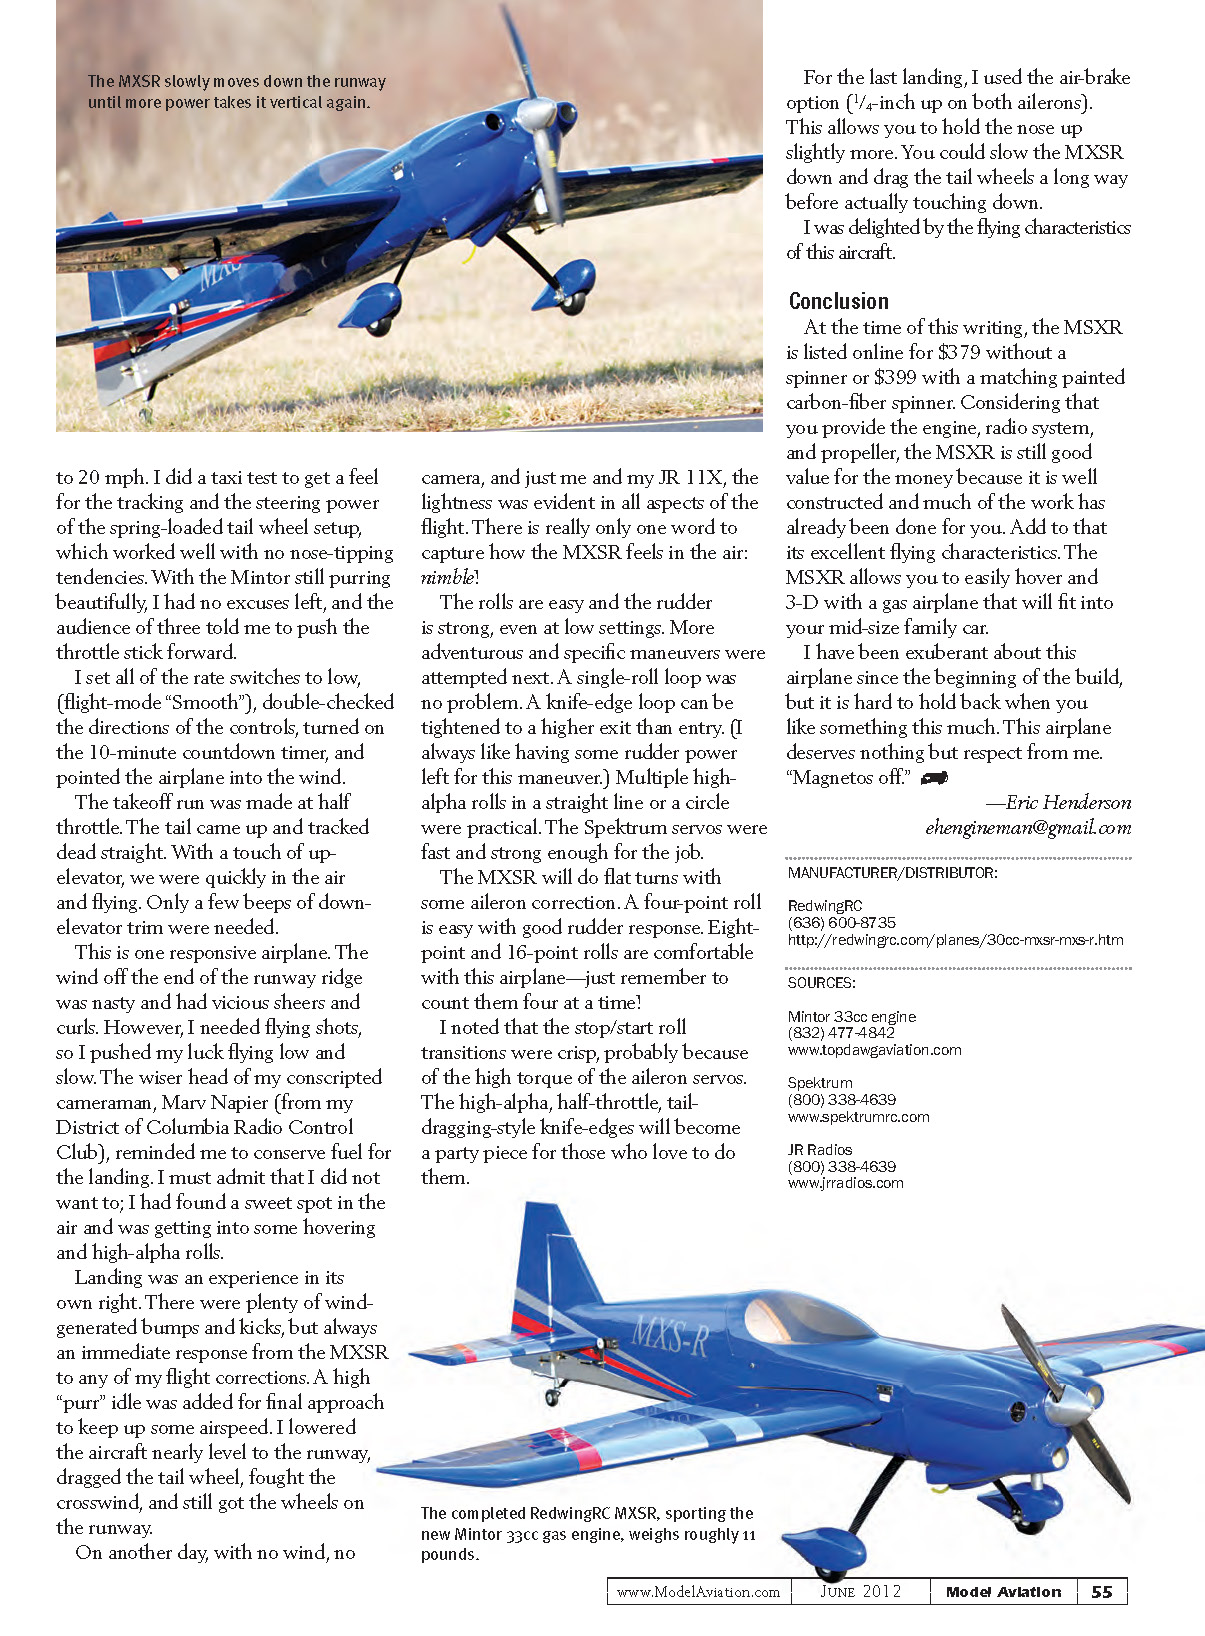
It was a windy day, with gusts of 10 to 20 mph. I did a taxi test to get a feel for the tracking and the steering power of the spring-loaded tailwheel setup, which worked well with no nose-tipping tendencies. With the Mintor still purring beautifully, I had no excuses left, and the audience of three told me to push the throttle stick forward.
I set all of the rate switches to low (flight mode “Smooth”), double-checked control directions, turned on the 10-minute countdown timer, and pointed the airplane into the wind.
The takeoff run was made at half throttle. The tail came up and tracked dead straight. With a touch of up elevator, we were quickly in the air. Only a few beeps of down-elevator trim were needed.
This is one responsive airplane. The wind off the end of the runway ridge produced vicious shears and curls, but I pushed my luck flying low and slow to get shots. My conscripted cameraman, Marv Napier (from my District of Columbia Radio Control Club), reminded me to conserve fuel for the landing. I must admit I didn’t want to; I had found a sweet spot in the air and was getting into hovering and high-alpha rolls.
Landing was an experience in its own right. There were plenty of wind-generated bumps and kicks, but always an immediate response from the MXSR to any flight corrections. I used a high idle for final approach to keep up some airspeed, lowered the aircraft nearly level to the runway, dragged the tailwheel, fought the crosswind, and still got the wheels on the runway.
On another day with no wind and no camera, just me and my JR 11X, the lightness of the airplane was evident in all aspects of the flight. There is really only one word to capture how the MXSR feels in the air: nimble.
Rolls are easy and the rudder is strong, even at low settings. A single-roll loop was no problem. A knife-edge loop can be tightened to a higher exit than entry (I like having some rudder power left for this maneuver). Multiple high-alpha rolls in a straight line or a circle were practical. The Spektrum servos were fast and strong enough for the job.
The MXSR will do flat turns with some aileron correction. A four-point roll is easy with good rudder response. Eight-point and 16-point rolls are comfortable with this airplane—just remember to count them four at a time!
I noted that the stop/start roll transitions were crisp, probably because of the high torque of the aileron servos. The high-alpha, half-throttle, tail-dragging-style knife-edges will become a party piece for those who love to do them.
For the last landing, I used the air-brake option (1/4-inch up on both ailerons). This allows you to hold the nose up slightly more. You can slow the MXSR down and drag the tail wheels a long way before actually touching down.
I was delighted by the flying characteristics of this aircraft.
Conclusion
At the time of this writing, the MXSR is listed online for $379 without a spinner or $399 with a matching painted carbon-fiber spinner. Considering that you provide the engine, radio system, and propeller, the MXSR is still good value for the money because it is well constructed and much of the work has already been done for you. Add to that its excellent flying characteristics. The MXSR allows you to easily hover and 3-D with a gas airplane that will fit into your mid-size family car.
I have been exuberant about this airplane since the beginning of the build, but it is hard to hold back when you like something this much. This airplane deserves nothing but respect from me. "Magnetos off."
—Eric Henderson [email protected]
MANUFACTURER/DISTRIBUTOR:
- RedwingRC
- Phone: (636) 600-8735
- http://redwingrc.com/planes/30cc-mxsr-mxs-r.htm
SOURCES:
- Mintor 33cc engine
- Phone: (832) 477-4842
- www.topdawgaviation.com
- Spektrum
- Phone: (800) 338-4639
- www.spektrumrc.com
- JR Radios
- Phone: (800) 338-4639
- www.jrradios.com
Transcribed from original scans by AI. Minor OCR errors may remain.

