

STEVENS AEROMODEL SWIFT 100
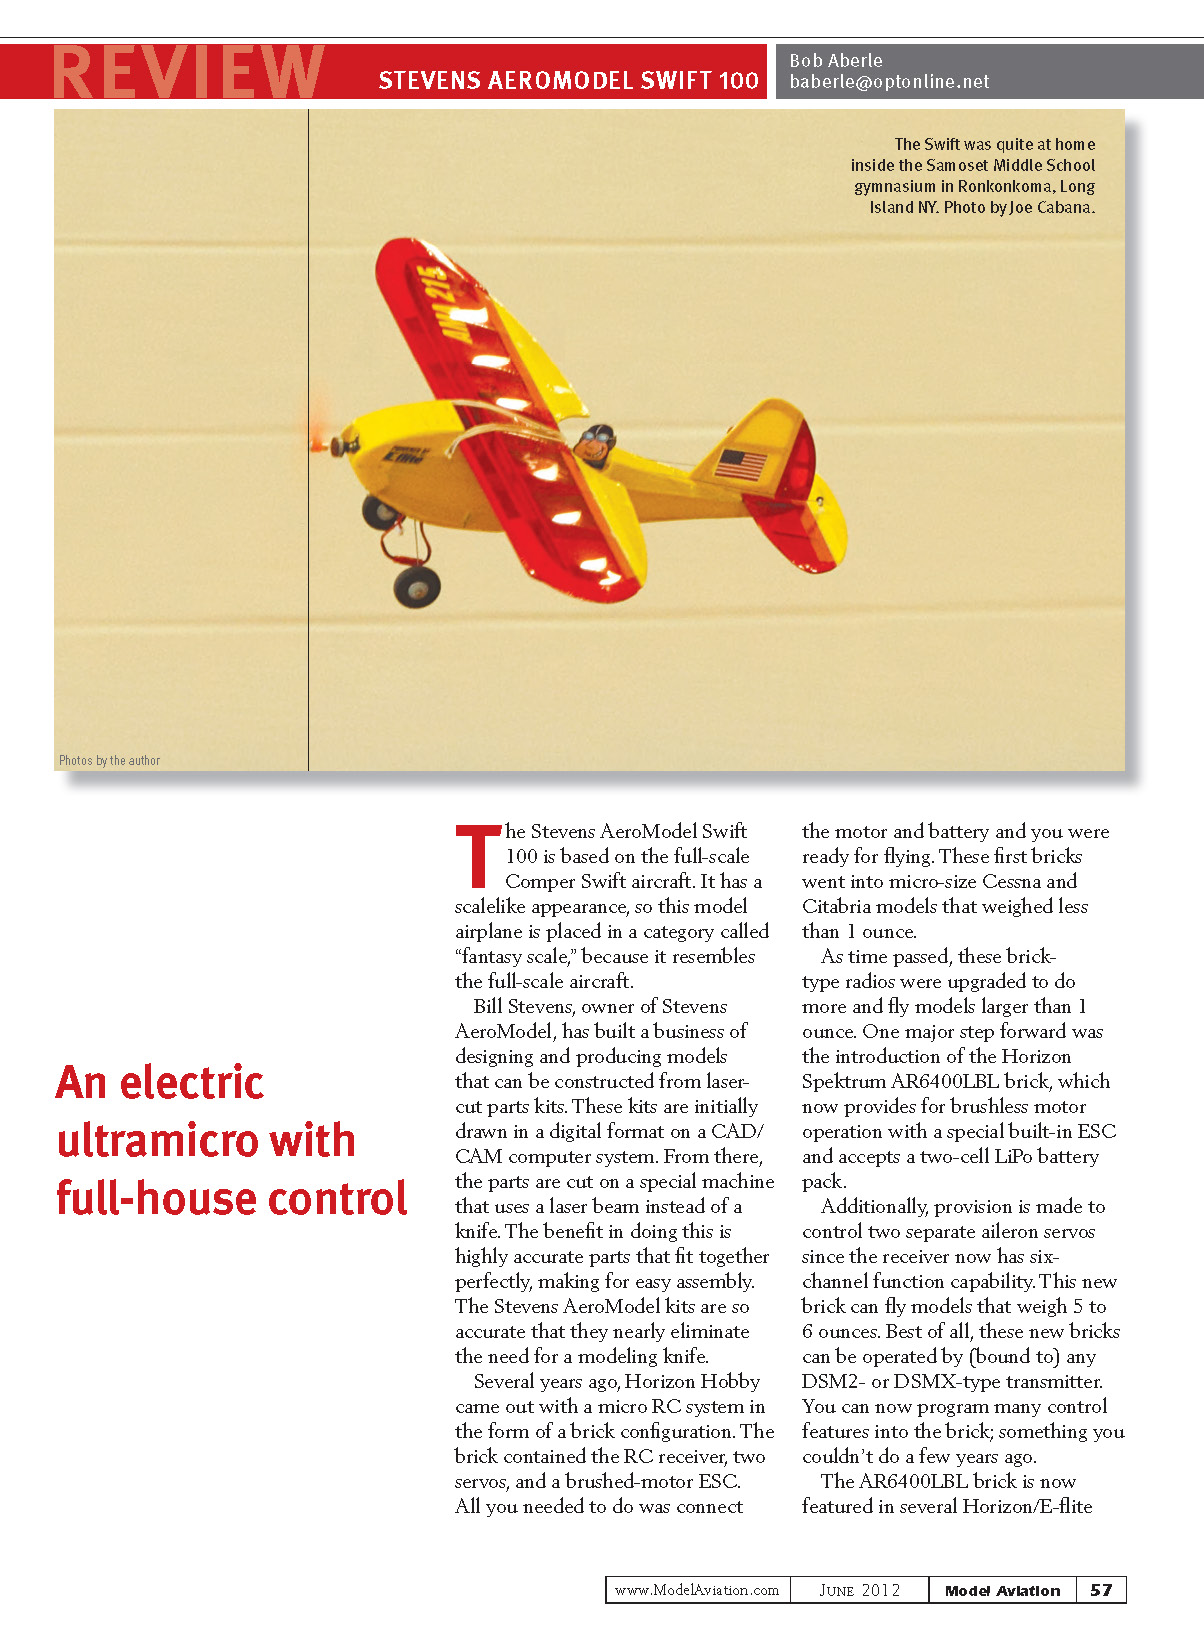
The Stevens AeroModel Swift 100 is based on the full-scale Comper Swift aircraft. It has a scalelike appearance, so this model airplane is placed in a category called "fantasy scale," because it resembles the full-scale aircraft.
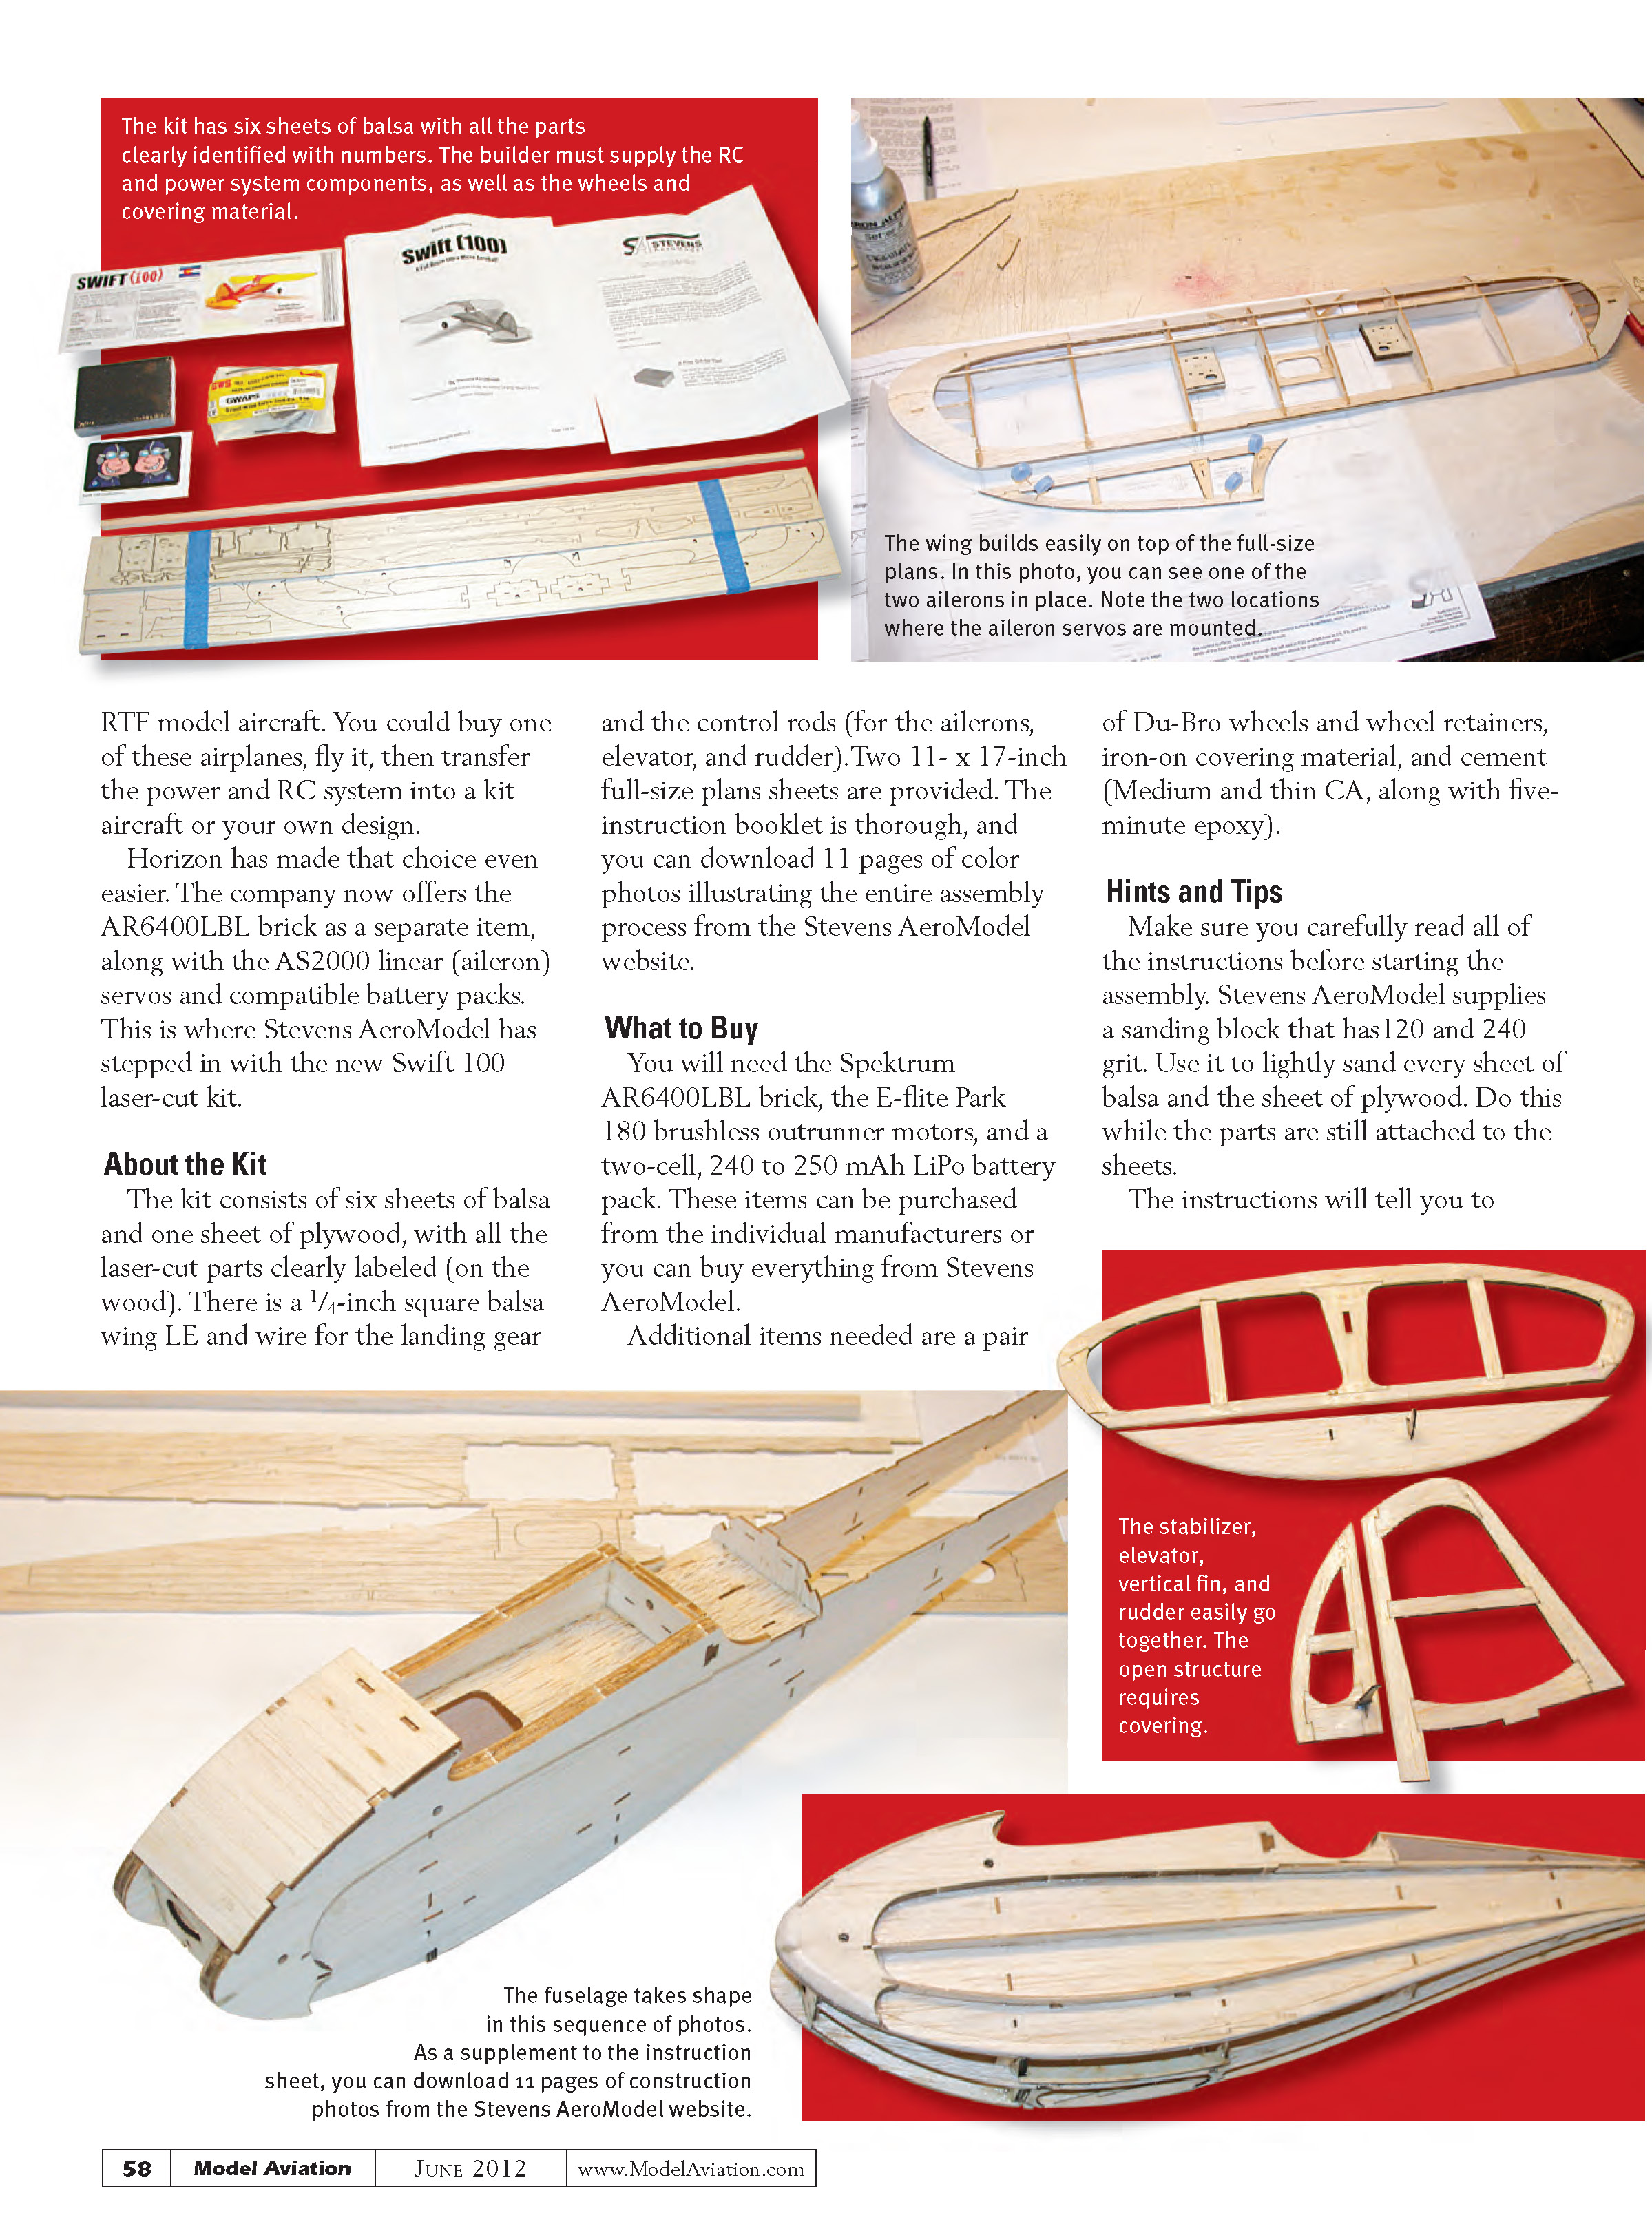
Bill Stevens, owner of Stevens AeroModel, has built a business designing and producing models that can be constructed from laser-cut parts kits. These kits are initially drawn in a digital format on a CAD/CAM computer system. From there, the parts are cut on a special machine that uses a laser beam instead of a knife. The benefit of this is highly accurate parts that fit together perfectly, making for easy assembly. The Stevens AeroModel kits are so accurate that they nearly eliminate the need for a modeling knife.
Several years ago, Horizon Hobby introduced a micro RC system in the form of a brick configuration. The brick contained the RC receiver, two servos, and a brushed-motor ESC. All you needed to do was connect the motor and battery and you were ready for flying. These first bricks went into micro-size Cessna and Citabria models that weighed less than 1 ounce.
As time passed, these brick-type radios were upgraded to do more and to fly models larger than 1 ounce. One major step forward was the introduction of the Horizon Spektrum AR6400LBL brick, which provides for brushless motor operation with a special built-in ESC and accepts a two-cell LiPo battery pack.
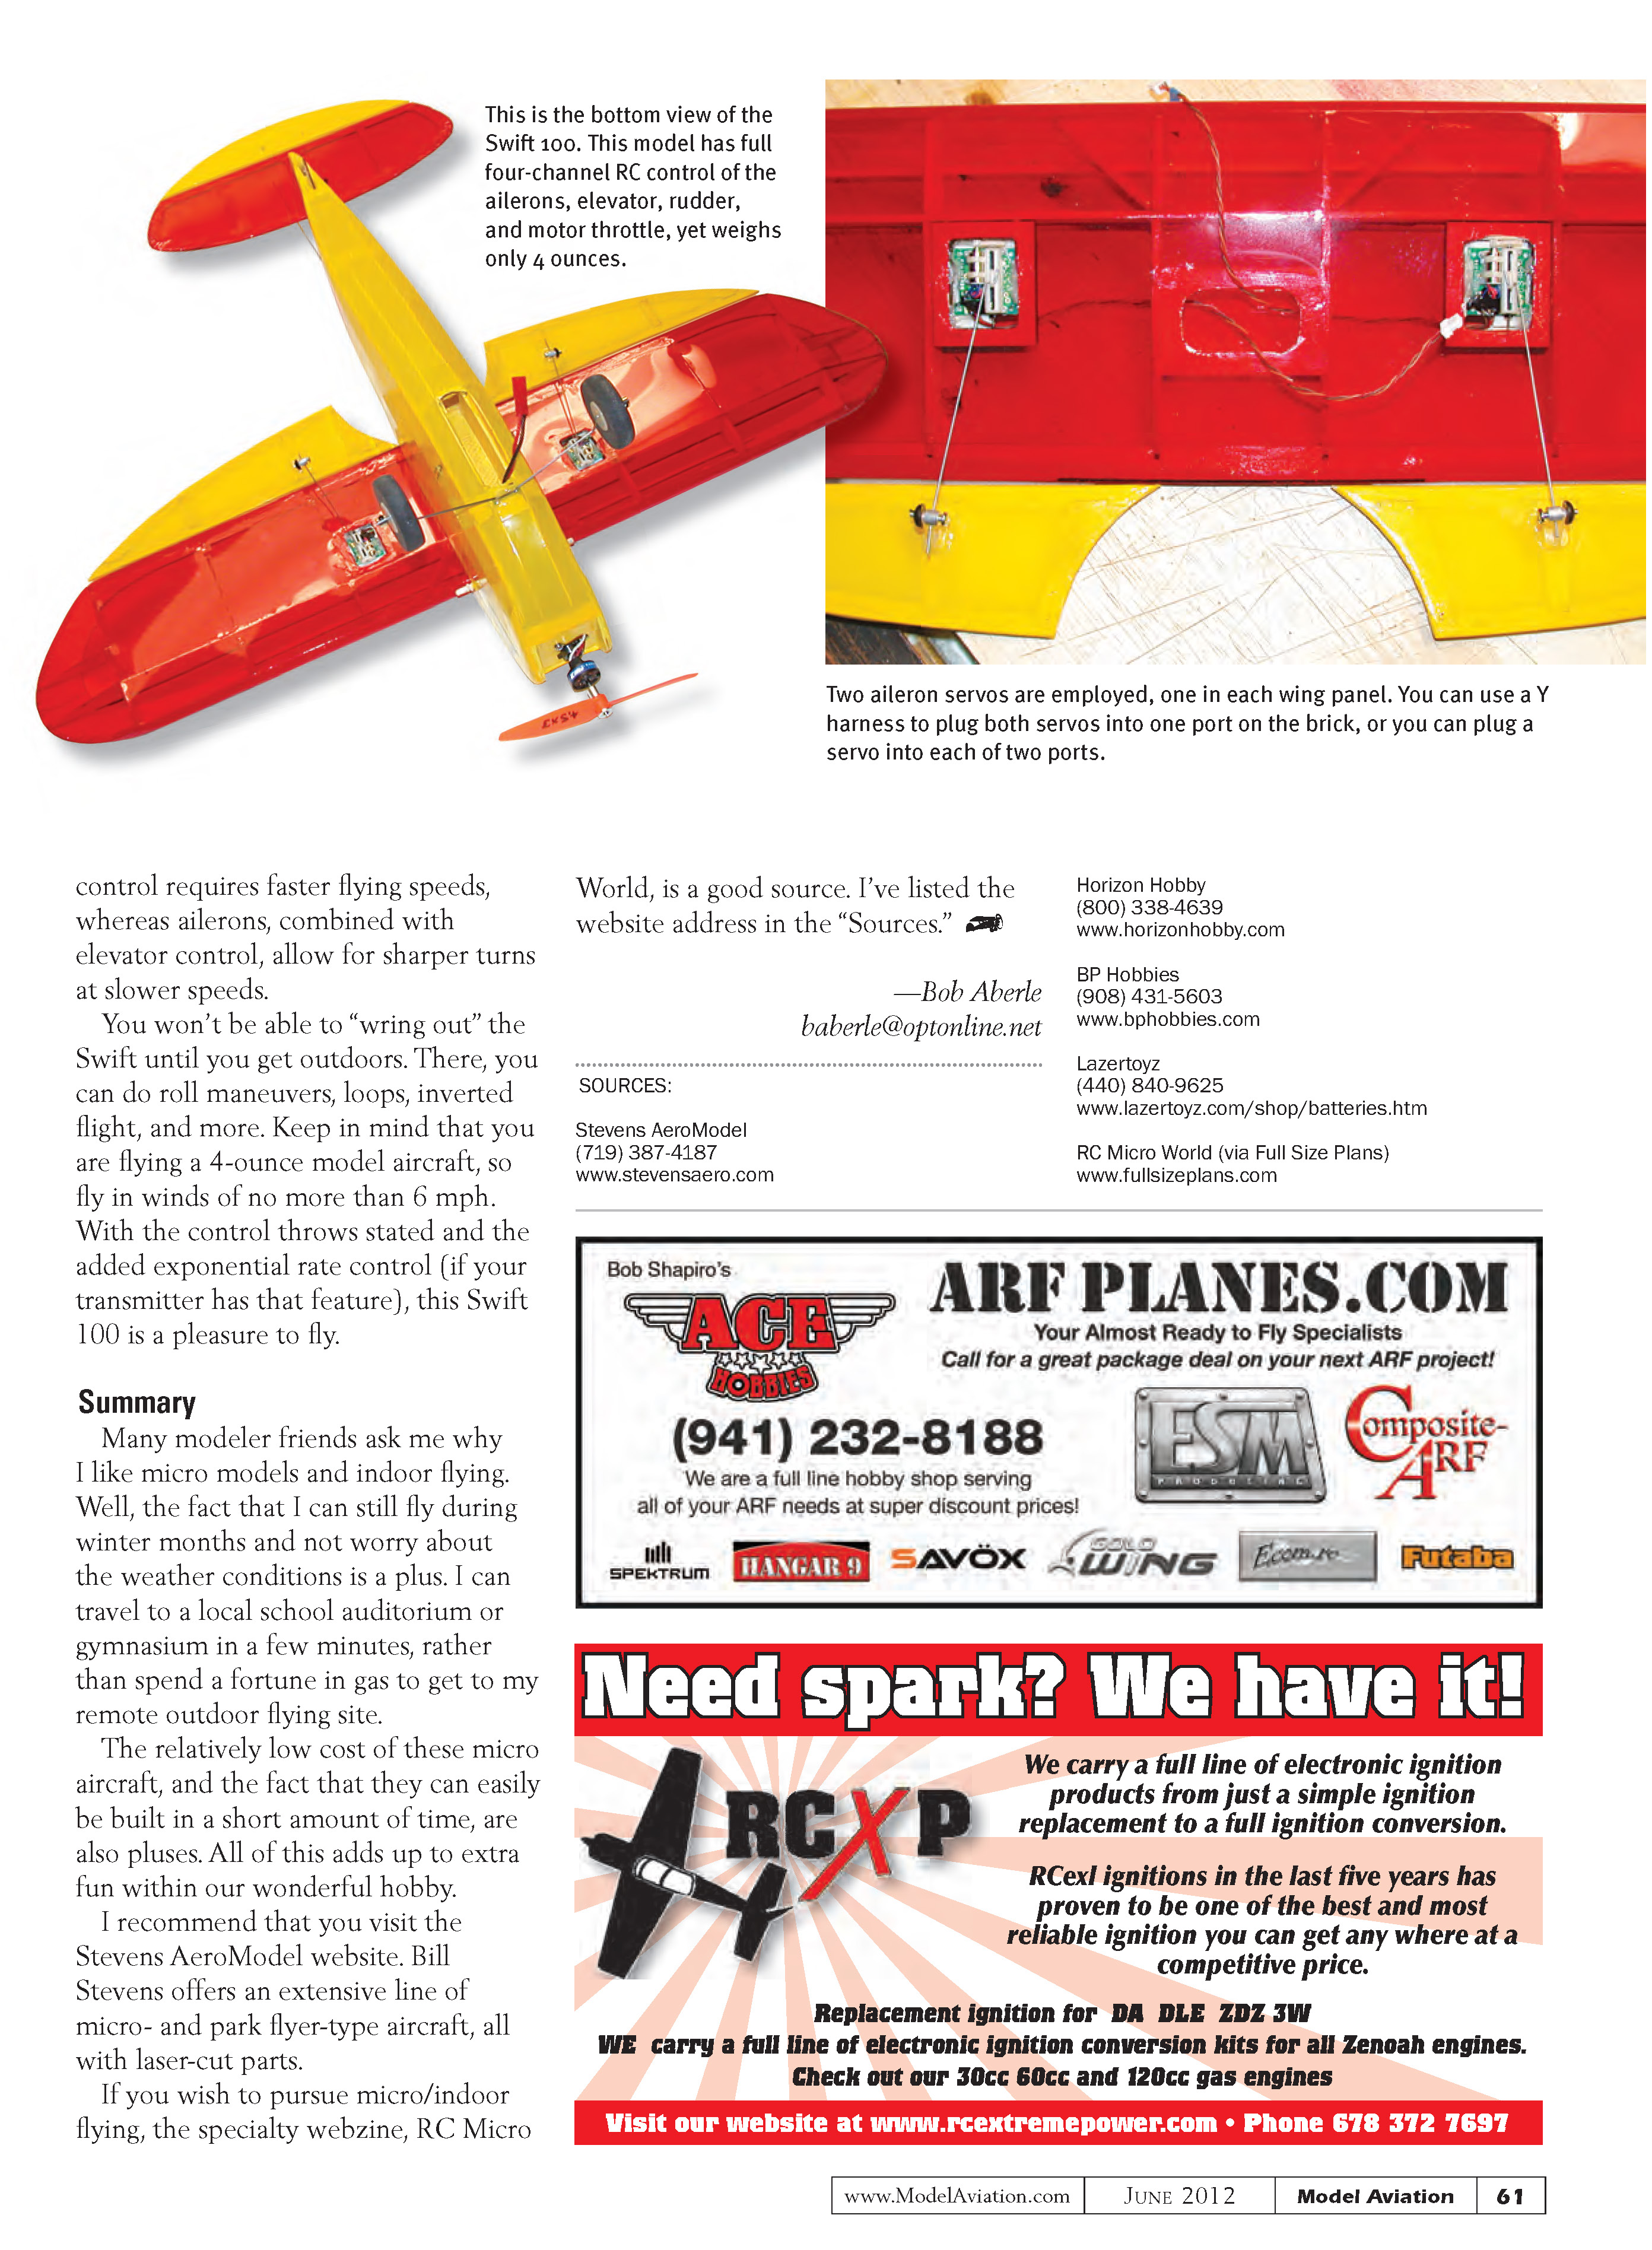
Additionally, provision is made to control two separate aileron servos since the receiver now has six-channel function capability. This new brick can fly models that weigh 5 to 6 ounces. Best of all, these new bricks can be operated by (bound to) any DSM2- or DSMX-compatible transmitter. You can now program many control features into the brick—something you couldn’t do a few years ago. The AR6400LBL brick is now featured in several Horizon/E-flite micro models.
About the Kit
The kit consists of six sheets of balsa and one sheet of plywood, with all the laser-cut parts clearly labeled on the wood. There is a 1/4-inch square balsa wing LE and wire for the landing gear and the control rods (for the ailerons, elevator, and rudder). Two 11 x 17-inch full-size plan sheets are provided. The instruction booklet is thorough, and you can download 11 pages of color photos illustrating the entire assembly process from the Stevens AeroModel website.
What to Buy
- Spektrum AR6400LBL brick
- E-flite Park 180 brushless outrunner motor
- Two-cell (2S), 240–250 mAh LiPo battery pack
- Du-Bro wheels and wheel retainers
- Iron-on covering material
- Cements: medium and thin CA, plus five-minute epoxy
These items can be purchased from the individual manufacturers or you can buy everything from Stevens AeroModel.
Hints and Tips
- Carefully read all of the instructions before starting assembly.
- Stevens AeroModel supplies a sanding block that has 120 and 240 grit. Use it to lightly sand every sheet of balsa and the sheet of plywood while the parts are still attached to the sheets.
- The instructions will tell you to assemble a series of parts without applying any cement. You later reach a point where the instructions direct you to use medium or thin CA cement; this way, if you accidentally make a mistake in the assembly process, it's an easy fix.
- The control rod wires are fashioned from the supplied .025-inch diameter wire. These wires are routed through laser-cut slots from the servo arms back to the control horns. The location of these slots is so precise that the wires move freely, without placing any drag on the servos.
- Although plywood control horns are supplied, consider using Du-Bro micro control horns with EZ connectors. This allows mechanical adjustments to the control surfaces even after the airplane is fully assembled and covered.
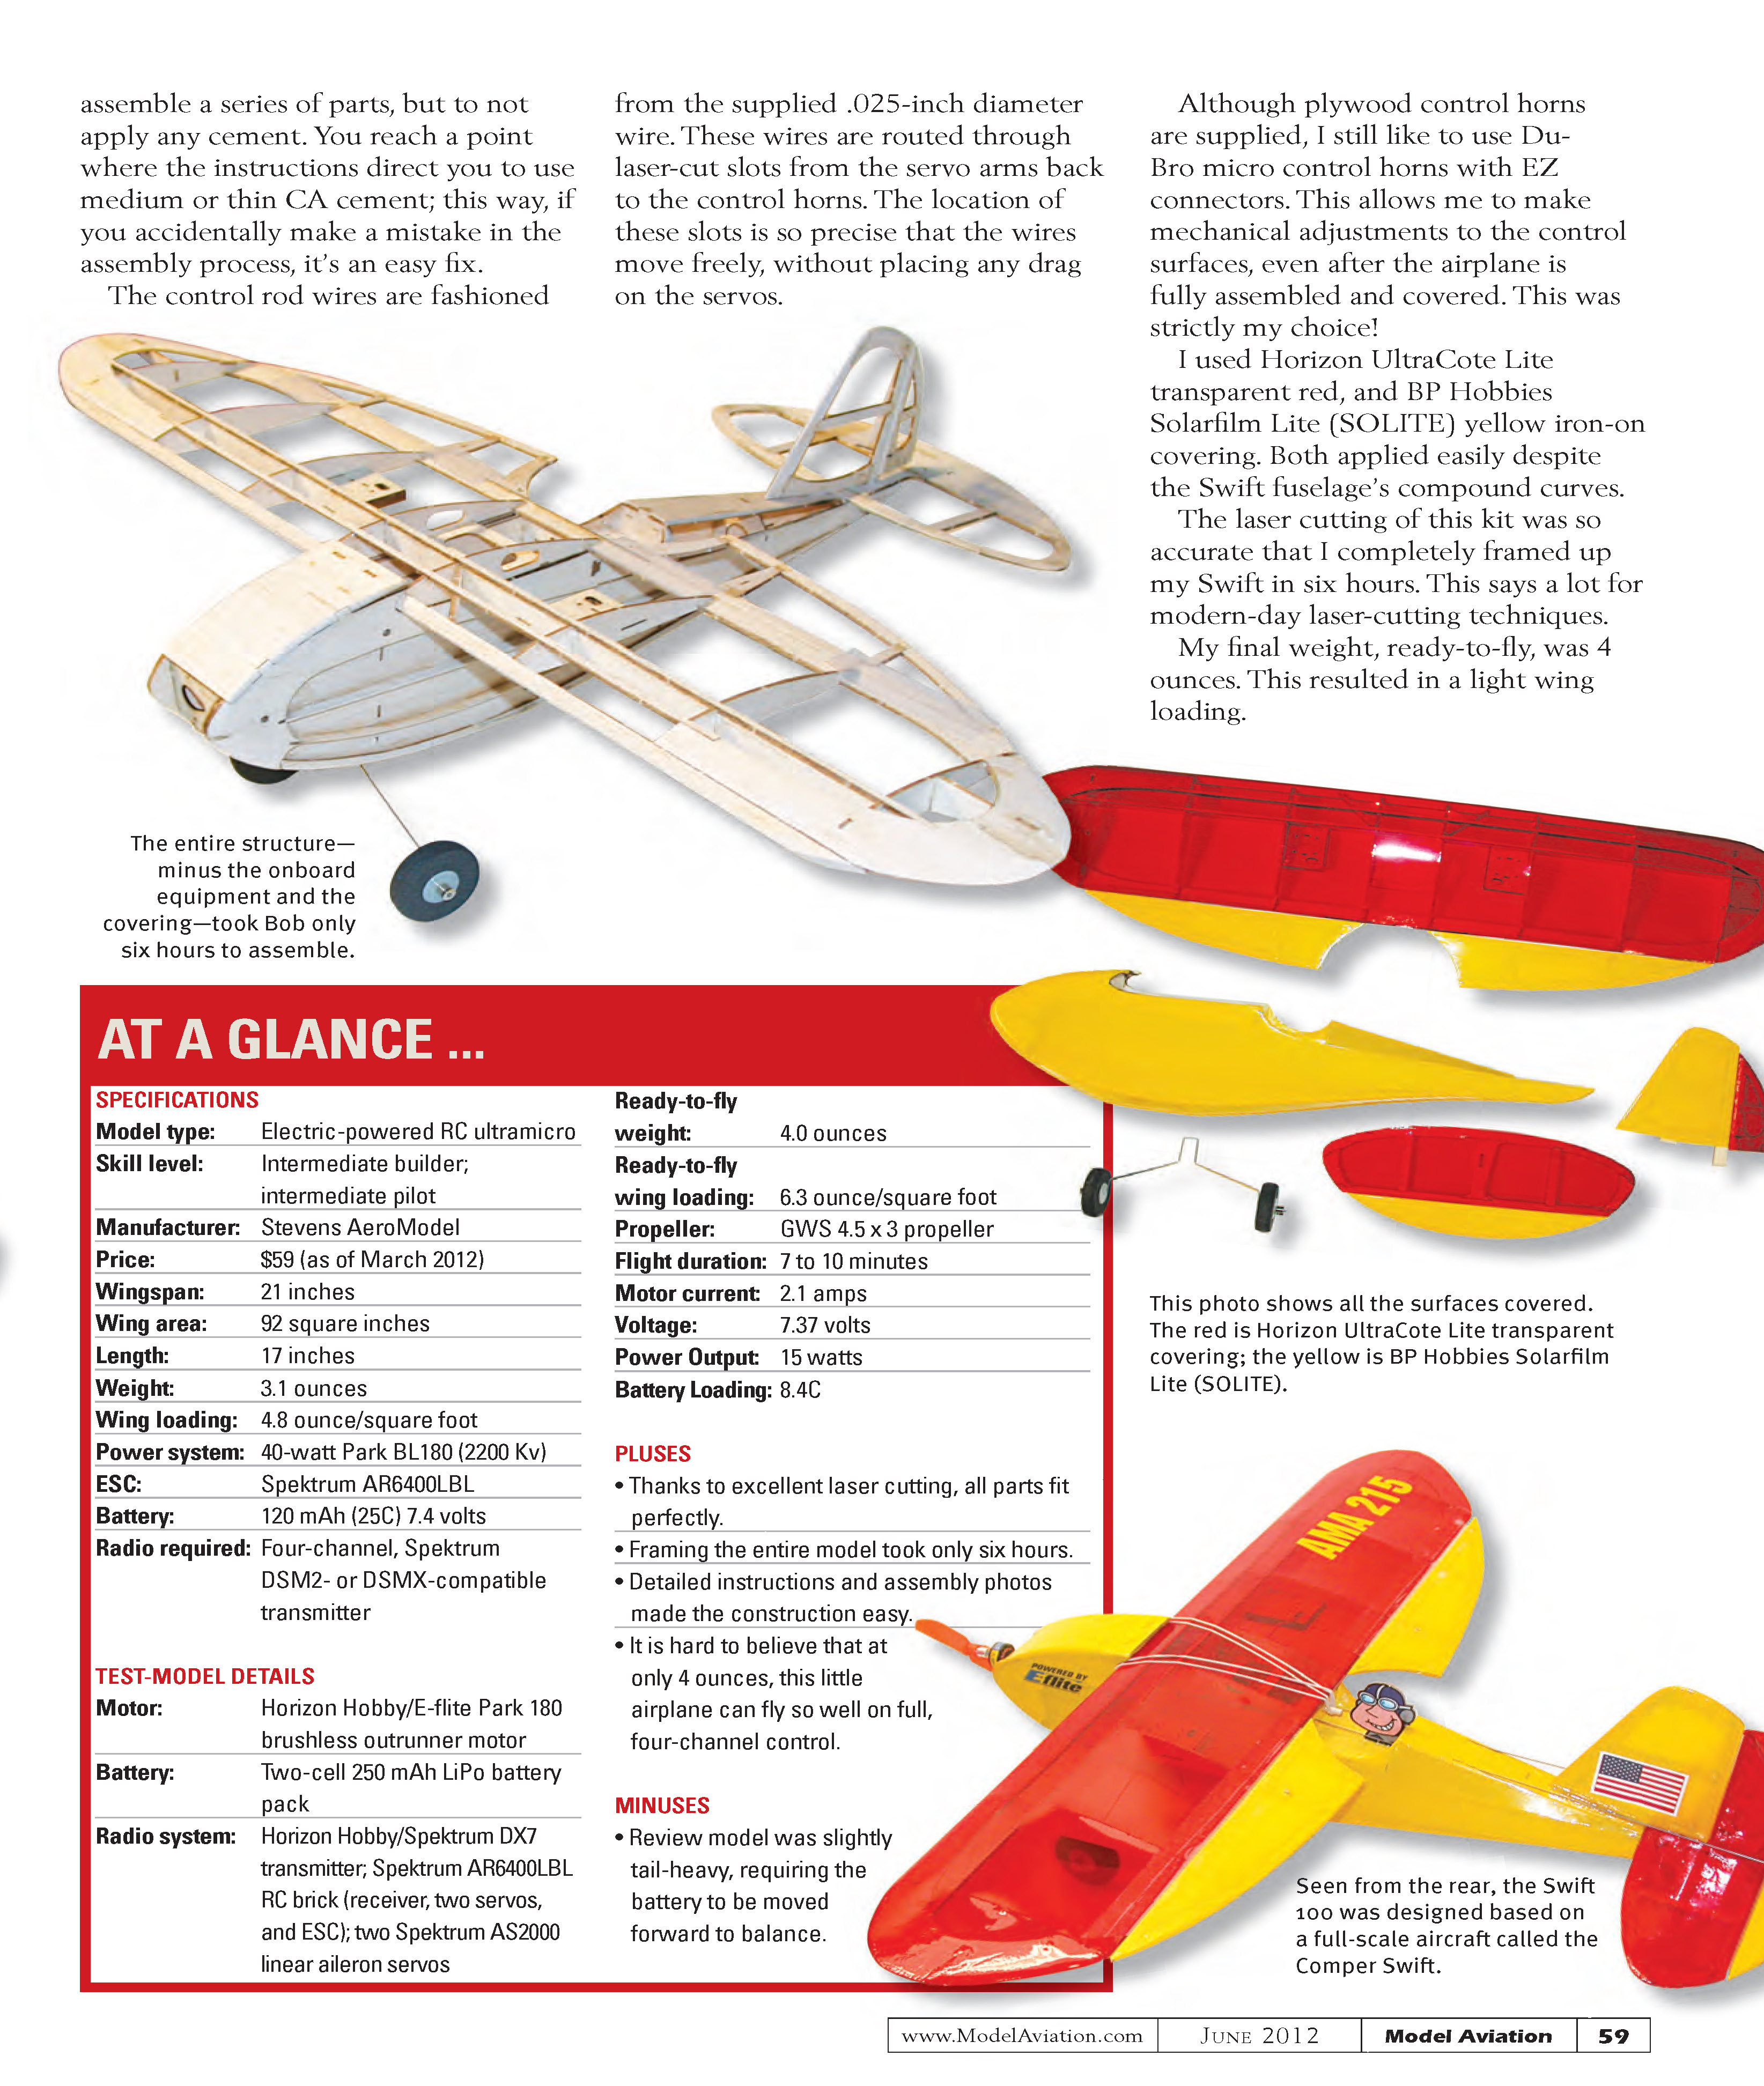
- I used Horizon UltraCote Lite transparent red and BP Hobbies Solarfilm Lite (SOLITE) yellow iron-on covering. Both applied easily despite the Swift fuselage’s compound curves.
The laser cutting of this kit was so accurate that I completely framed up my Swift in six hours. My final weight, ready-to-fly, was 4 ounces. This resulted in a light wing loading.
Final Balance
The CG location on the plans was 1/8- to 1/4-inch behind the main spar—that's roughly 26% from the wing LE. When finished, my Swift came out slightly tail-heavy. I'm known for building heavy, so this shouldn't have been a surprise to me. If I had balanced my Swift to the specified location, however, I would have needed 0.4 ounce of lead weight in the nose (near the motor). I decided to move the two-cell LiPo battery pack forward from its initial position so it would be between the firewall and fuselage former F-3.
The battery is still accessible from the bottom of the fuselage and is held in place with two small wire hooks and several rubber bands. Relocating the battery in this manner allowed me to achieve the exact CG location.
I suggest that you initially locate the battery as recommended in the plans. If you do come out tail-heavy, it can be moved forward quickly. There is plenty of room for the battery at either location.
Final control throws:
- Ailerons: 1/4 inch either side of neutral
- Elevator: 5/16 inch
- Rudder: 3/8 inch
Exponential rate control (Stevens AeroModel recommendation):
- Aileron: 50%
- Elevator: 50%
- Rudder: 30%
Flying Experiences
To date, I've flown my Swift 100 more indoors than outdoors because our weather on Long Island, New York, was poor in February. My indoor facility is a large gymnasium. The Swift maneuvers well, mainly because of the aileron control. I've found that rudder control requires faster flying speeds, whereas ailerons combined with elevator control allow for sharper turns at slower speeds.
You won't be able to "wring out" the Swift until you get outdoors. There, you can do roll maneuvers, loops, inverted flight, and more. Keep in mind that you are flying a 4-ounce model aircraft, so fly in winds of no more than 6 mph. With the control throws stated and the added exponential rate control (if your transmitter has that feature), this Swift 100 is a pleasure to fly.
Summary
Many modeler friends ask me why I like micro models and indoor flying. The fact that I can still fly during winter months and not worry about the weather conditions is a plus. I can travel to a local school auditorium or gymnasium in a few minutes, rather than spend a fortune in gas to get to my remote outdoor flying site.
The relatively low cost of these micro aircraft, and the fact that they can easily be built in a short amount of time, are also advantages. All of this adds up to extra fun within our wonderful hobby.
I recommend that you visit the Stevens AeroModel website. Bill Stevens offers an extensive line of micro- and park-flyer-type aircraft, all with laser-cut parts.
If you wish to pursue micro/indoor flying, the specialty webzine RC Micro World is a good source. I've listed the website address in the "Sources."
—Bob Aberle [email protected]
SOURCES:
- Stevens AeroModel (719) 387-4187 www.stevensaero.com
- Horizon Hobby (800) 338-4639 www.horizonhobby.com
- BP Hobbies (908) 431-5603 www.bphobbies.com
- Lazertoyz (440) 840-9625 www.lazertoyz.com/shop/batteries.htm
- RC Micro World (via Full Size Plans) www.fullsizeplans.com
Transcribed from original scans by AI. Minor OCR errors may remain.

