
RTF micro aircraft are easy and relaxing to fly
Fortunately, for fans of micro aircraft, the micro segment of our hobby continues to grow at a fast pace. We have so many wonderful choices in RTF micro aircraft today — from 3-D aerobatic models to easy-to-fly, two-channel airplanes.
I enjoy flying all types. I like practicing 3-D to improve my flying skills, and I also like to pilot my two-channel airplanes that are slow and relaxing to fly. I love to fly them just before dark, when the wind is calm on a beautiful summer day. It is a soothing experience.
I designed my Classroom Fighters for Plantraco with this in mind, because I wanted others to enjoy the experience. A new two-channel RTF model called the Nano-Micro Stick 75 recently was released from Ares. Because I have designed several different types of two-channel models, I was excited to test the model and see how it performed.
Ares Nano-Micro Stick 75
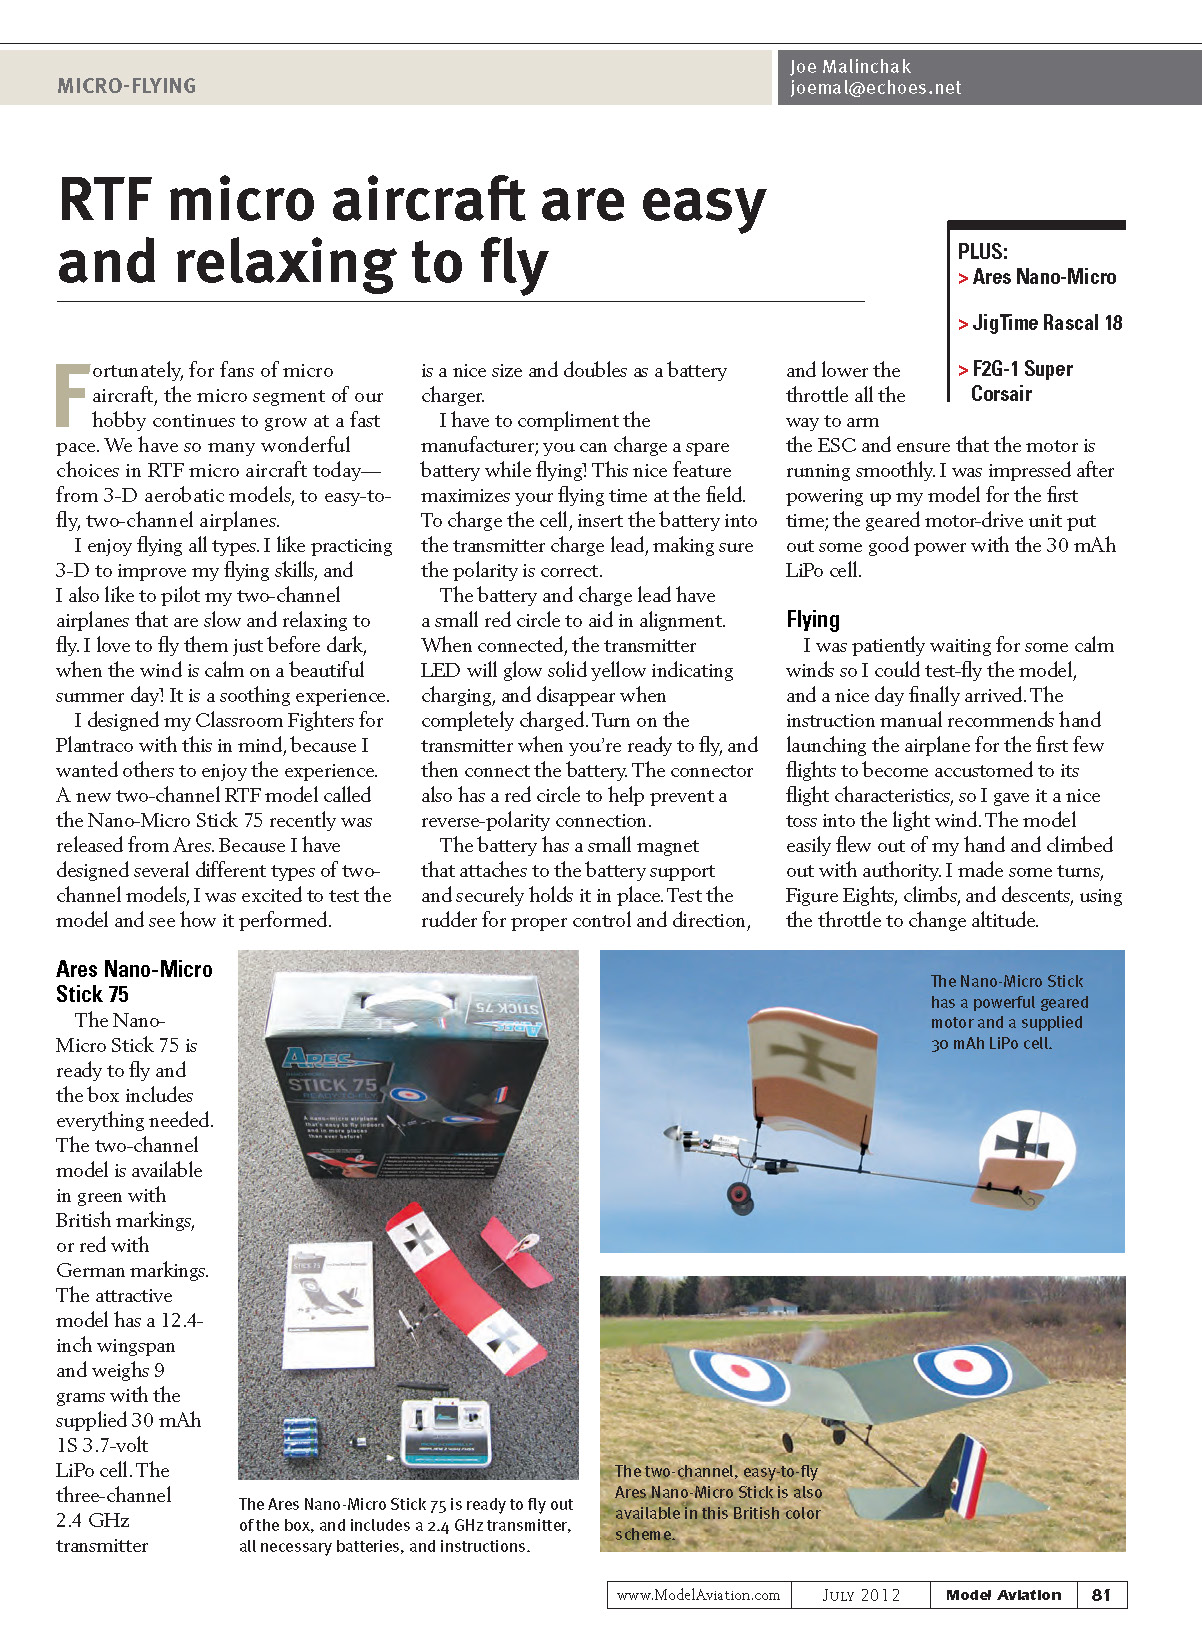
The Nano-Micro Stick 75 is ready to fly and the box includes everything needed. The two-channel model is available in green with British markings or red with German markings. The attractive model has a 12.4-inch wingspan and weighs 9 grams with the supplied 30 mAh 1S 3.7-volt LiPo cell. The three-channel 2.4 GHz transmitter is a nice size and doubles as a battery charger.
I have to compliment the manufacturer: you can charge a spare battery while flying. This nice feature maximizes your flying time at the field. To charge the cell, insert the battery into the transmitter charge lead, making sure the polarity is correct.
- The battery and charge lead have a small red circle to aid in alignment.
- When connected, the transmitter LED will glow solid yellow indicating charging and will go out when the cell is completely charged.
- Turn on the transmitter when you’re ready to fly, and then connect the battery. The connector also has a red circle to help prevent a reverse-polarity connection.
- The battery has a small magnet that attaches to the battery support and securely holds it in place.
Test the rudder for proper control and direction, and lower the throttle all the way to arm the ESC and ensure that the motor is running smoothly. I was impressed after powering up my model for the first time; the geared motor-drive unit put out some good power with the 30 mAh LiPo cell.
Flying
I was patiently waiting for some calm winds so I could test-fly the model, and a nice day finally arrived. The instruction manual recommends hand launching the airplane for the first few flights to become accustomed to its flight characteristics, so I gave it a nice toss into the light wind. The model easily flew out of my hand and climbed out with authority. I made some turns, figure eights, climbs, and descents, using the throttle to change altitude.
The wind had picked up and I climbed the Nano-Micro Stick 75 to see what it could do. Surprisingly, I was able to perform a round loop with the two-channel model. I gave it full throttle and the model pitched up high into the wind. As it went over the top, I reduced the throttle and it came around the loop nicely and recovered. I also made some tight high-speed turns.
The airplane makes nice takeoffs and landings from a hard surface, requiring little ground for takeoff (ROG). It is easy to fly, and should only take an experienced modeler a minute or two to master. With a little guidance, a beginner could fly the Nano-Micro Stick 75 in a short amount of time. My model flew great out of the box, with good slow-speed characteristics.
The instruction manual explains how to adjust the wing position to move the CG for fast or slow flight. Moving the wing backward will allow the aircraft to fly faster and handle a little wind when flying outside. Moving the wing forward will allow the model to fly slower, giving it a more nose-high attitude. This is good for indoor flight in small areas.
The Ares Nano-Micro Stick 75 has a list price of $59.99 and is available at HobbyTown USA stores nationwide.
Cindy’s Thoughts
This model is really cute! I had no problems flying the airplane. After a few flights, my husband flew his model against mine, and we did some dogfighting in our front yard. You can add a small streamer to the tail and try to cut off your opponent’s streamer. I won’t tell you who won.
JigTime Rascal 18
Fellow "Small-Field Flying" columnist Paul Bradley and his brother, Ralph, have a wonderful website full of plans and information about many different types of model aircraft. One of his web pages has a link to some great free-flight (FF) model designs from the past, including the JigTime Rascal 18.
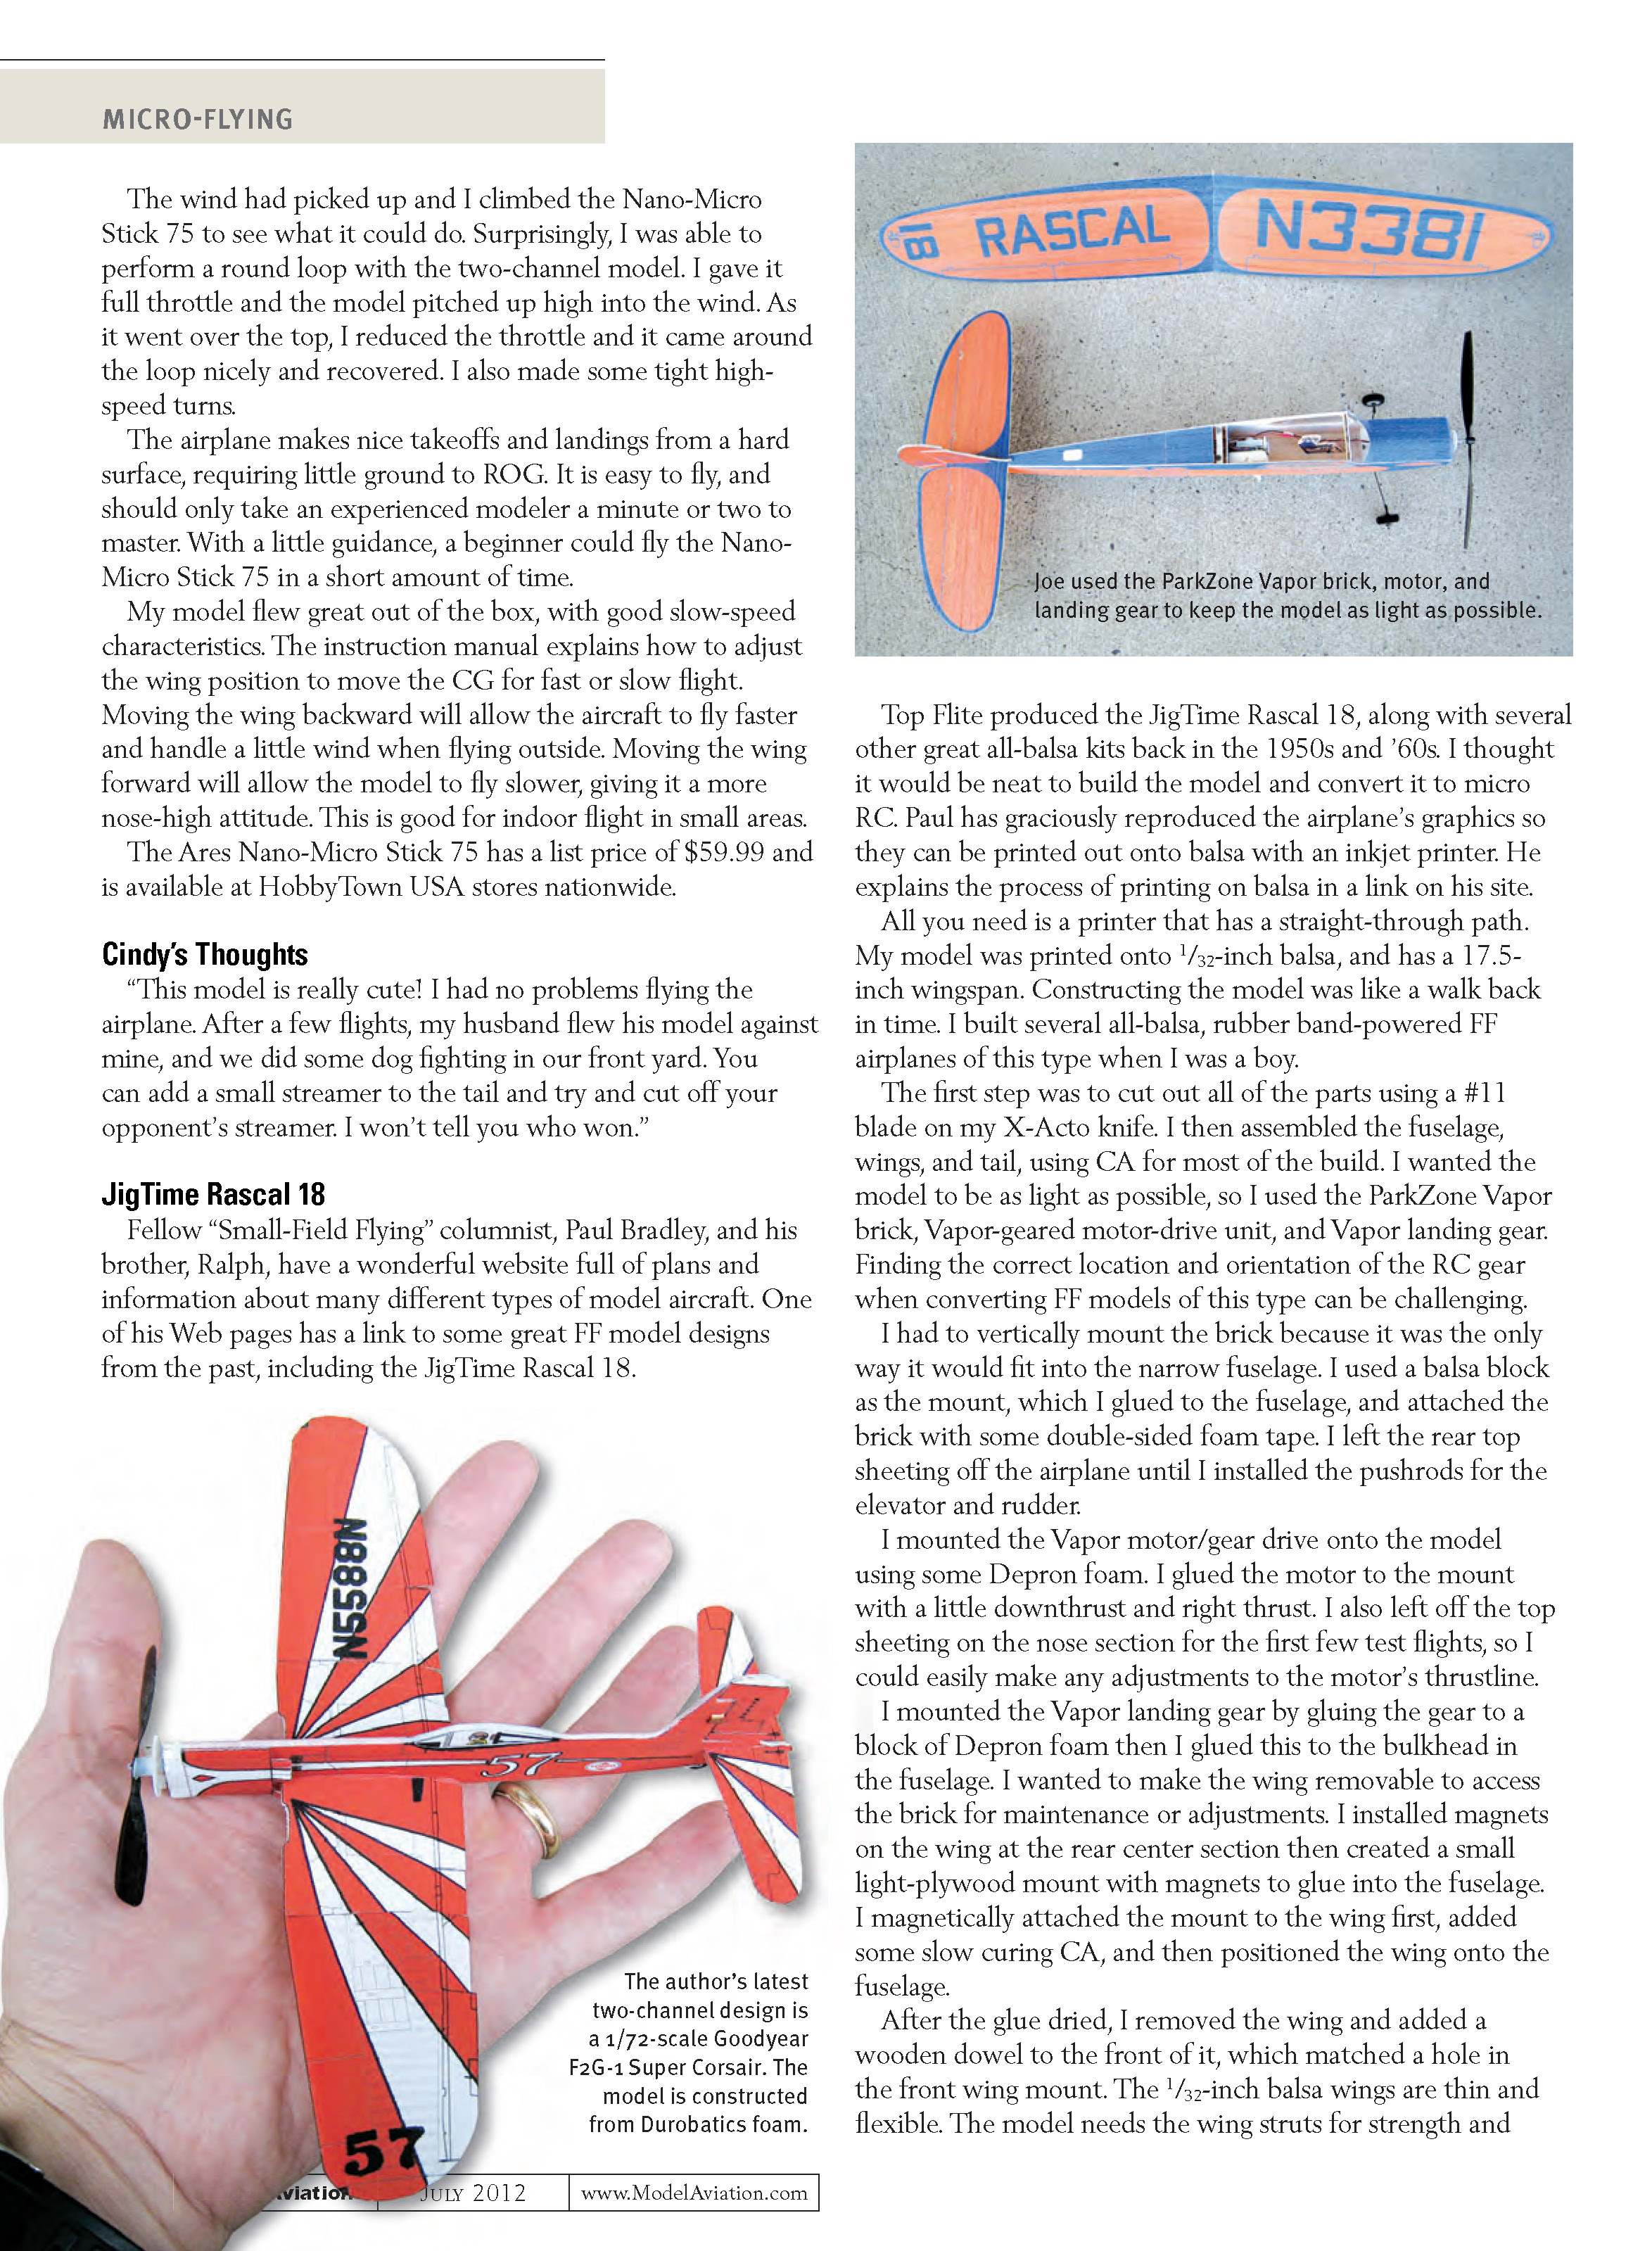
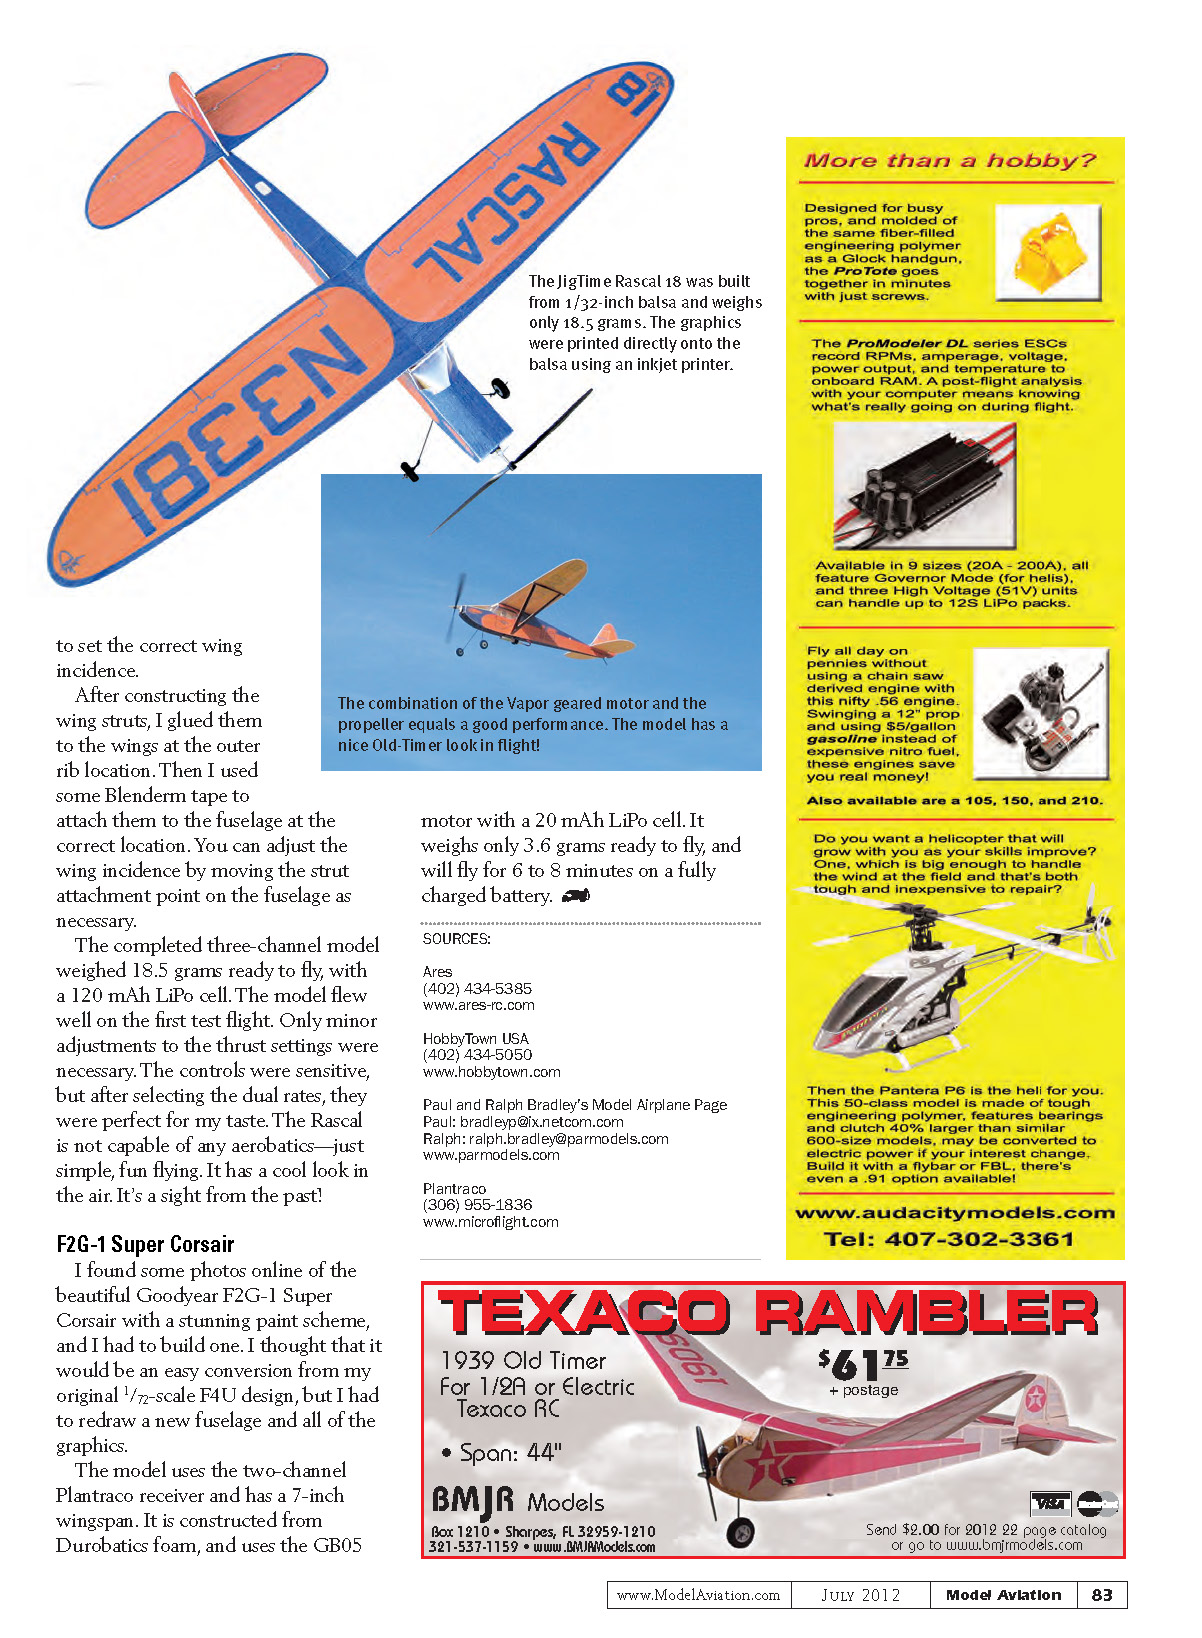
Top Flite produced the JigTime Rascal 18, along with several other great all-balsa kits back in the 1950s and ’60s. I thought it would be neat to build the model and convert it to micro RC. Paul has graciously reproduced the airplane’s graphics so they can be printed out onto balsa with an inkjet printer. He explains the process of printing on balsa in a link on his site.
All you need is a printer that has a straight-through path. My model was printed onto 1/32-inch balsa and has a 17.5-inch wingspan. Constructing the model was like a walk back in time. I built several all-balsa, rubber-band-powered FF airplanes of this type when I was a boy.
The first step was to cut out all of the parts using a #11 blade on my X-Acto knife. I then assembled the fuselage, wings, and tail, using CA for most of the build. I wanted the model to be as light as possible, so I used the ParkZone Vapor brick, Vapor-geared motor-drive unit, and Vapor landing gear. Finding the correct location and orientation of the RC gear when converting FF models of this type can be challenging.
Key construction and installation notes:
- I had to vertically mount the brick because it was the only way it would fit into the narrow fuselage. I used a balsa block as the mount, glued to the fuselage, and attached the brick with double-sided foam tape.
- I left the rear top sheeting off the airplane until I installed the pushrods for the elevator and rudder.
- I mounted the Vapor motor/gear drive onto the model using some Depron foam. I glued the motor to the mount with a little downthrust and right thrust and left the top sheeting off the nose for the first few test flights so the thrustline could be adjusted easily.
- I mounted the Vapor landing gear by gluing the gear to a block of Depron foam, then glued this to the bulkhead in the fuselage.
- I wanted the wing to be removable to access the brick for maintenance. I installed magnets on the wing at the rear center section, then created a small light-plywood mount with magnets to glue into the fuselage. I magnetically attached the mount to the wing first, added some slow-curing CA, and then positioned the wing onto the fuselage.
- After the glue dried, I removed the wing and added a wooden dowel to the front of it, which matched a hole in the front wing mount.
The 1/32-inch balsa wings are thin and flexible. The model needs the wing struts for strength and to set the correct wing incidence. After constructing the wing struts, I glued them to the wings at the outer rib location. Then I used some Blenderm tape to attach them to the fuselage at the correct location. You can adjust the wing incidence by moving the strut attachment point on the fuselage as necessary.
The completed three-channel model weighed 18.5 grams ready to fly, with a 120 mAh LiPo cell. The model flew well on the first test flight. Only minor adjustments to the thrust settings were necessary. The controls were sensitive, but after selecting the dual rates they were perfect for my taste. The Rascal is not capable of any aerobatics — just simple, fun flying. It has a cool look in the air. It’s a sight from the past!
Transcribed from original scans by AI. Minor OCR errors may remain.

