
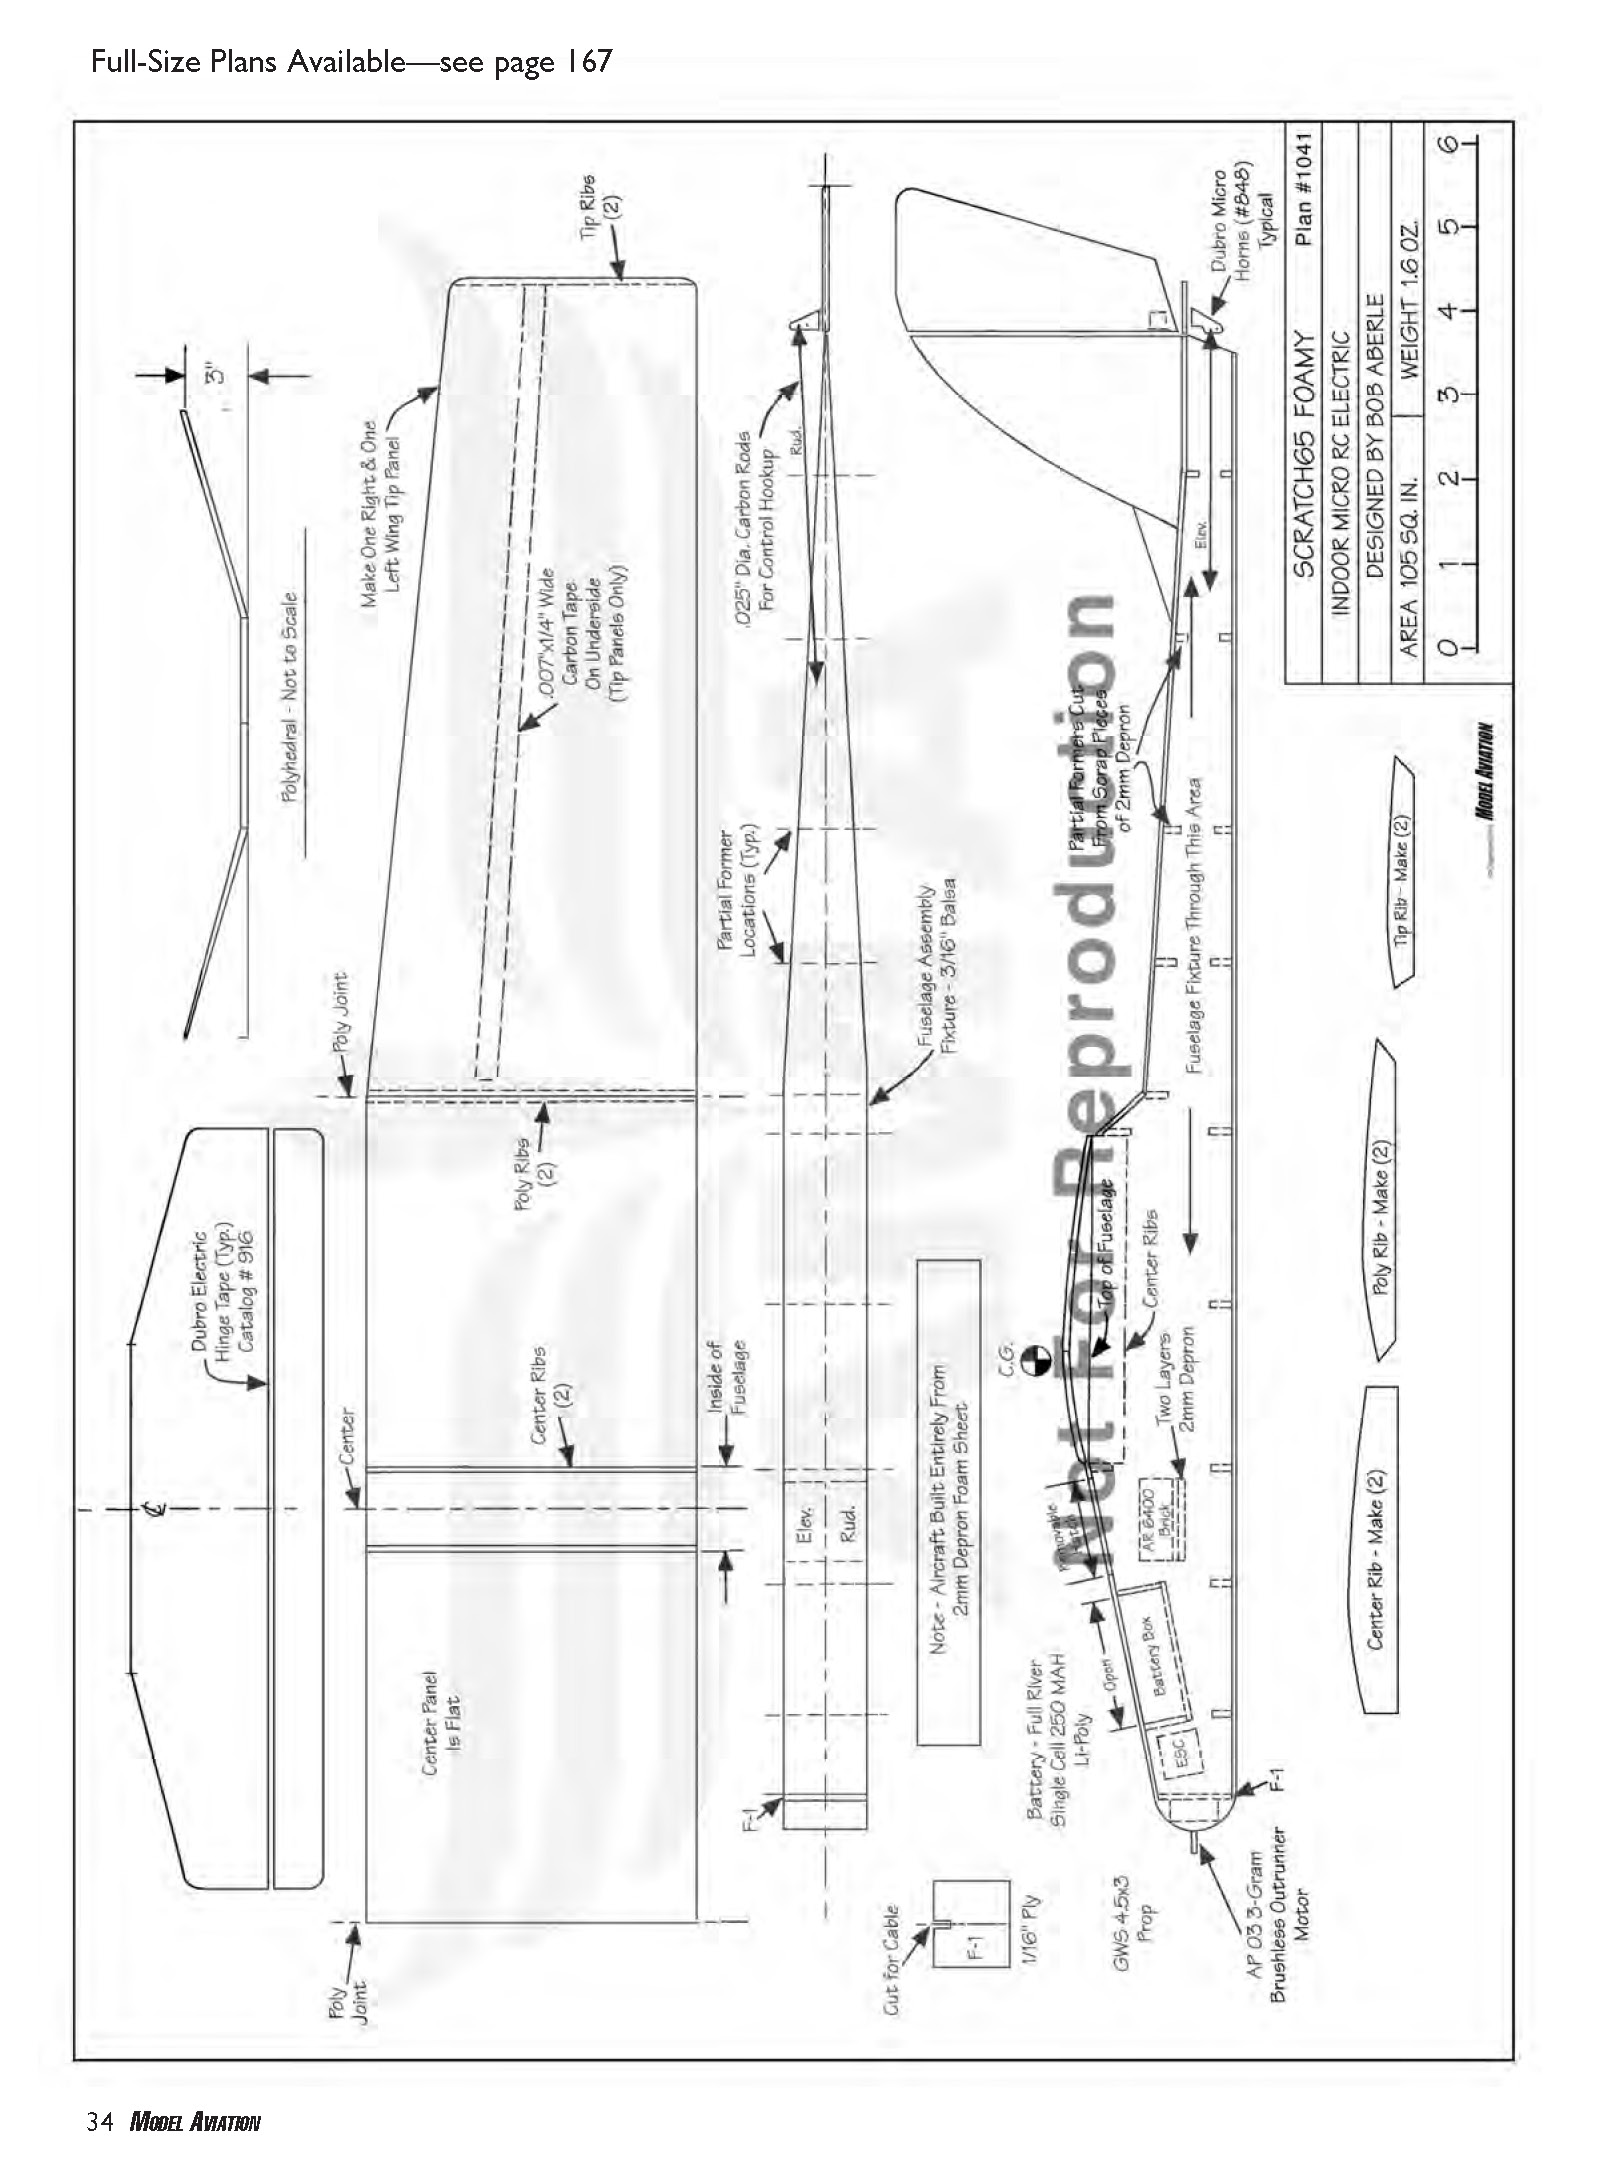

Scratch Foamy
by Bob Aberle
Overview
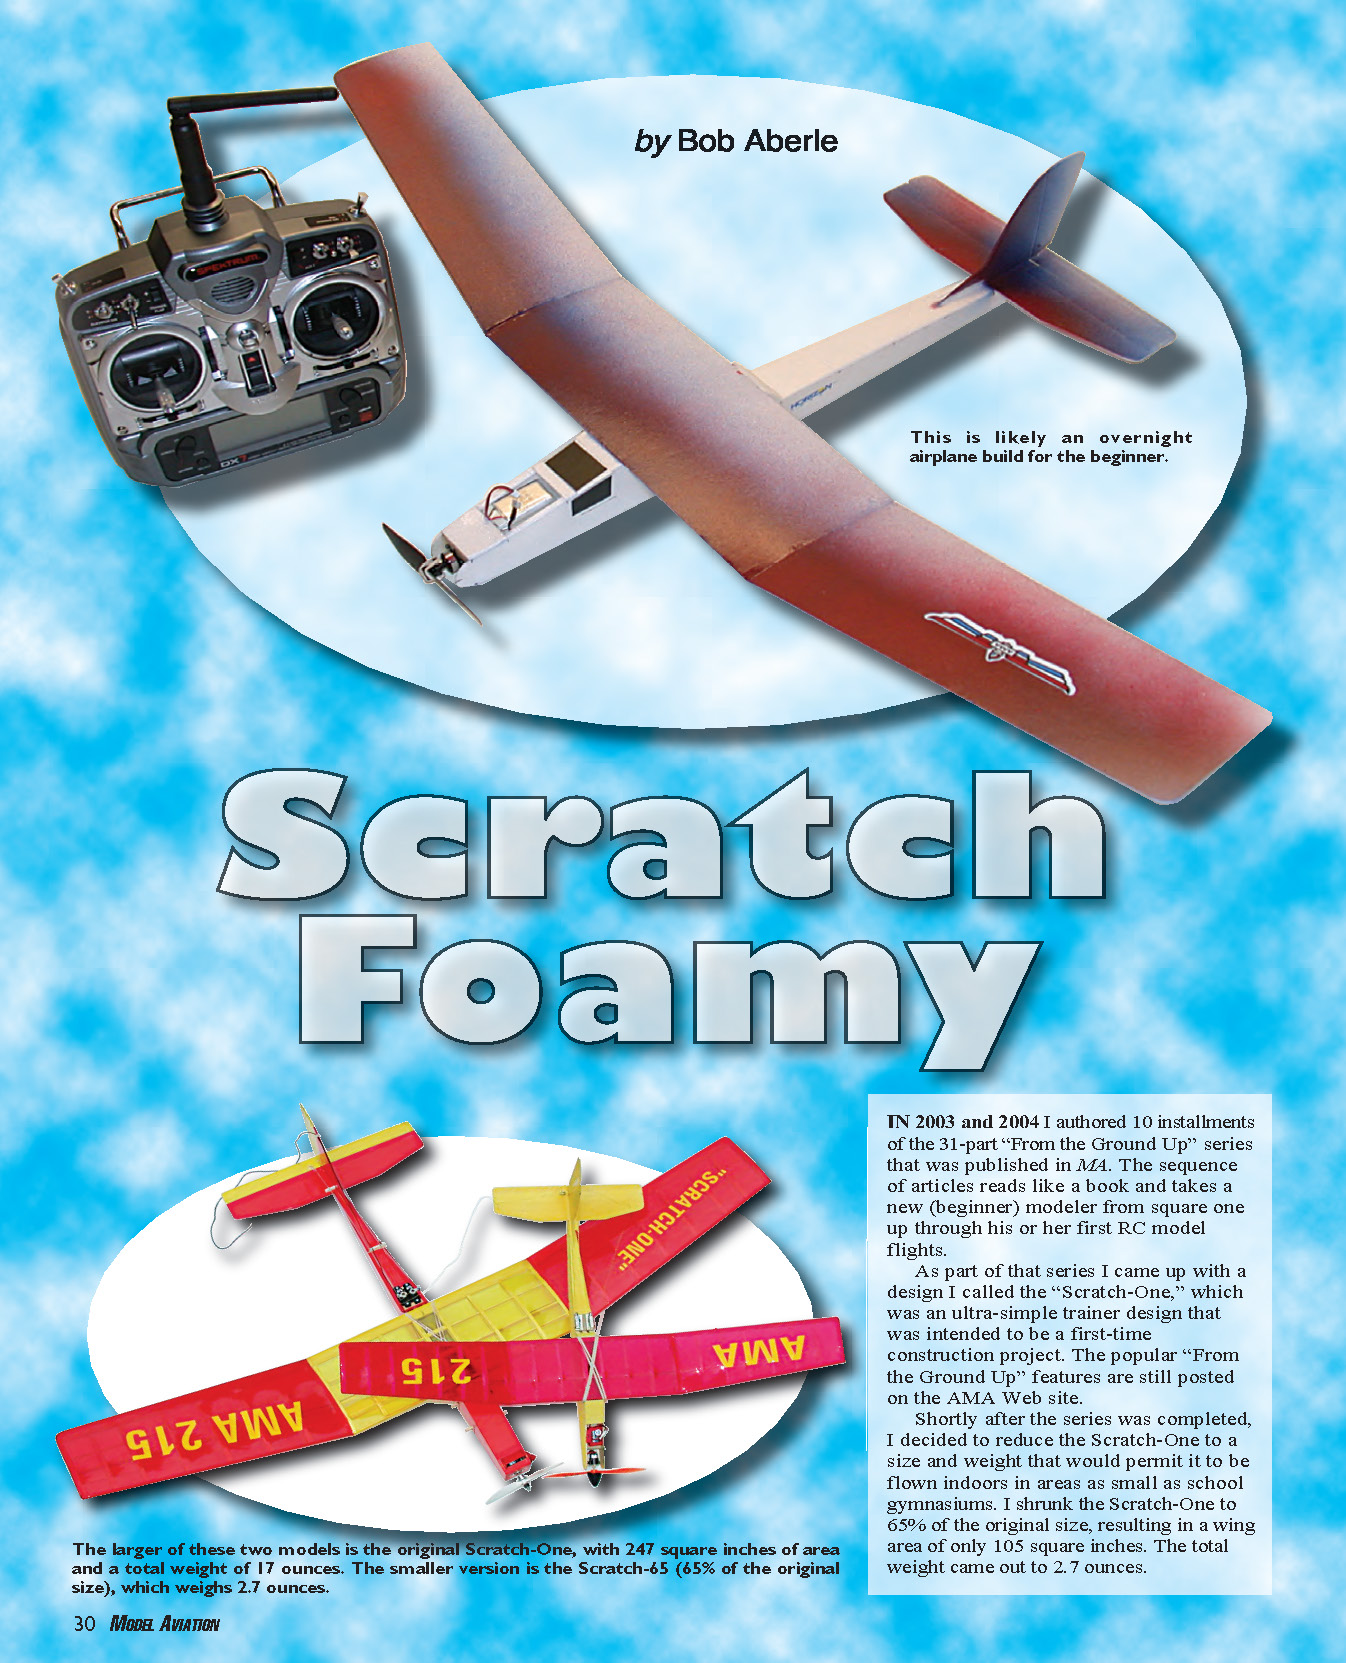
In 2003–2004 I wrote part of the "From the Ground Up" series for Model Aviation. One design from that series was the ultra-simple trainer "Scratch-One," which I later shrank to 65% size as the "Scratch-65" for indoor flying. With advances in micro RC hardware and materials, I revised the design again into an all-foam version I call the "Scratch Foamy."
This all-Depron version is buildable from a single 15 x 39 inch sheet of 2mm Depron (roughly $3) and uses a ParkZone AR6400 "brick" receiver/servo module plus a BSD Micro RC AP03 3-gram brushless motor and companion micro ESC.
Key characteristics / Specifications
- Type: RC sport park flyer (indoor/micro)
- Skill level: Beginner
- Wingspan: 29.5 in
- Wing area: 105 sq in
- Length: 20 in
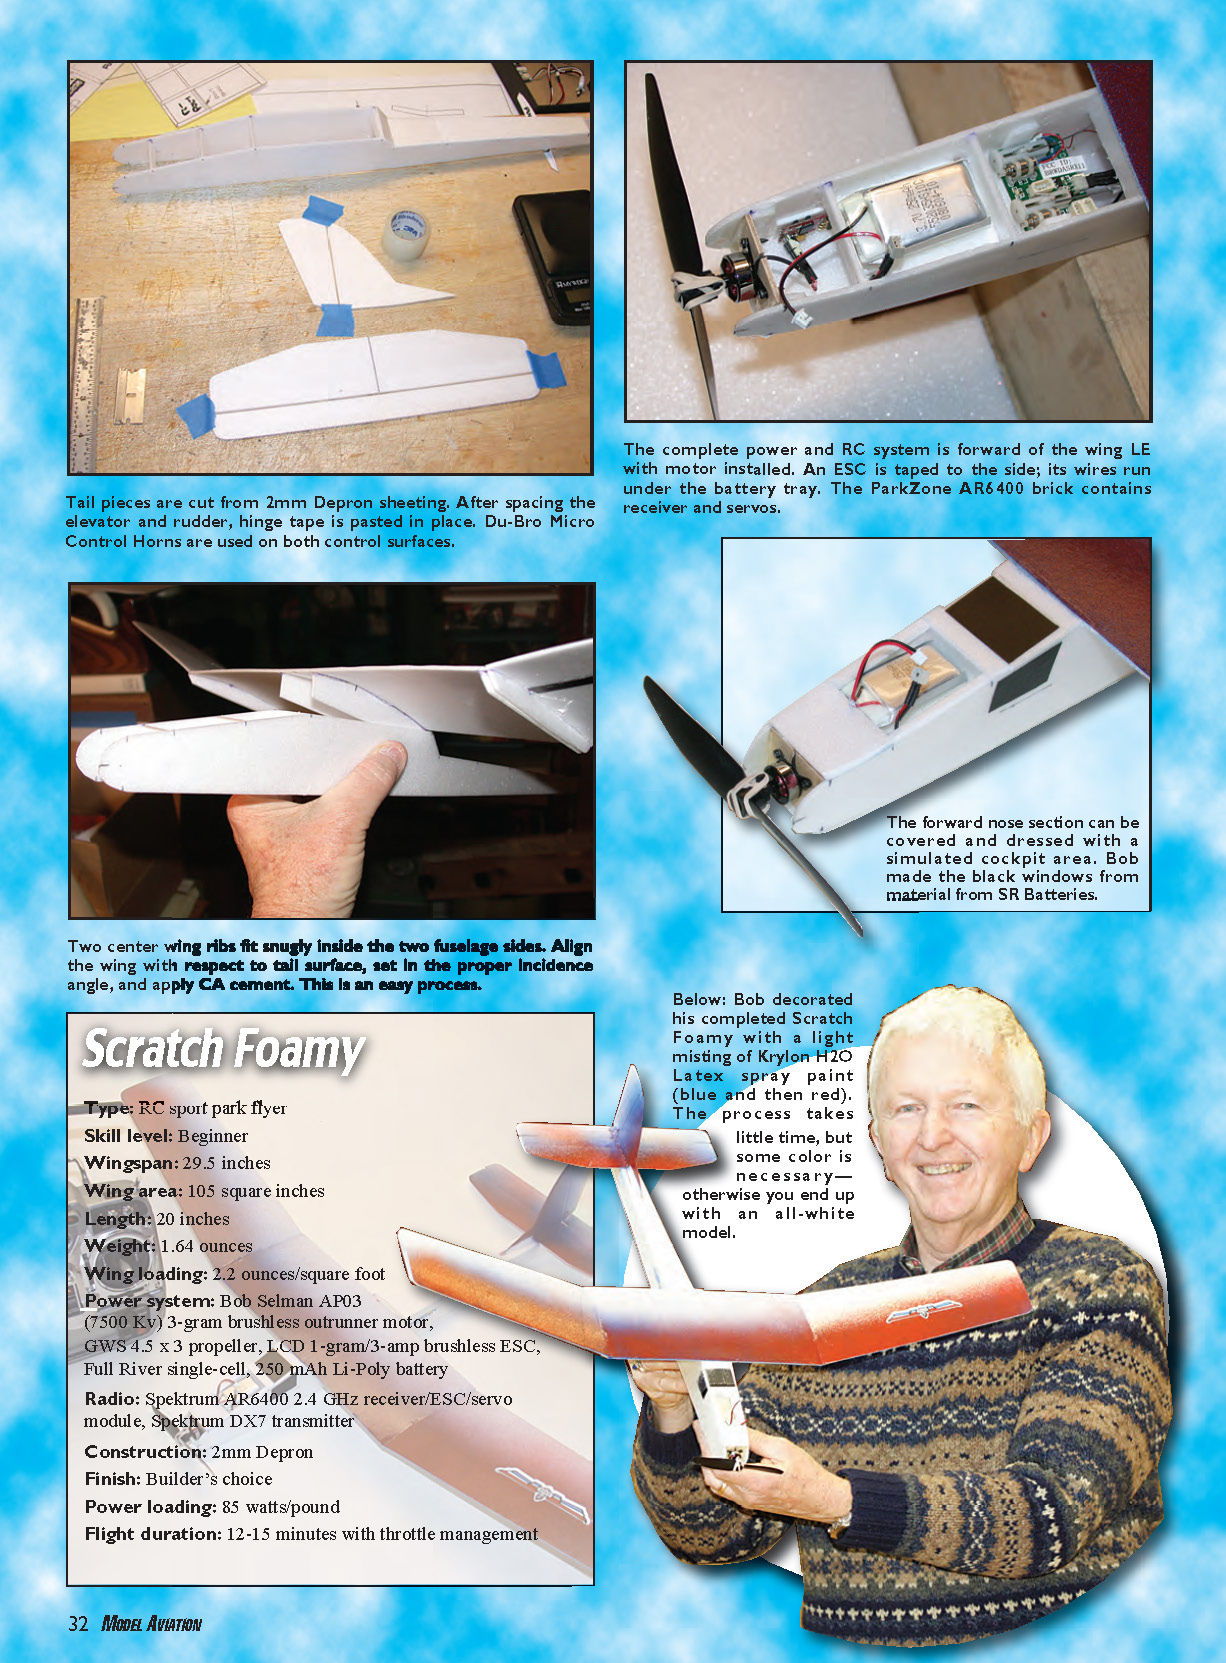
- Weight: 1.64 oz (finished)
- Wing loading: 2.2 oz/sq ft
- Power system:
- AP03 7500 Kv 3-gram brushless outrunner motor (Bob Selman/BSD Micro RC)
- GWS 4.5 x 3 prop
- LCD 1-gram / 3-amp brushless ESC
- Full River single-cell Li-Poly 250 mAh battery
- Radio: Spektrum AR6400 2.4 GHz receiver/ESC/servo module (removed from ParkZone Sukhoi RTF), Spektrum DX7 transmitter
- Construction: 2mm Depron foam sheeting
- Finish: Builder’s choice (I used Krylon H2O Latex misted color)
- Power loading: 85 watts/pound
- Typical flight duration: 12–15 minutes with throttle management
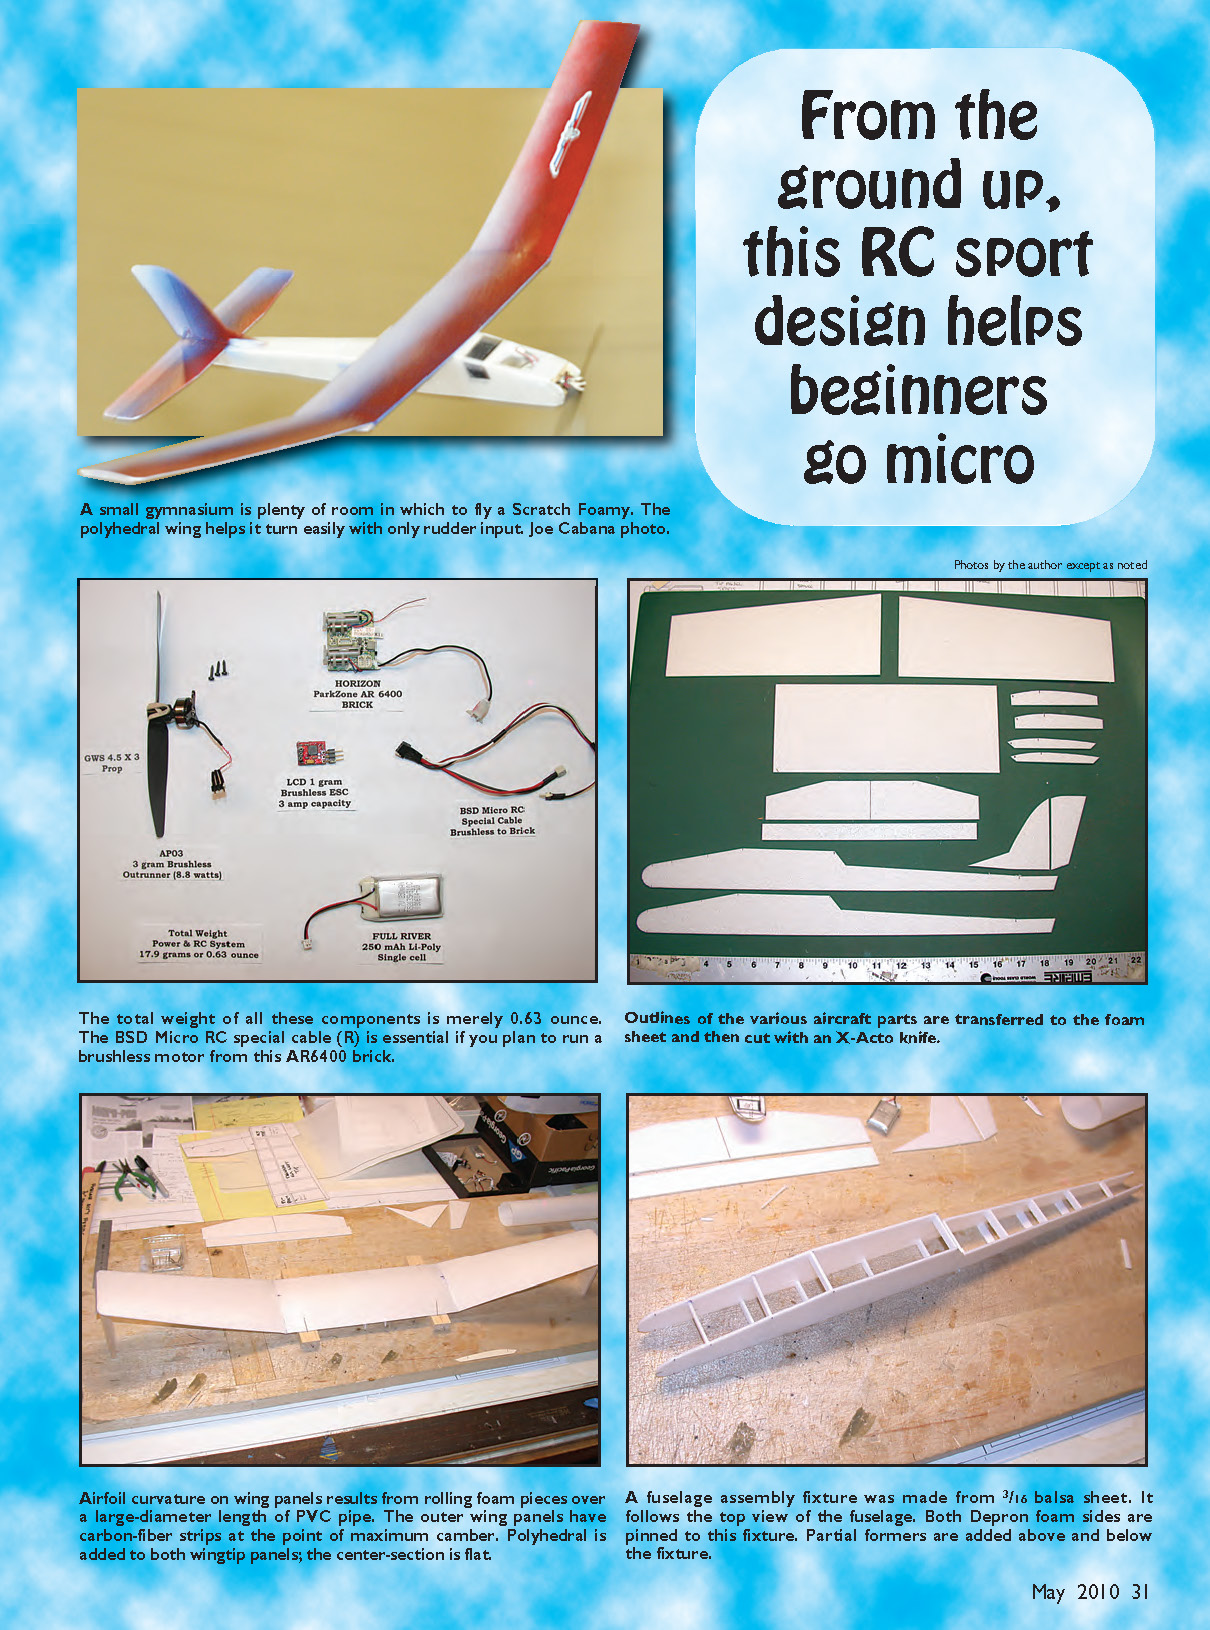
Note: The electronics pack (receiver/servos/ESC) is very light — total weight of these components is small (a few tenths of an ounce), which helps keep the finished aircraft under 2 ounces.
Background and performance comparison
- The original Scratch-65 (built from balsa/covering) weighed about 2.7 oz and used older brushed/geared motors and a two-cell Li-Poly (145 mAh). Power loading then was about 30 W/lb and flight was mostly at full throttle.
- The Scratch Foamy weighs about 1.64 oz, uses a modern 3-gram brushless motor and a single-cell 250 mAh Li-Poly, and delivers about 8.8 W input to the motor. Power loading is now about 85 W/lb, so the model flies at well under half throttle and achieves long flights (12–15 minutes).
- The brushless motor is more efficient and longer-lived than the brushed type. The 2.4 GHz DSM2 radio system also reduces antenna length and provides interference-resistant control.
CONSTRUCTION
I will highlight the important construction steps; a full plans article appeared in February 2005 MA for the Scratch-65, and this follows those practice lines adapted for Depron.
Tools & adhesives
- X-Acto knife (sharp blade)
- Foam-friendly medium-viscosity CA and accelerator
- Double-stick tape
- Heat-shrink tubing or thin-diameter aluminum tubing for rod ends
- Pinning board and pins
- 3–4 in diameter PVC pipe (for wing camber)
Materials
- 2mm Depron foam sheet (15 x 39 in)
- 3/16 in balsa for fuselage assembly fixture
- .007 in x 1/4 in carbon tape (under wingtip panels)
- .025 in diameter carbon rods for control linkages
- .015 in wire for Z-bend rod ends
- Du-Bro Micro Control Horns (item 848)
- Du-Bro Electric Hinge Tape (item 916) or Blenderm
- AP03 brushless motor, LCD micro ESC, Full River 250 mAh Li-Poly
- ParkZone AR6400 brick (receiver + two built-in servos + brushed ESC that can be reprogrammed for brushless)
Patterns and cutting
- Copy plan portions to manila folders and cut templates.
- Trace templates onto Depron and cut parts with an X-Acto knife.
- Cutting Depron is quick; keep blades sharp and make multiple light passes.
Wing
- Create airfoil curvature by slowly rolling each wing panel over a large-diameter PVC pipe (3–4 in) for a few minutes. Do not apply heat.
- Use six ribs total: two center ribs (attach wing to fuselage), two polyhedral joint ribs, and two tip ribs.
- No internal spars are required; reinforce underside of outer wing panels with .007 in x 1/4 in carbon tape for extra stiffness.
- Outer panels have polyhedral; the center panel is flat.
Fuselage
- Cut a fuselage assembly fixture from 3/16 in balsa to the top-view outline.
- Pin Depron fuselage sides to the fixture and add partial formers above and below until aligned. Remove pins and withdraw the fixture to leave an aligned fuselage.
- Cut vertical and horizontal tailpieces from 2mm Depron. Space elevator and rudder, then install hinge tape.
- Install Du-Bro Micro Control Horns (item 848) on rudder and elevator.
- Control rods: use .025 in carbon rods with short lengths of .015 in wire formed into Z-bends at each end. Attach wire ends to carbon rods using heat-shrink tubing or thin aluminum tubing crimped with pliers. This allows initial neutral alignment before final crimp.
Radio and power installation
- Mount the ParkZone AR6400 brick to a double layer of 2mm Depron using double-stick tape.
- Mount the LCD 1-gram / 3-amp brushless ESC to the fuselage side, just behind the plywood firewall, also with double-stick tape.
- When installing the AP03 motor on the firewall, drill a clearance hole for the motor shaft if it protrudes out the rear of the power plant.
- The AR6400 brick was designed for brushed motors; to run a brushless motor you need:
- a special cable available from BSD Micro RC (about $13), and
- to reprogram the AR6400 receiver for brushless operation (see ParkZone User Guide). The reprogramming is simple and quick.
- If you remove the AR6400 brick from a ParkZone Sukhoi RTF, bind the brick to any Spektrum DSM2-type transmitter (e.g., DX7).
Control mapping note
- The AR6400 brick's rudder servo initially responds to the left transmitter stick (brick configured for four-channel aircraft where aileron is on the right stick). To operate rudder from the right stick, use your transmitter's aileron/rudder mix set to 100% so rudder follows the right stick.
Final assembly
- Confirm controls and motor operation before final assembly.
- Install the wing: the two center ribs are spaced to fit just inside the fuselage sides and press against both sides. Align the wing relative to the tail surfaces and apply CA cement to secure.
Finishing
- I misted two colors of Krylon H2O Latex spray paint over the white foam for decoration. I applied blue to the wing and stabilizer leading edges, then a red mist. This quick paint job added very little weight.
Flying
- Control throws used: rudder ±3/8 in, elevator ±3/16 in (set with transmitter EPA).
- Balance point: 1 1/4 in back from the wing leading edge (as shown on the plans). My example balanced perfectly with no added ballast.
- Flying environment: I flew in a double-size high school gymnasium with approx. 20 ft ceilings. Most flying is at half throttle; tight turns with no stall tendencies.
- The model is primarily intended for indoor flying but can be flown outdoors in extremely calm conditions (early morning/evening). It also qualifies as a park flyer in calm weather.
- The AP03 3-gram brushless outrunner (~9 W input) is capable of flying models up to about 2–2.5 oz, making it suitable for many small rubber-scale kits and micro projects.
Notes
- The ParkZone AR6400 brick includes two built-in servo outputs and a brushed-motor ESC (reprogrammable for brushless). For brushed-motor setups (as supplied in some RTFs) you could use the simpler three-channel ParkZone brick used in Ember/Vapor models. For brushless use, you must fit the special cable and reprogram the unit.
- Brushless systems are more efficient and longer-lived than brushed/geared motors, and modern Li-Poly cells with higher capacity provide longer flight times with less weight penalty.
Contact
Bob Aberle [email protected]
Sources
- "From the Ground Up" series: www.modelaircraft.org/mag/FTGU/titlespagetfgu.htm
- AP03-7500 Kv brushless 3-gram outrunner motor, LCD 1-gram/3-amp brushless ESC, Full River 250 mAh Li-Poly cell, special interconnecting cable, carbon control rods:
- Bob Selman Designs (BSD Micro RC), (417) 358-9521, www.bsdmicrorc.com
- Carbon wing-reinforcing tape:
- Aerospace Composite Products, (800) 811-2009, www.acp-composites.com
- Foam-safe CA, accelerator, GWS props:
- BP Hobbies, (732) 287-3933, www.bphobbies.com
- Du-Bro products (micro horns, hinge tape):
- Du-Bro, (800) 848-9411, www.dubro.com
- Spektrum DX7 transmitter, ParkZone AR6400:
- Horizon Hobby, (800) 338-4639, www.horizonhobby.com
- Krylon paints: www.krylon.com
- 2mm Depron foam:
- RCfoam, (404) 363-6680, www.rcfoam.com
- RC Micro World online magazine: www.cloud9rc.com
- Simulated black window material:
- SR Batteries, (631) 286-0079, www.srbatteries.com
Transcribed from original scans by AI. Minor OCR errors may remain.

