
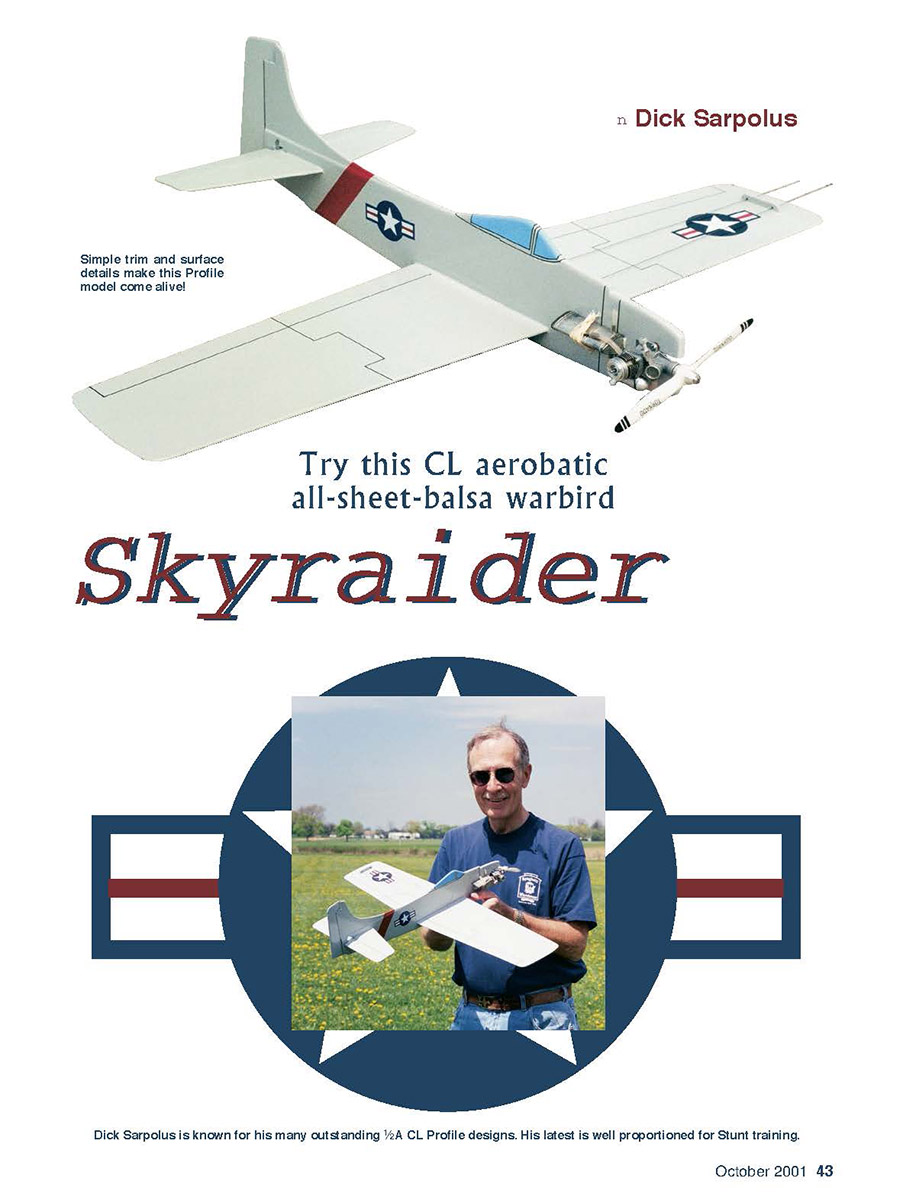
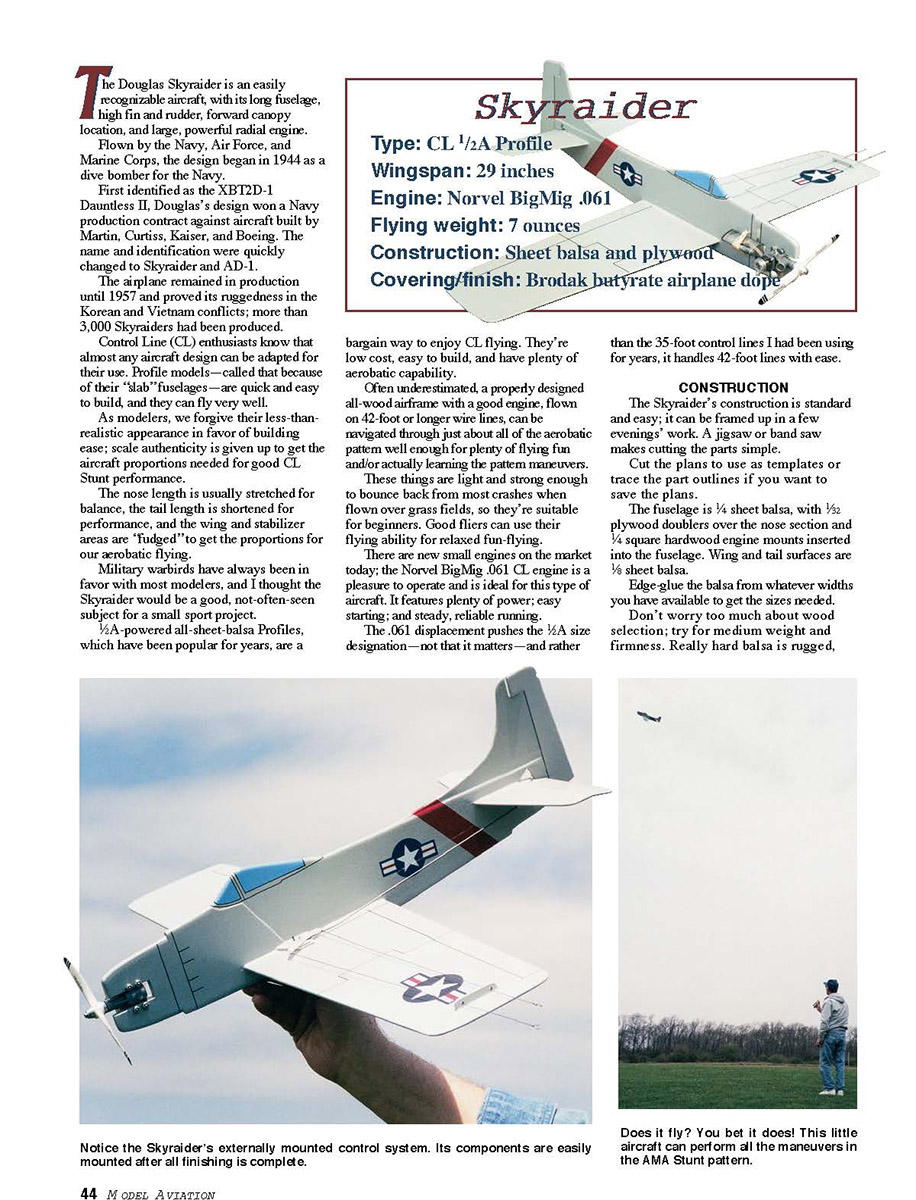
Skyraider
Try this CL aerobatic all-sheet-balsa warbird
by Dick Sarpolus
The Douglas Skyraider is an easily recognizable aircraft, with its long fuselage, high fin and rudder, forward canopy location, and large, powerful radial engine.
Flown by the Navy, Air Force, and Marine Corps, the design began in 1944 as a dive bomber for the Navy. First identified as the XBT2D-1 Dauntless II, Douglas's design won a Navy production contract against aircraft built by Martin, Curtiss, Kaiser, and Boeing. The name and identification were quickly changed to Skyraider and AD-1. The airplane remained in production until 1957 and proved its ruggedness in the Korean and Vietnam conflicts; more than 3,000 Skyraiders had been produced.
Control Line (CL) enthusiasts know that almost any aircraft design can be adapted for their use. Profile models—called that because of their "slab" fuselages—are quick and easy to build, and they can fly very well. As modelers, we forgive their less-than-realistic appearance in favor of building ease; scale authenticity is given up to get the aircraft proportions needed for good CL Stunt performance.
The nose length is usually stretched for balance, the tail length shortened for performance, and the wing and stabilizer areas "fudged" to get the proportions for our aerobatic flying. Military warbirds have always been in favor with most modelers, and the Skyraider makes a good, not-often-seen subject for a small sport project.
1/2A-powered all-sheet-balsa Profiles, which have been popular for years, are a bargain way to enjoy CL flying. They're low cost, easy to build, and have plenty of aerobatic capability. Often underestimated, a properly designed all-wood airframe with a good engine, flown on 42-foot or longer wire lines, can be navigated through just about all of the aerobatic pattern well enough for plenty of flying fun and/or actually learning the pattern maneuvers.
These models are light and strong enough to bounce back from most crashes when flown over grass fields; they're suitable for beginners. Good fliers can use their flying ability for relaxed fun-flying.
There are new small engines on the market today; the Norvel BigMig .061 CL engine is a pleasure to operate and is ideal for this type of aircraft. It features plenty of power, easy starting, and steady, reliable running. The .061 displacement pushes the 1/2A size designation—not that it matters—and rather than the 35-foot control lines I had been using for years, it handles 42-foot lines with ease.
Construction
The Skyraider's construction is standard and easy; it can be framed up in a few evenings' work. A jigsaw or band saw makes cutting the parts simple. Cut the plans to use as templates or trace the part outlines if you want to save the plans.
Materials and general tips
- Fuselage: 1/4 sheet balsa, with 1/32 plywood doublers over the nose section and 1/4 square hardwood engine mounts inserted into the fuselage.
- Wing and tail surfaces: 1/8 sheet balsa.
- Servo mounts: 1/32 plywood; use light ply for the nose doubler.
- Spar: 1/8 x 3/8 hardwood for wing join.
- Pushrods: 1/16 piano wire with brass tube guides.
- Leadouts: .025 wire.
- Bellcrank: molded nylon two-inch bellcrank.
- Control horn: bolt-on small nylon control horn.
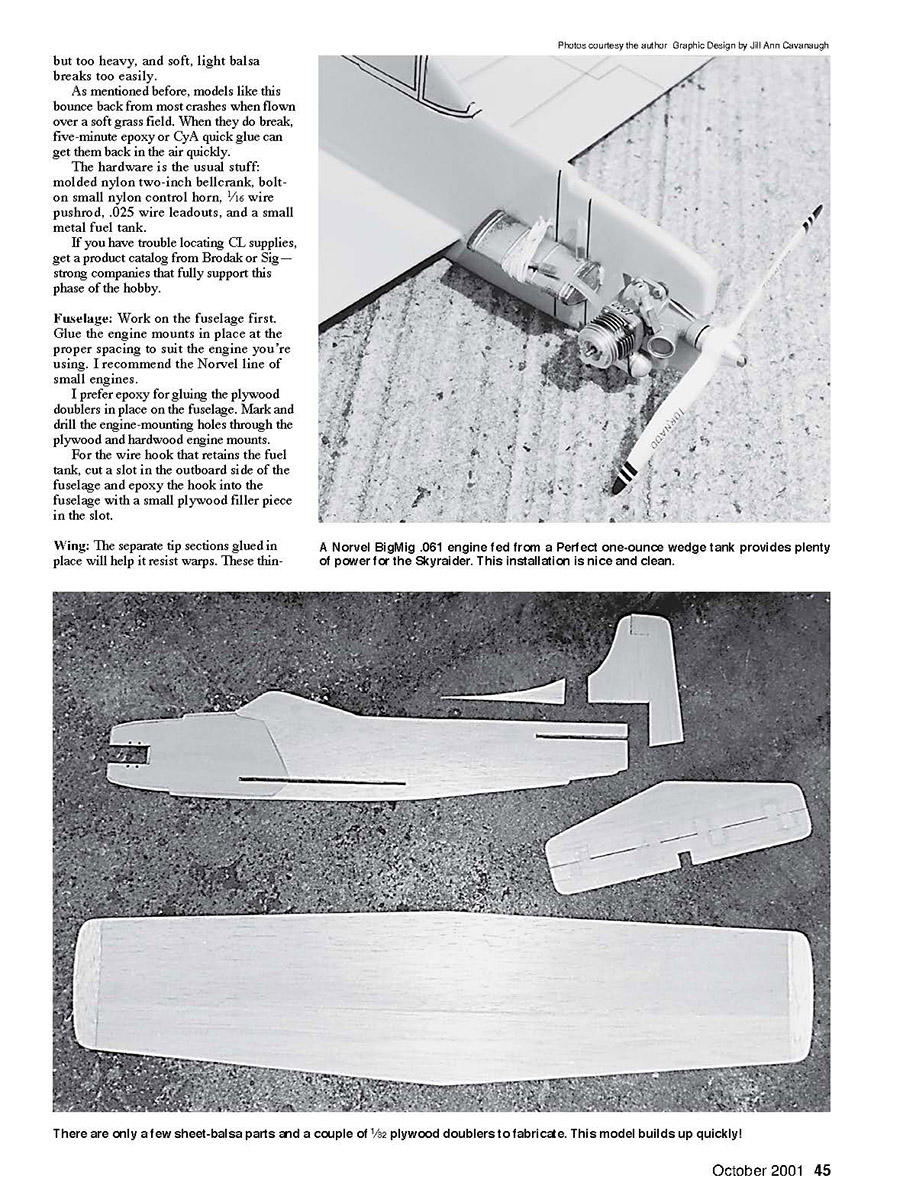
- Engine: small metal fuel tank and appropriate mounts; the Norvel line is recommended.
Edge-glue balsa from whatever widths you have available to get needed sizes. Don't worry too much about wood selection; try for medium weight and firmness. Really hard balsa is rugged but tends to be brittle and harder to sand. Soft balsa is easy to sand but may dent more easily. Choose stock that's fair in grain and reasonably straight.
When crashes do occur, five-minute epoxy or CyA quick glue can get the model back in the air quickly.
If you have trouble locating CL supplies, get a product catalog from Brodak or Sig—strong companies that fully support this phase of the hobby.
Fuselage
- Work on the fuselage first. Glue the engine mounts in place at the proper spacing to suit the engine you are using.
- Epoxy the plywood doublers in place on the fuselage. Mark and drill the engine-mounting holes through the plywood and hardwood engine mounts.
- For the wire hook that retains the fuel tank, cut a slot in the outboard side of the fuselage and epoxy the hook into the fuselage with a small plywood filler piece in the slot.
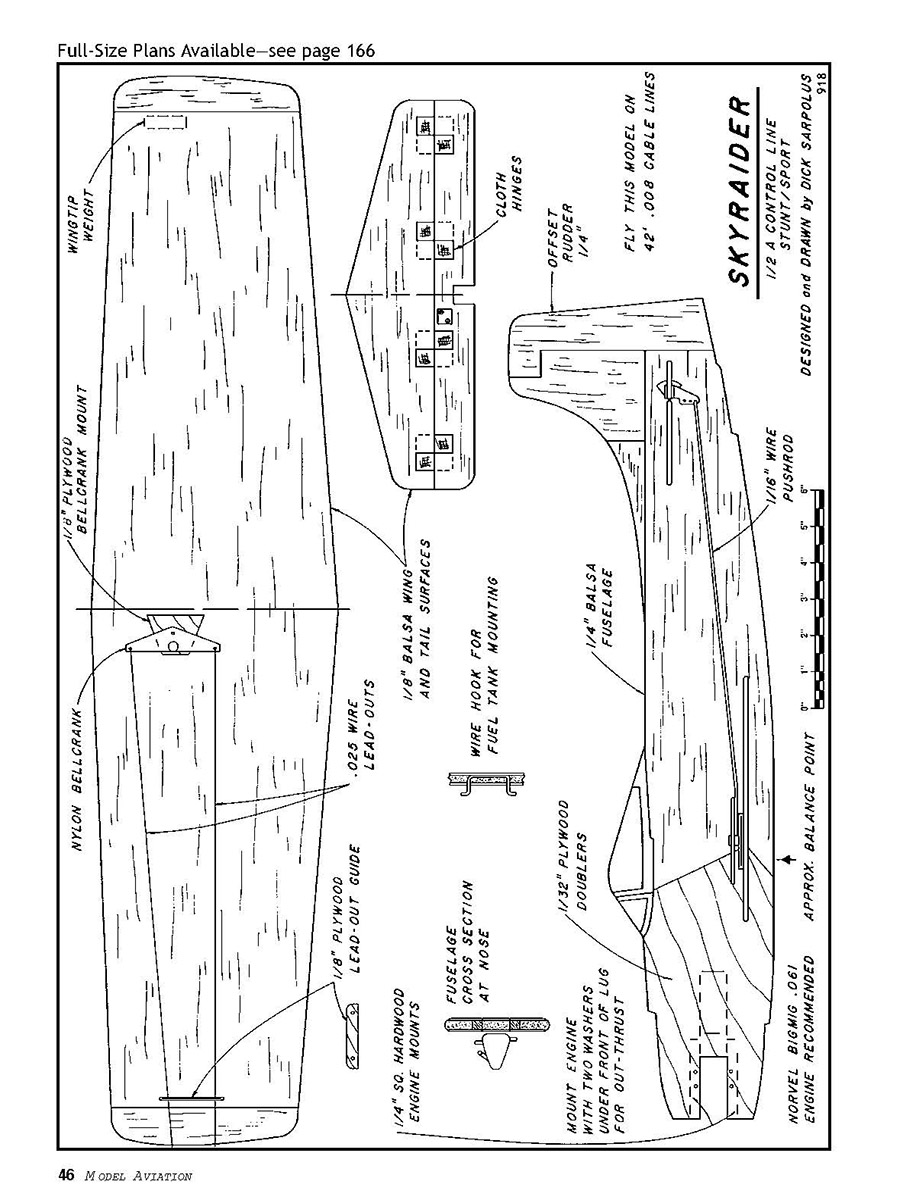
- Install 1/4 square hardwood engine mounts into the fuselage as shown on the plan.
Wing
- The wing is built in two panels; join them with a 1/8 x 3/8 hardwood spar and cement.
- The ailerons are sheet balsa with plywood hinges. Make sure the hinge line is located aft enough to provide positive travel and avoid binding.
- The separate tip sections glued in place will help the wing resist warps.
Tail
- Tail surfaces are cut from 1/8 sheet; sand to airfoil shape as shown on the plan.
- Install the elevator and rudder with CA hinges or pinned hinges.
Hardware and control system
- Pushrods: 1/16 piano wire with brass tube guides.
- Leadouts: .025 wire.
- Bellcrank mount: add the plywood bellcrank mount and mount the nylon bellcrank with a small screw.
- Control horn: bolt the nylon control horn to the elevator and link it to the bellcrank with a 1/16 wire pushrod. The pushrod length should allow the elevator and bellcrank to be lined up in neutral for equal elevator movement in both directions.
- Add a keel-out guide and outboard trip-weight as required.
Final assembly
- Slide the wing through the fuselage slot and align it at right angles to the fuselage. Use pins to hold the wing in place, tack it with CyA glue, then use epoxy for a strong joint.
- Glue the tail surfaces to the fuselage, aligning them with the wing. Check from the side that the engine thrustline, incidence, and stabilizer are parallel.
- Form small fillets at the fuselage and surface joints for strength and appearance, using epoxy mixed with micro balloons.
- With everything checked out, remove the engine, bellcrank, and control horn to be reinstalled later with the leadouts and fuel tank after painting.
Finish
I still use traditional butyrate airplane dope to finish all-balsa projects such as this; it's been working for me for roughly 50 years. Don't try for a perfect finish with all signs of the wood grain hidden; it would take too much paint and add too much weight. Use a transparent paint to get a reasonable finish and protect the wood from spilled fuel and exhaust oil.
Finish steps:
- After final-sanding the bare balsa, apply one coat of sanding sealer and sand it well.
- Add five or six coats of clear dope, sanding between coats. This seals the wood enough to accept two or three sprayed-on coats of color.
- Spray the airplane with the base color (author used gray dope), mask canopy areas and paint them a contrasting color (author used light blue), then mask and paint accent stripes (author painted a red stripe around the rear fuselage).
- Add panel lines with a drafting pen for scale effect, then spray a few coats of clear dope over the whole airplane to protect the lines and add gloss.
- Apply insignia with decals or hand-painted markings.
Preflight
- Add the control-system hardware, engine, and fuel tank, and check for proper balance.
- Use a washer or two under the front of each engine-mounting lug for several degrees of outthrust to assist in keeping the lines tight while flying.
- If nose or tail weight is needed for balance, drill a 1/16-inch hole in the fuselage and glue in a length of heavy solder or a hex steel nail.
- A tail-heavy model will be too sensitive to the controls for smooth flying; add weight as needed to obtain good handling.
- With everything reinstalled, balance the model at the recommended center of gravity. A properly balanced model will fly true and perform all Stunt maneuvers with authority.
Flight
- Adjust the engine before launch, with the airplane held pointing up at an angle.
- For hand launch: have the launcher keep the lines tight and point the airplane slightly toward the outside of the flying circle; take a few steps forward and release the airplane in a level position with a forward arm motion.
- Hand-launch the Skyraider into wind and trim for straight and level flight.
- The model will perform loops, rolls, and tumbles; with practice you can fly a full AMA Stunt pattern.
- The Skyraider is stable and responds well to throttle and elevator changes. Practice and adjust the throws for precise control.
- Fly this model for fun; try every maneuver you can think of, relax, and enjoy the "direct-connection" way to fly.
The Skyraider is an enjoyable CL Stunt model that combines good looks with solid flying characteristics. Its simple construction and forgiving flight behavior make it ideal for sport fliers and those wanting to transition to Stunt flying.
— Ron W.
There is no additional article text on this page — it contains only the full-size plan drawing and labels for the "Skyraider" model.
Transcribed from original scans by AI. Minor OCR errors may remain.

