
Stevens AeroModel Buzz 400
Jerry Smith <REDACTED>
The Buzzard Bombshell, a FF gas model, was designed by Joe Konefes in 1940 and published in Air Trails that same year. It was later kitted by Maicraft Inc.
Today the Buzzard Bombshell remains a classic among the airplanes of yesteryear and during its time was well rooted in championships nationwide.
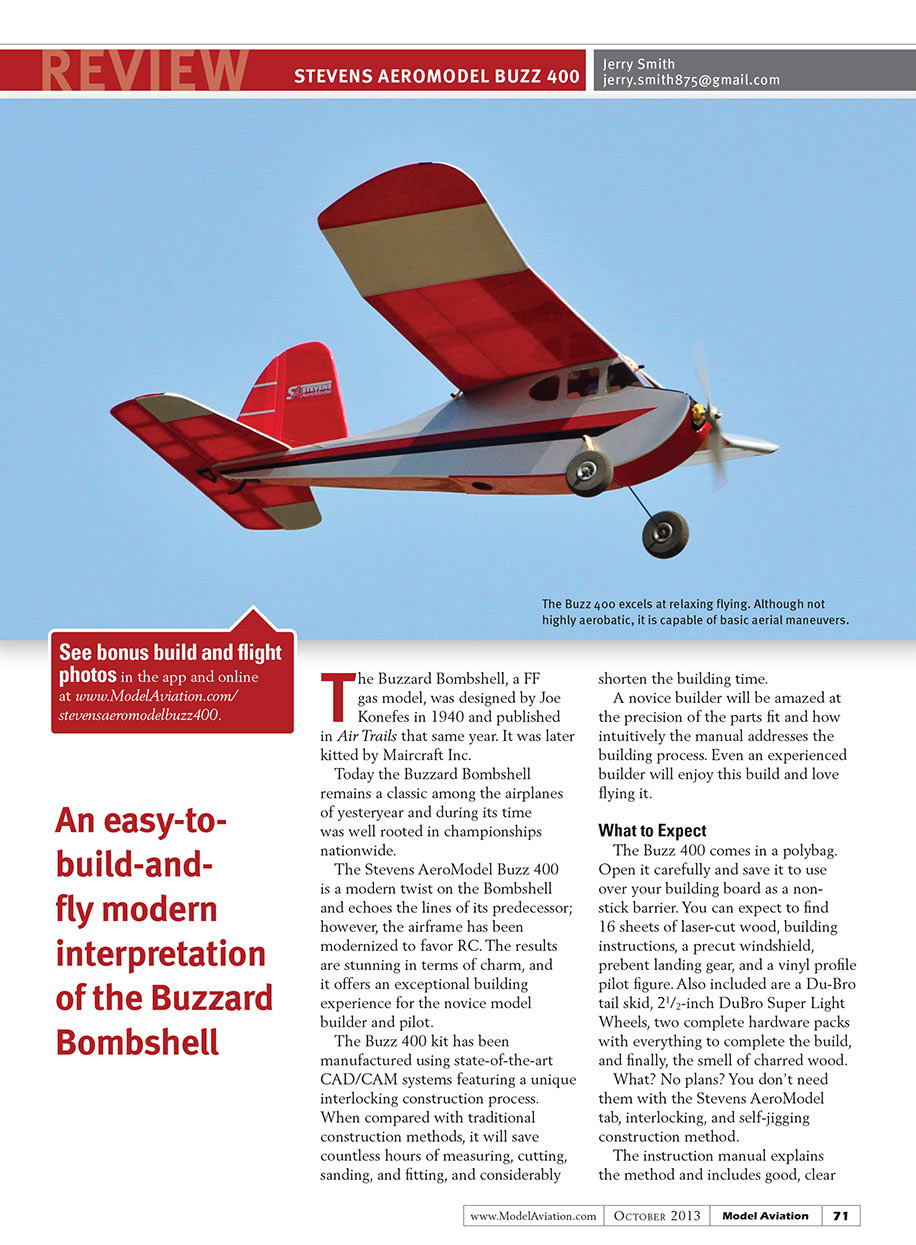
The Stevens AeroModel Buzz 400 is a modern twist on the Bombshell and echoes the lines of its predecessor; however, the airframe has been modernized to favor RC. The results are stunning in terms of charm, and it offers an exceptional building experience for the novice model builder and pilot.
The Buzz 400 kit has been manufactured using state-of-the-art CAD/CAM systems featuring a unique interlocking construction process. When compared with traditional construction methods, it will save countless hours of measuring, cutting, sanding, and fitting, and considerably shorten the building time.
A novice builder will be amazed at the precision of the parts fit and how intuitively the manual addresses the building process. Even an experienced builder will enjoy this build and love flying it.
What to Expect
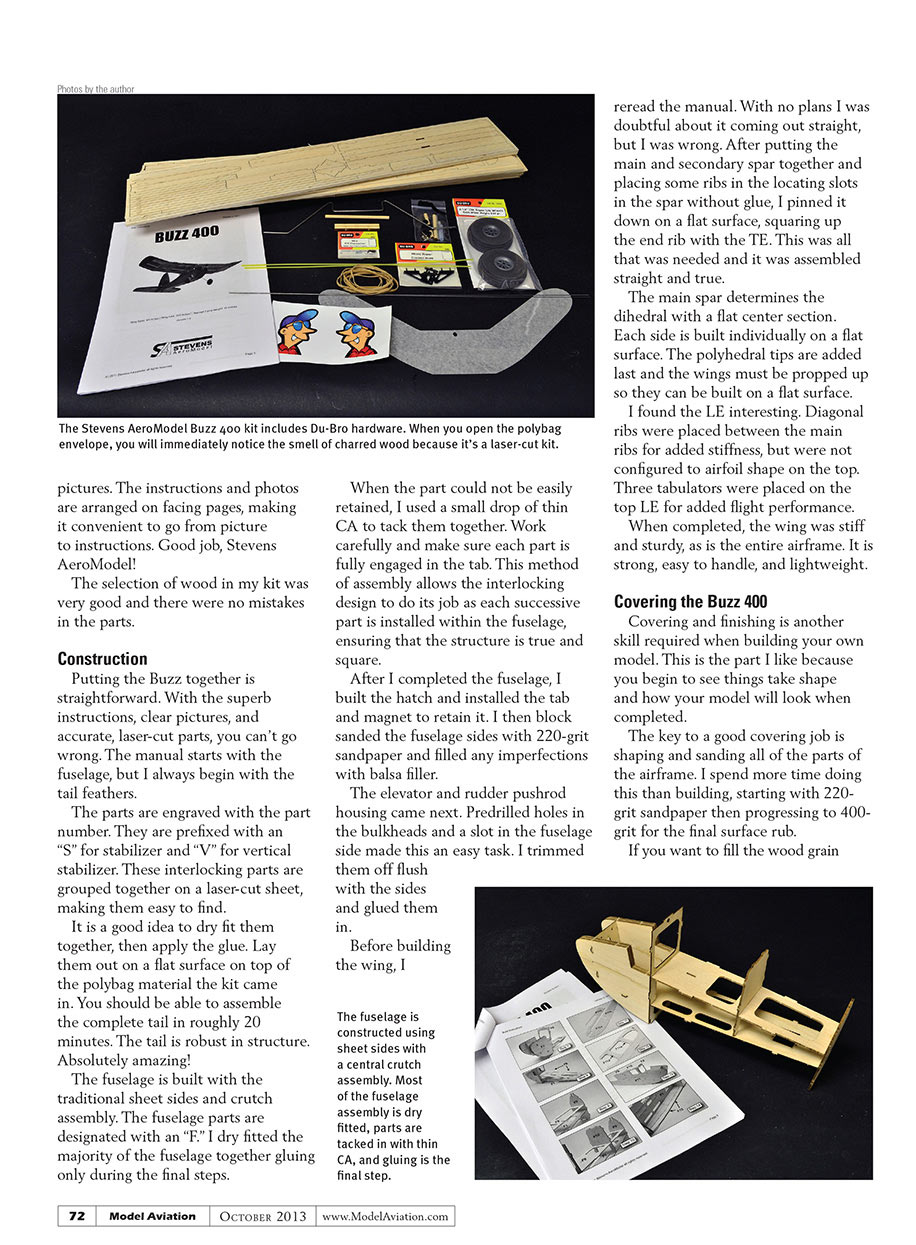
The Buzz 400 comes in a polybag. Open it carefully and save it to use over your building board as a non-stick barrier. You can expect to find 16 sheets of laser-cut wood, building instructions, a precut windshield, pre-bent landing gear, and a vinyl profile pilot figure. Also included are a Du-Bro tail skid, 2-1/2-inch DuBro Super Light Wheels, two complete hardware packs with everything to complete the build, and finally, the smell of charred wood.
What? No plans? You don't need them with the Stevens AeroModel tab, interlocking, and self-jigging construction method.
The instruction manual explains the method and includes good, clear pictures. The instructions and photos are arranged on facing pages, making it convenient to go from picture to instructions. Good job, Stevens AeroModel!
The selection of wood in my kit was very good and there were no mistakes in the parts.
Construction
Putting the Buzz together is straightforward. With the superb instructions, clear pictures, and accurate, laser-cut parts, you can't go wrong. The manual starts with the fuselage, but I always begin with the tail feathers.
The parts are engraved with the part number. They are prefixed with an "S" for stabilizer and "V" for vertical stabilizer. These interlocking parts are grouped together on a laser-cut sheet, making them easy to find.
It is a good idea to dry fit them together, then apply the glue. Lay them out on a flat surface on top of the polybag material the kit came in. You should be able to assemble the complete tail in roughly 20 minutes. The tail is robust in structure. Absolutely amazing!
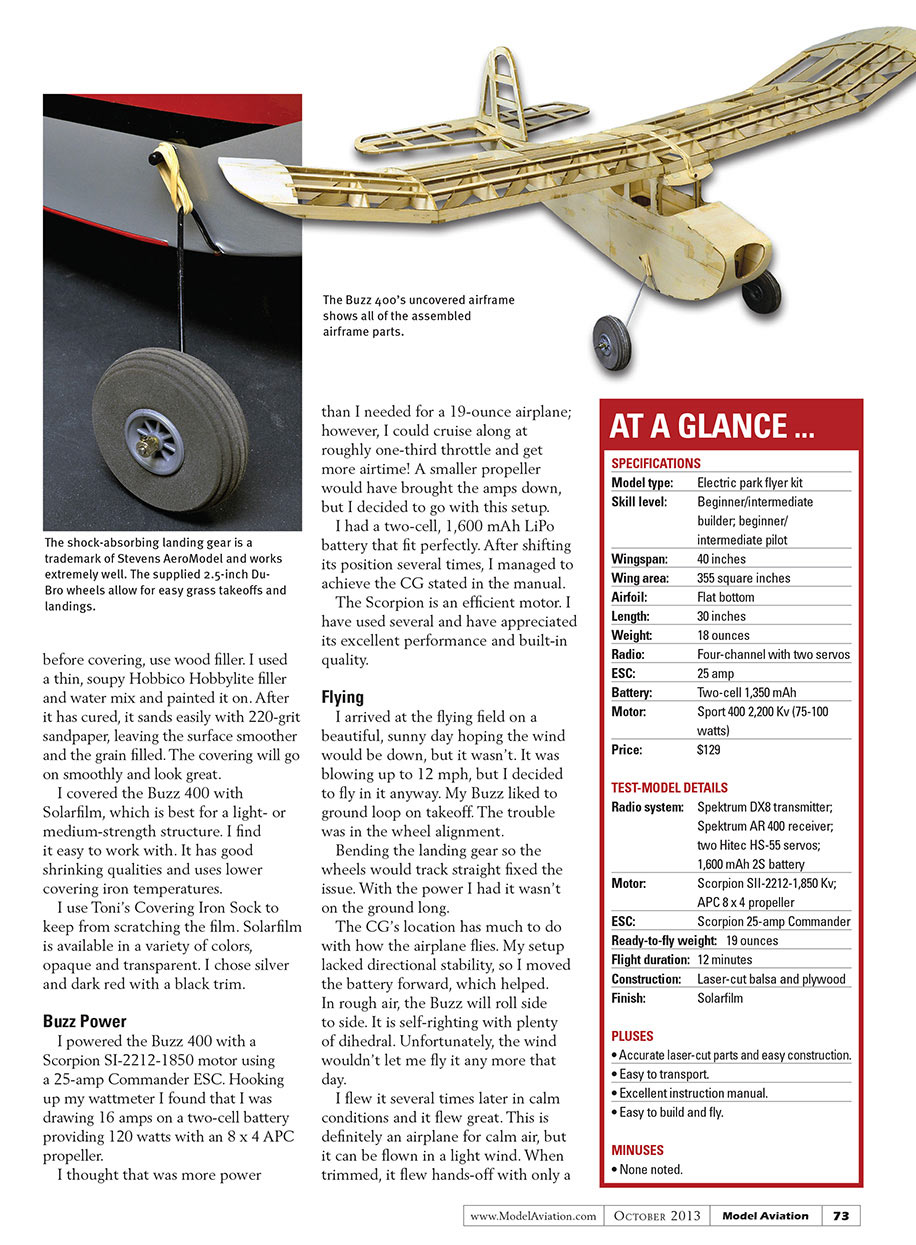
The fuselage is built with the traditional sheet sides and crutch assembly. The fuselage parts are designated with an "F." I dry fitted the majority of the fuselage together gluing only during the final steps.
When the part could not be easily retained, I used a small drop of thin CA to tack them together. Work carefully and make sure each part is fully engaged in the tab. This method of assembly allows the interlocking design to do its job as each successive part is installed within the fuselage, ensuring that the structure is true and square.
After I completed the fuselage, I built the hatch and installed the tab and magnet to retain it. I then block sanded the fuselage sides with 220-grit sandpaper and filled any imperfections with balsa filler.
The elevator and rudder pushrod housing came next. Predrilled holes in the bulkheads and a slot in the fuselage side made this an easy task. I trimmed them off flush with the sides and glued them in.
Before building the wing, I reread the manual. With no plans I was doubtful about it coming out straight, but I was wrong. After putting the main and secondary spar together and placing some ribs in the locating slots in the spar without glue, I pinned it down on a flat surface, squaring up the end rib with the TE. This was all that was needed and it was assembled straight and true.
The main spar determines the dihedral with a flat center section. Each side is built individually on a flat surface. The polyhedral tips are added last and the wings must be propped up so they can be built on a flat surface.
I found the LE interesting. Diagonal ribs were placed between the main ribs for added stiffness, but were not configured to airfoil shape on the top. Three tabulators were placed on the top LE for added flight performance.
When completed, the wing was stiff and sturdy, as is the entire airframe. It is strong, easy to handle, and lightweight.
Covering the Buzz 400
Covering and finishing is another skill required when building your own model. This is the part I like because you begin to see things take shape and how your model will look when completed.
The key to a good covering job is shaping and sanding all of the parts of the airframe. I spend more time doing this than building, starting with 220-grit sandpaper then progressing to 400-grit for the final surface rub.
If you want to fill the wood grain before covering, use wood filler. I used a thin, soupy Hobbico Hobbylite filler and water mix and painted it on. After it has cured, it sands easily with 220-grit sandpaper, leaving the surface smoother and the grain filled. The covering will go on smoothly and look great.
I covered the Buzz 400 with Solarfilm, which is best for a light- or medium-strength structure. I find it easy to work with. It has good shrinking qualities and uses lower covering iron temperatures.
I use Toni's Covering Iron Sock to keep from scratching the film. Solarfilm is available in a variety of colors, opaque and transparent. I chose silver and dark red with a black trim.
Buzz Power
I powered the Buzz 400 with a Scorpion SI-2212-1850 motor using a 25-amp Commander ESC. Hooking up my wattmeter I found that I was drawing 16 amps on a two-cell battery providing 120 watts with an 8 x 4 APC propeller.
I thought that was more power than I needed for a 19-ounce airplane; however, I could cruise along at roughly one-third throttle and get more airtime! A smaller propeller would have brought the amps down, but I decided to go with this setup.
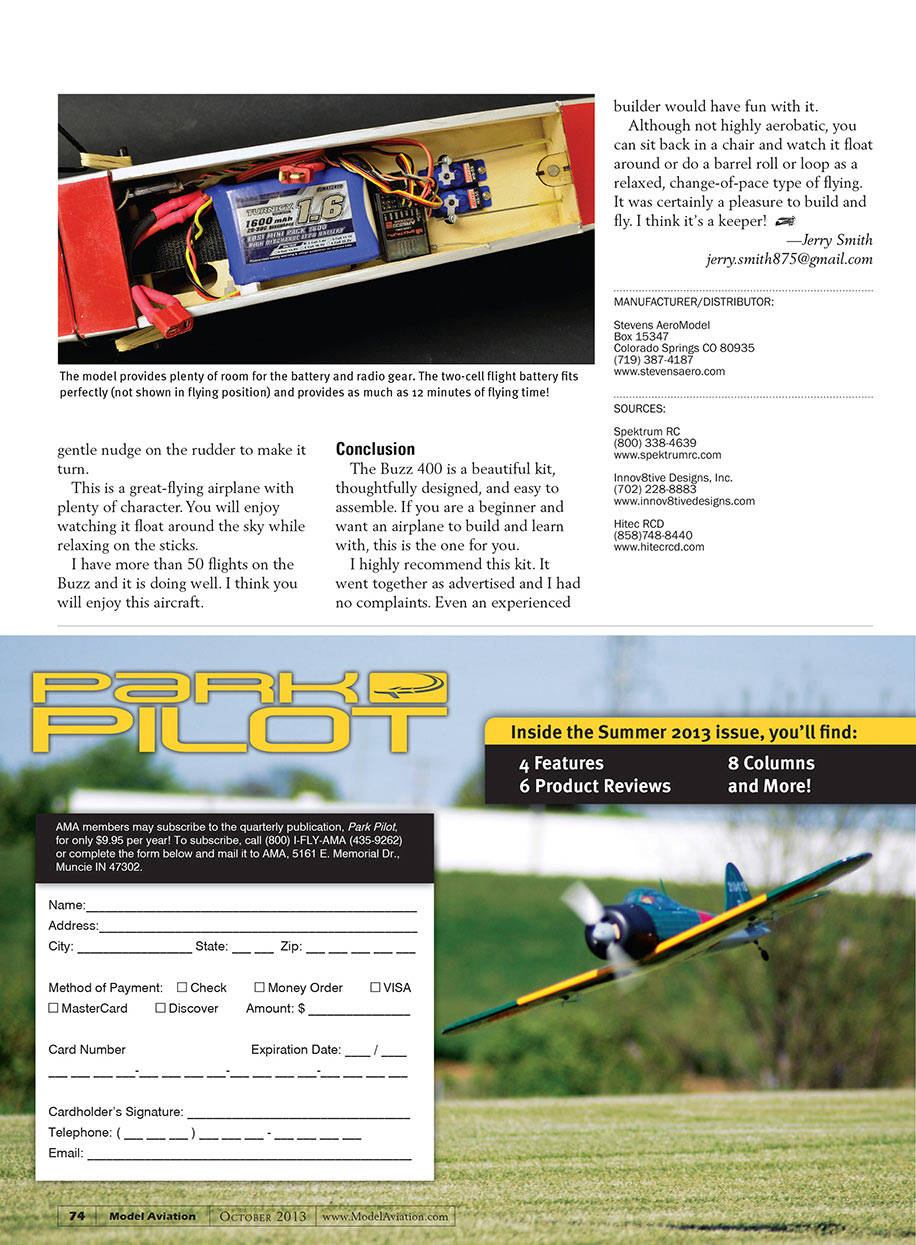
I had a two-cell, 1,600 mAh LiPo battery that fit perfectly. After shifting its position several times, I managed to achieve the CG stated in the manual. The Scorpion is an efficient motor. I have used several and have appreciated its excellent performance and built-in quality.
Flying
I arrived at the flying field on a beautiful, sunny day hoping the wind would be down, but it wasn't. It was blowing up to 12 mph, but I decided to fly in it anyway. My Buzz liked to ground loop on takeoff. The trouble was in the wheel alignment.
Bending the landing gear so the wheels would track straight fixed the issue. With the power I had it wasn't on the ground long.
The CG's location has much to do with how the airplane flies. My setup lacked directional stability, so I moved the battery forward, which helped. In rough air, the Buzz will roll side to side. It is self-righting with plenty of dihedral. Unfortunately, the wind wouldn't let me fly it any more that day.
I flew it several times later in calm conditions and it flew great. This is definitely an airplane for calm air, but it can be flown in a light wind. When trimmed, it flew hands-off with only a slight turn that needed a little right trim. Landing is simple. With a little power it will come around and float in nicely. Because the airframe is light, I backed off the power early and pulled up to make a touch-down. The landing gear absorbs bumps with the soft foam tires.
Conclusion
The Stevens AeroModel Buzz 400 is a well-designed, easy-to-build park flyer that offers good performance for the weight and power system recommended. It's great for beginners moving up and for experienced pilots who want a fun cruising airplane. gentle nudge on the rudder to make it turn.
This is a great-flying airplane with plenty of character. You will enjoy watching it float around the sky while relaxing on the sticks.
I have more than 50 flights on the Buzz and it is doing well. I think you will enjoy this aircraft.
Conclusion
The Buzz 400 is a beautiful kit, thoughtfully designed, and easy to assemble. If you are a beginner and want an airplane to build and learn with, this is the one for you.
I highly recommend this kit. It went together as advertised and I had no complaints. Even an experienced builder would have fun with it.
Although not highly aerobatic, you can sit back in a chair and watch it float around or do a barrel roll or loop as a relaxed, change-of-pace type of flying. It was certainly a pleasure to build and fly. I think it's a keeper!
— Jerry Smith <REDACTED>
MANUFACTURER/DISTRIBUTOR: Stevens AeroModel Box 15347 Colorado Springs CO 80935 (719) 387-4187 www.stevensaero.com
SOURCES: Spektrum RC (800) 338-4639 www.spektrumrc.com
Innov8tive Designs, Inc. (702) 228-8883 www.innov8tivedesigns.com
Hitec RCD (858) 748-8440 www.hitecrcd.com
Transcribed from original scans by AI. Minor OCR errors may remain.

