
Swash Plate: Align T-Rex 450SE (CDE)
By Steve Kaluf
The Cadillac of miniature helicopters, dressed all in carbon and blue metal.
ALIGN is a large Taiwanese corporation that manufactures vacuums, power feeds, and several other household appliances, as well as OEM (original equipment manufacturer) products. The company burst onto the radio-control market approximately three years ago with a miniature electric-powered helicopter that took the world by storm: the T-Rex 450.
The 450 is a fairly low-cost machine; however, it is also a great model that is extremely well thought out and flies great. It is supported by low-cost parts, which is one of the keys to any helicopter’s success.
As good as the original T-Rex was, that did not stop aftermarket producers from coming up with a ton of add-ons and hop-up parts. Not to be outdone, Align started producing upgraded helicopters. It added metal parts, a longer tailboom, and constantly improved an already great machine. This made the model even more popular because the Align parts for the improved version were mostly bolt-ons to even the most basic T-Rex.
It did not take long for Align to introduce a Collective Cyclic Pitch Mixing, or CCPM (the company calls it CDE), version and more metal parts. Align also sells a nice variety of motors and ESCs, chargers, batteries, and rotor blades. That means it can combine components that work extremely well together.
It has been amazing to see how many helicopter pilots have T-Rexs. It seems to be one of those “must-have” items. It is, without a doubt, at the top of the mini helicopter food chain.
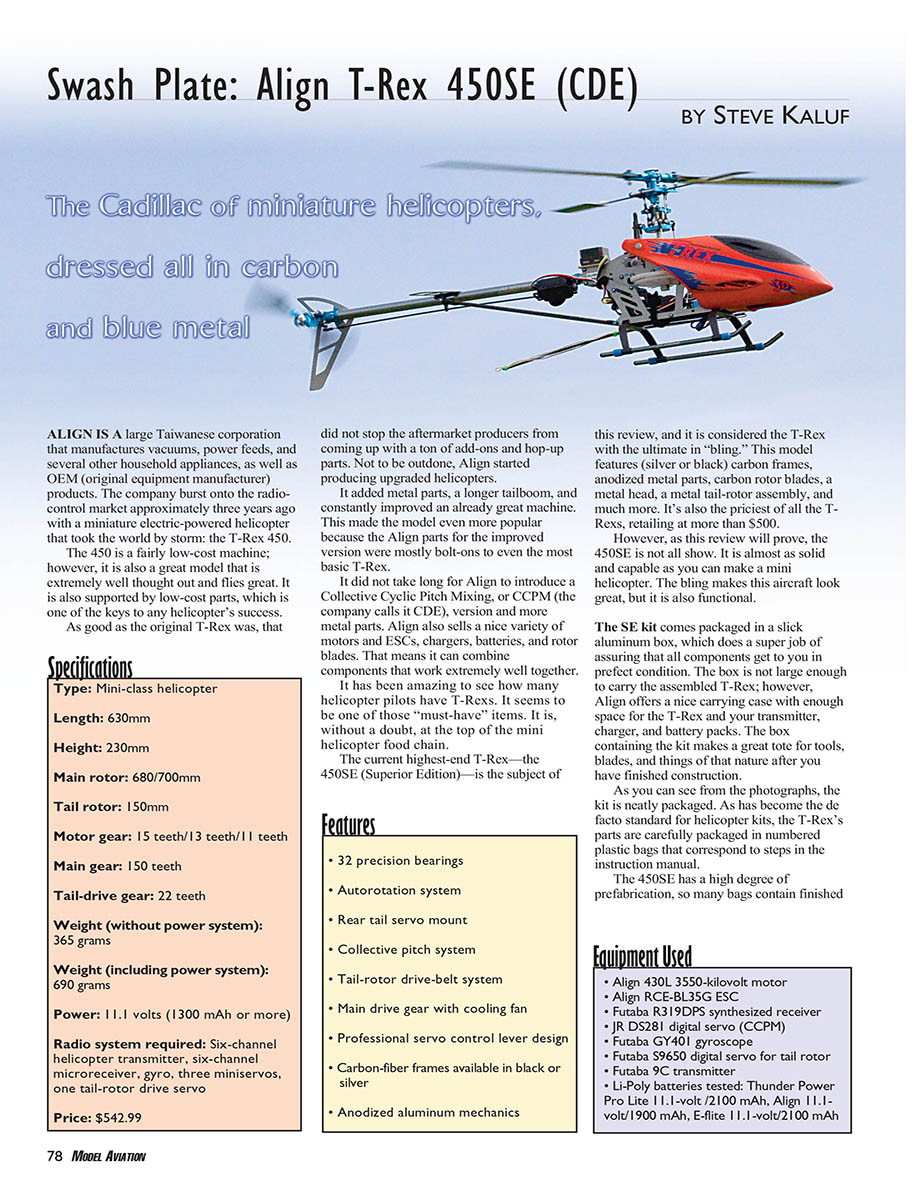
The current highest-end T-Rex—the 450SE (Superior Edition)—is the subject of this review, and it is considered the T-Rex with the ultimate in “bling.” This model features (silver or black) carbon frames, anodized metal parts, carbon rotor blades, a metal head, a metal tail-rotor assembly, and much more. It’s also the priciest of all the T-Rexs, retailing at more than $500.
However, as this review will prove, the 450SE is not all show. It is almost as solid and capable as you can make a mini helicopter. The bling makes this aircraft look great, but it is also functional.
The SE kit comes packaged in a slick aluminum box, which does a super job of assuring that all components get to you in perfect condition. The box is not large enough to carry the assembled T-Rex; however, Align offers a nice carrying case with enough space for the T-Rex and your transmitter, charger, and battery packs. The box containing the kit makes a great tote for tools, blades, and things of that nature after you have finished construction.
As you can see from the photographs, the kit is neatly packaged. As has become the de facto standard for helicopter kits, the T-Rex’s parts are carefully packaged in numbered plastic bags that correspond to steps in the instruction manual. The 450SE has a high degree of prefabrication, so many bags contain finished subassemblies. A plastic box holds the motor, ESC, and motor/ESC connectors. Two sets of main rotor blades (325 mm wood and 315 mm carbon) are included.
Align includes tools and thread locker in all its kits. The box contains a screwdriver and hex wrenches, as well as red and blue thread locker.
Specifications
- Type: Mini-class helicopter
- Length: 630 mm
- Height: 230 mm
- Main rotor: 680/700 mm
- Tail rotor: 150 mm
- Motor gear: 15 teeth / 13 teeth / 11 teeth
- Main gear: 150 teeth
- Tail-drive gear: 22 teeth
- Weight (without power system): 365 grams
- Weight (including power system): 690 grams
- Power: 11.1 volts (1300 mAh or more)
- Radio system required: Six-channel helicopter transmitter, six-channel microreceiver, gyro, three mini servos for CCPM, one tail-rotor drive servo
- Price: $542.99
Features
- 32 precision bearings
- Autorotation system
- Rear tail servo mount
- Collective pitch system (CCPM/CDE)
- Tail-rotor drive-belt system
- Main drive gear with cooling fan
- Professional servo control lever design
- Carbon-fiber frames available in black or silver
- Anodized aluminum mechanics
Equipment Used
- Align 430L 3550 kV motor
- Align RCE-BL35G ESC
- Futaba R319DPS synthesized receiver
- JR DS281 digital servos (for CCPM)
- Futaba GY401 gyroscope
- Futaba S9650 digital servo for tail rotor
- Futaba 9C transmitter
- Li-Poly batteries tested: Thunder Power Pro Lite 11.1 V / 2100 mAh, Align 11.1 V / 1900 mAh, E-flite 11.1 V / 2100 mAh
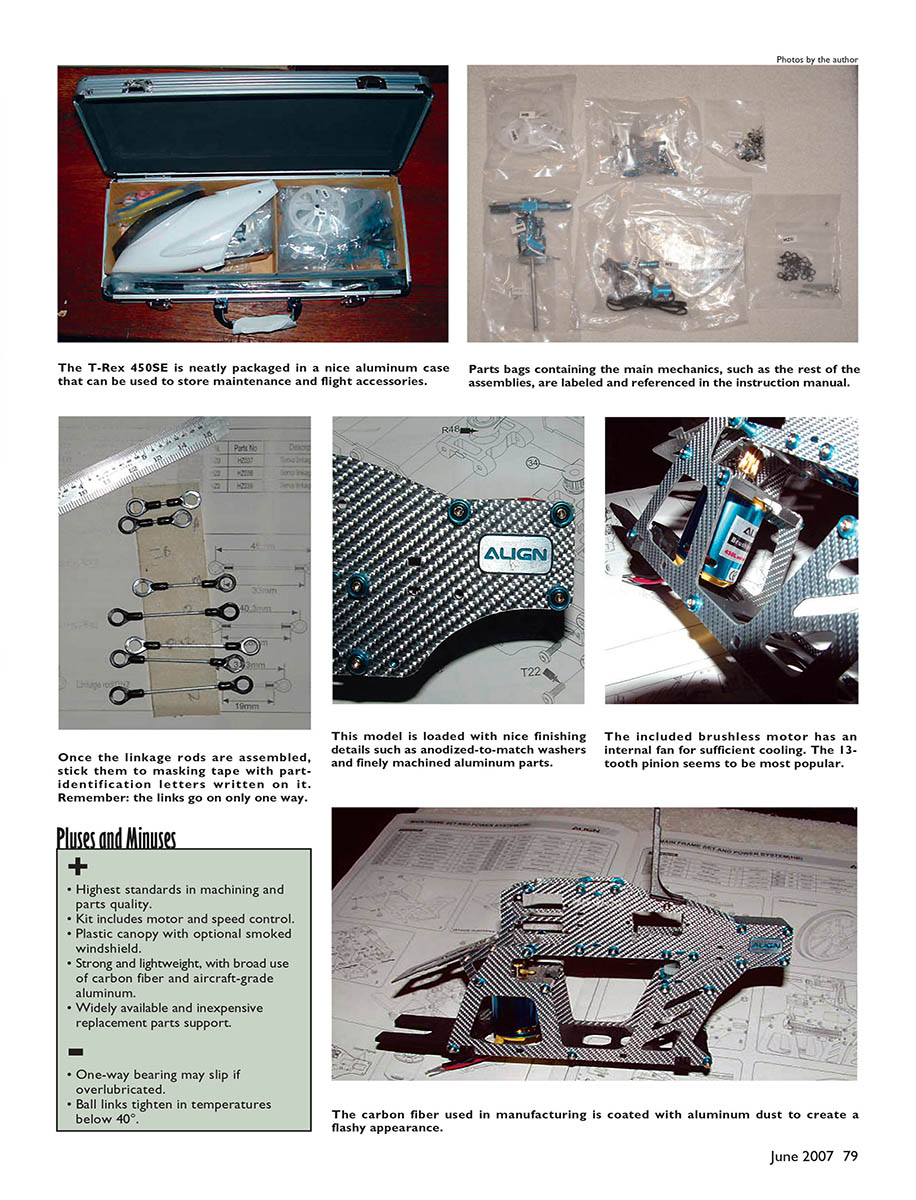
The T-Rex 450SE is neatly packaged in a nice aluminum case that can be used to store maintenance and flight accessories. Parts bags containing the main mechanics, such as the rest of the assemblies, are labeled and referenced in the instruction manual.
Once the linkage rods are assembled, stick them to masking tape with part-identification letters written on it. Remember the links go on only one way.
This model is loaded with nice finishing details such as anodized-to-match washers and finely machined aluminum parts.
The included brushless motor has an internal fan for sufficient cooling. The 13-tooth pinion seems to be the most popular.
Pluses and Minuses
- Highest standards in machining and parts quality.
- Kit includes motor and speed control.
- Plastic canopy with optional smoked windshield.
- Strong and lightweight, with broad use of carbon fiber and aircraft-grade aluminum.
- Widely available and inexpensive replacement parts support.
- One-way bearing may slip if overlubricated.
- Ball links tighten in temperatures below 40°F (≈4°C).
- Belt life can be questionable; inspect regularly.
The carbon fiber used in manufacturing is coated with aluminum dust to create a flashy appearance.
Assembly and Build Notes
The provided motor is Align’s 430L outrunner. It does not appear to be an outrunner at first because the outermost can does not rotate. However, if you disassemble the motor you will find that it is indeed an outrunner. The 430L is rated at 3550 kV.
The Align RCE-BL35G programmable ESC is stock in the kit, and it is a nice match for the 430L motor. I also used an Align 1900 mAh 3S Li-Poly battery pack and an Align balance charger.
The T‑Rex’s assembly is fairly straightforward, especially if you have built other helicopters. The manual is well illustrated, and each section has a parts listing at the top of the page that includes item numbers. However, the manual is lacking in words to adequately describe several assembly sequences. This is not a huge problem, but it could cause some difficulties for you—especially if this is one of your first helicopter models.
In addition, the manual does not always take into account the preassembled components: it shows how to construct each set of parts, regardless of whether they are preassembled or not. I prefer manuals that show only the necessary assembly sequences in the main section and put more detailed assemblies in a separate section for teardown. This is a personal preference rather than a fault of Align.
Although Align is thoughtful to include a screwdriver and hex wrenches, I do not recommend using the supplied hex wrenches. Use the hardened straight-shaft hex wrenches sold by RC-car and helicopter suppliers—those with large anodized handles. You'll need a 1.5 mm and a 2.5 mm wrench. Anything else is too soft or too inaccurate for the button-head hex bolts used for most of the 450SE's assembly. Be extremely careful not to overtighten bolts and screws; you could easily strip the supplied hardware. The supplied screwdriver is adequate, but take time to check each preassembled component to make sure the fasteners are tight and have thread lock applied. I did not find a single loose fastener, but this is a good habit to get into.
The manual begins with diagrams of the various bolts and screws used to put the model together. Those drawings are useful in identifying the parts. Then there is a description and diagram of the linkages you'll have to assemble. The visuals are not to scale, which can be a problem, but they do include the correct measurements for linkage-rod length, one of the most crucial stages of assembling any helicopter.
The linkage rods must be assembled to the correct length. If they are, you will typically be rewarded with a nice, level swashplate right off the bat and correct servo arm/rod geometry. I use a metric steel rule and a metric digital caliper to ensure that the linkage rods are the correct length.
A trick I use to keep the linkage rods straight is to place them, after assembling them, on a piece of masking tape I've marked with the part number or letter and the number of rods of that size. This way they don't get lost and I can easily identify each rod during construction. I like to assemble all the rods before I do anything else. This is also a good time to size each ball link end.
Many people simply put the link on the ball and squeeze it with a pair of needle-nose pliers. That works, but it's a ham-handed method and too much pressure can break a link or deform the ball. I prefer a simple ball-link sizing tool, available from several suppliers. To use it you snap the link onto the sizing tool; it contains a small blade that cleans up and properly sizes the link. Most devices have a small amount of adjustment so you can set the sizing tool to the dimension that works best for the links you are using.
As are those on JR helicopters, the Align links are full-turn only. Each link has an "A" on it; that side must face away from the ball. The link will not fit on the ball with the "A" toward it.
Once the links are completed, move on to final assembly of the head. There is not much to do here since it is almost fully put together. You have ball ends to place on the mixing levers (be sure to use thread lock), and the feathering shaft, bearings, O-rings, dampers and spacers, blade grips, and flybar are basically the only parts you have to put on the head. As with any helicopter you must be sure everything works smoothly with no binding. Take the time at this stage to thoroughly check out the head and make sure it is right.
You have a decision to make as you assemble the head. Two sizes of spacers are provided that will stiffen or soften the head dampening. Use the smaller 1.5 mm spacer if you like a softer head (better for hovering and beginners). If you'll be doing aerobatic flight at all, you'll want the larger spacer to stiffen the head. Many pilots feel the head is still too soft for 3-D flight with the larger spacer and install additional spacers to stiffen it further. You have to decide what works best for you.
Next in assembly is constructing the main frames, which have an upper and lower assembly. The separate upper and lower frames are preassembled, with the exception of putting the two together into a single unit and adding a few standoffs, canopy mounts, and the antirotation bracket.
Once the frames are assembled, it's time to mount the motor. Solder the supplied connectors onto the motor leads before you mount the motor in the frames. Installing the pinion gear at this time is easier than after mounting. Mounting the motor is simple using only two bolts. There are two different-sized bolt holes on the top of the motor—determine the correct orientation and use the appropriate holes.
You have three pinions to choose from (11, 13, and 15 tooth), so look at Align's recommendation and pick the pinion that will give you the head speed you want for the type of flying you do. The 11-tooth version is fine for hovering and casual flying. Use the 13- or 15-tooth pinion for aerobatics or any 3-D flying. Align's latest recommendation is that the 15-tooth pinion be used only on motors rated above 3550 kV.
I set the pitch to +9° / -9°; hover happens at approximately 6° for my model.
Motor, ESC, and Batteries
The ESC provided with the 450SE is the Align RCE-BL35G. It features soft start, battery protection, motor timing, governor mode, and brake (not for use with a helicopter). Programming is easy using your transmitter's throttle stick. As do most ESCs, the BL35G beeps out the programming at start-up.
I chose the Align 11.1 V, 1900 mAh Li-Poly and the Thunder Power Pro Lite 2100 mAh packs for the T-Rex. Both perform great. The Thunder Power 2100 mAh pack's extra capacity gives me roughly three more minutes of run time in hovering or gentle flight; it provides a bit less in aggressive flight.
Be prepared the first time you spool up this machine—the head speed is high! Depending on the pinion gear you select and the throttle curve you use, you might see as high as 3,000 rpm. With the 11-tooth pinion my tachometer could not read the top end, but according to the charts in the manual the model should turn 2,320–2,800 rpm depending on flight mode. The 2,800 rpm figure seems extraordinarily high, but the model performs great at that head speed.
Most pilots who fly 3-D select the 15-tooth pinion and regularly turn more than 3,000 rpm in idle-up/stunt modes. If you crank your 450SE's head speed this high, it is imperative that you obtain and install the newer tail-drive gears/pulleys to reduce the tail-rotor rpm. There are known cases of tail blades leaving helicopters when this was not done. Many sport-type pilots prefer the 13-tooth pinion; it offers a nice balance of performance and economy. I now use the 13-tooth pinion and it gives the best overall performance for my style of flying. When I land the T-Rex the batteries, ESC, and motor are still cool.
Flying
"Wow" is an accurate description of how this little helicopter flies. I made all my initial flights indoors in a fairly confined space since it was winter in Indiana when I did this review. The first time I listened to this model spool up in a confined space it was slightly intimidating. If you take your time with setup, the intimidation factor will decrease by the time you lift the T-Rex into its first hover.
This is a stable aircraft, especially for its size. But make no mistake—it is responsive—so use caution as you stir the sticks the first time.
After the first flight I dialed in exponential (expo) to soften things around center. This helps remove overcontrolling. I started with approximately 30% and soon reduced that to 20%, and for indoor flying it's roughly 8%. Outside I run full throw with no expo.
The tail rotor has a huge amount of authority. You'll want a good gyro and tail-rotor pitch-control servo to handle the tail. I chose the Futaba GY401 gyro and Futaba S9650 digital servo. This is a great combination that locks the tail up no matter how hard you push the T-Rex. The GY401 is perhaps the most popular heading-hold gyro, and its price and size are perfect for the T-Rex. Be sure to obtain and install the blue tail gear and pulley set to reduce tail-rotor rpm.
When pushed into forward flight the T-Rex picks up speed immediately. It can really blast away if you desire! This is a small machine, so it can get far away quickly. Forward flight is smooth and predictable.
The T-Rex tracks like it is on rails. The amount of power the 430L motor delivers is incredible. You have to really be pushing it to bog the motor down at all.
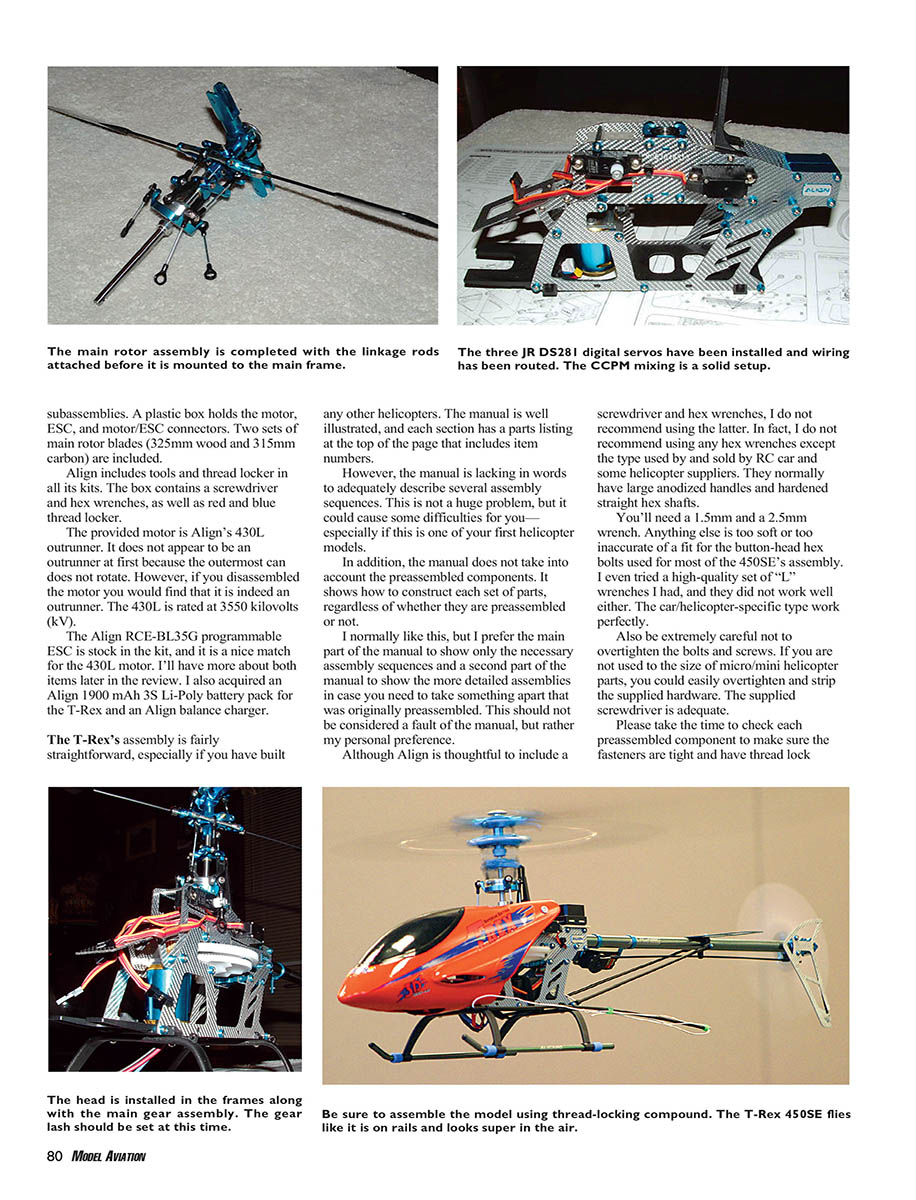
The CCPM setup with the JR DS281 servos seems to be the hot ticket for this machine. Control of the head is nearly perfect with this setup. JR now has a DS285 servo, which boasts a higher speed (.18 s) than the DS281 (.23 s). I believe the DS281 has been replaced by the DS285. Either servo is an excellent choice.
The 450SE's turns are smooth and predictable. Stall turns are precise, with the turn stopping as soon as you neutralize the tail-rotor stick, as are pirouettes. Loops and rolls are almost beginner-easy. I'm far from being a 3-D pilot, but I have seen some of the top pilots in the country put the T-Rex through an incredible amount of hard 3-D flying. As far as I can tell, there is not much (if anything) this machine cannot do.
The small 450SE does not have as much stored energy in the blades as larger machines during an autorotation. However, it manages to do them well. There is an altitude that may be a no-man's land (too high for the already stored energy to save you and too low to spool the rotor back up), but that area is small. The nice thing about an electric-powered helicopter is that you don't have too many unintentional autorotations to worry about.
This is an incredible helicopter. Almost the only negative I can think of (outside of a few minor hits in the manual) is that belt life is questionable at times. Lubricate the belt with WD-40, silicone, or something similar; watch the tension and inspect it after every flight. If you see any obvious wear or yellow threads showing, don't fly—replace the belt. I'm hopeful that Align will come up with a new belt that will last a bit longer. In these days of belts lasting for almost the life of the machine, a helicopter of this quality should have a high-quality belt. But don't let that minor issue get in the way of building a T-Rex 450SE.
This is one of those models that almost everyone who flies helicopters just has to have. It has the looks, the inexpensive parts, the availability, the overall price, and the performance that make it a must-have.
Steve Kaluf [email protected]
Distributor:
- Align RC / Assurance RC
- 14565 Suite H Valley View Ave.
- Santa Fe Springs, CA 90670
- (562) 926-5357
- www.align.com.tw/html/en/c_rindex.htm
Other Published Resources:
Transcribed from original scans by AI. Minor OCR errors may remain.

