


Swash Plate: JR Vibe 90 3D Helicopter
Ray Stacy
3-D helicopter pilots will be thrilled with this "full-bling" model
Roughly a year ago I received the JR Vibe from MA and Horizon Hobby for review. Being a longtime Vigor pilot, I was excited to see what changes had been made to the new product. The big difference with this review is that I have been flying the Vibe for a year and have a good feel for it; that is rare for reviewers. Thank you to AMA’s Michael Ramsey for giving me the time to put a few gallons on the machine before writing the article.
This model is the result of JR team members’ feedback on the Vigor’s proven design. Curtis Youngblood is widely regarded as one of the best helicopter pilots in the world. His search for the perfect helicopter, attention to detail, engineering skills, and amazing control over model helicopters have led him, and team members Len Sabato and Marty Kuhns, to refine the successful Vigor CS to become the new JR Vibe. Significant improvements have been made to the clutch, head, and tail-rotor assemblies to enhance performance.
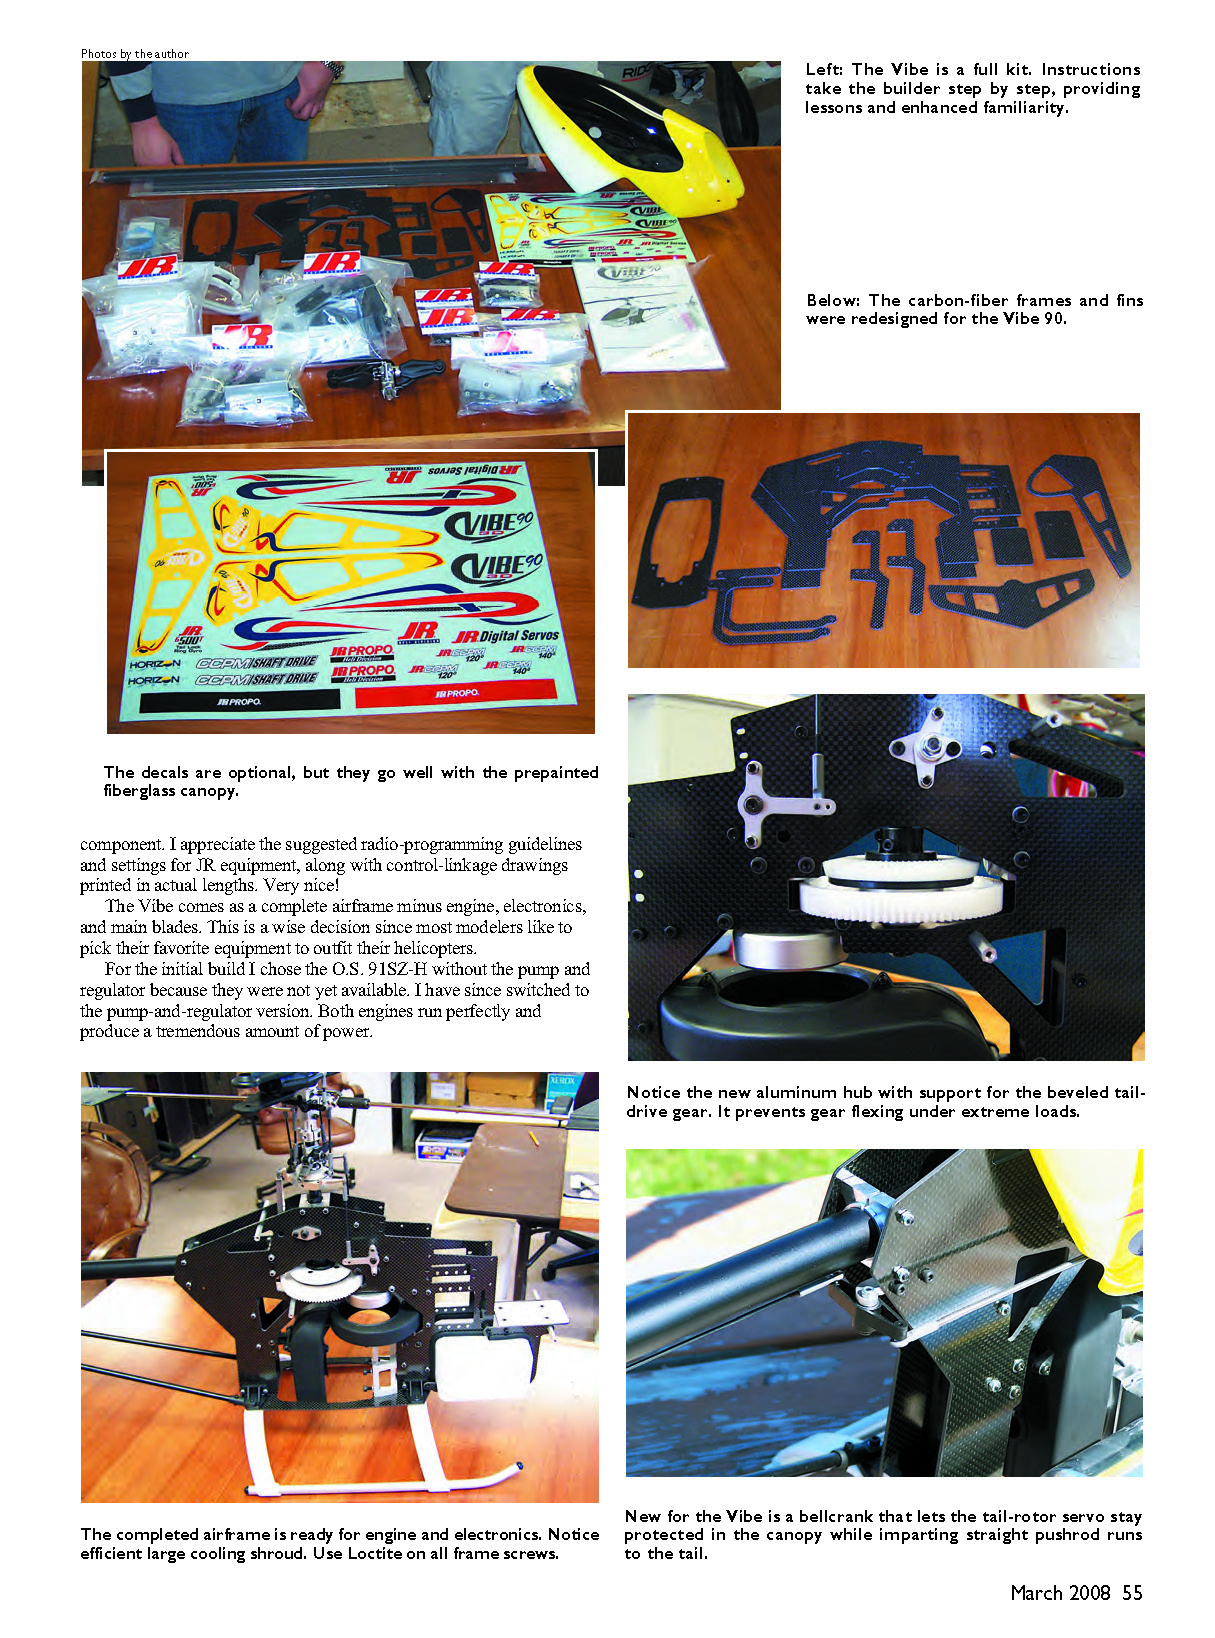
The helicopter arrived packaged in a sturdy, colorful box, with all parts neatly bagged and labeled to correspond to the assembly steps in the detailed building instructions. I have read many instruction manuals through the years, and the Vibe’s manual is absolutely one of the best. The illustrations are clear, the descriptions are complete, and the assembly flow is logical. Each step has “Team Tips” where applicable to assist in the building process. The manual also includes exploded drawings with part numbers detailing every component. I appreciate the suggested radio-programming guidelines and settings for JR equipment, along with control-linkage drawings printed in actual lengths.
The Vibe comes as a complete airframe minus engine, electronics, and main blades. This is a wise decision since most modelers like to pick their favorite equipment to outfit their helicopters. For the initial build I chose the O.S. 91SZ-H without the pump and regulator because they were not yet available. I have since switched to the pump-and-regulator version. Both engines run perfectly and produce a tremendous amount of power.
The Youngblood MP5 is my muffler of choice. The MP2 worked wonderfully, but the MP5 is even better and is more suited for the higher head speeds. Horizon Hobby provided the preferred JR DS8317 servos for cyclic control and the JR G7000T/8700G heading-hold gyro package for the tail. This complete servo setup is a proven combination of speed, torque, and reliability. The initial power supply was a JR four-cell, 4500 mAh battery. There was no shortage of flying time with that pack! My preferred radio was the JR XP9303 transmitter with the R649-S PCM receiver. I have since switched to the new Spektrum DX7 system from Horizon Hobby. This spread-spectrum radio rocks: solid connection, fast response time, and no worries about interference from popular park flyers. In addition, I started with NHP 710 main blades and NHP tail-rotor blades.
Construction
This kit’s quality is nothing short of a benchmark. No trimming, grinding, or sanding is needed to get parts to fit properly. The Vibe 90 is a pleasure to build. It comes with several main components, such as the main rotor head and tail-rotor gearbox, preassembled. I enjoy this as much as anyone, but please take the time to make sure all screws are tight and that you have applied thread locker to the appropriate locations.
Building any helicopter has many important steps. Read the manual carefully. An important part of the Vibe build is grounding the carbon frame, which is done to eliminate the possibility of radio-frequency noise. Don't skip this step. By grinding through a small area of the clear epoxy coating to expose the raw carbon, the aluminum crossmember will be able to electrically conduct between the side frames. If you neglect this step, you may experience radio glitches that could harm your new Vibe.
JR suggests that you not fully tighten the frame screws until the major part of the frame is assembled. Then, using a flat surface as a base, tighten the cross bolts in the order recommended to ensure that the frame is straight.
The Vibe drive system has received a total upgrade, beginning with a larger-diameter start shaft that uses a heavy-duty, one-way bearing. The new hardened main shaft, with its heavy-duty autorotation assembly and newly supported bevel gear hub, has also been beefed up. Take your time when setting the gear mesh. I like a tiny bit of play in the gears so they will work smoothly. The manual describes a process to set this mesh. Get it right and your gears will last indefinitely.
The Vibe has one of the most solid engine mounts in the business. Not only is it supported from the back, but it is also supported from the bottom. There will be no twisting here! Either the YS 91ST or O.S. 91 engine will be a perfect fit.
As did its predecessor, the Vibe's swashplate can be configured as 140° Collective Cyclic Pitch Mixing (CCPM) or the more common 120° CCPM setup. I chose 140° to mimic the setup Curtis Youngblood originally did in an effort to eliminate unwanted CCPM interactions that are commonly seen on the 120° setup.
The difference is that with a standard 120° setup, the outer swashplate balls are evenly spaced. Fore/aft cyclic inputs result in the front two servo linkages moving less than the rear in-line servo linkage. Interaction can occur because of the difference in servo travel. This translates into a quick cyclic input possibly causing a pitch change. Those who are looking for absolute precision in their flying may notice this; sport fliers will not.
The 140° CCPM setup extends the front two mounted swashplate input balls forward, so that their longitudinal distance from the main shaft equals that of the in-line swash ball on the rear. In fore/aft cyclic moves, the front two servo linkages move the same distance as the rear servo linkage.
Note: the Spektrum DX7 does not support the 140° CCPM configuration natively. However, you can simulate the support in the transmitter by adding an elevator-to-pitch mix.
The JR Vibe has one of the most efficient cooling fans available. It is larger in diameter than most, which means the fan blades spin faster and provide increased airflow. The fan hub is mounted to the engine with top and bottom collets to ensure proper centering of the fan. I ran the Youngblood Active Throttle Governor on the Vibe and installed the sensor magnets at this time.
The clutch mounts to the fan hub using two 4mm screws. The hub has four holes so you can rotate the clutch 90° if required to minimize runout. Use red thread locker when attaching the clutch. The clutch screws can come loose in time and ruin the fan hub.
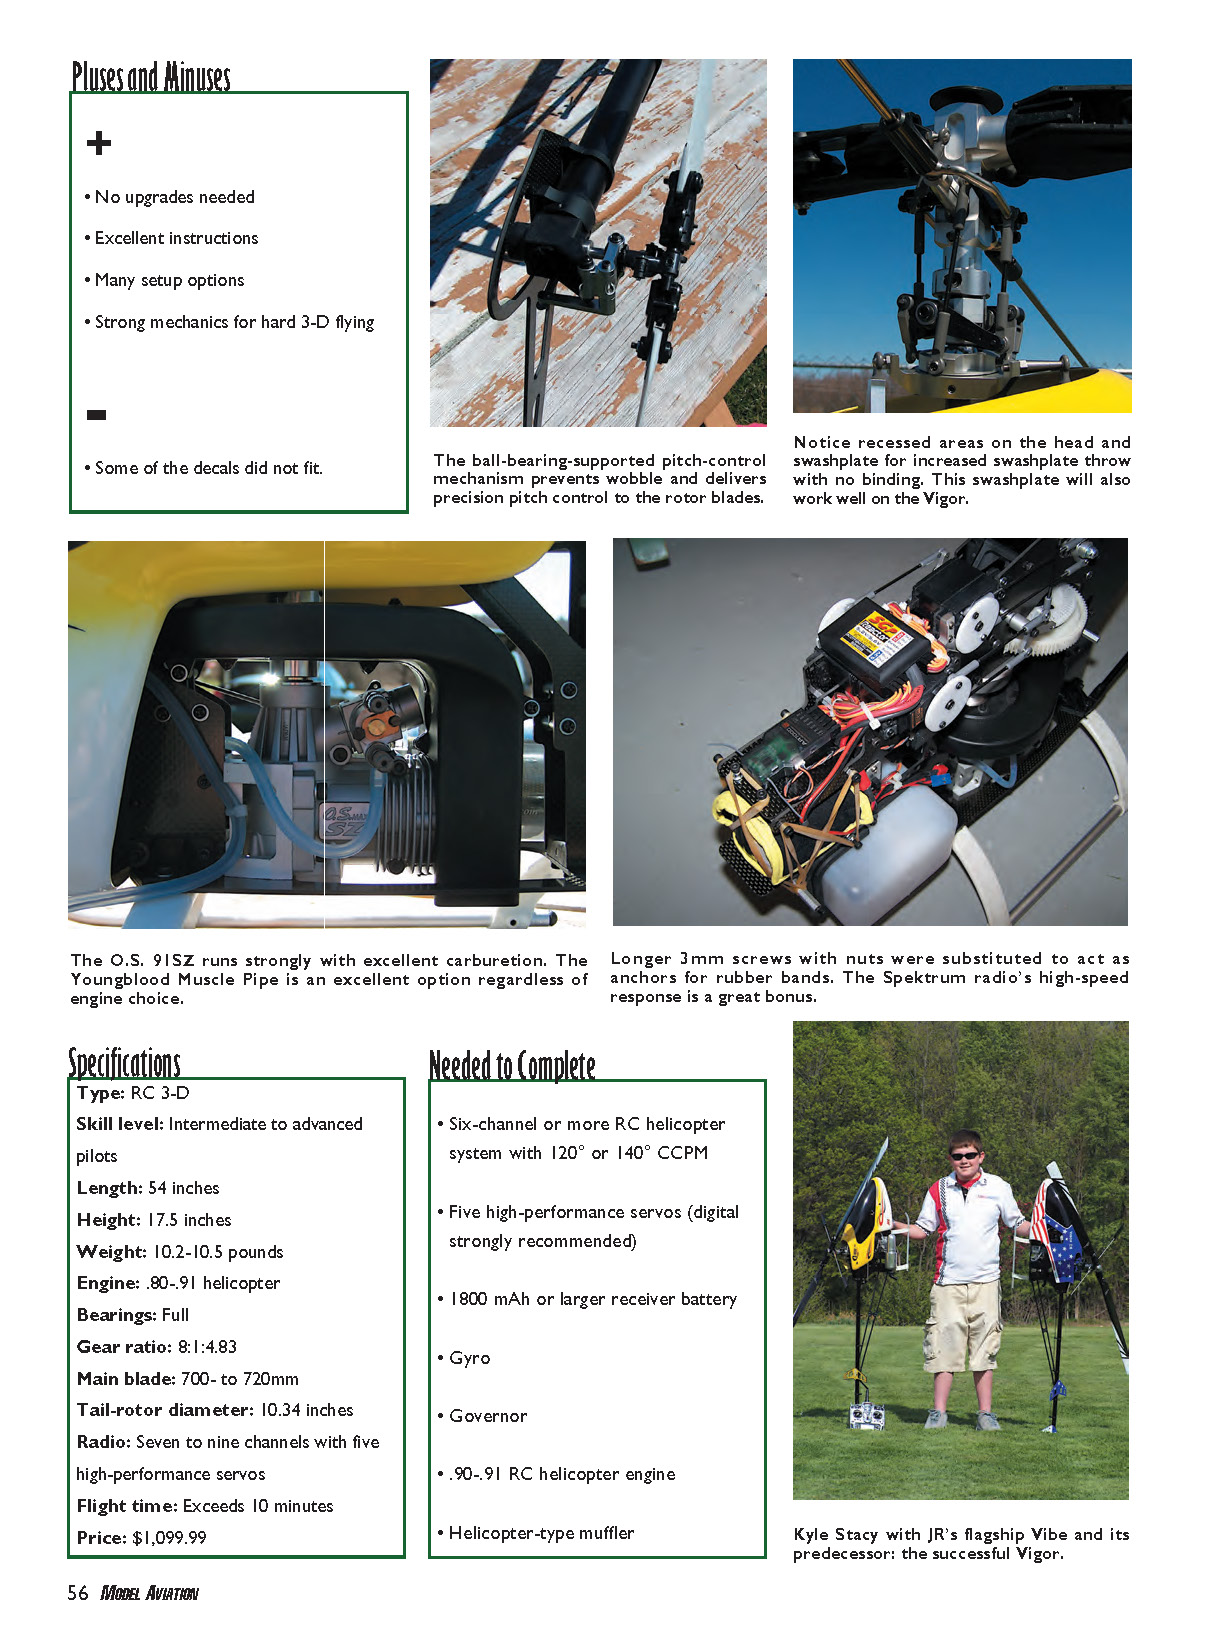
The tail-rotor transmission comes preassembled. The tail-rotor pitch-control mechanism delivers precision tail control because of the ball-bearing-supported, dual-point tail-slider mechanism. This was an upgrade on the Vigor but is stock on the Vibe. The tail-rotor pitch-control linkage now has a frame-mounted bellcrank in the mix, which lets the tail-rotor servo mount in the canopy yet still have straight runs to the tail. I like this; it delivers crisp control and keeps the tail-rotor servo out of the exhaust gunk.
Prepare the aluminum drive shaft by attaching two carrier bearings to it using green thread locker or cyanoacrylate. The carrier bearings use a rubber O-ring around the outside of the carrier to hold the bearing and shaft assembly in place in the boom. Lubricate the inside of the boom with a soap-and-water solution to aid in sliding the drive-shaft assembly into place.
The tail-rotor transmission has a nice plastic access plug that can easily be removed to inspect the gears and add grease as needed.
The head assembly is where significant changes can be seen between the Vigor and the Vibe. The Vibe head has been machined in the corners to allow additional cyclic throws without binding. It also includes a new adjustable flybar/blade ratio system that lets the pilot tune the response to his or her liking. The Vibe’s new swashplate has had material removed to prevent binding of the mixer arms. It works so well that you may want to order a Vibe swashplate for your Vigor.
The Vibe head comes preassembled. As with every helicopter I own, I like to disassemble the head and inspect the bearings. This is the time to grease the thrust bearings if required. When assembling the head and linkages, I like to use a ball-link reamer to get the perfect fit for the plastic links. I have never been a fan of squeezing the links with pliers to loosen them.
The Vibe comes with a beautifully finished yellow-and-white fiberglass canopy. As with the rest of the helicopter, the canopy’s quality is top-notch. My only suggestion is that the manufacturer make the black windshield slightly smaller; my old eyes seem to struggle with orientation at the 45° nose-in position. On the flip side, I seem to be the only one who has that problem.
The decals look great and are easy to apply to the canopy. My fin decals did not fit properly to the stylish new carbon-fiber fin set. I have been told that this was because of an early run and has since been corrected.
From here you can install your radio of choice. I started with the JR XP9303 and switched to the Spektrum DX7. Take your time to get the CCPM system set up properly. This will make the difference between a good-flying helicopter and a great-flying helicopter.
Pluses and Minuses
- No upgrades needed
- Excellent instructions
- Many setup options
- Strong mechanics for hard 3-D flying
- Some of the decals did not fit
Specifications
- Type: RC 3-D
- Skill level: Intermediate to advanced pilots
- Length: 54 inches
- Height: 17.5 inches
- Weight: 10.2–10.5 pounds
- Engine: .80–.91 helicopter engines
- Bearings: Full
- Gear ratio: 8.1:4.83
- Main blade: 700–720 mm
- Tail-rotor diameter: 10.34 inches
- Radio: Seven to nine channels with five high-performance servos
- Flight time: Exceeds 10 minutes
- Price: $1,099.99
Needed to Complete
- Six-channel or greater RC helicopter system with 120° or 140° CCPM
- Five high-performance servos (digital strongly recommended)
- 1800 mAh or larger receiver battery
- Gyro
- Governor
- .90–.91 RC helicopter engine
- Helicopter-type muffler
Upgrades and Accessories I Tried
- Radix main and tail-rotor blades (SB version available)
- Curtis Youngblood Super Stubz flybar paddles (lightweight option)
- Youngblood Active Throttle Governor
- Scott Gray Products SGP Reactor (dedicated three-servo power bus and dual regulated supplies)
The Reactor is unique because it features a dedicated three-servo power bus, allowing you to plug the high-drain servos directly into the regulator. Some digital servos can draw 2–3 amps each under load, which is why a dedicated power bus is useful. The Reactor provides pretuned voltages: 5.2 volts to the receiver, gyro, tail rotor, and throttle servos, and 5.6 volts to the three main high-current CCPM servos through the power bus. I use the Reactor with a 2S 4000 mAh Li-Poly battery and can fly all day without charging. Testing has shown that each flight takes approximately 300 mAh out of the pack.
An important thing to remember is that any helicopter’s flybar gets stressed when the pilot does extreme 3-D flying, and it will eventually break. I suggest checking this often and replacing it at regularly scheduled intervals. I change the flybar roughly once a month.
Flying
The first flights with the Vibe were everything you would expect from a helicopter of this caliber. Its hovering and flying characteristics are rock solid. The helicopter appears to flow through flips, rolls, tumbles, and pirouettes easier than ever thought possible. The Vibe truly does track as if it is on rails.
Its 3-D flight is limited only by the pilot’s skills. I have been flying this machine for roughly a year, and it only gets better. I cannot say I have found any shortcomings with the model. It continues to perform well week after week with nothing more than routine maintenance.
Upgrade fanatics will be disappointed; the Vibe doesn’t need any. It comes out of the box with everything you need.
A longtime friend and flying buddy is convinced that you cannot tell the difference between a low-end plastic helicopter and a high-end, 90-size competition machine. After flying the Vibe, you will "feel the difference" and you will like it!
Ray Stacy [email protected]
Manufacturer / Distributor
- JR / Horizon Hobby
- 4105 Fieldstone Rd., Champaign, IL 61822
- (877) 504-0233
- [email protected]
- www.horizonhobby.com
Sources
- Vibe 90, JR electronics, governor and NHP rotor blades, YS 91ST helicopter engine: Horizon Hobby
- MP5, Radix blades, Super Stubz, Active Throttle Governor: CJ Youngblood Enterprises, Inc., (979) 828-4269, www.curtisyoungblood.com
- SGP Reactor: Scott Gray Products, (519) 208-0361, www.scottgrayrc.com
- O.S. 91SZ-H helicopter engine: Tower Hobbies, (800) 637-4989, www.towerhobbies.com
Other Review Sources
- Model Airplane News, October 2006
- Model Helicopter World, May 2006
- RC Heli, Winter 2005
Transcribed from original scans by AI. Minor OCR errors may remain.

