

Swash Plate: MIA Micro-FLIGHT Bumble Bee
John H. Patton
Construction
More than 30 years ago, Du-Bro Products Inc. (founder Dewey Broberg) developed an RC helicopter powered by an Ohlsson & Rice chain saw engine. It was based on a Hughes 300–style body and controlled by a fixed-pitch rotor system. That Hughes 300 was my introduction to RC helicopters—big, heavy, underpowered, and difficult to fly. Frustration was common when just trying to hold the beast in a hover. The word “fun” was rarely used with that model.
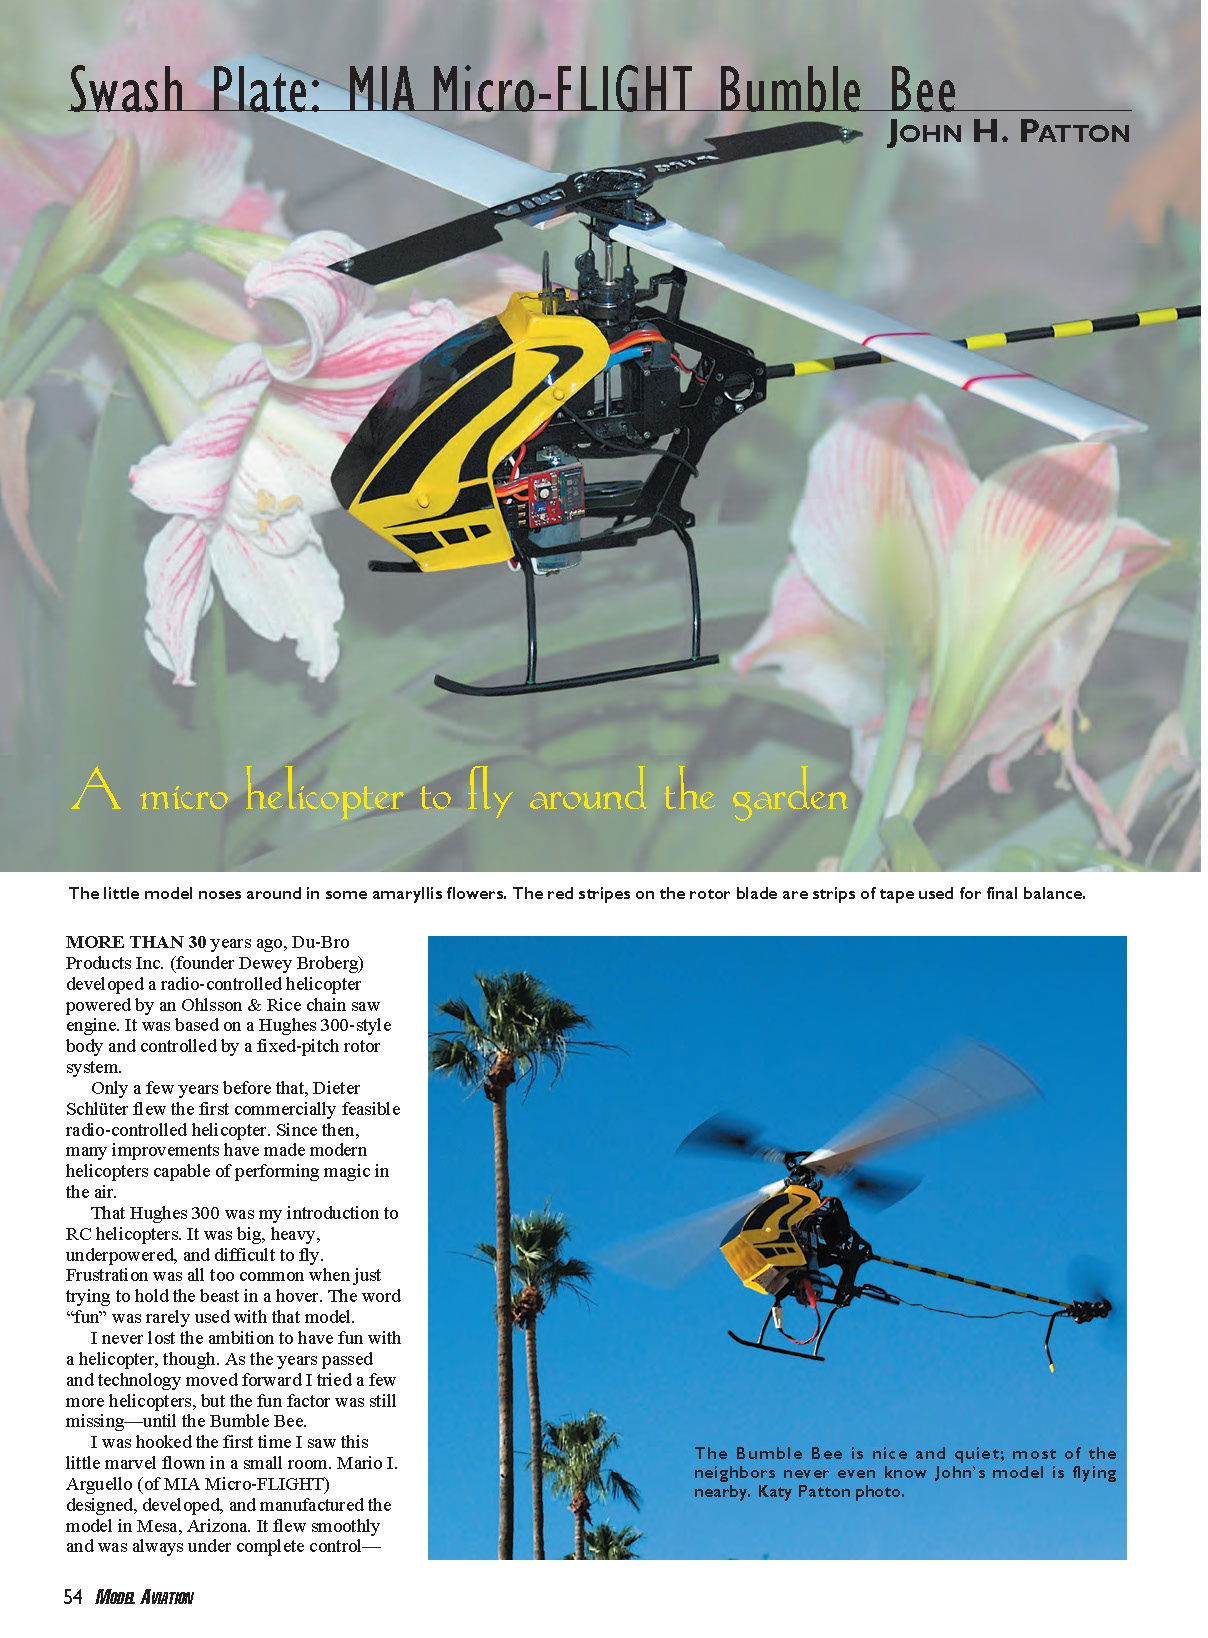
I never lost the ambition to have fun with a helicopter. Over the years I tried a few more helicopters, but the fun factor was still missing—until the Bumble Bee. I was hooked the first time I saw this little marvel flown in a small room. Mario I. Arguello (of MIA Micro-FLIGHT) designed, developed, and manufactured the model in Mesa, Arizona. It flew smoothly and was always under complete control—plenty good enough to do touch‑n‑gos on a table and actually climb stairs. It reminded me of the way a bee visits a flower and then goes off to another, hence the name Bumble Bee.
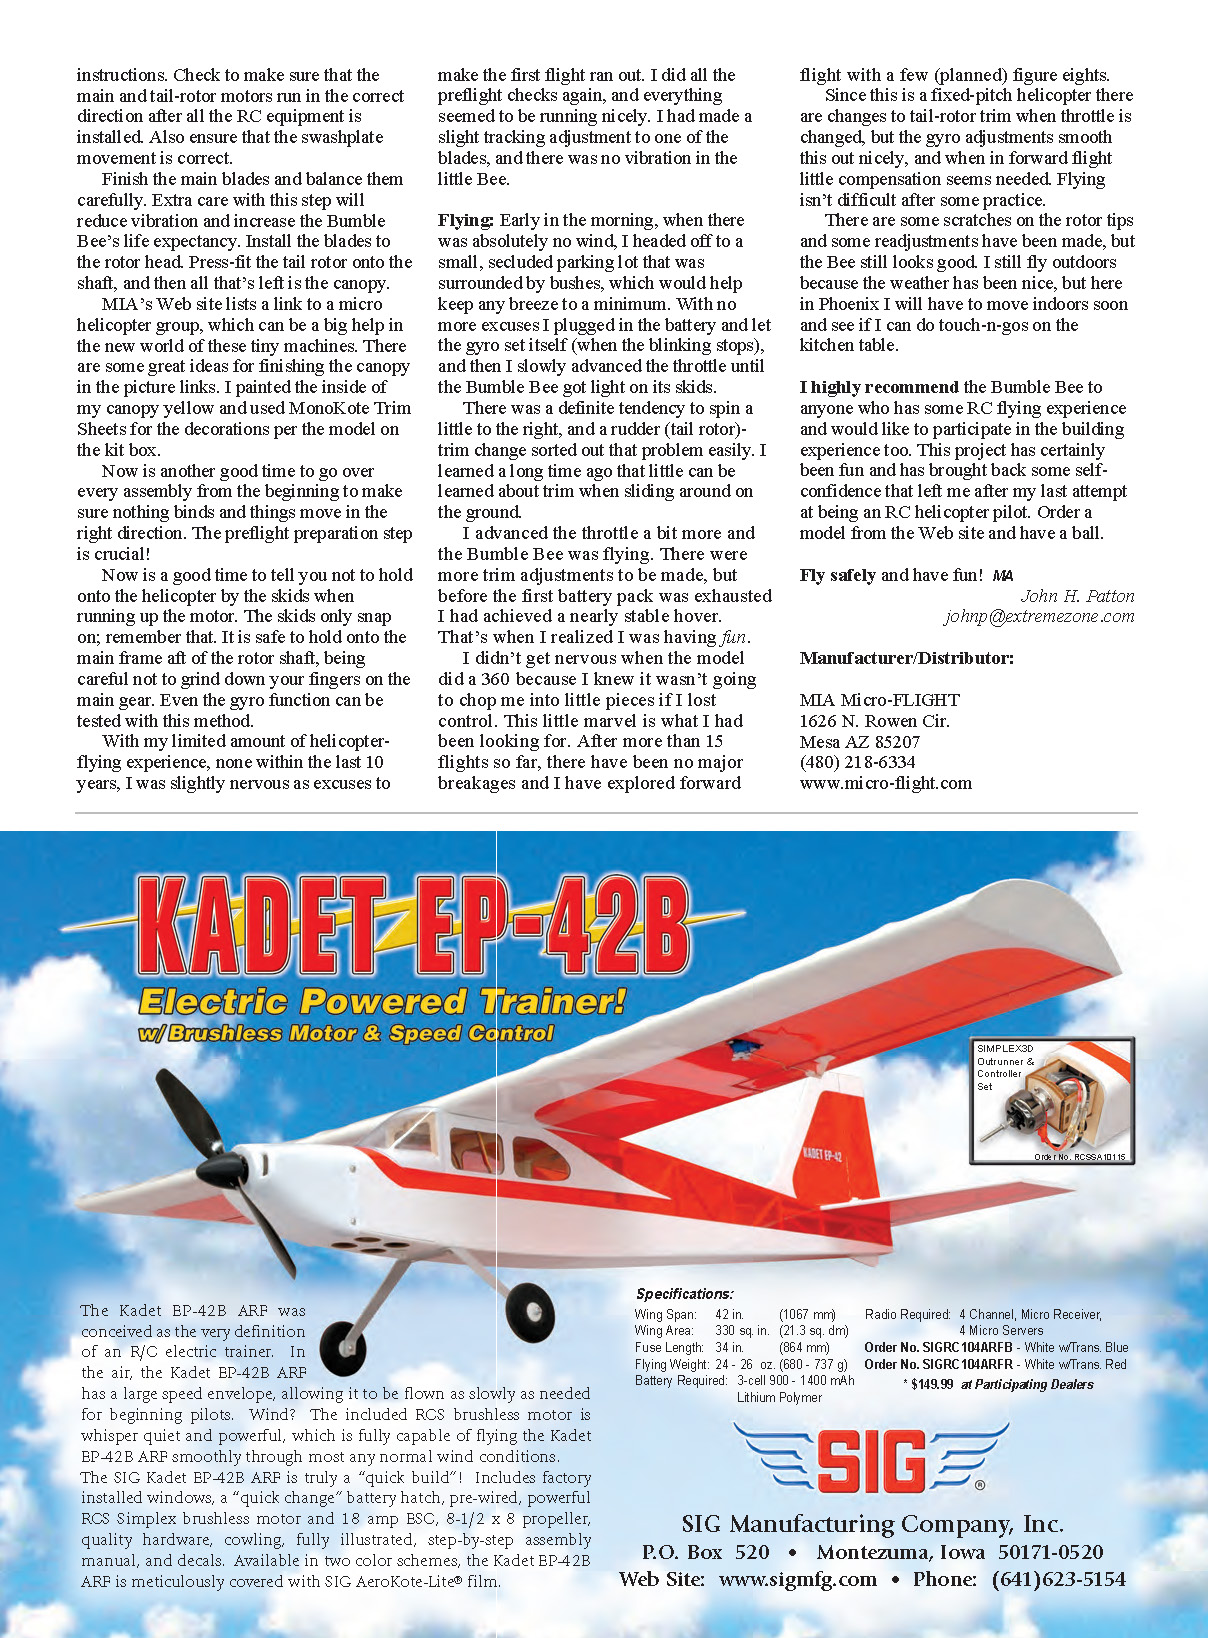
The kit’s packaging is superb: small parts are grouped in bags for each assembly step. Some parts are tiny and require care not to lose them—don’t open a bag unless you need the parts. Included is a precision CNC‑milled sheet of black G‑10 fiberglass containing several parts that should be handled carefully. The milling is extremely clean and accurate, producing parts that fit together nicely.
The assembly booklet is well thought out and guides the builder through the steps. The construction drawings are professionally CAD drawn, clear, and logical—the designer clearly has an engineering and manufacturing background. Building the frames, bearings, and small assemblies is a major part of the fun, and allows a much better understanding of how the model works. I have nothing against “buy‑and‑fly,” but people miss out on a large part of the hobby by not spending time at the workbench.
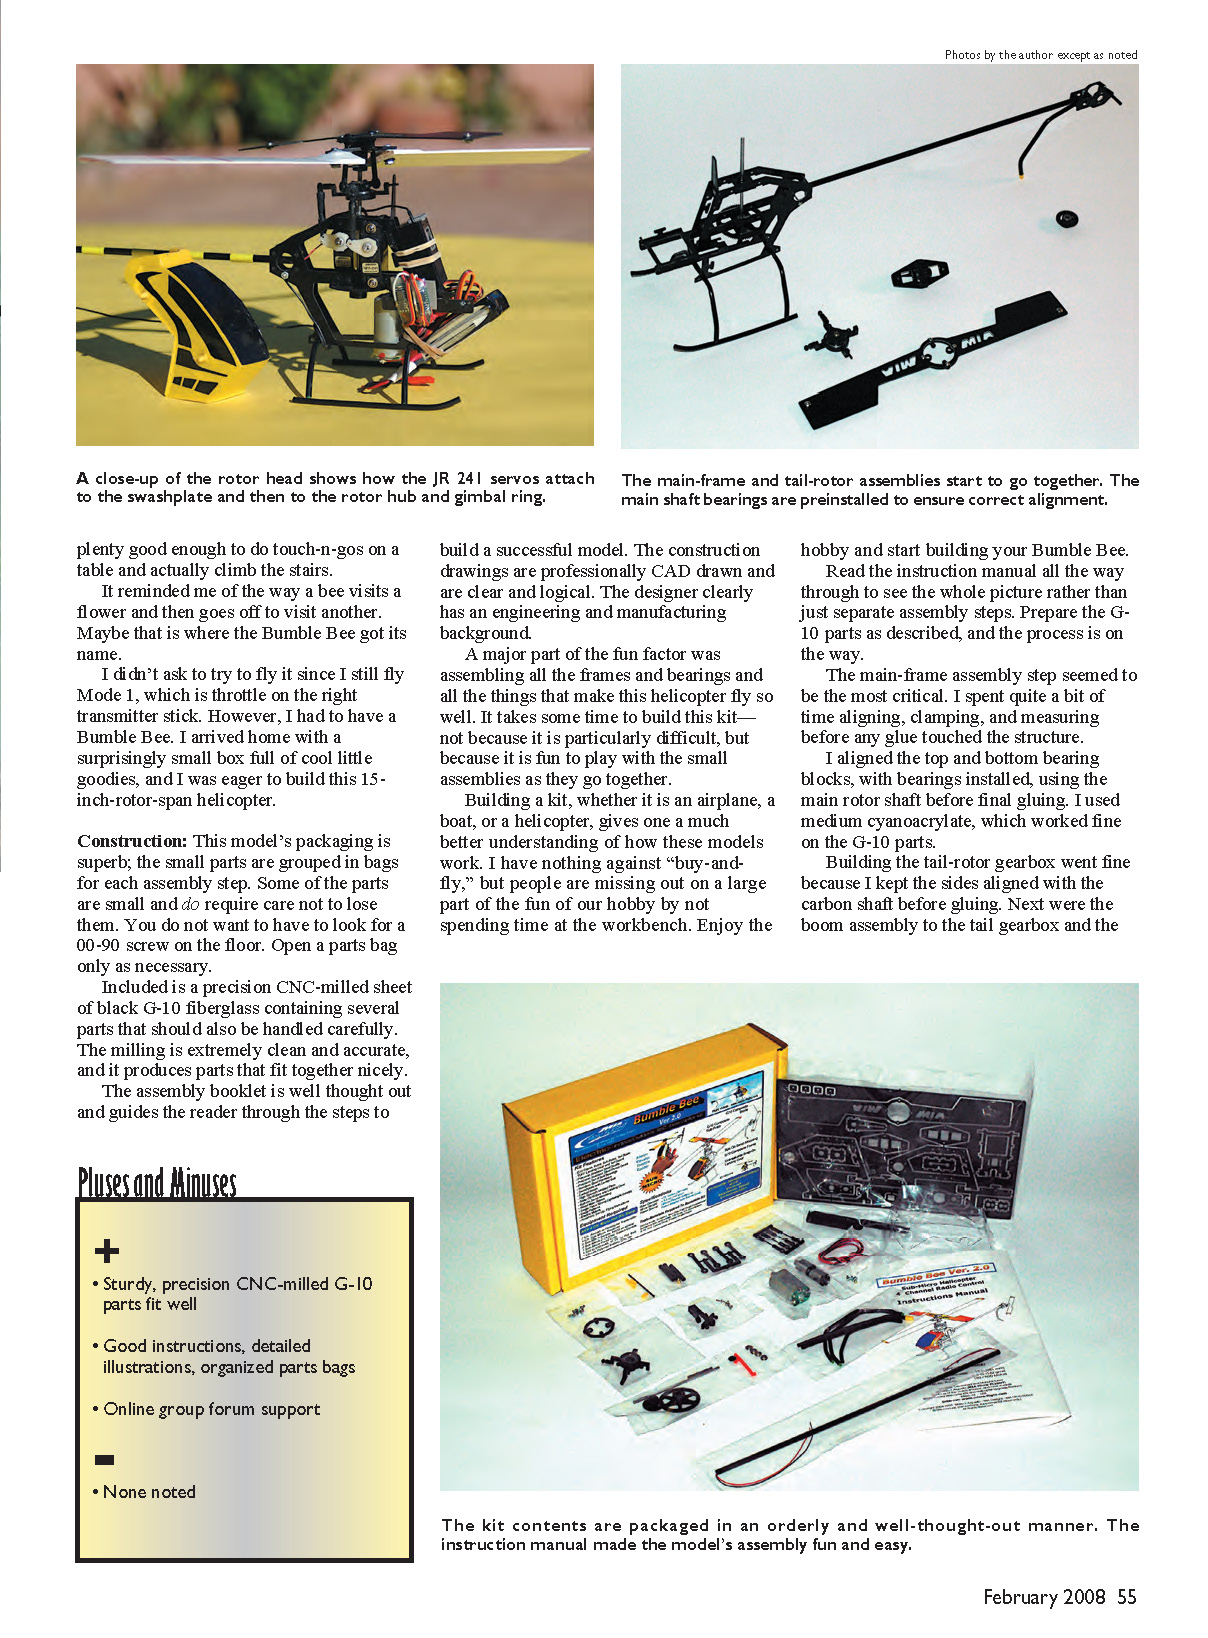
Read the instruction manual all the way through to see the whole picture, not just separate assembly steps. Prepare the G‑10 parts as described and follow the notes in each step. The main‑frame assembly is the most critical; I spent time aligning, clamping, and measuring before any glue touched the structure. This parallels the standard caution carpenters remind themselves of: measure twice, cut once. I aligned the top and bottom bearing blocks, with bearings installed, using the main rotor shaft before final gluing. I used medium cyanoacrylate, which worked fine on the G‑10 parts.
Building the tail‑rotor gearbox went smoothly because I kept the sides aligned with the carbon shaft before gluing. Next came the boom assembly, the tail gearbox, and the main‑frame assembly. With the cool landing‑gear skids attached, the Bumble Bee finally started to look like a helicopter.
Study the drawings before working on the subassemblies and pay attention to all the notes around each step. Take your time—this kit takes a while to build, not because it’s particularly difficult, but because it’s fun to play with the small assemblies as they go together.
Electronics and Final Assembly
The instructions for electrical connections are excellent. Before installation, test all radio, ESC, and gyro connections. Now is a good time to sort out mixing for throttle to tail rotor (rudder). Both the throttle and tail‑rotor ESCs must arm with the throttle stick and trim in the low position—this ensures neither motor will start at a high speed unexpectedly. The tail rotor and main rotor motors should start at a low speed and increase as throttle is raised.
Install the radio equipment, making sure to correctly align the roll and pitch servo outputs to the swashplate per the instructions. Check that the main and tail‑rotor motors run in the correct directions after all RC equipment is installed, and verify that the swashplate movement is correct.
Finish and balance the main blades carefully—extra care here reduces vibration and increases the Bumble Bee’s life expectancy. Install the blades on the rotor head, press‑fit the tail rotor onto the shaft (the tail motor and blade are press fits), and install the canopy. MIA’s website links to a micro helicopter group that can be a big help; there are great canopy finishing ideas in the picture links. I painted the inside of my canopy yellow and used MonoKote Trim Sheets for the decorations shown on the kit box.
Before the first flight, go over every assembly from the beginning to make sure nothing binds and everything moves in the right direction—the preflight preparation step is crucial. Do not hold the helicopter by the skids when running up the motor—the skids only snap on. It is safe to hold the main frame aft of the rotor shaft (avoid the main gear) to test motors and gyro function.
Pluses and Minuses
- Sturdy, precision CNC‑milled G‑10 parts fit well
- Good instructions, detailed illustrations, organized parts bags
- Online group/forum support
- None noted for negatives
Specifications
- Type: Micro helicopter kit, fixed‑pitch rotor
- Rotor diameter: 15 inches (381 mm)
- All‑up weight: 5 ounces (142 grams)
- Length: 15 inches (381 mm)
- Height: 5.5 inches
- Main motor: Mabuchi 180
- Tail motor: N‑20
- Flight duration: Five minutes
- Price: $124.99
Test‑Model Details
- Transmitter: JR X347
- Receiver: JR 610M
- Servos: two JR NES241
- Gyro: Century Helicopter Products micro piezo, solid state (part CN2022E)
- ESC: Two Castle Creations Pixie‑7Ps (both mounted on the frame with double‑stick tape)
- Battery: Three‑cell, 300 mAh Li‑Poly (note: a 2S 300 mAh Li‑Poly pack was used for initial flying)
The simple tail‑rotor motor is a press fit, as is the tail blade. The gear mesh is smooth with no adjusting required.
Flying
Early one morning, with absolutely no wind, I took the Bumble Bee to a small secluded parking lot surrounded by bushes to keep any breeze to a minimum. After plugging in the battery and letting the gyro set itself (wait until the blinking stops), I slowly advanced the throttle until the Bumble Bee got light on its skids. There was a tendency to spin a little to the right; a rudder (tail rotor) trim change sorted that out easily.
I advanced the throttle a bit more and the Bumble Bee was flying. There were more trim adjustments to be made, but before the first battery pack was exhausted I had achieved a nearly stable hover. That’s when I realized I was having fun. I didn’t get nervous when the model did a 360 because I knew it wasn’t going to chop me into little pieces if I lost control. This little marvel is what I had been looking for.
After more than 15 flights so far, there have been no major breakages and I have explored forward flight with a few planned figure eights. Since this is a fixed‑pitch helicopter, tail‑rotor trim changes when throttle is changed, but the gyro adjustments smooth this out nicely; in forward flight little compensation seems needed. There are some scratches on the rotor tips and a few readjustments have been made, but the Bumble Bee still looks good. I still fly outdoors because the weather has been nice, but here in Phoenix I will move indoors soon and try touch‑n‑gos on the kitchen table.
I highly recommend the Bumble Bee to anyone with some RC flying experience who would like to enjoy the building experience as well. This project has been fun and has brought back some self‑confidence that left me after my last attempt at being an RC helicopter pilot. Order a model from the website and have a ball.
Fly safely and have fun!
John H. Patton [email protected]
Manufacturer/Distributor
MIA Micro‑FLIGHT 1626 N. Rowen Cir. Mesa, AZ 85207 (480) 218‑6334 www.micro‑flight.com
Transcribed from original scans by AI. Minor OCR errors may remain.

