
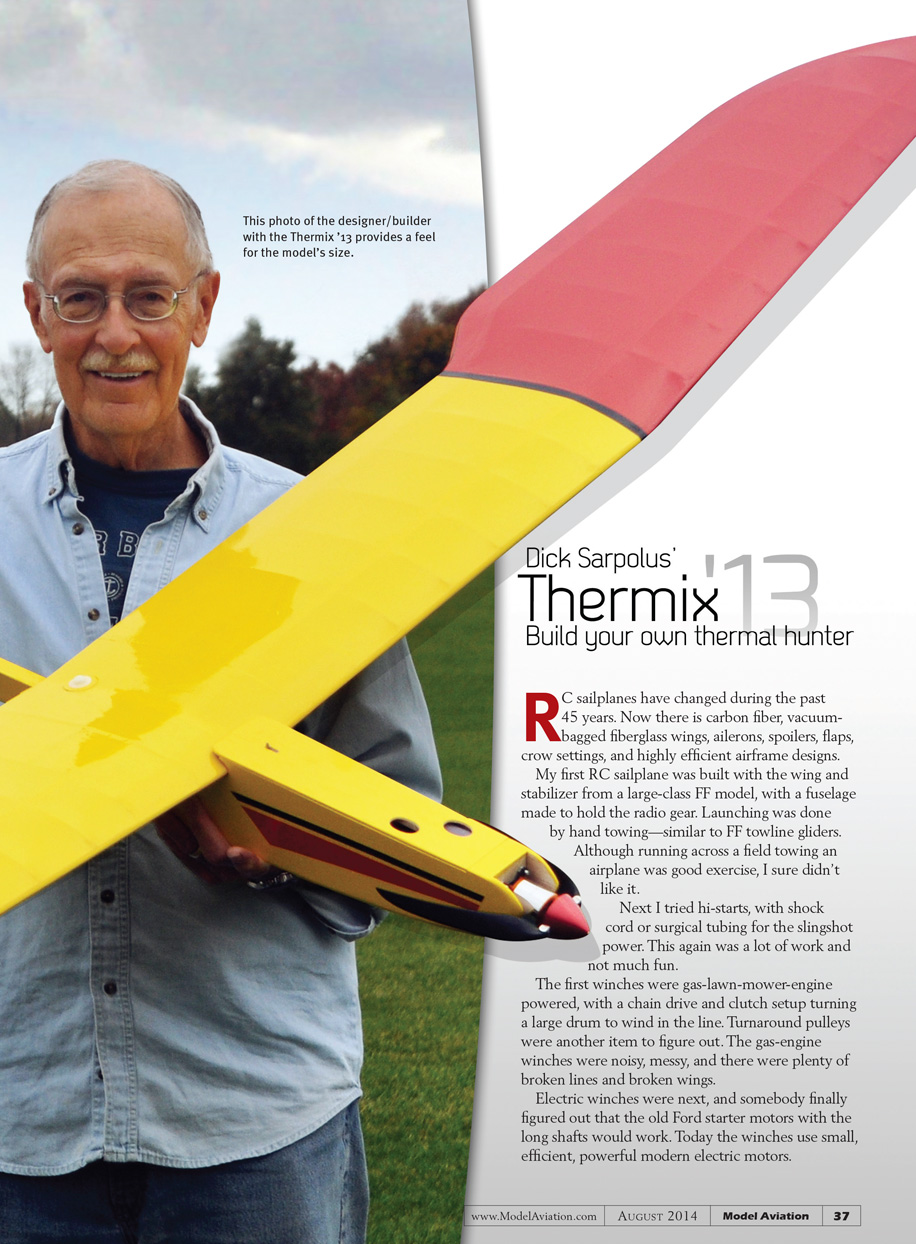
Dick Sarpolus' Thermix '13
Build your own thermal hunter
RC sailplanes have changed a lot during the past 45 years. Now there is carbon fiber, vacuum-bagged fiberglass wings, ailerons, spoilers, flaps, crow settings, and highly efficient airframe designs.
My first RC sailplane was built with the wing and stabilizer from a large-class FF model and a fuselage made to hold the radio gear. Launching was done by hand towing—similar to free-flight towline gliders. Although running across a field towing an airplane was good exercise, I sure didn't like it.
Next I tried hi-starts, using shock cord or surgical tubing for the slingshot power. This again was a lot of work and not much fun. The first winches were gas-lawn-mower-engine powered, with a chain drive and clutch turning a large drum to wind in the line. Turnaround pulleys added complexity. The gas-engine winches were noisy and messy, and there were plenty of broken lines and broken wings.
Electric winches came next, and somebody figured out that old Ford starter motors with long shafts would work. Today the winches use small, efficient modern electric motors. But what I consider the best advancement from those early days is the use of a powerful electric motor and a folding propeller in the nose of today’s RC sailplanes. I’m not referring to contest flying—just a sunny summer day, soaring for fun, looking for thermals, and enjoying easy launching without a winch or hi-start.
I wanted to do some sailplane flying and to make wood chips and sawdust—not go out and buy an ARF. I wanted to build retro style for nostalgia’s sake.
When I look back at early model sailplane activity, Frank Zaic and his Thermic series of glider designs come to mind first. Frank Zaic is part of aeromodeling history and is well known to those who appreciate the hobby’s background. He designed sailplanes before World War II; many were produced in kit form by JASCO and later Jetco Models. He’s in the AMA, National Free Flight Society (NFFS), and Society of Antique Modelers (SAM) Halls of Fame. His Model Aeronautic Year Books from the 1930s through the 1960s are worth reading, and most of his publications can still be found.
As a kid in the 1950s I built Frank’s Thermic 18, Thermic 20, and Thermic 36 hand-launched gliders, and later used his classic Thermic 100 wing as the basis for a few RC sailplanes. The instantly recognizable widened and tapered wingtip shape on many of his larger sailplanes came from the 1930s German Minimoa sailplane, designed by Wolf Hirth. That wing shape is still seen occasionally, often for nostalgic value. Some enthusiasts build replica Thermic 100 sailplanes; plans and reproduction kits are available.
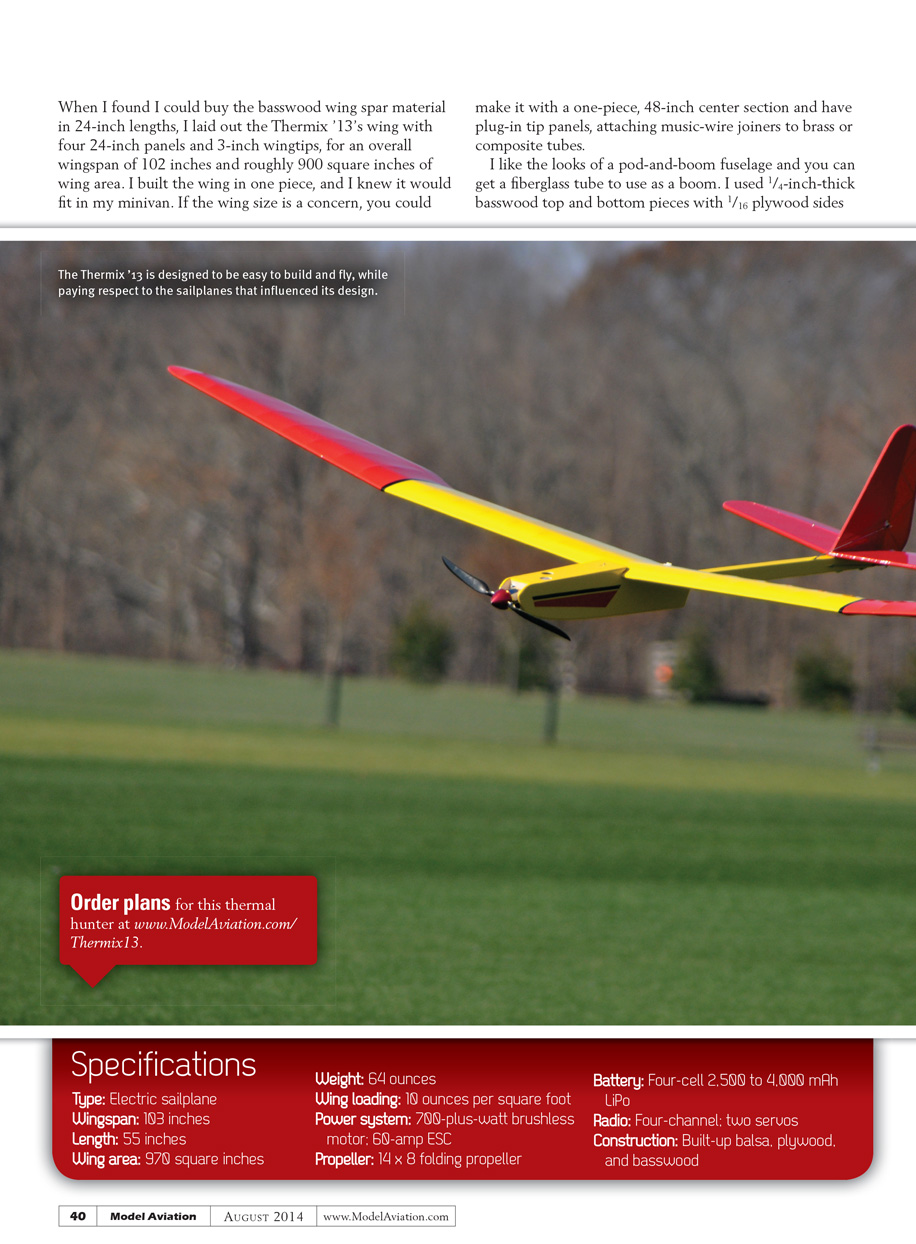
I decided to use Frank’s general Thermic 100 wing shape and pod-and-boom styling, coupled with old-style building techniques, but with an electric motor in the nose. This project is intended to be an easy-flying model for some fun on a nice summer day—coasting around and looking for thermal lift, knowing the motor in the nose is there to help if needed. It’s built with balsa, basswood or spruce, and plywood.
This model uses a simple, basic structure of balsa, basswood, and plywood. No exotic materials or techniques are required. It has a polyhedral wing and is controlled with rudder and elevator. The tail surfaces are built up over the plans and the tail assembly is held to the boom with two 1/4-20 nylon bolts.
When I found I could buy basswood wing-spar material in 24-inch lengths, I laid out the Thermix '13 wing with four 24-inch panels and 3-inch wingtips, for an overall wingspan of 102 inches and roughly 900 square inches of wing area. I built the wing in one piece so it would fit in my minivan. If the wing size is a concern, you can make a one-piece 48-inch center section with plug-in tip panels, attaching music-wire joiners to brass or composite tubes.
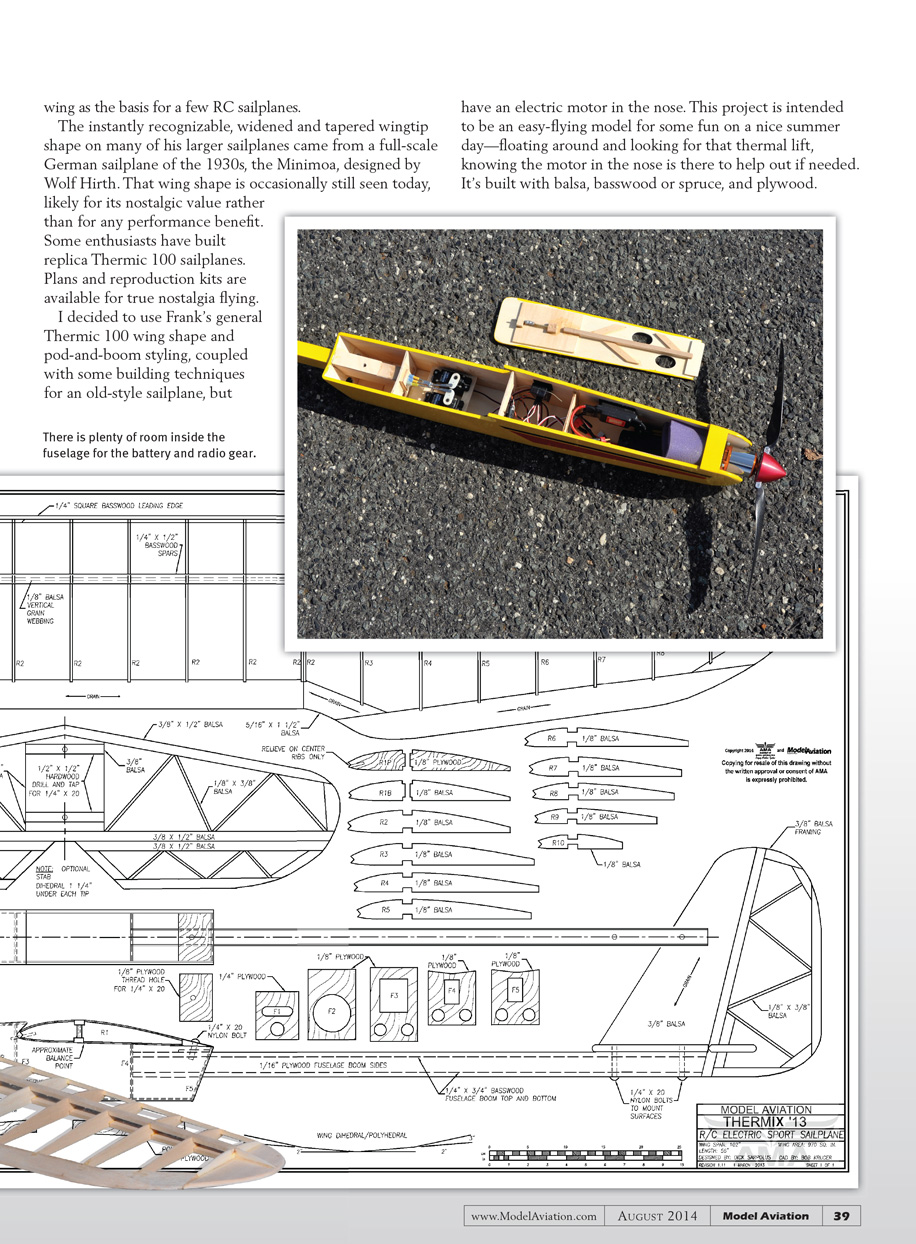
I like the looks of a pod-and-boom fuselage. You can get a fiberglass tube to use as a boom, but I used an all-wood boom: 1/4-inch-thick basswood top and bottom pieces with 1/16-inch plywood sides. Using balsa sides and plywood doublers for the fuselage section that holds the radio gear, motor, and battery pack provides a rugged structure rather than an ultra-light one.
The motor I used is a BP Hobbies A2826-4 with a 14 x 8 folding propeller and a four-cell LiPo battery pack. That setup is more than needed for relaxed flying; a smaller power system would work, though I enjoy the straight-up climb capability at times. A 2,500 mAh battery is plenty for climbing high, cutting power, and looking for thermals. A pack up to 4,000 mAh can be used if you want longer flights without worrying about finding lift. I used a 60-amp ESC with built-in BEC circuitry to power the receiver and servos.
Construction
To build the Thermix '13, gather the necessary materials and cut up a copy of the plans for paper templates so you can trace and cut the parts. I sourced my balsa, basswood, and plywood from National Balsa.
I took my time cutting all of the parts and made a complete kit before starting construction. As the prototype progressed I made a number of changes and threw some parts away. You won’t have that problem now; the plans reflect the final version and I’m happy with it. Because you’ll be scratch-building, feel free to make changes and try different ideas. Repairing or replacing parts will be straightforward.
I cut the plan sheet into pieces and built the wing panels on a flat building surface, covering the plans with wax paper to protect them. I laid the lower spar and the lower center-section sheeting pieces down on the plans and positioned the ribs over their locations. The opposite-side wing panels were built over the same plans to get correct rib spacing but with the ribs oriented the other direction.
I used vertical-grain balsa spar webbing in the center panels only. With the top spars, leading edges (LEs), and trailing edges (TEs) glued in place, I removed the wing panels from the building surface. The panels were joined with the plywood dihedral and polyhedral joiners. I wrapped the center-section joint with a strip of 6-inch fiberglass cloth and epoxy.
The tail surfaces were built up over the plans; I added a little dihedral to the horizontal stabilizer so its tips wouldn’t catch the ground during landing. That was probably unnecessary—the stabilizer would have been easier to build flat. I drilled and tapped the hardwood pieces in the stabilizer 1/4-20 to accept the two nylon bolts that hold the tail assembly to the fuselage boom.
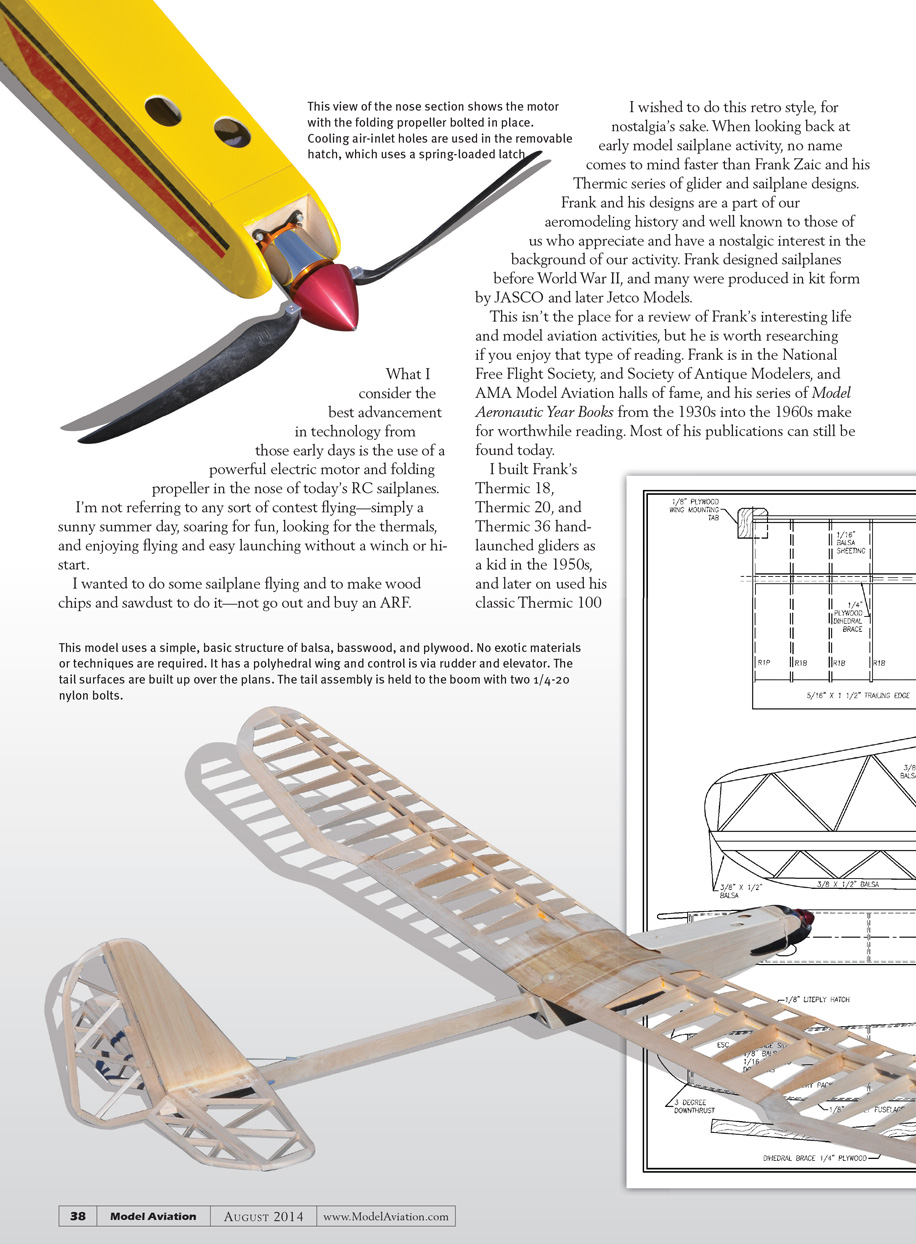
The fuselage pod-and-boom sections are easily built up and the boom is glued into the holes in the pod formers. I put several cooling air-inlet holes in the removable plywood hatch, which is held in place with a spring-loaded latch mechanism; strong magnets could also be used. Nylon tubing-style pushrods to the elevators and rudder run inside the boom. The wing is held to the fuselage with a plywood tab at the LE and one 1/4-20 nylon bolt at the TE.
The motor is bolted to a plywood firewall, with plenty of room for the ESC and any reasonably sized battery pack. Servos are installed under the wing position. You don’t need a tow hook on the bottom of the fuselage unless you want a “pure” sailplane. Nylon-pinned hinges are used on the elevators and rudder, and your favorite type of iron-on covering will do.
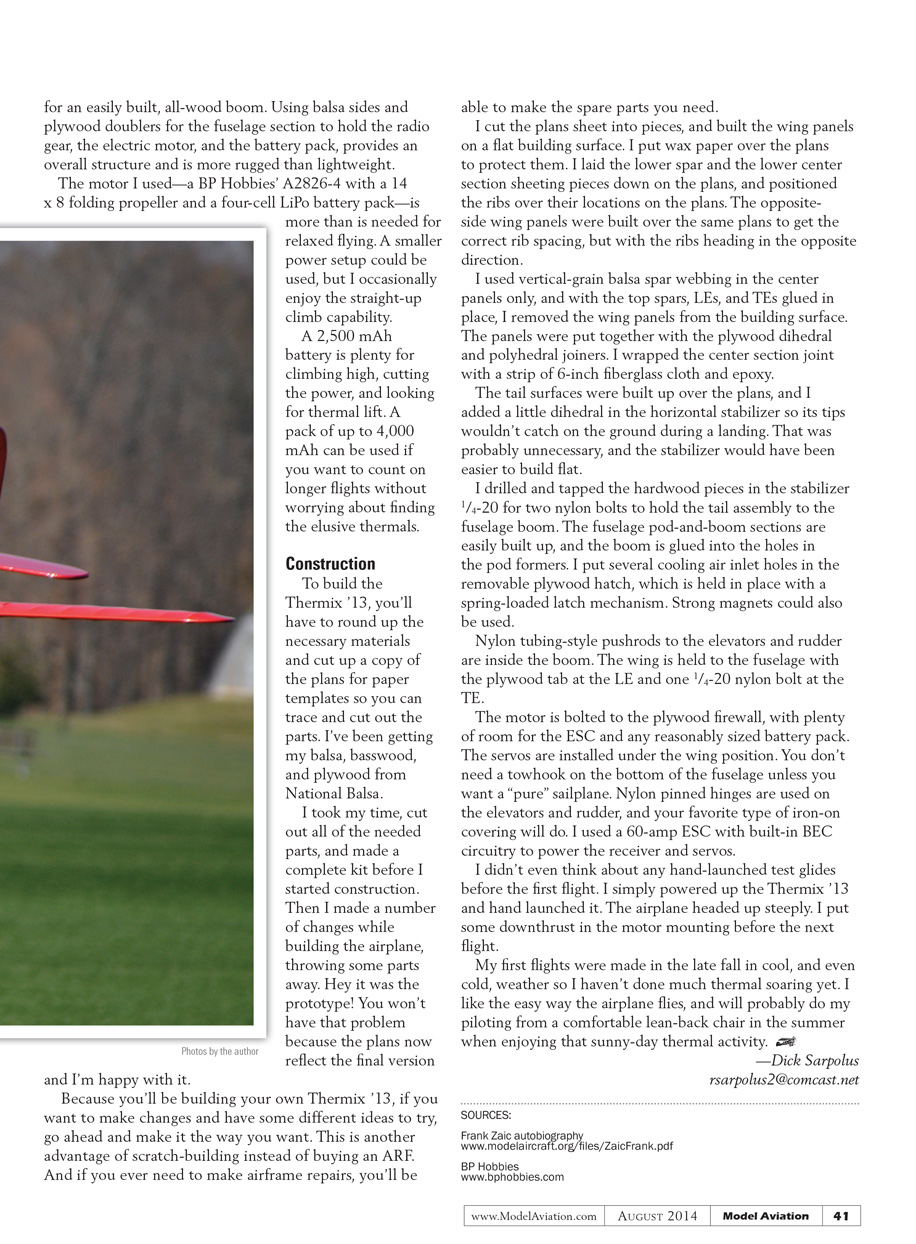
I didn’t even try hand-launched test glides before the first flight—I simply powered up the Thermix '13 and hand-launched it. The airplane headed up steeply, so I added some downthrust to the motor mount before the next flight. My first flights were made in late fall in cool (even cold) weather, so I haven’t done much thermal soaring yet. I like the easy way the airplane flies and will probably do my piloting from a comfortable lean-back chair in the summer while enjoying sunny-day thermal activity.
—Dick Sarpolus [email protected]
Sources
- Frank Zaic autobiography: www.modelaircraft.org/files/ZaicFrank.pdf
- BP Hobbies: www.bphobbies.com
Transcribed from original scans by AI. Minor OCR errors may remain.

