
Top Flite Mini Contender EP ARF - 2013/03
Greg Gimlick [email protected]
Designer Dave Platt is world renowned for his scale achievements and participation at the annual Top Gun event. He is an innovator in scale techniques and, in the case of the Contender, he changed the way people thought about aerodynamic designs of the time. This is best explained by his own words from the July 1970 issue of American Aircraft Modeler:
“Aerodynamically, the model incorporates many variations from the norm. There are no absolutes in model design so one man’s approach represents only his opinion. Mine is that the ‘drive-the-CG-back-as-far-as-you-can’ philosophy is bad for the average pilot, because it leads to a touchy model with a razor-edged margin of stability. Instead, I place the CG well forward and achieve the maneuvers by sufficiently large and far-moving control surfaces to overpower the inherent stability of the model.”
This was a major design philosophy change and one that continues today. Look at our current line of 3-D designs and you can see how his larger control surfaces and exaggerated throws dominate the market.
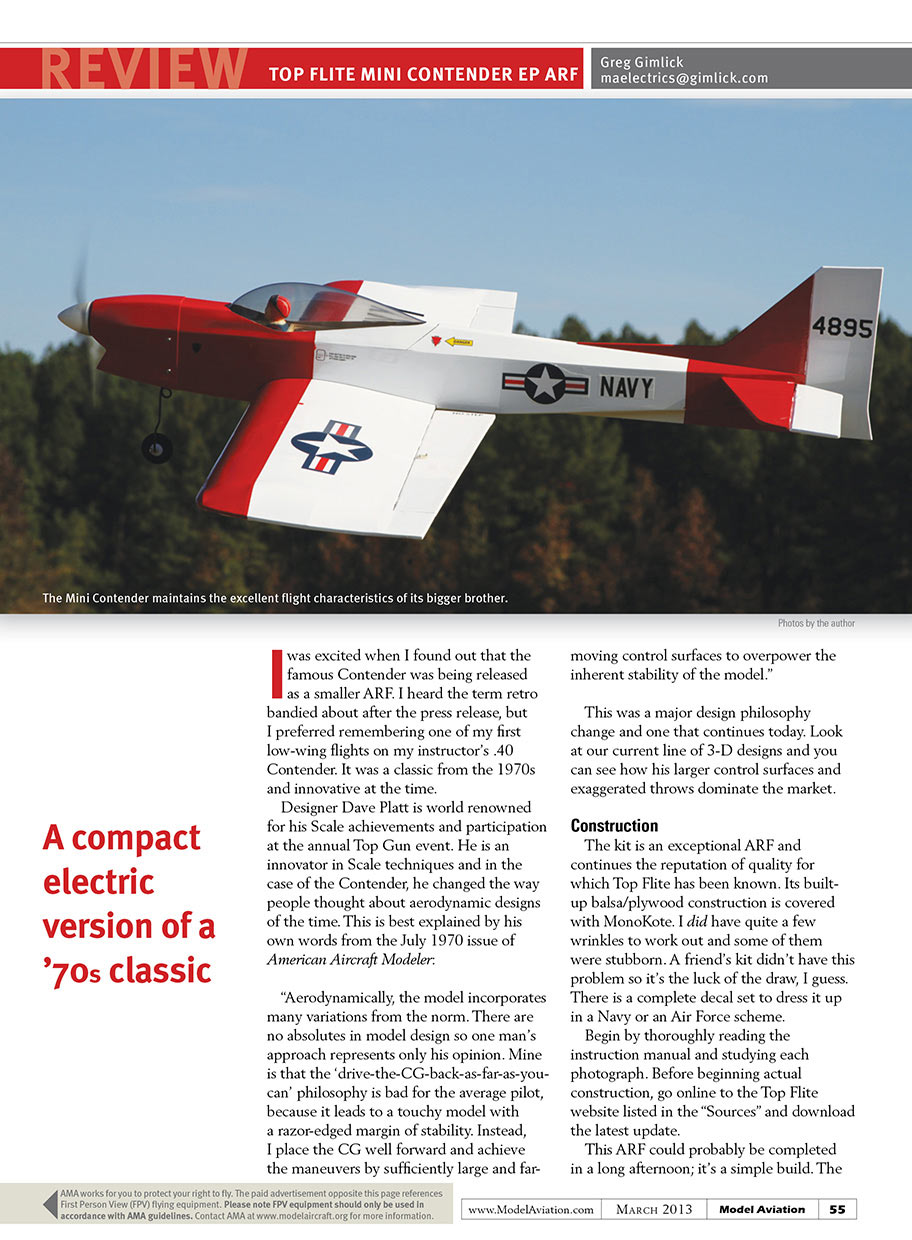
A compact electric version of a ’70s classic
I was excited when I found out that the famous Contender was being released as a smaller ARF. I heard the term “retro” bandied about after the press release, but I preferred remembering one of my first low-wing flights on my instructor’s .40 Contender. It was a classic from the 1970s and innovative at the time.
Construction
The kit is an exceptional ARF and continues the reputation of quality for which Top Flite has been known. Its built-up balsa/plywood construction is covered with MonoKote. I did have quite a few wrinkles to work out and some of them were stubborn. A friend’s kit didn’t have this problem, so it’s the luck of the draw, I guess. There is a complete decal set to dress it up in a Navy or an Air Force scheme.
Begin by thoroughly reading the instruction manual and studying each photograph. Before beginning actual construction, go online to the Top Flite website listed in the “Sources” and download the latest update.
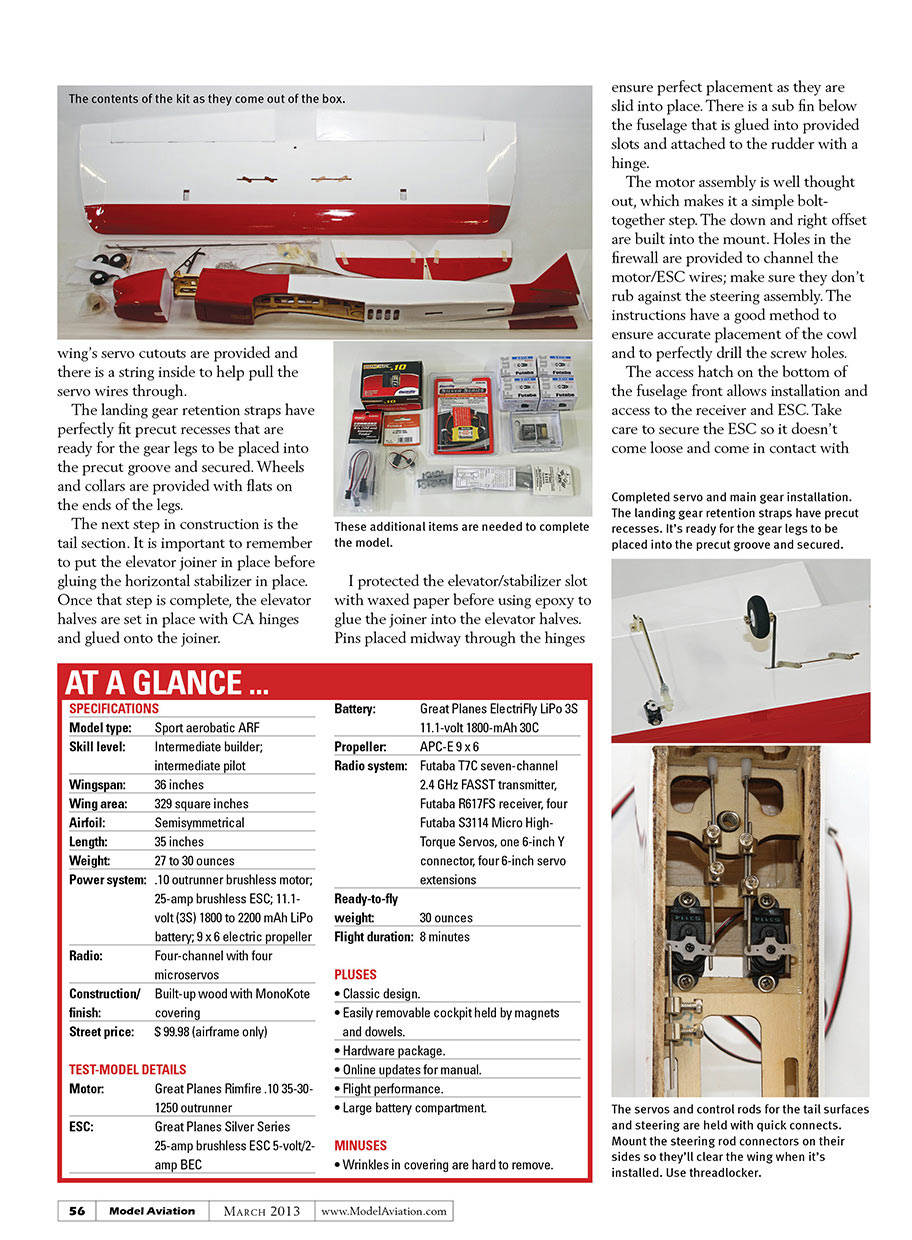
This ARF could probably be completed in a long afternoon; it’s a simple build. The wing’s servo cutouts are provided and there is a string inside to help pull the servo wires through. The landing gear retention straps have perfectly fit precut recesses that are ready for the gear legs to be placed into the precut groove and secured. Wheels and collars are provided with flats on the ends of the legs.
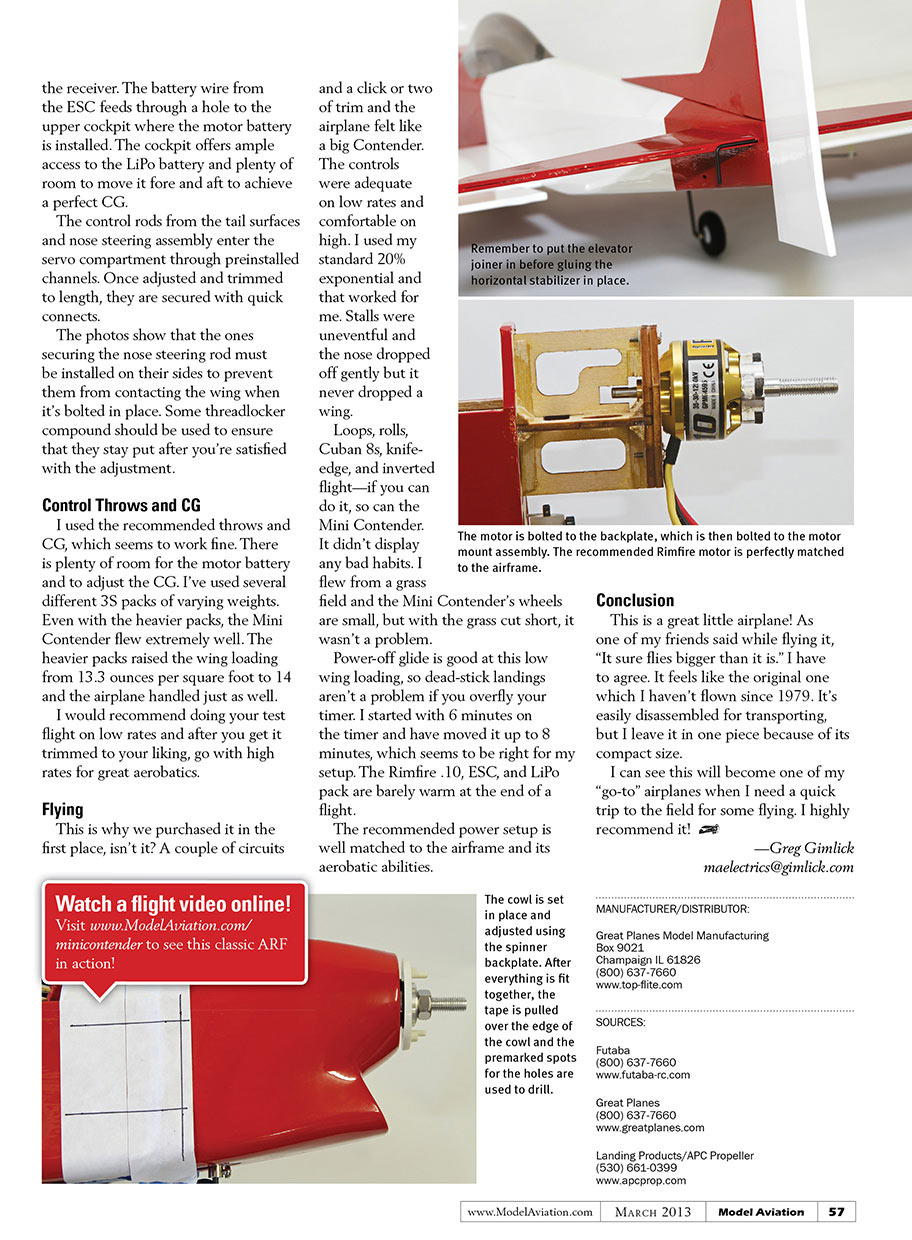
The next step in construction is the tail section. It is important to remember to put the elevator joiner in place before gluing the horizontal stabilizer in place. Once that step is complete, the elevator halves are set in place with CA hinges and glued onto the joiner. I protected the elevator/stabilizer slot with waxed paper before using epoxy to glue the joiner into the elevator.
Pins placed midway through the hinges ensure perfect placement as they are slid into place. There is a sub fin below the fuselage that is glued into provided slots and attached to the rudder with a hinge.
The motor assembly is well thought out, which makes it a simple bolt-together step. The down and right offset are built into the mount. Holes in the firewall are provided to channel the motor/ESC wires; make sure they don't rub against the steering assembly. The instructions have a good method to ensure accurate placement of the cowl and to perfectly drill the screw holes.
The access hatch on the bottom of the front fuselage allows installation and access to the receiver and ESC. Take care to secure the ESC so it doesn't come loose and come in contact with the servos.
The servos and control rods for the tail surfaces and steering are held with quick connects. Mount the steering rod connectors on their sides so they'll clear the wing when it's installed. Use threadlocker.
The battery wire from the ESC feeds through a hole to the upper cockpit where the motor battery is installed. The cockpit offers ample access to the LiPo battery and plenty of room to move it fore and aft to achieve a perfect CG.
The control rods from the tail surfaces and nose steering assembly enter the servo compartment through preinstalled channels. Once adjusted and trimmed to length, they are secured with quick connects.
The photos show that the ones securing the nose steering rod must be installed on their sides to prevent them from contacting the wing when it's bolted in place. Some threadlocker compound should be used to ensure that they stay put after you're satisfied with the adjustment.
Control Throws and CG
I used the recommended throws and CG, which seems to work fine. There is plenty of room for the motor battery and to adjust the CG. I've used several different 3S packs of varying weights. Even with the heavier packs, the Mini Contender flew extremely well. The heavier packs raised the wing loading from 13.3 ounces per square foot to 14 and the airplane handled just as well.
I would recommend doing your test flight on low rates and after you get it trimmed to your liking, go with high rates for great aerobatics.
Flying
This is why we purchased it in the first place, isn't it? A couple of circuits and a click or two of trim and the airplane felt like a big Contender. The controls were adequate on low rates and comfortable on high. I used my standard 20% exponential and that worked for me. Stalls were uneventful and the nose dropped off gently but it never dropped a wing.
Loops, rolls, Cuban 8s, knife-edge, and inverted flight—if you can do it, so can the Mini Contender. It didn't display any bad habits. I flew from a grass field and the Mini Contender's wheels are small, but with the grass cut short, it wasn't a problem.
Power-off glide is good at this low wing loading, so dead-stick landings aren't a problem if you overfly your timer. I started with 6 minutes on the timer and have moved it up to 8 minutes, which seems to be right for my setup. The Rimfire .10, ESC, and LiPo pack are barely warm at the end of a flight.
The recommended power setup is well matched to the airframe and its aerobatic abilities.
Conclusion
This is a great little airplane! As one of my friends said while flying it, "It sure flies bigger than it is." I have to agree. It feels like the original one which I haven't flown since 1979. It's easily disassembled for transporting, but I leave it in one piece because of its compact size.
I can see this will become one of my "go-to" airplanes when I need a quick trip to the field for some flying. I highly recommend it!
—Greg Gimlick [email protected]
Transcribed from original scans by AI. Minor OCR errors may remain.

