
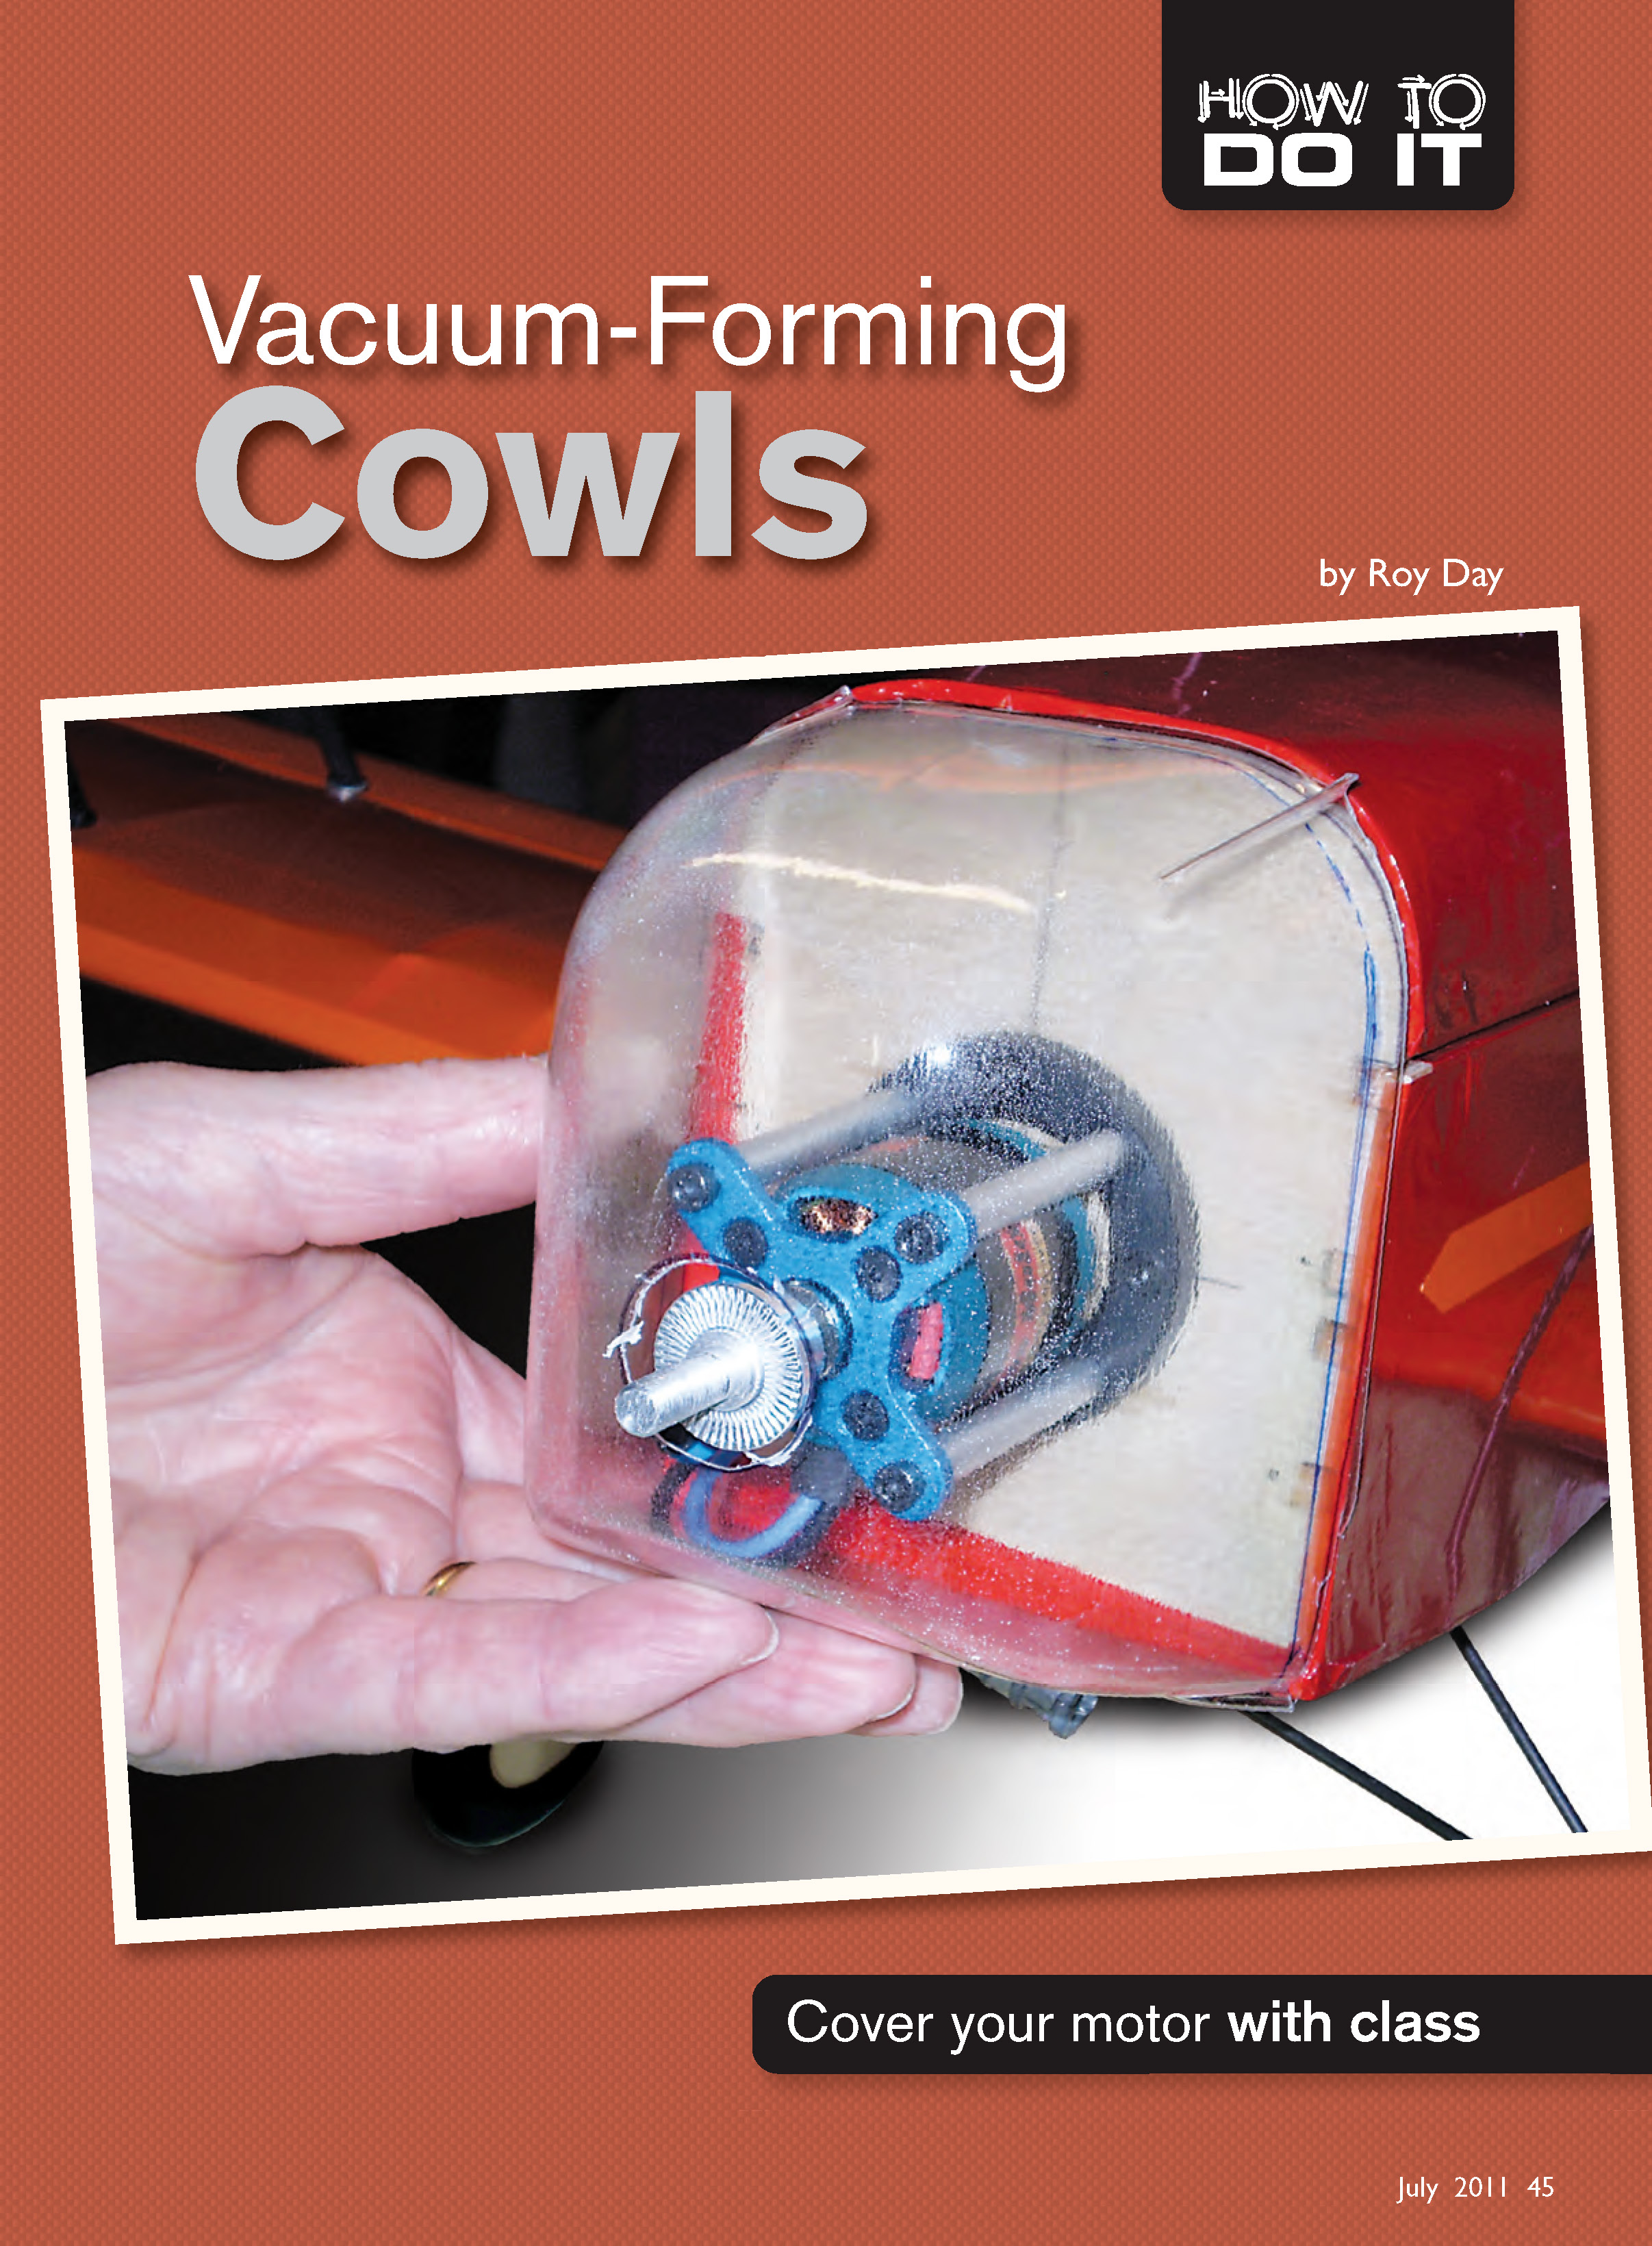
Vacuum-Forming Cowls
by Roy Day
If you build your own models, you often need to construct cowls and perhaps canopies. Vacuum-forming is a good way to produce a lightweight plastic cowl and is ideally suited for making canopies.
Equipment
- A vacuum source (I use my shop vacuum).
- A vacuum box (you can build or purchase one — see Sources).
- A mold (called a plug), which is the shape of the desired cowl or canopy.
- A place to heat the plastic sheet (usually your kitchen oven).
An excellent source of information about vacuum-forming for hobby projects is the book Vacuum Forming for Hobbyists by Douglas E. Walsh ($12.95). He also sells plans for building a vacuum box and has much other useful information for the hobbyist. Douglas does business as Workshop Publishing (see Sources).
Plastics
There are several plastics you can use for vacuum-forming. Two that work well for hobby projects:
- PETG (sometimes sold under the brand name Vivak)
- Clear plastic available in 0.020, 0.040, and 0.060 inches.
- Forms readily after heating at about 270°–310°F. Warm the material in your oven until it sags approximately 1-1/2 to 2 inches before you pull it out and quickly press it over your plug on the vacuum box. Your vacuum source determines what thickness of plastic you can form successfully; you will need to experiment. I typically use 0.020- or 0.040-inch sheets.
- ABS
- Normally white (unsuitable for clear canopies) and available in similar thicknesses to PETG.
- For ABS, set your oven to about 350°–360°F. Allow roughly the same amount of sag as for PETG. ABS cools slightly slower than PETG, giving you more time to work, and it forms well.
Check the Internet or the Yellow Pages for plastic suppliers.
Plugs
Molds can be made from several materials, but remember they get considerable heat when hot plastic is formed over them. The best material to use is wood. Balsa works well and is easy to shape.
You can make plugs from blue or pink foam, but you must coat them with something; otherwise the heat will distort them. I cover foam plugs with successive layers of auto-body bonding putty (available at auto-parts stores). It can be sanded to a smooth finish. If you use putty, apply roughly 1/8–3/16 inch of putty on the foam plug to properly insulate it from the hot plastic. Alternatively, use foam faced with pieces of balsa, which you then shape to form your plug.
Vacuum-Forming a Cowl (follow along with the photos)
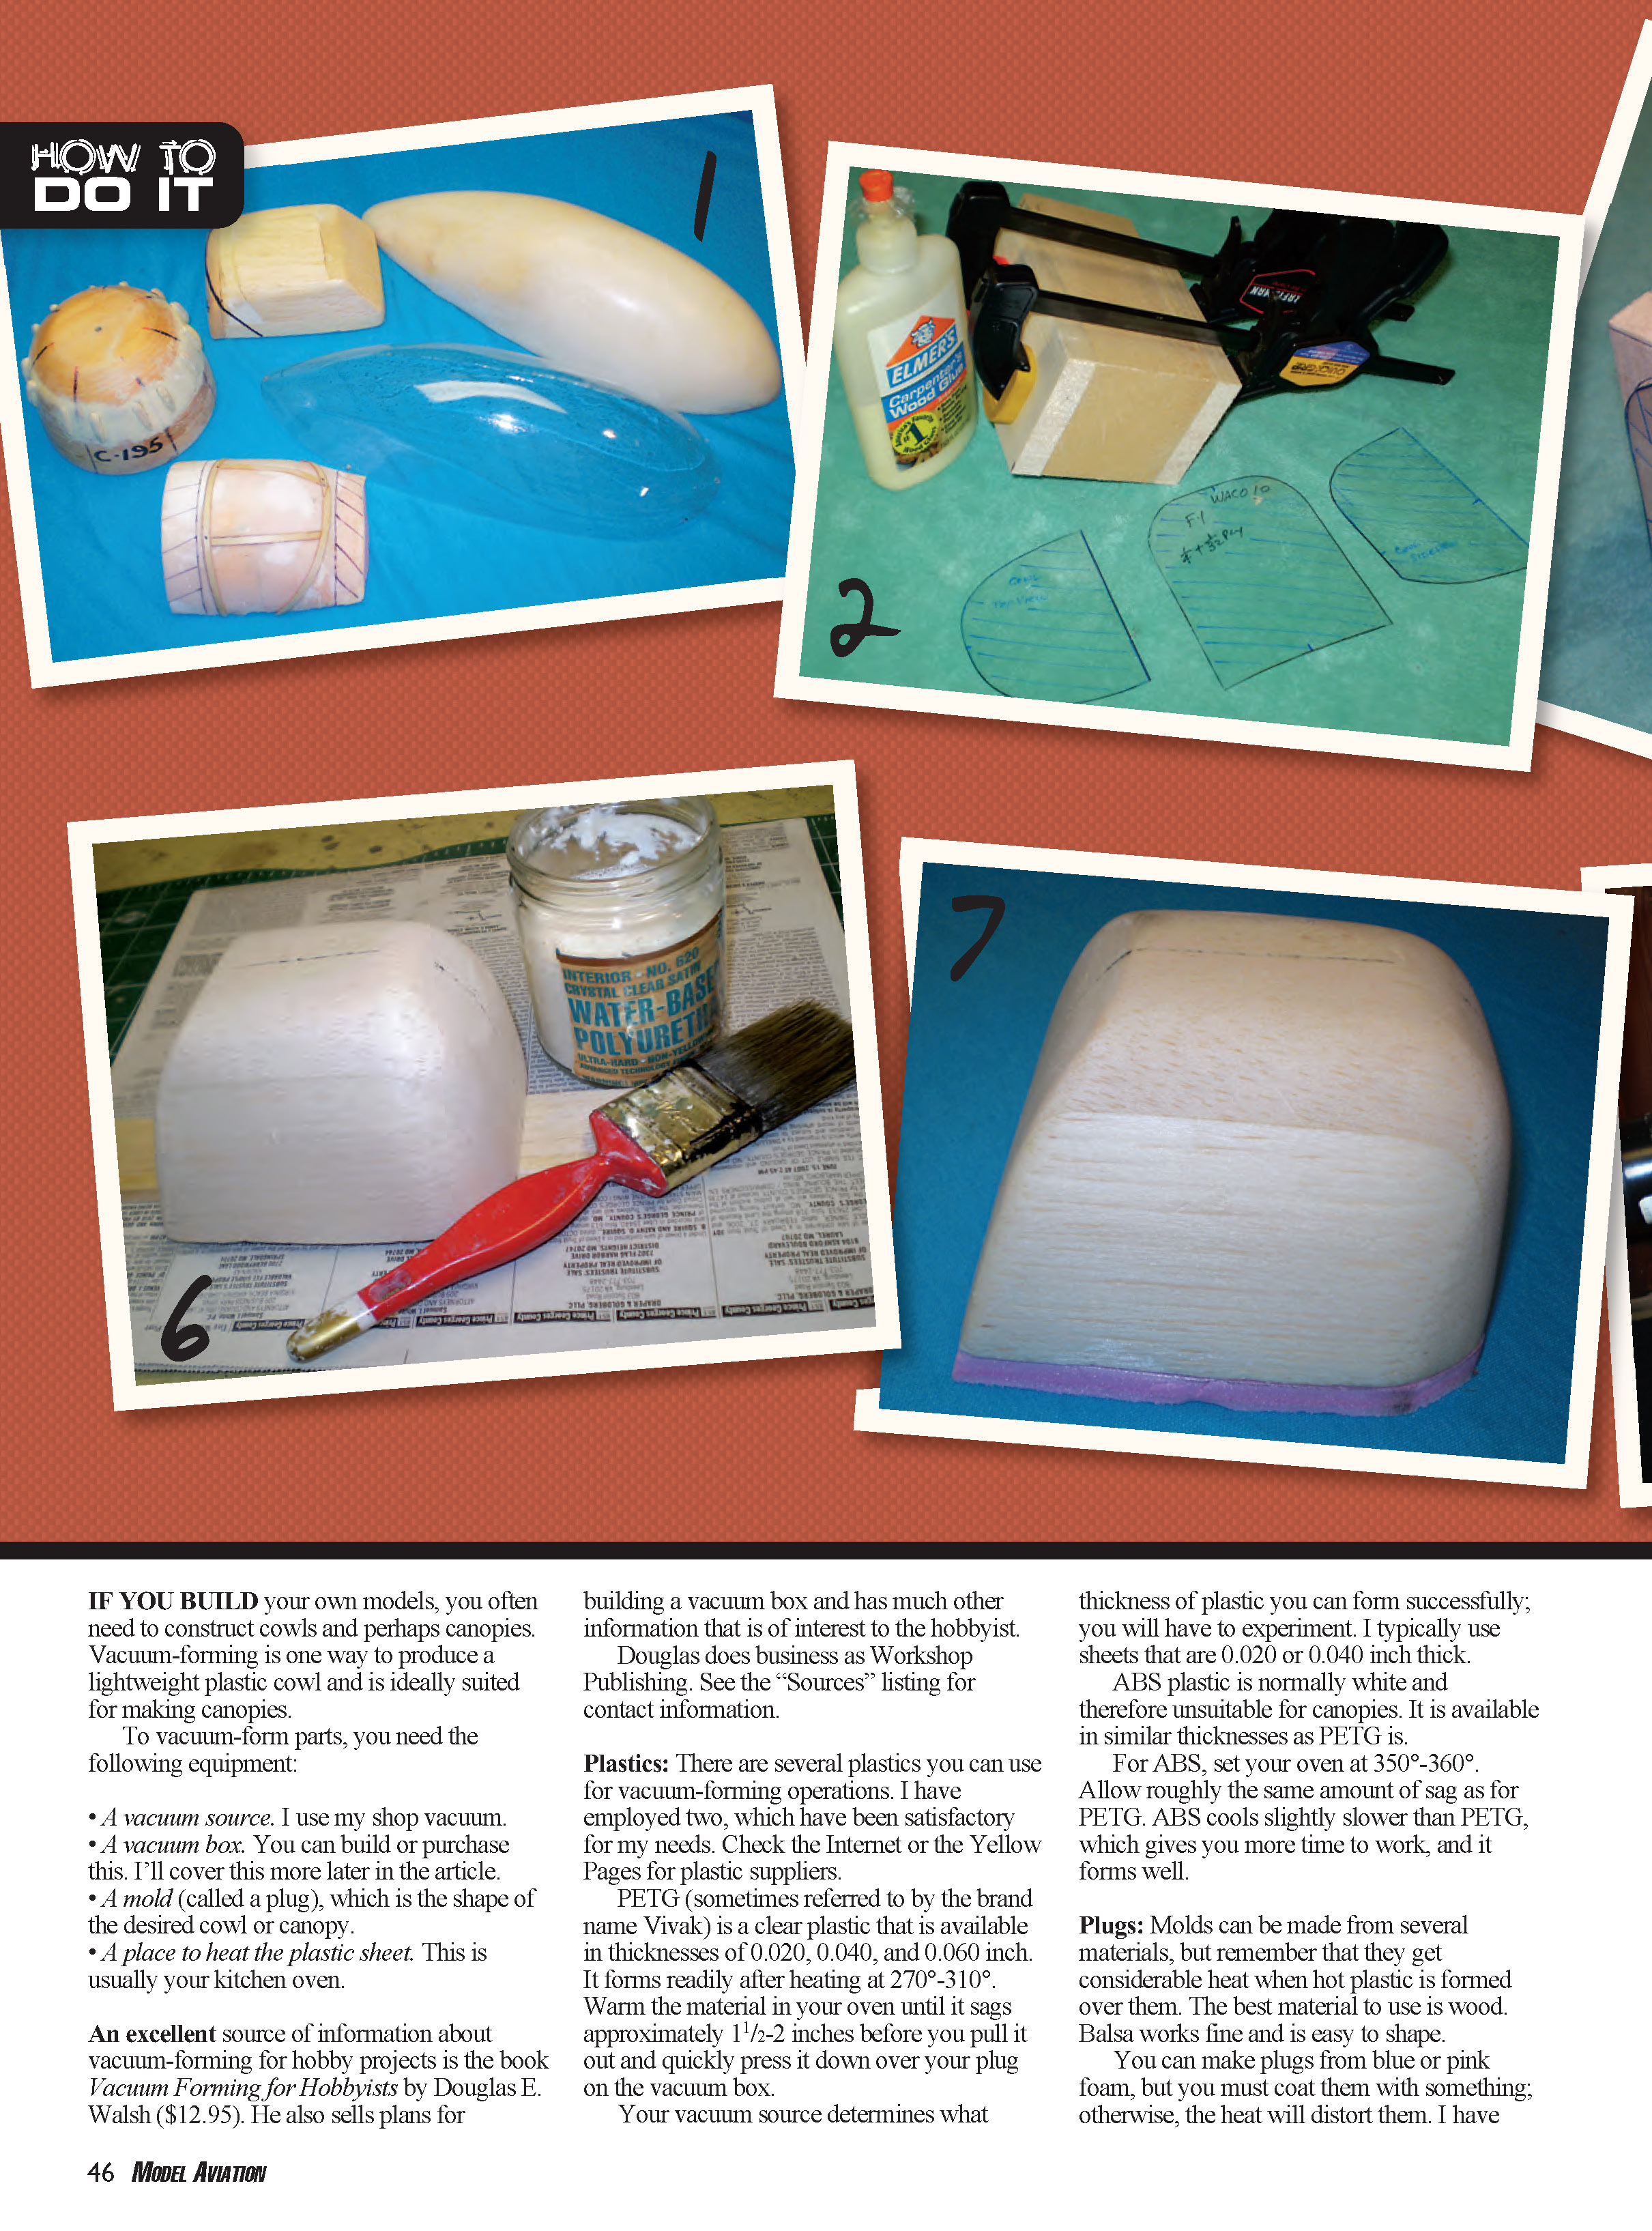
- Photo 1: Four plugs made from different materials. At the bottom is a canopy plug made from pink foam coated with auto-body bonding putty. Narrow strips of 1/64-inch plywood are glued to the model to simulate canopy framing. On the left is a plug made from pine, turned on a lathe to form a radial cowl for a Cessna 195. At the top is a canopy plug made from balsa, and to the right is a large canopy plug made from pink foam covered with putty. In the center is a PETG canopy made using that plug.
- Photo 2: Glue together balsa blocks from your scrap box that are big enough for the cowl plug.
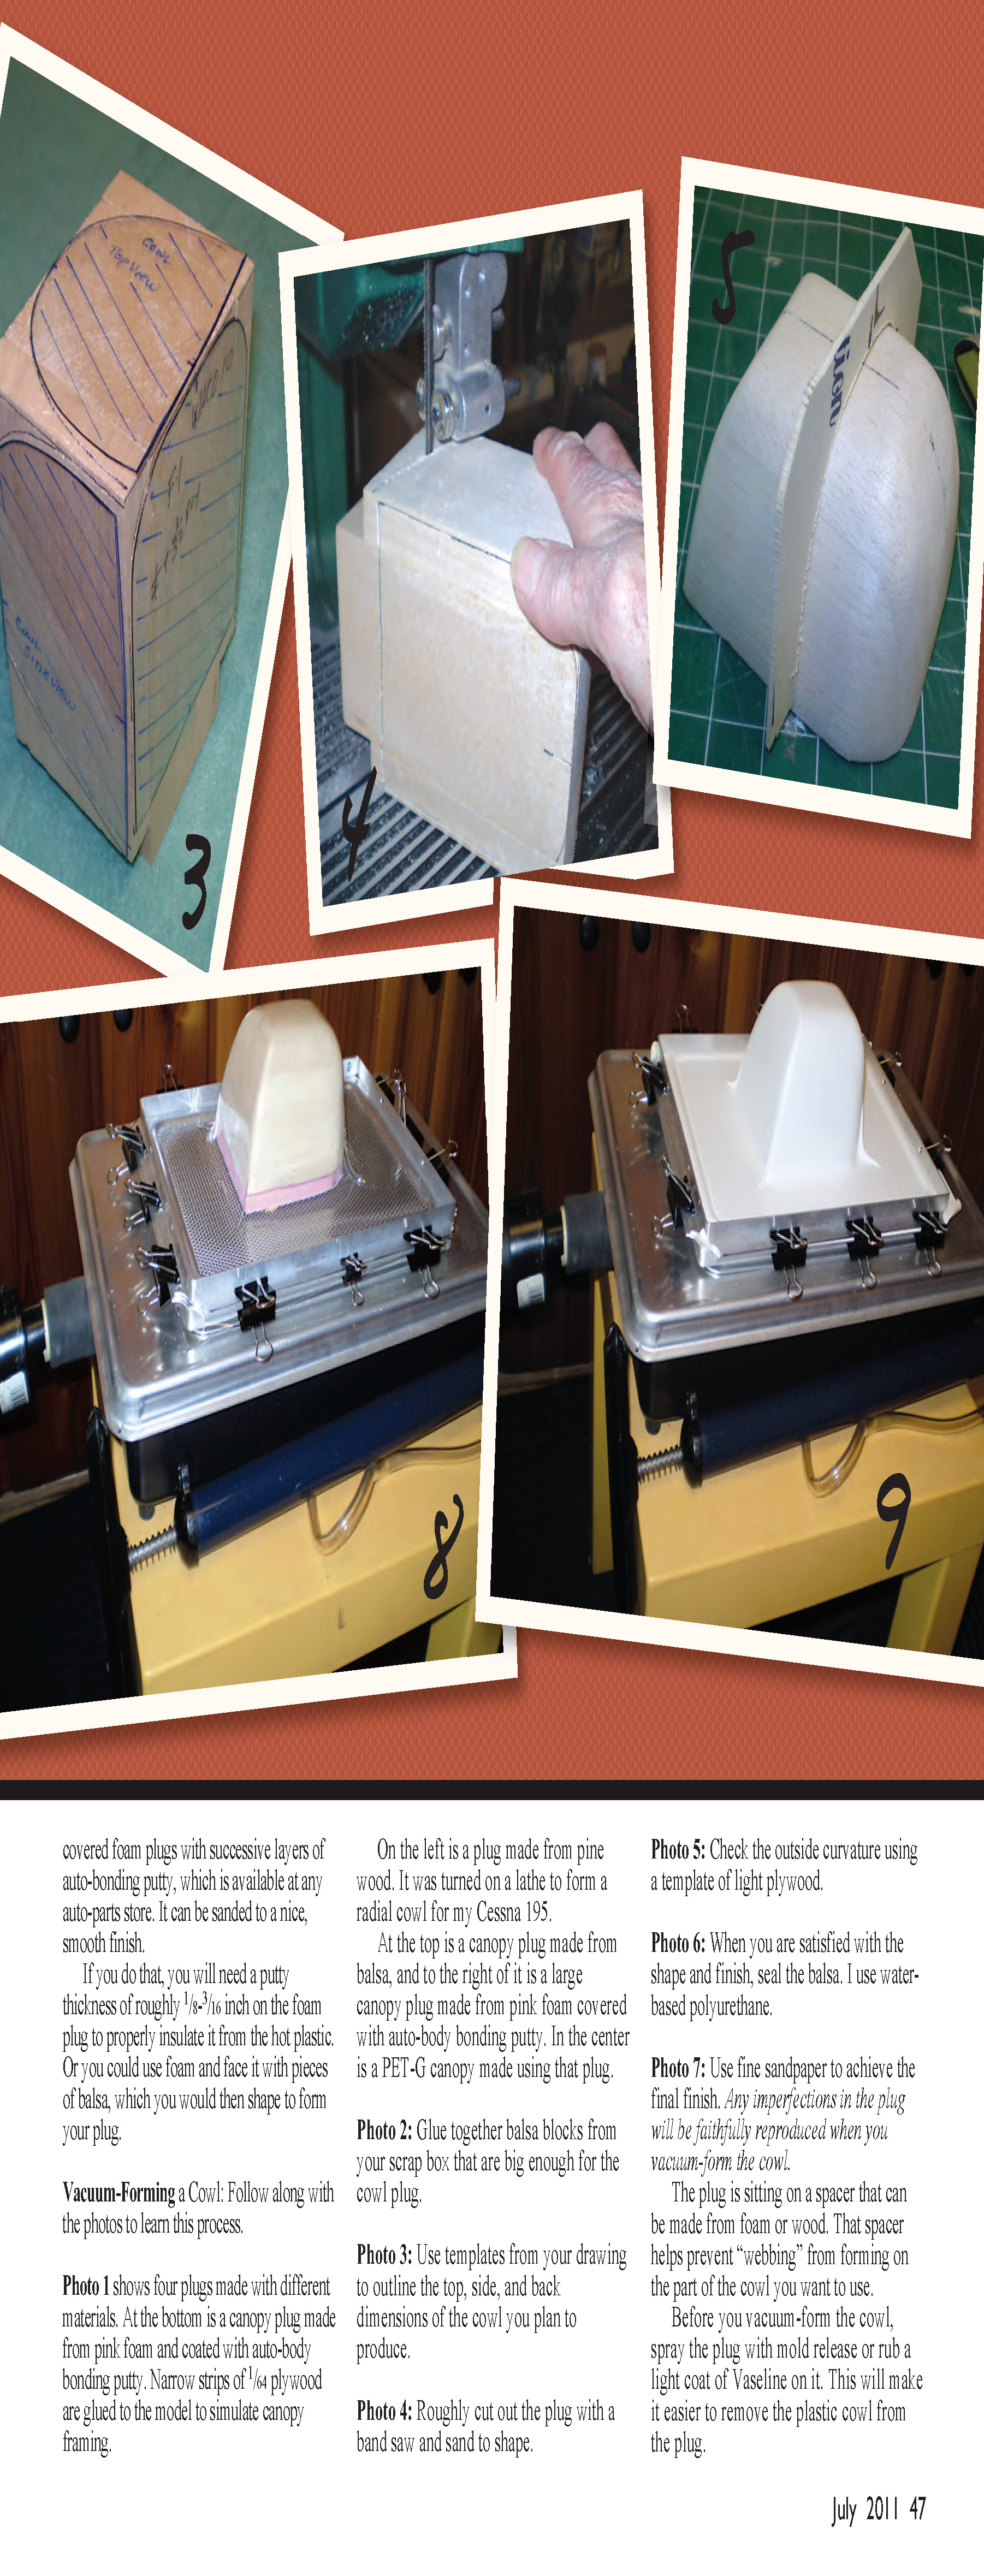
- Photo 3: Use templates from your drawing to outline the top, side, and back dimensions of the cowl you plan to produce.
- Photo 4: Roughly cut out the plug with a band saw and sand to shape.
- Photo 5: Check the outside curvature using a template of light plywood.
- Photo 6: When you are satisfied with the shape and finish, seal the balsa. I use water-based polyurethane.
- Photo 7: Use fine sandpaper to achieve the final finish. Any imperfection in the plug will be faithfully reproduced when you vacuum-form the cowl.
- The plug should sit on a spacer (foam or wood) to help prevent "webbing" on the part of the cowl you want to use.
- Before vacuum-forming, spray the plug with mold release or rub a light coat of Vaseline on it to make removal of the plastic easier.
- Photo 8: Prepare to vacuum-form. For this example I used PETG and the smaller of two vacuum boxes I have. This box requires a 9 x 12-inch sheet of plastic; the larger box uses 12 x 18-inch plastic. Hook up your shop vacuum to the vacuum box and place it close to the oven where you will heat the plastic. Set the oven temperature appropriate to the plastic and watch the sag.
- When the plastic has sagged about 1-1/2 to 2 inches, turn on the shop vacuum. Wear heat-resistant gloves when handling the plastic in its frame. Quickly remove the hot plastic in its frame and press it down over the plug, sealing it to the frame of the vacuum box. It may take a couple of tries before you are successful.
- Photo 9: Repeat the process as needed. Example: I used ABS for a repeat run; both cowls turned out well.
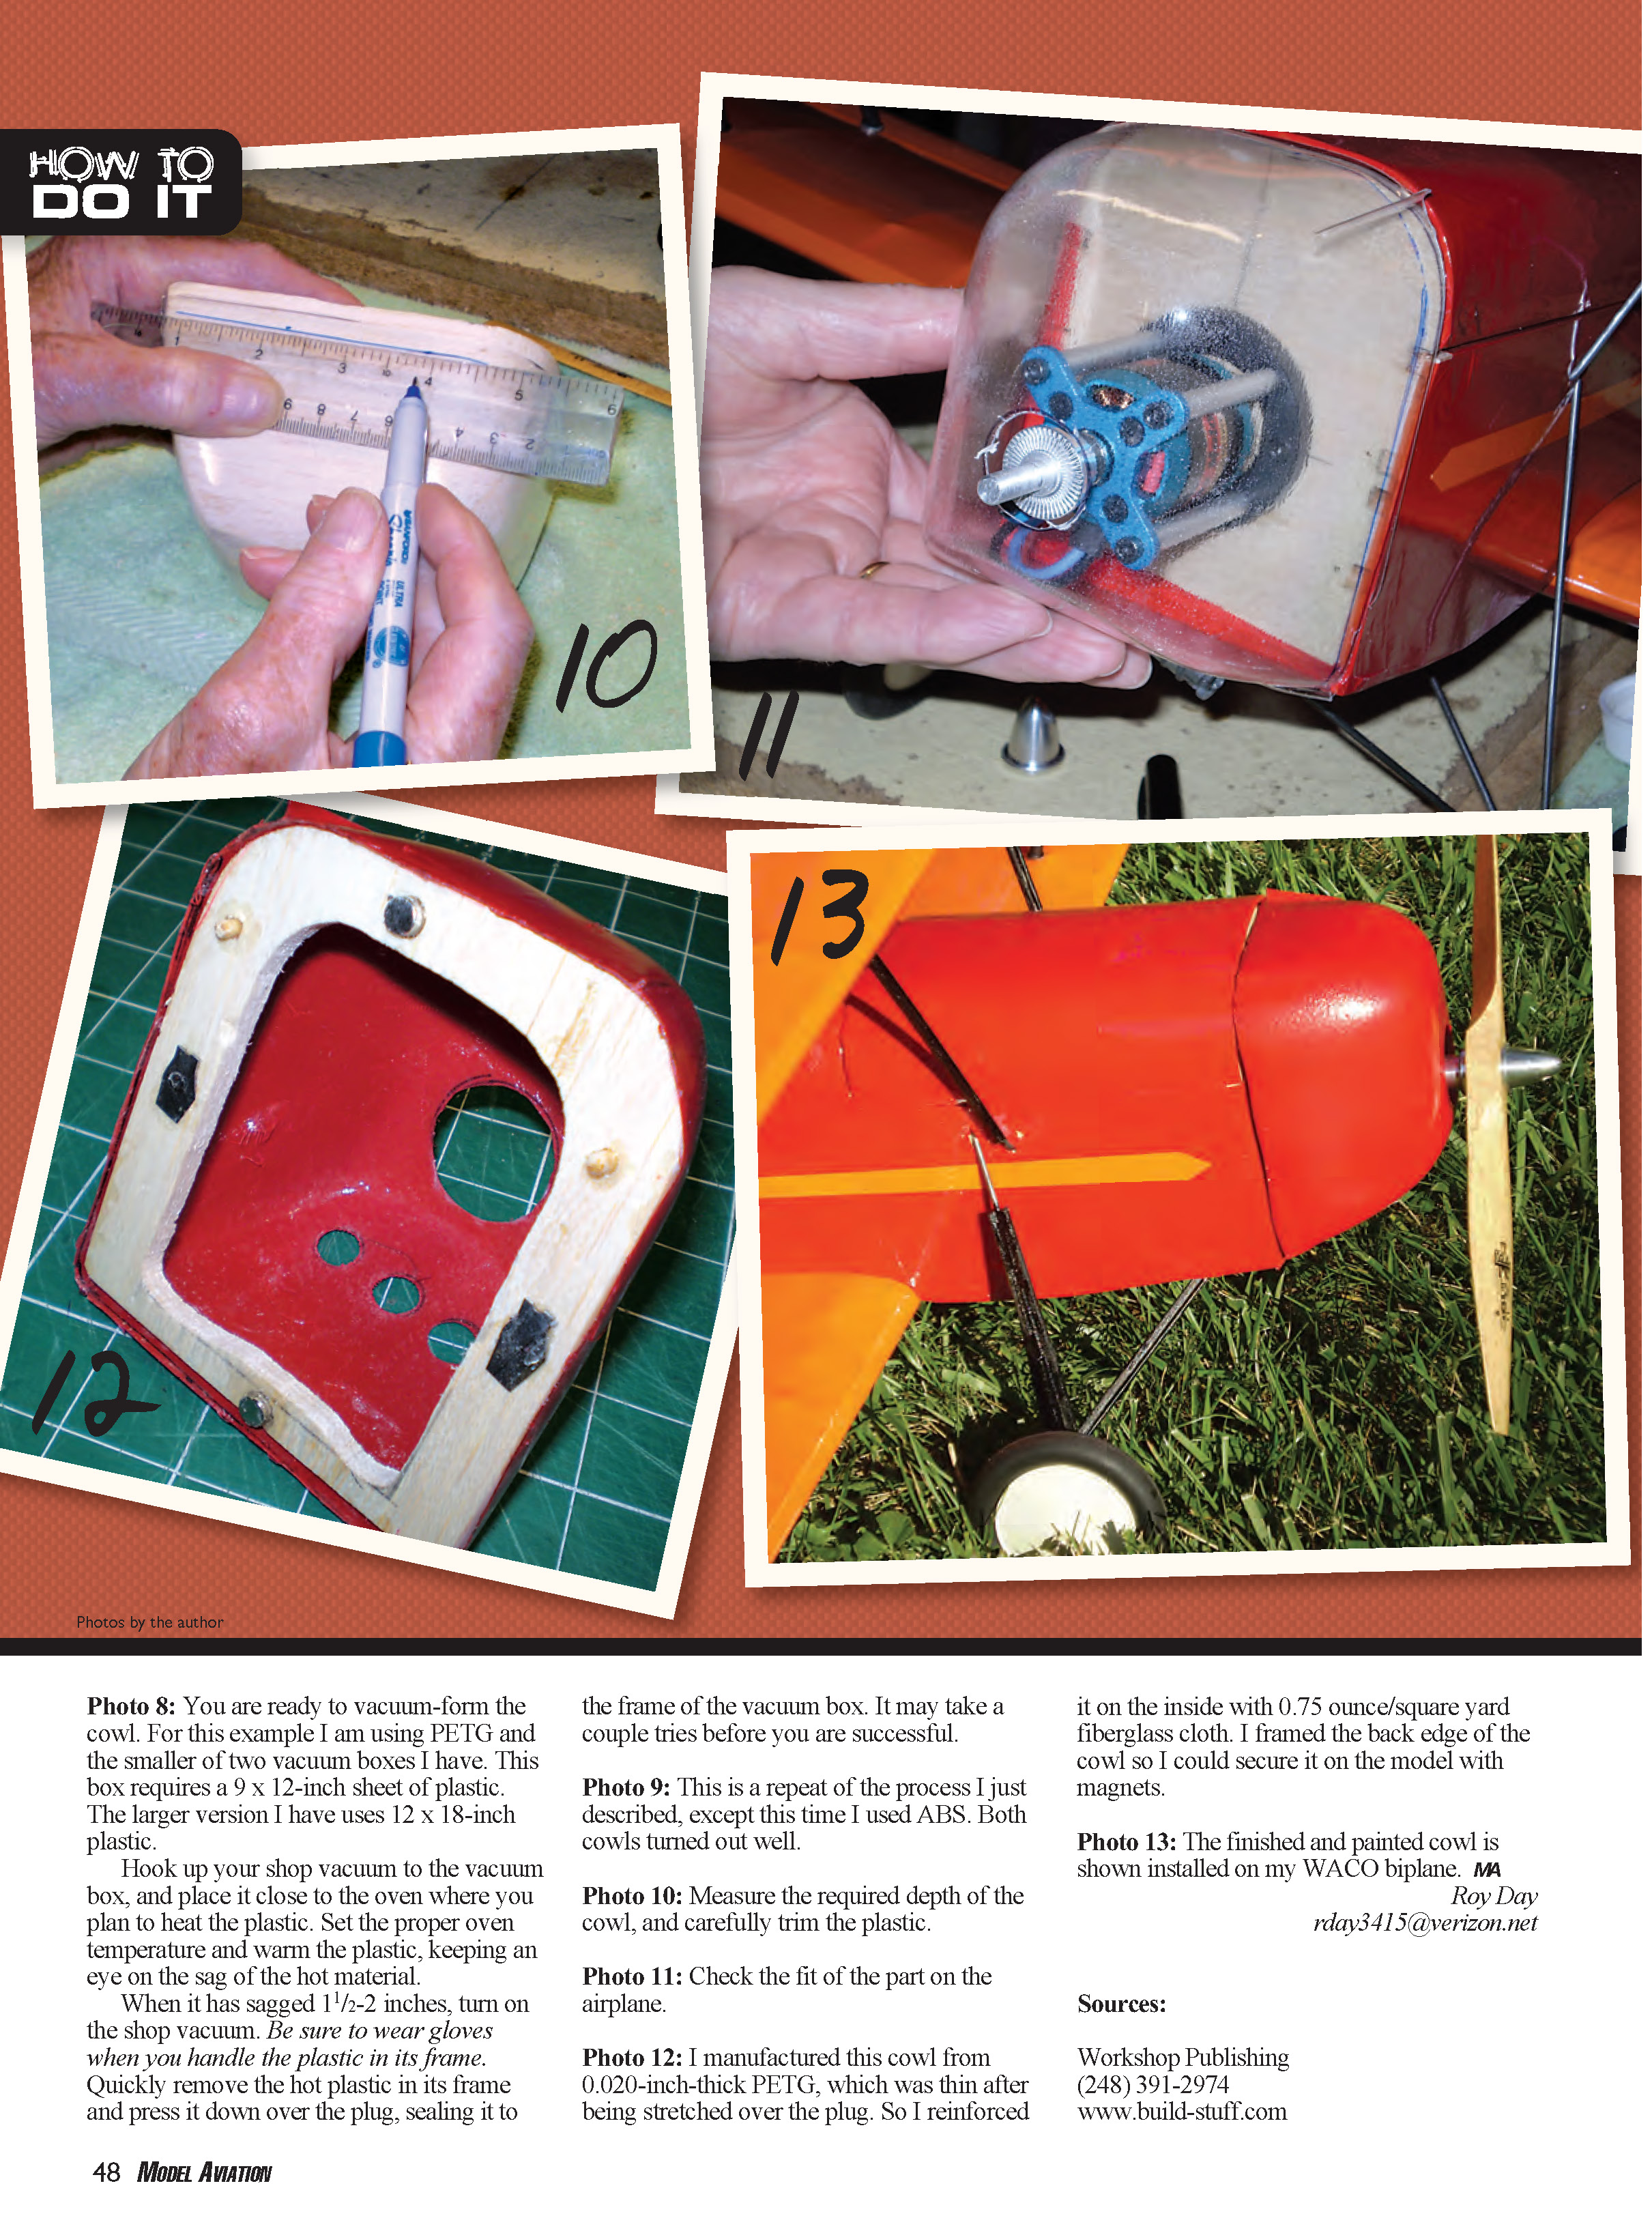
- Photo 10: Measure the required depth of the cowl and carefully trim the plastic.
- Photo 11: Check the fit of the part on the airplane.
- Photo 12: If the formed plastic is thin after stretching (for example, 0.020-inch PETG), reinforce it on the inside with lightweight fiberglass cloth (I used 0.75 ounce per square yard). Frame the back edge of the cowl so you can secure it to the model with magnets.
- Photo 13: The finished and painted cowl installed on a WACO biplane.
Tips
- Your vacuum source limits the thickness of plastic you can form successfully; test different thicknesses to see what works.
- Wear gloves when handling hot plastic and work quickly when transferring from oven to vacuum box.
- Any flaws in the plug surface will reproduce in the part—take care with sanding and sealing.
- Use mold release or a light coat of Vaseline on the plug to ease removal.
Roy Day [email protected]
Sources
- Workshop Publishing
Phone: (248) 391-2974 Web: www.build-stuff.com
Transcribed from original scans by AI. Minor OCR errors may remain.

