
When to rebuild
by Bob Hunt
In my past three columns, I have reported on my experiences with basecoat/clearcoat finishing systems, materials, and techniques. I promised to get on with other subjects this time, but it seems that I've hit a nerve with many.
I have received perhaps more mail, email, telephone calls, and comments from friends on this subject than I have for nearly anything that I've covered in the past. I have learned more since I wrote the last column, so I'm going to share that with you.
In my May 2012 column, I wrote about shooting on a coat of ChromaBase silver paint as a blocking coat to cover the carbon-mat and filler coat spots that are left after sanding. The basecoat easily goes over the silver in one thin coat, and at that point you can begin trimming.
Since my last column, I have finished my Gene Shaffer–designed model that I affectionately call the Oosa-Amma. (It was so named because Gene put a huge USA on one wing and an equally large AMA on the other wing. Together it just seemed to spell something that sounded like Oosa-Amma.)
I miscalculated the amount of "grip" that the ChromaBase silver paint would have compared with the silver dope that I used for this purpose in the past. The silver dope didn't bond sufficiently to the filler coat, and the tape I used to mask off the color trim areas would occasionally pull up some of the substrate. It was a pain!
Unfortunately, although the basecoat/clearcoat paints seem to grip better than the dope did, I still experienced a few areas where very small amounts of the basecoat would come up with the tape when it was removed.
I told my good friend and building/flying partner, Buddy Wieder, about this problem during the trimming process. He told me that to prevent this from happening he uses a low-temperature heat gun and flicks the area ahead of the tape with some hot air as he removes it. I tried that and it worked perfectly!
The heat softened the adhesive on the tape just enough to make it release easily from the surface, and no additional areas of basecoat were pulled up throughout the rest of the trimming process.
Because of this, I'll continue using the ChromaBase silver as a blocking/indicator coat on future projects.
When to Rebuild and Refinish
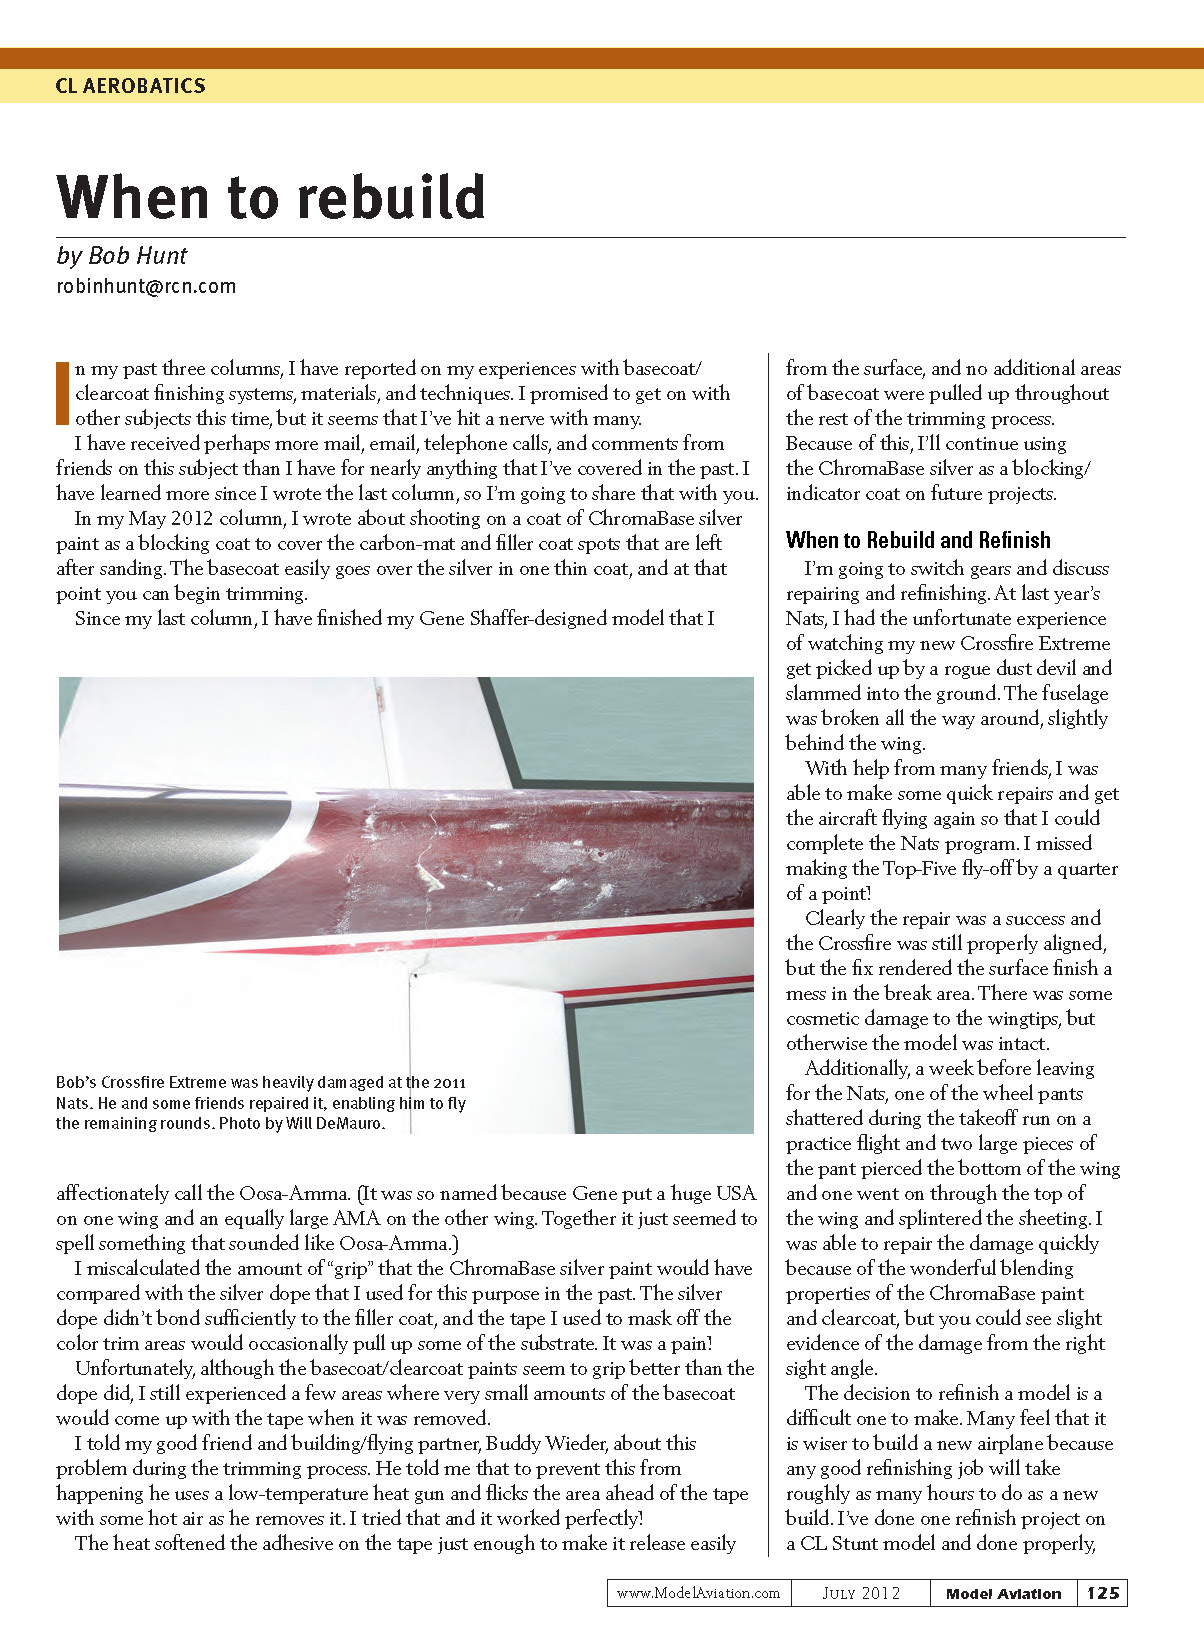
I'm going to switch gears and discuss repairing and refinishing. At last year's Nats, I had the unfortunate experience of watching my new Crossfire Extreme get picked up by a rogue dust devil and slammed into the ground. The fuselage was broken all the way around, slightly behind the wing.
With help from many friends, I was able to make some quick repairs and get the aircraft flying again so that I could complete the Nats program. I missed making the Top-Five fly-off by a quarter of a point!
Clearly the repair was a success and the Crossfire was still properly aligned, but the fix rendered the surface finish a mess in the break area. There was some cosmetic damage to the wingtips, but otherwise the model was intact.
Additionally, a week before leaving for the Nats, one of the wheel pants shattered during the takeoff run on a practice flight. Two large pieces of the pant pierced the bottom of the wing, and one went on through the top of the wing and splintered the sheeting. I was able to repair the damage quickly because of the wonderful blending properties of the ChromaBase paint and clearcoat, but you could see slight evidence of the damage from the right-side angle.
The decision to refinish a model is a difficult one to make. Many feel that it is wiser to build a new airplane because any good refinishing job will take roughly as many hours to do as a new build. I've done one refinish project on a CL Stunt model and, done properly, it takes many hours. Ironically, that was done on my 1987 vintage Crossfire and it took many hours to complete.
What factors should you consider when contemplating a refinishing project? The most important is the way the model flies. If you have a favorite model that turns equally in both directions, grooves in both upright and inverted flight, and feels "good" to you when it is at the end of the lines, that is a prime candidate. That means that the wing and stabilizer were installed properly and that there is no decalage between the two. That's the most important thing to get right when building a Stunt model.
That's how I felt about my 1987 Crossfire, and that's how I feel about my new Crossfire Extreme. In both cases there was much rebuilding and/or repairing to do along with the refinishing. You must decide if the damage that needs repairing—or any alterations you might be considering—will add extra weight that might render the model useless afterward.
In the case of the 1987 Crossfire, I decided to remove and replace the movable surfaces with lighter ones and to replace the bottom block for aesthetic reasons. That model had too much paint applied initially, and I thought that with the modifications and a lighter finish, the result would be a much lighter aircraft.
That worked out well; I was able to remove 8 ounces from the airplane and still obtain a great finish. The Crossfire sat on the front row of the Appearance Point judging at the 1990 Nats. It flew much better than it had before, and it looked nicer, too. A successful project!
The new Crossfire Extreme had one huge additional thing going for it when I decided to rebuild and refinish it—because it is an electric-powered model, there would be no fuel soakage to deal with!
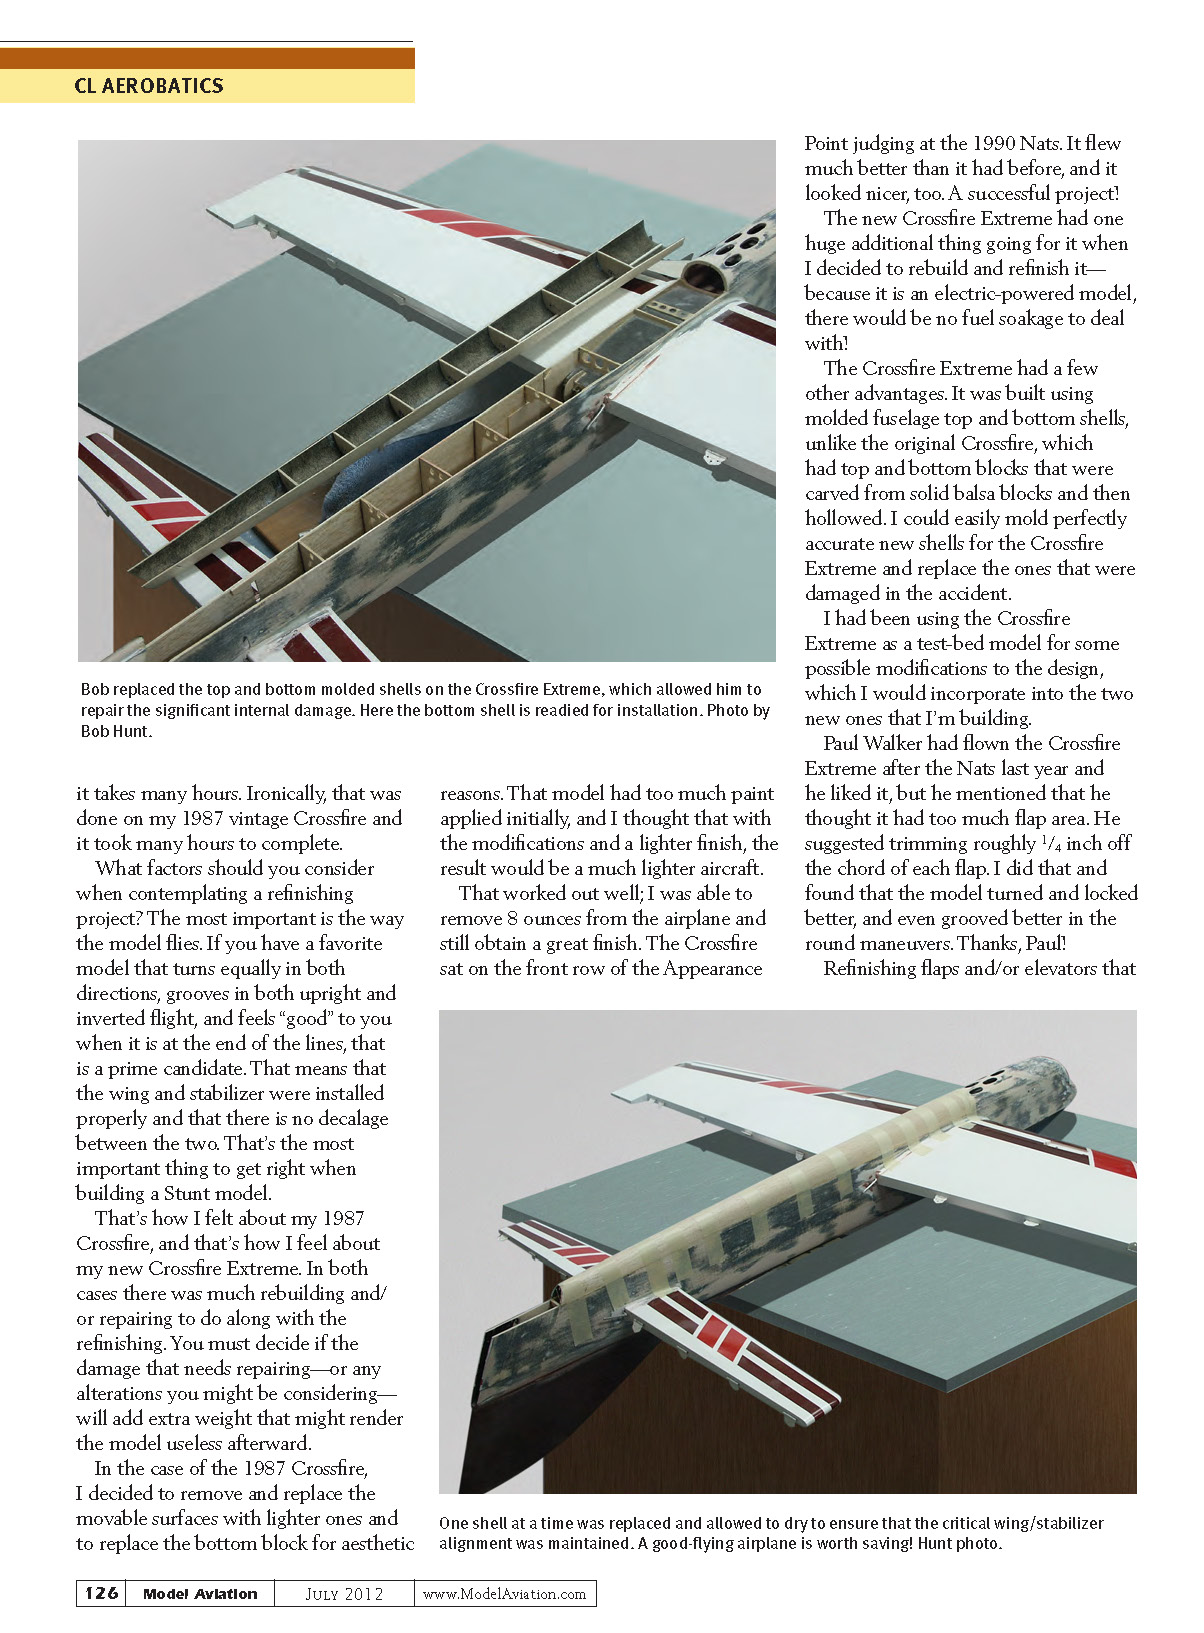
The Crossfire Extreme had a few other advantages. It was built using molded fuselage top and bottom shells, unlike the original Crossfire, which had top and bottom blocks that were carved from solid balsa blocks and then hollowed. I could easily mold perfectly accurate new shells for the Crossfire Extreme and replace the ones that were damaged in the accident.
I had been using the Crossfire Extreme as a test-bed model for some possible modifications to the design, which I would incorporate into the two new ones that I'm building.
Paul Walker had flown the Crossfire Extreme after the Nats last year and he liked it, but he mentioned that he thought it had too much flap area. He suggested trimming roughly 1/4 inch off the chord of each flap. I did that and found that the model turned and locked better, and even grooved better in the round maneuvers. Thanks, Paul!
Refinishing flaps and/or elevators that are attached to the model is too much of a pain to even consider, so I removed them, being careful not to damage the hinge mounts in the fixed surfaces. I had replaced elevators on models in the past and found that I could reuse the original hinges.
During this process, I found out something interesting. I had used Pacer Formula 560 Canopy Glue to install the hinges. I was moderately concerned about the long-term strength of the adhesive. It was difficult to trim the wood and glue from the surface of the large Great Planes hinges that I used.
The glue was well attached and even remained slightly flexible. There was no danger of any of the hinges loosening or pulling out. I will use this glue for hinge installation from now on!
I decided to remove all of the hinges from the fixed surfaces and install new ones. It was too difficult to sand away the catalyzed clearcoat and the ChromaBase paint from the perimeter of each of the 18 hinges!
I opted to cut the hinges out of the fixed surfaces by making cuts around each hinge and removing the resulting rectangle of wood that contained the hinge. I cleaned up the slots to accept balsa plugs.
After the plugs were glued in place and sanded flush with the surface, I slotted them and installed new hinges in both the fixed and movable surfaces. This turned out to be easier and neater and I remembered that this is what I had done when I refinished the Crossfire in 1987.
Removing the catalyzed polyurethane clearcoat, the base color coat, and the trim colors is probably the most daunting task when refinishing. You could patiently block sand all those coats off the airframe, but that would take hours—maybe days or weeks! I prefer to use a paint stripper in a controlled manner.
I used Klean-Strip KS-3 Premium Stripper, which is formulated to remove epoxy and polyurethane-based paint. I didn't want to strip the finish all the way down to the carbon-mat layer. I aimed to get down to the blocking coat. With some careful experimenting, I was able to achieve this goal and removed the majority of the paint finish in a short amount of time.
The stripper's instructions say to neutralize the residue stripper using low-odor mineral spirits, which worked well. A note of caution here: follow the safety directions on the can exactly! Wear splatter-proof eyewear and rubber gloves while working with this stuff.
I was able to carefully block sand the remaining paint and blocking coat from the model using #220 grit sandpaper and a small, flat block. After the paint and blocking coat had been removed, I fine-sanded the surfaces with #400 wet-or-dry sandpaper and a foam sanding block.
I stripped and sanded the fuselage first and then installed the new molded shells before stripping and sanding the flying surfaces. I nearly opted to forgo installing the new shells and just refinish the fuselage over the external repairs we made at the Nats.
It was a good thing I didn't! There was some significant damage inside the fuselage, and removing the shells gave me the opportunity to brace the damaged fuselage sides properly. I'm not sure the model would have lasted long with that sort of damage.
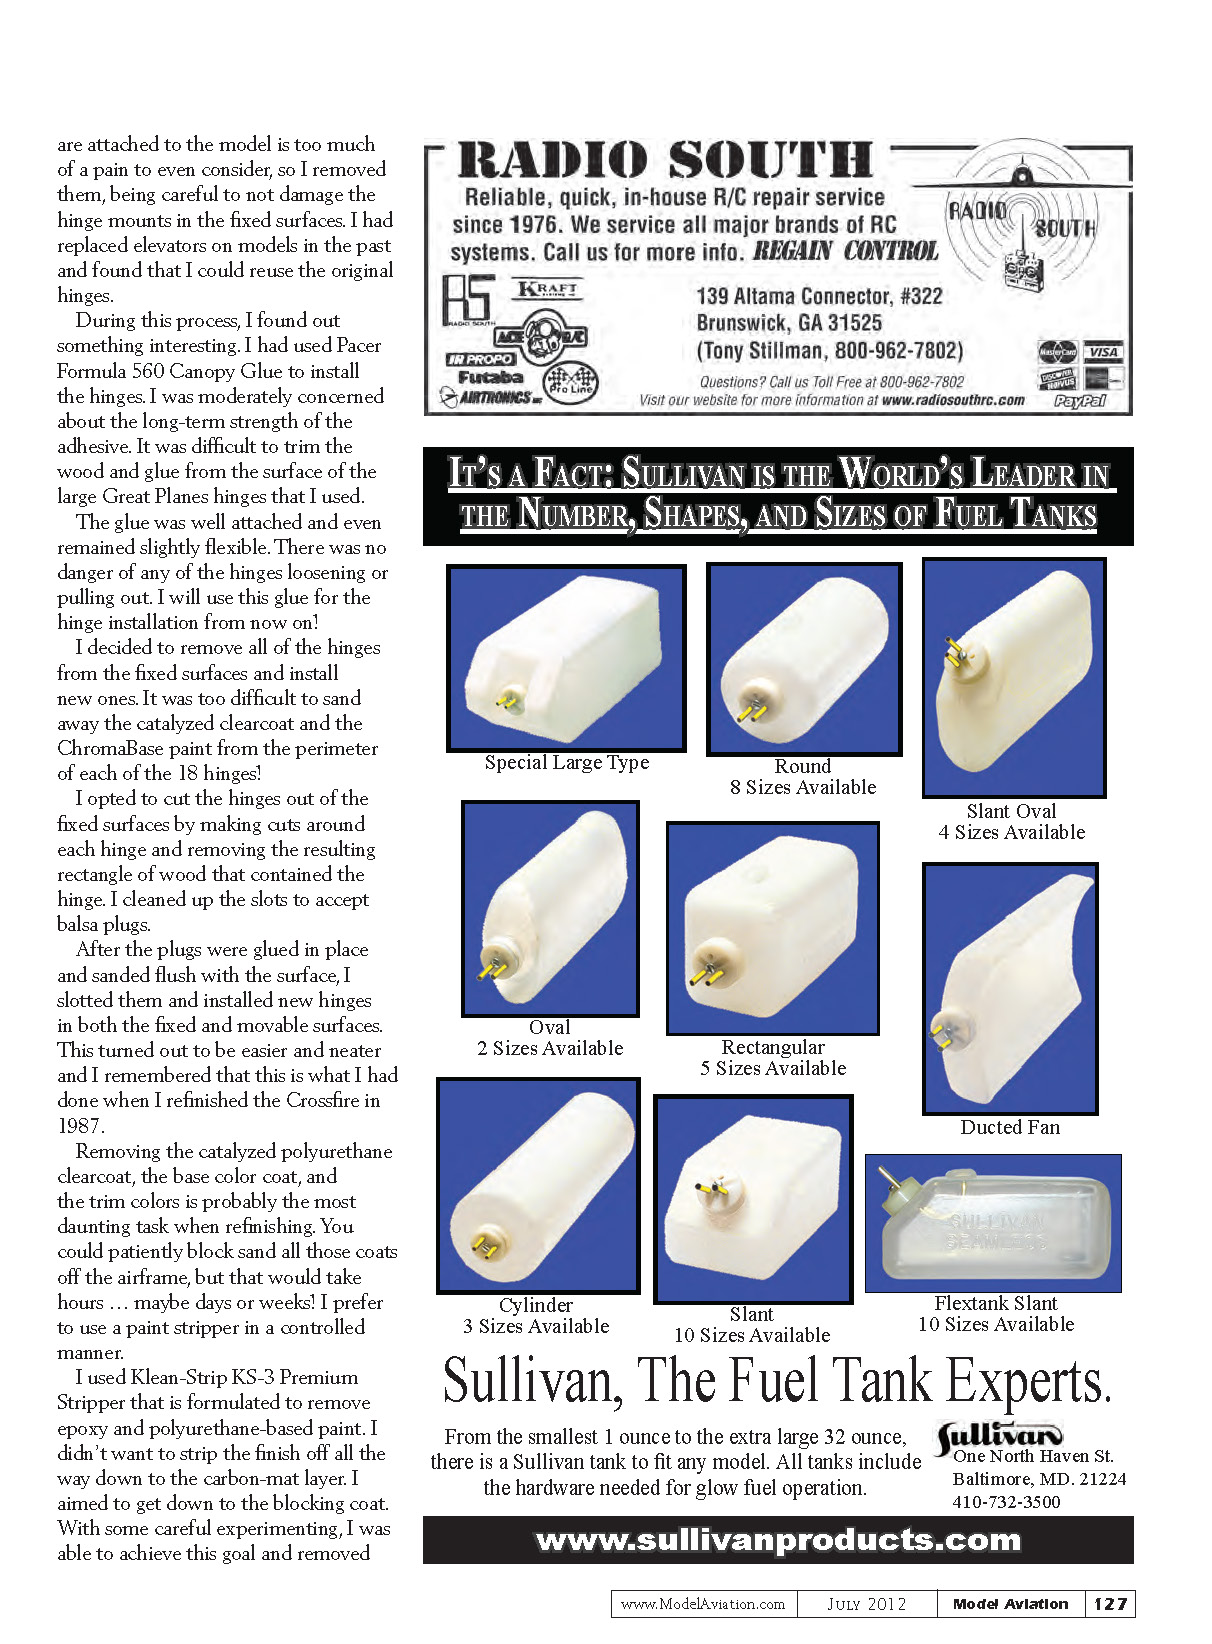
To ensure that the wing/stabilizer alignment was maintained during the repair process, I replaced one shell at a time. The entire process—removing the shells, fixing the damage, and replacing the shells with new ones—took only two days. I'm glad I did it!
I took the opportunity to make a few aesthetic changes to the Crossfire Extreme. I lowered the fin/rudder height slightly and reshaped the ventral fin. My projections are for a model that weighs a couple of ounces less than it did with the original finish. That is because of my increasing familiarity with the basecoat/clearcoat system.
Next time, I should be able to report on the finished—uh, refinished—product!
Sources
- Pacer Formula 560 Canopy Glue
(800) 538-3091 www.supergluecorp.com/pacer-industrial
- Klean-Strip
(800) 398-3892 www.wmbarr.com/kleanstrip/default.aspx
- DuPont ChromaSystems
- Precision Aerobatics Model Pilots Association
Transcribed from original scans by AI. Minor OCR errors may remain.

