
Worth a Closer Look
Luscombe Silvaire
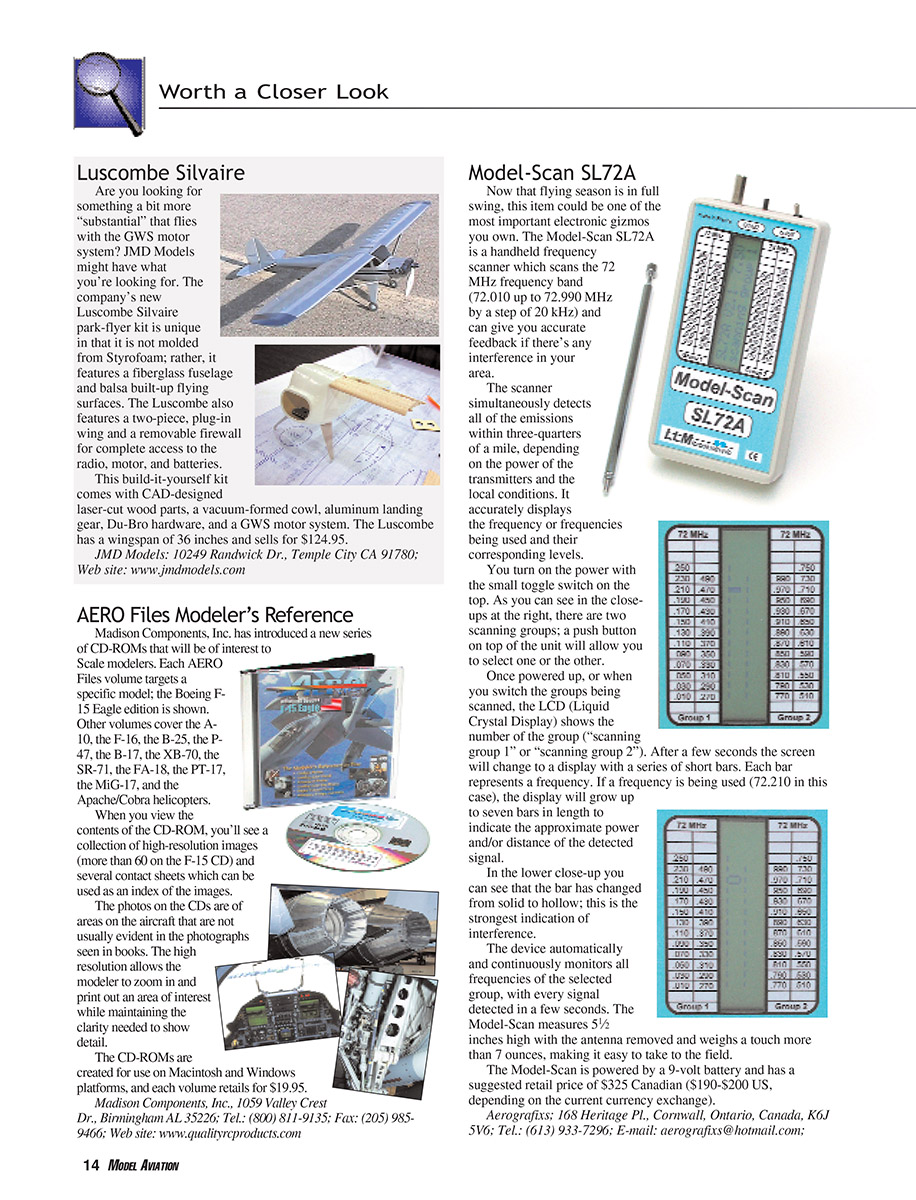
Are you looking for something a bit more "substantial" that flies with the GWS motor system? JMD Models might have what you're looking for. The company's new Luscombe Silvaire park-flyer kit is unique in that it is not molded from Styrofoam; rather, it features a fiberglass fuselage and balsa built-up flying surfaces. The Luscombe also features a two-piece, plug-in wing and a removable firewall for complete access to the radio, motor, and batteries.
This build-it-yourself kit comes with CAD-designed laser-cut wood parts, a vacuum-formed cowl, aluminum landing gear, Du-Bro hardware, and a GWS motor system. The Luscombe has a wingspan of 36 inches and sells for $124.95.
JMD Models: 10249 Randwick Dr., Temple City, CA 91780; Web site: www.jmdmodels.com
AERO Files Modeler's Reference
Madison Components, Inc. has introduced a new series of CD-ROMs that will be of interest to scale modelers. Each AERO Files volume targets a specific model; the Boeing F-15 Eagle edition is shown. Other volumes cover:
- A-10
- F-16
- B-25
- P-47
- B-17
- XB-70
- SR-71
- F/A-18
- PT-17
- MiG-17
- Apache/Cobra helicopters
When you view the contents of the CD-ROM, you'll see a collection of high-resolution images (more than 60 on the F-15 CD) and several contact sheets that can be used as an index of the images. The photos on the CDs focus on areas of the aircraft that are not usually evident in photographs seen in books. The high resolution allows the modeler to zoom in and print out an area of interest while maintaining the clarity needed to show detail.
The CD-ROMs are created for use on Macintosh and Windows platforms, and each volume retails for $19.95.
Madison Components, Inc., 1059 Valley Crest Dr., Birmingham, AL 35226; Tel.: (800) 811-9135; Fax: (205) 985-9466; Web site: www.qualityrcproducts.com
Model-Scan SL72A
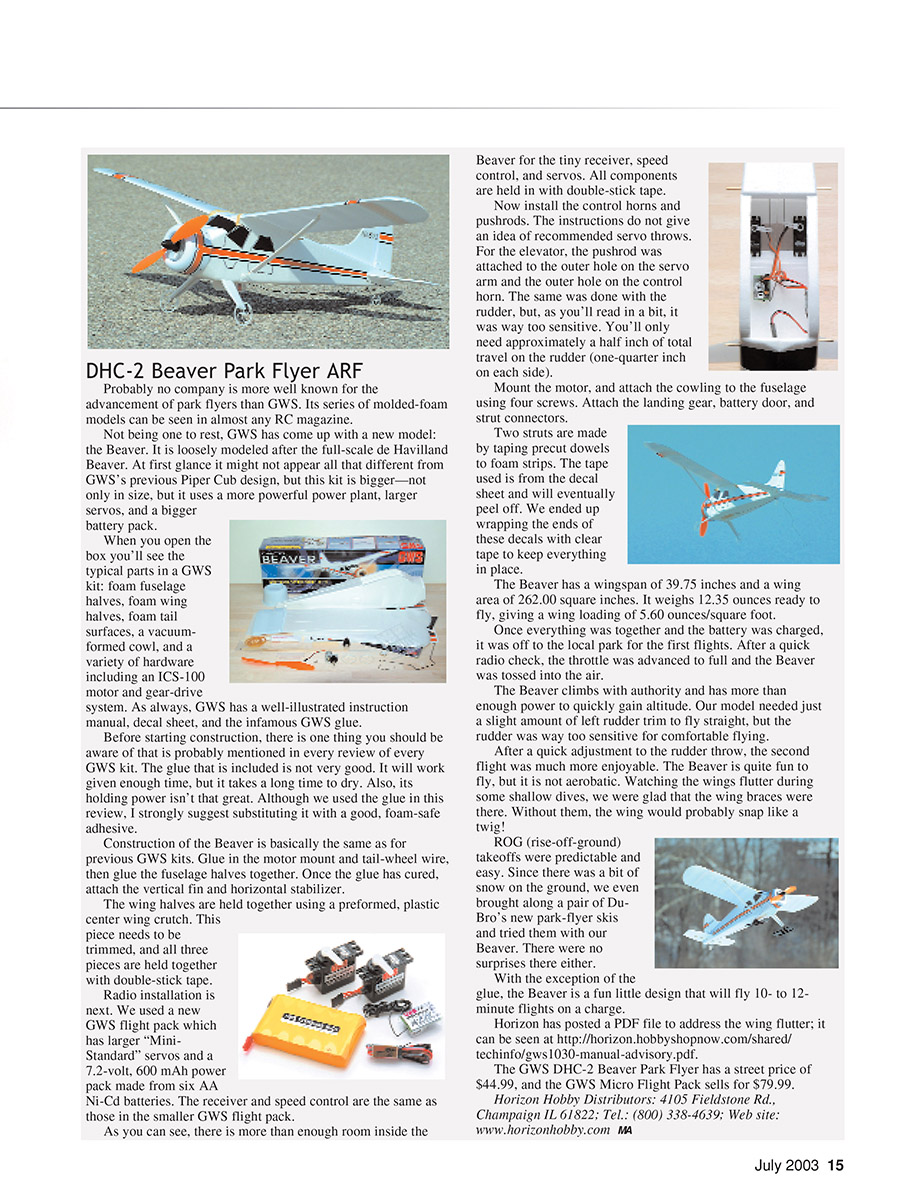
Now that flying season is in full swing, this item could be one of the most important electronic gizmos you own. The Model-Scan SL72A is a handheld frequency scanner which scans the 72 MHz frequency band (72.010 up to 72.990 MHz by steps of 20 kHz) and can give you accurate feedback if there's any interference in your area.
The scanner simultaneously detects all emissions within three-quarters of a mile, depending on the power of the transmitters and local conditions. It accurately displays the frequency or frequencies being used and their corresponding levels.
You turn on the power with the small toggle switch on the top. As shown in the closeups, there are two scanning groups; a pushbutton on top of the unit will allow you to select one or the other.
Once powered up, or when you switch the scanning groups, the LCD shows the number of the group ("scanning group 1" or "scanning group 2"). After a few seconds the screen changes to a display with a series of short bars. Each bar represents a frequency. If a frequency is being used (72.210 in this example), the display will grow up to seven bars in length to indicate the approximate power and/or distance of the detected signal. In the lower close-up the bar has changed from solid to hollow; this is the strongest indication of interference.
The device automatically and continuously monitors all frequencies of the selected group, with every signal detected in a few seconds. The Model-Scan measures 5 1/2 inches high with the antenna removed and weighs just over 7 ounces, making it easy to take to the field.
The Model-Scan is powered by a 9-volt battery and has a suggested retail price of $325 Canadian ($190–$200 US, depending on the current currency exchange).
Aerografixs; 168 Heritage Pl., Cornwall, Ontario, Canada K6J 5V6; Tel.: (613) 933-7296; E-mail: [email protected]
GWS DHC-2 Beaver Park Flyer
Begin by installing the tiny receiver, speed control, and servos. All components are held in place with double-stick tape.
Install the control horns and pushrods. The instructions do not give recommended servo throws. For the elevator, the pushrod was attached to the outer hole on the servo arm and the outer hole on the control horn. The same setup was used for the rudder, but it proved to be way too sensitive. You'll only need approximately a half inch of total travel on the rudder (one-quarter inch on each side).
Mount the motor, and attach the cowling to the fuselage using four screws. Attach the landing gear, battery door, and strut connectors.
Two struts are made by taping precut dowels to foam strips. The tape supplied on the decal sheet will eventually peel off, so it's recommended to wrap the ends of these decals with clear tape to keep everything in place.
The Beaver has a wingspan of 39.75 inches and a wing area of 262.00 square inches. It weighs 12.35 ounces ready to fly, giving a wing loading of 5.60 ounces per square foot.
Once everything was together and the battery was charged, it was off to the local park for the first flights. After a quick radio check, the throttle was advanced to full and the Beaver was tossed into the air.
The Beaver climbs with authority and has more than enough power to quickly gain altitude. Our model needed just a slight amount of left rudder trim to fly straight, but the rudder was way too sensitive for comfortable flying.
After a quick adjustment to the rudder throw, the second flight was much more enjoyable. The Beaver is cute and fun to fly, but it is not aerobatic. Watching the wings flutter during some shallow dives, we were glad that the wing braces were there—without them the wing would probably snap like a twig.
ROG (rise-off-ground) takeoffs were predictable and easy. Since there was a bit of snow on the ground, we even brought along a pair of Du-Bro's new park-flyer skis and tried them with our Beaver. There were no surprises there.
With the exception of the glue, the Beaver is a fun little design that will fly 10- to 12-minute flights on a charge.
Horizon has posted a PDF file to address the wing flutter; it can be seen at: http://horizon.hobbyshopnow.com/shared/techinfo/gws1030-manual-advisory.pdf
The GWS DHC-2 Beaver Park Flyer has a street price of $44.99, and the GWS Micro Flight Pack sells for $79.99.
Horizon Hobby Distributors: 4105 Fieldstone Rd., Champaign, IL 61822; Tel.: (800) 338-4639; Web site: www.horizonhobby.com
Transcribed from original scans by AI. Minor OCR errors may remain.

