
Plane Talk: Sportsman Aviation Excelleron 90 ARF
Dean Pappas
NOT LONG AGO in the marketplace, there were few high-quality ARFs for aerobatic or 3-D practice. At one end of the availability scale were high-priced, custom-built models (costing much more than $1,000); at the other end were heavier, lower-performance ARFs that used foam and plastics extensively.
That is no longer the case because the global economy has brought economic viability to the manufacture of traditional wood airframes. Our demand for better products has done wonders for the weight and reliability of ARFs in general, and it has made competitive aerobatics and 3-D-capable aircraft practical from a cost perspective.
The Sportsman Aviation Excelleron 90 is intended to be just such a switch-hitter. It has all the “numbers” of a successful 90-size RC Aerobatics (Pattern) model but with 3-D-sized control surfaces.
The Excelleron is derived from an earlier 90-size version of past Japanese F3A (FAI Pattern) team member Hajime Hatta’s Explorer. That’s impressive parentage for an aerobatic ARF, and after a full winter and spring of flying, I can easily vouch for the Excelleron’s viability as an entry-level Pattern competition mount. A fair number of upperclassmen in this event are also using the Excelleron as a low-cost practice airplane.
Did I mention low cost? The Excelleron has a street price of approximately $250, and for your money you get an airplane that is nicely covered in real UltraCote and requires only main component assembly and equipment installation.
The model was nicely packed, with plenty of protection for the components. However, despite this, one wing panel was damaged in shipment. Global Hobby Distributors replaced the damaged wing promptly, and that problem disappeared.
It was decided to review the Excelleron from the standpoint of creating a moderate-cost/high-performance model for the purposes of learning advanced aerobatics and participating in entry-level competition. On the way there, some time would be spent evaluating the Excelleron’s 3-D capabilities.
To accomplish this mission, I needed plenty of well-behaved horsepower that would not require learning the quirks of a tuned exhaust system. Given the airplane’s size and the likely finished weight (right at 9 pounds), the best options were a normally aspirated 120 four-stroke or a muffled 1.20 two-stroke. I ended up trying both, eventually settling on the Magnum 120 RFS four-stroke.
The Excelleron kit includes all necessary hardware, including a soft engine mount. The manufacturer recommends this sturdy mount for a 90-size four-stroke, but after plenty of flights with two- and four-stroke 120s, the mount shows no signs of wear.
Global sells this soft mount as a separate item, making maintenance easy. This alone makes for a large savings in the price of the overall package; high-quality soft mounts can cost as much as $150.
I initially chose the Magnum 1.20AR two-stroke. A muffled engine this size, when fitted with the appropriate propeller, would allow me to keep within the Pattern noise restrictions (96 decibels at 3 meters) and provide plenty of ponies for 3-D and graceful aerobatics without annoying the neighbors!
Consistent with the intent of this program, the price of radio equipment would be minimized by using only the capabilities of a medium-cost radio. In the complete instruction manual that came with the kit, Global recommends servos with an output torque of 65 ounce-inches or more. I decided on Futaba S9202s for the flight surfaces because they more than satisfy the manufacturer's requirement and are inexpensive (roughly $50 apiece).
The powerful S9202s were frontline Pattern equipment before the advent of digital servos. These days you can get a quantity discount on them from Tower Hobbies. I used a standard servo—the Futaba S3004—for the throttle.
Since I was not actually testing radios, I used my trusty old Futaba 9ZAP. The programming was purposely kept simple. No coupling features were used in this review, save for the two-aileron-servo feature which is common to most midgrade radios these days. I used exponential (expo), but almost all midgrade radios have this feature as well.
One place where I refused to pinch pennies was on the flight-pack battery. I chose an SR Batteries five-cell, 900 mAh NiMH battery for its light weight (3.7 ounces), low cell resistance, and high capacity. This battery is now standard equipment in my Pattern aircraft, and it suffers almost no weight disadvantage against a typical Li-Ion/regulator combination.
That was what I tested. Now let's get on with it.
Assembly: The "A" in ARF is supposed to mean "Almost," as in
Almost Ready to Fly. Even with the time it took to stop and take notes and pictures for this review, I spent two weeks of evenings getting the Excelleron ready to fly. The 42-page manual was well illustrated and went into plenty of detail, so I will describe only the general outline to show where I deviated to make improvements.
Construction began with the wings. One of the few things I did different from the instructions was to substitute the metal hinges provided in the kit with Du-Bro Heavy Duty Nylon Hinges (item 257). I date back to the days when any ferrous metal-to-metal contact in an airplane might cause radio-frequency interference, and I can't bring myself to break that rule. I used Pacer Technology Formula 560 glue for the hinges. It actually bonds to the plastic and gives me much more working time than cyanoacrylate does.
After the ailerons were hinged, I mounted their servos and linkages. I used all the supplied hardware. I discarded the aileron-servo covers; they didn't fit the S9202s.
I joined the wing as described in the manual. This required much soul-searching because it did not call for the dihedral joint to be reinforced with a fiberglass bandage. The Walls and Blenders I have performed with the Excelleron have proven the designers right about this.
Use plenty of slow-cure epoxy to make the wing joint. I used 30-minute Pacer Z-Poxy for all airframe assembly. The manual suggests using masking tape to hold the wing panels together tightly during gluing, but I found a bunch of #64 rubber bands useful as well.
Bind the two wing hold-down dowels with a couple of rubber bands, and use a few more around the fixed portion of the TE, inboard of the ailerons. The wing is designed with a small dihedral angle, which worked out just right.
When fitting the wing to the fuselage (shown in the middle of page 12 in the manual), make sure that the distance from the tail post to the outside corner of the aileron opening is—within 1/16 inch—the same on both sides. You may have to make the holes in the wing TE oblong and glue the plywood reinforcing plate to suit the wing bolts. The review airplane assembled straight despite the fact that the wing was a replacement part.
Pluses and Minuses
- Excellent for intermediate pilot looking to advance to high-alpha and precision aerobatic flying.
- All-wood, well-built airframe with neatly painted and fuel-proofed fiberglass parts.
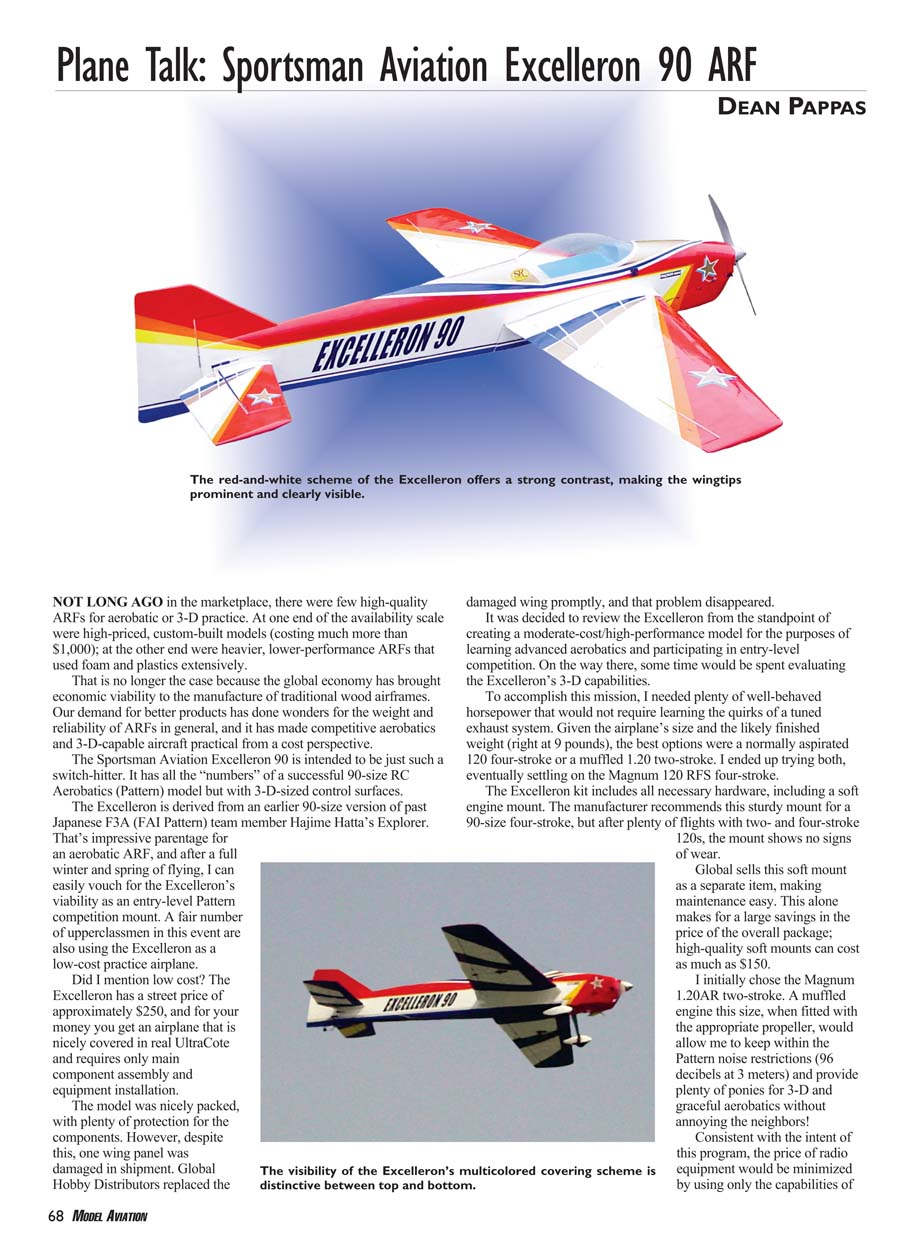
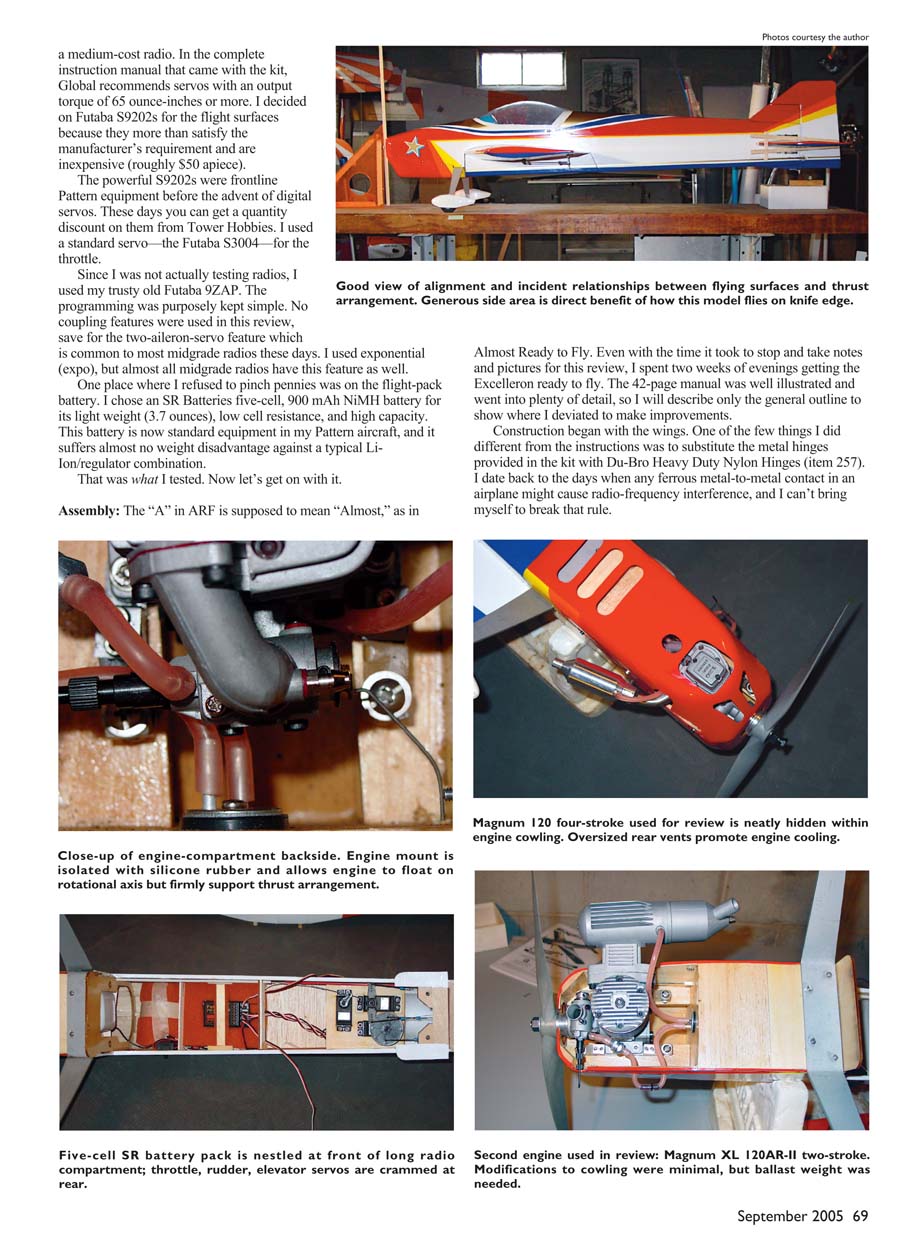
- Highly visible UltraCote color scheme.
- Soft engine-mounting system for quiet operation and promotion of long equipment life.
- High-quality instruction manual.
- Minimal wing-incidence and engine-thrust adjustments required for electronic couple-free flight trimming.
- Elevator and rudder linkage hardware required replacement for precision setup of pull-pull control system.
- Metal hinges were replaced with heavy-duty nylon hinges.
Using RTV (room-temperature vulcanizing) silicone to glue the belly pan onto the covered wing worked fine. The tail feathers mounted as described.
Keep in mind that careful flying-surface alignment can make the difference between a decent-flying model and an excellent-flying model. Be sure to glue the tail into the fuselage so that it's square viewed from the top and parallel to the wing viewed from the front. This alignment step is critical in making your Excelleron fly as it was intended.
Installing the landing gear was next. Many ARFs have weak landing-gear mounting points. Although the Excelleron's main gear structure looked well designed, I still took the time to wick heat-thinned epoxy into the landing-gear hold-down area, to fill any gaps in the glue joints. You should do the same with any ARF. Cover the blind nuts and mounting holes with bits of masking tape so you don't end up with a rude surprise when it comes time to screw the gear legs to the model!
The gear has held up nicely, but I cracked one fiberglass wheel pant in cold weather. A bit of cyanoacrylate and fiberglass cloth fixed that. For those of us who fly from grass, I would like to see wheel pants on the Excelleron that can house larger-diameter tires.
I mounted the Magnum 1.20AR with the supplied soft mount without incident. As I mentioned, the manual is quite detailed.
I mounted the cowl with six 4-40 screws and blind nuts. The manual suggests wood screws and cyanoacrylate-hardened threads, but even with a soft mount this is a high-vibration area, and wood threads just don't cut it.
Besides, an aerobatic model is supposed to be practiced with—a lot! Therefore, little details such as cowls mounted with the right hardware make a difference, so that they don't have to be redone after 150 flights. The cutout for the muffler straddled the cowl line, making any necessary maintenance easy.
The supplied 420cc fuel tank (14.2 ounces) was plumbed for two lines. The fuel feed to the engine runs out a hole in the fuselage side, runs forward through a simple tube joiner, and re-enters the fuselage connecting to the carburetor through a fuel filter.
Fueling is accomplished by breaking the line apart at the coupler: simple, light, and reliable. Fancy fueling devices are a no-no in competition because they will leak air and ruin the consistency of your engine runs when you can least afford it. The filling vent was connected to muffler pressure.
The tank was surrounded in foam rubber, and a 1/4-inch-thick piece was used on the bottom to lower the tank because its centerline was still a bit above the needle valve. If the tank were left mounted high, it would lead to a lean-out tendency during inverted maneuvers. With the stock tank and appropriate location, the Excelleron's tendency is slight and has not been a problem. A 3/32 balsa plate was glued in above the tank to hold it in place.
The receiver was swaddled in foam in the middle of the wing saddle, and the battery ended up right in front of it after migrating around to help find the right CG location. The airplane ultimately trimmed with the CG 7 1/4 inches behind the LE at the root.
The CG worked out almost the same with a 120 four-stroke since the Magnum 1.20 RFS weighed within an ounce or two of the 1.20AR and its muffler. More about that experiment later.
The elevator linkage is an area that deserves a bit of extra attention. I had never used pull-pull cables on a dual elevator control before, so this was a learning experience.
The supplied hardware worked great, with one exception. Pull-pull cable geometry is noncritical when you are driving one control surface, such as the rudder. However, the deflections on the elevator halves must match precisely at all times. This becomes difficult if the cable tension is too tight or too loose. It's impossible if the tension changes as the control moves.
The problem with this system in particular is that the included control horns didn't reach far enough forward to be directly in line with the elevator hinge line. The solution was to substitute the 3/4-inch-long control-horn linkage from a Du-Bro control-horn package (item 867). You'll need at least four of them.
After this, a straight line could be drawn through both clevis holes and the center of the hinge line. After carefully adjusting all four horns to the same length, matching the up- and down-elevator throws was a cinch. I think I shortened one of the four horns by one turn to get things perfect.
Matching the elevator throws requires that you make a special tool. I used two straight 1/4 square balsa sticks that were approximately 16 inches long and two pieces of double-stick tape. Place the sticks on the elevator halves so they almost meet at the airplane's centerline (use the rudder as a guide), and start adjusting. This is also useful for getting the halves aligned at neutral.
The rest of the construction was as described in the manual.
The Engine: The Magnum 1.20AR two-stroke was broken in on a 5% nitromethane, 20% castor blend and flown on S&W 15% Sport blend. The engine demonstrated great horsepower from the beginning, but fuel draw was inadequate when propped down to a noise-conscious 8,500 rpm. This engine was designed for higher-rpm operation—an unwelcome feature for quiet aerobatic performance.
The ensuing dealings with the engine importer and manufacturer were a pleasure. As a result of our cooperative efforts, new 1.20ARs will be fitted with a smaller carburetor that has approximately two-thirds the original effective choke area. This change improved the fuel draw enough to withstand any high-G maneuvering, turning the Magnum AR into an aerobatics-worthy engine. A 15 x 8 propeller should get the engine into the low 9,000 rpm vicinity, and a 15 x 10 proved to be a bit too much load.
In the search for more quiet and "aerobatics-friendly" horsepower, the Magnum 120 RFS four-stroke was retrofitted to the Excelleron. The bolt pattern was the same as the AR's, and only small additional cutouts to the cowl were necessary.
After a proper break-in and valve adjustment, the RFS turns an APC 15 x 8 propeller at roughly 8,500 rpm and pulls almost as strongly as the two-stroke at low rpm. The same 15% Sport mix and O.S. F-type glow plug suit the engine well.
The four-stroke's characteristics are ideal for the beginning Aerobatics pilot. Using a 15 x 8 propeller, the Excelleron can be flown at wide-open throttle through all the looping maneuvers in the Sportsman schedule without suffering from an overspeeding problem. This reduces the pilot's workload nicely. The available horsepower would easily handle the Intermediate Aerobatics schedule as well.
Trimming and Flying: The Excelleron started life with the 3-D throws recommended on page 39 of the assembly manual. The model performed most 3-D maneuvers easily, as long as its moderate wing loading was respected.
A sole-purpose 3-D aircraft would have been designed and constructed more lightly, at the expense of stiffness and precision. The Excelleron does not make this compromise. As a result, maneuvers such as Walls and Waterfalls required a bit of extra attention and respect to prevent inadvertent tip-stalling.
Torque Rolls and Knife Edge Loops were easy. High-alpha knife edges were easy because of the Excelleron's generous amount of fuselage side area. It is probably one of the easiest models I've flown the high-alpha knife-edge maneuvers with.
After enjoying the 3-D characteristics all winter (waiting for calmer and warmer weather!), the trimming and adjustment started in earnest. The throws were eventually tamed to the following (with all throws measured at the TE in inches).
Function Throw Expo Aileron high rate 25/32 inch up and 3/4 inch down 40% Aileron low rate 21/32 inch up and 5/8 inch down 40% Elevator high rate 1 1/2 inches up and 1 1/2 inches down 30% Elevator low rate 1 1/4 inches up and 1 1/4 inches down 30% Rudder high rate 3 1/8 inches left and right 50% Rudder low rate 2 1/2 inches left and right 50%
The Excelleron is normally flown in high-rate rudder and elevator and low-rate aileron for all maneuvers except Snap Rolls, when the situation is reversed. Since there are no Snap Rolls in the beginning, or Sportsman, Aerobatics schedules (visit www.nsra.org to see all schedules), even dual rates are unnecessary at first.
Notice that there is a small but necessary amount of aileron differential. The amount of differential (how much more up deflection than down) was adjusted until the airplane rolled "on a line" during vertical climbs and dives.
The entire airplane was laterally balanced, from wingtip to wingtip, before its maiden flight. The right thrust and right rudder trim were adjusted so that the model tracked straight during vertical climbs and consecutive loops. Because the Excelleron components were built straight at the factory, and because I took the time to balance the airplane from side to side, no further loop trimming was necessary.
The right thrust worked out to just less than 3/4 inch across a 15-inch propeller, which is the same as 2 3/4° of right thrust. The Excelleron carries approximately 3/32 inch of right rudder, as measured at the TE.
At the beginning of the knife-edge and vertical trimming process, the model showed a tendency to pull to the canopy in vertical up- and down-lines and in both knife edges. The cure for this usually involves moving the CG back, sometimes in conjunction with a small amount of positive incidence in the wing. After moving the CG back past the 7 1/4 inches behind the LE at the root point, a tail-heavy feel developed. It was time for Plan B!
The CG was moved forward until the tail-heavy feel went away, and a 1/16-inch shim was inserted at the wing TE. This added 1/3° positive incidence. A full 1° of downthrust was added to help fix the canopy pull in the vertical climb, and the Excelleron started to trim like a real Pattern airplane. During the course of a few flights, the CG was inched back to nearly 7 1/4 inches behind the LE at the root.
All this fiddling resulted in a model that requires no knife-edge electronic mixing, and tracking in the vertical is entirely acceptable. The Excelleron trimmed out beautifully.
This model is adequate for all classes of competition up through Advanced. If you are intent on flying it in contests, you may want to use digital servos for the primary flight controls (especially the generously proportioned elevator) to improve control centering. If you are contemplating using the Excelleron for more complex and horsepower-intensive Aerobatics schedules, consider a piped two-stroke or a supercharged four-stroke engine. MA
Specifications:
Wingspan: 66.5 inches Wing area: 865 square inches Length: 67.5 inches Weight: 8.0-8.5 pounds Wing loading: 20-22 ounces/square foot Engines used: Magnum XL 120AR-II two-stroke, Magnum XL 120 RFS four-stroke Radio equipment: Four heavy-duty standard-size servos, one standard servo, four- to six-channel radio, 4.8- to 6.0-volt flight battery
Distributor:
Global Hobby Distributors 18480 Bandilier Cir. Fountain Valley CA 92708 (714) 963-0329 www.globalhobby.com
Transcribed from original scans by AI. Minor OCR errors may remain.

